
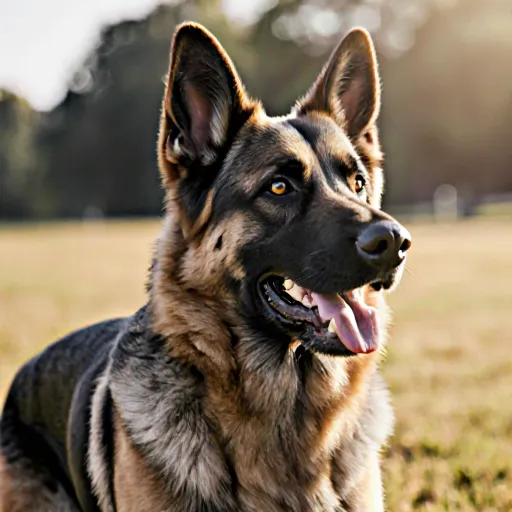
From Pain to Pawsitive Power!
“Transform Trauma Into Triumph: Dog Training Secrets”
Table of Contents
- Introduction
- Choosing a Rescue Dog
- Preparing Your Home
- Initial Vet Visit
- Basic Commands
- House Training
- Socialization
- Leash Training
- Advanced Skills
- Managing Behavior Issues
- Exercise Needs
- Grooming Basics
- Feeding Guidelines
- Traveling with Your Dog
- Conclusion
- FAQ
Introduction
Adopting a rescue dog is an act of compassion that brings joy and companionship into both your life and the animal’s. However, many rescue dogs come with unique challenges—previous trauma, lack of basic training, or simply being unaccustomed to human interaction. The key to a smooth transition lies in consistent, patient training that respects their past experiences while building trust for the future.
1. Start With the Basics: Establishing Structure
- House Training: Rescue dogs often haven’t learned proper elimination habits. Use a designated outdoor area, reward immediately after they relieve themselves, and maintain a consistent schedule (first thing in the morning, after meals, before bedtime).
- Leash Etiquette: Begin with a short leash in a quiet environment. Reward calm walking behavior and gently correct pulling by stopping until the dog relaxes.
- Basic Commands: “Sit,” “Stay,” and “Come” form the foundation. Keep sessions short (5–10 minutes), use high‑value treats, and always end on a positive note.
2. Build Trust Through Positive Reinforcement
Rescue dogs may be wary of new people or situations. Use praise, treats, and gentle touch to reinforce desired behavior. Avoid any form of punishment; it can re‑activate fear responses.
| Method | When to Use |
|---|---|
| Clicker Training | Marking precise actions, especially useful for dogs that are still learning the “yes” signal. |
| Treat‑Based Rewards | Immediate reinforcement after a correct action. |
| Gentle Redirects | When the dog exhibits undesirable behavior (e.g., chewing on furniture). |
3. Socialization: Introducing New People and Environments
Gradual exposure is essential. Start with calm, familiar settings before progressing to busy parks or pet stores.
- People: Let the dog approach at their own pace. Offer treats for sniffing and gentle pets.
- Other Dogs: Arrange controlled meet‑ups with vaccinated, friendly dogs. Keep initial interactions brief to avoid overwhelm.
- Vehicles & Tools: Introduce the car, truck, or grooming tools slowly—allow sniffing and reward calmness before starting any activity.
4. Addressing Common Rescue Challenges
- Separation Anxiety: Start by leaving the dog alone for short periods, gradually increasing duration while rewarding calm behavior.
- Jumping & Begging: Teach a “Place” command—lead them to a mat or bed and reward staying there. Ignore jumps until they sit calmly.
- Food Guarding: Use the “Leave it” command during meals, rewarding the dog for ignoring food on the counter.
5. Consistency Across Household Members
Everyone interacting with the rescue dog should follow the same commands and reward system. Mixed signals can confuse the animal and delay progress.
6. Practical Tools & Resources
- Training Treats: Small, soft, high‑value treats that can be given frequently without overfeeding.
- Clicker or Marker Device: Helps in precise behavior marking.
- Online Courses & Local Workshops: Look for classes focused on rescue dog training—many shelters partner with trainers to provide discounted sessions.
7. Celebrate Milestones!
Keep a training journal or photo log. Document progress such as the first successful “Sit” command, first walk without pulling, or first calm visit to the vet. Celebrating these milestones boosts confidence for both you and your dog.
Remember: Training a rescue dog is less about speed and more about building a bond rooted in trust. Patience, consistency, and positive reinforcement are your best allies on this rewarding journey.
Choosing a Rescue Dog
When you decide to bring a rescue into your home, the first step is selecting the right dog for your lifestyle, experience level, and household dynamics. A thoughtful selection process not only increases the chances of a successful adoption but also sets the foundation for effective training after the dog arrives.
1. Assess Your Lifestyle
- Activity Level: If you enjoy long walks, hikes, or running, look for a breed or mix that thrives on high energy. For more sedentary households, consider calmer breeds like Bulldogs, Basset Hounds, or certain terrier mixes.
- Living Space: Apartment dwellers may prefer smaller dogs or those with lower space requirements. Larger breeds often need rooms to roam and plenty of exercise.
- Family Composition: If you have young children or other pets, research breeds known for their patience and sociability.
2. Understand the Dog’s History
Rescue shelters often provide a “background card” with each dog. Pay attention to:
- Previous Training: Some rescue dogs have attended basic obedience classes or have been house-trained.
- Health Issues: Chronic conditions (e.g., hip dysplasia, allergies) may affect activity levels and training needs.
- Behavioral Notes: Signs of fear, aggression, or anxiety can guide how you approach training.
3. Meet the Dog in Person
Don’t rely solely on photos. Spend time interacting with multiple dogs at a shelter to gauge temperament. Observe:
- Body Language: A relaxed tail, soft eyes, and a calm demeanor are good indicators.
- Response to Stimuli: How does the dog react to strangers, toys, or sudden noises?
- Energy Level: Does the dog’s excitement match your daily routine?
4. Consider the Rescue Organization’s Philosophy
Some shelters focus on “no‑kill” policies, while others may have specific training programs for their dogs. Choose an organization that aligns with your values and offers post‑adoption support.
5. Prepare Your Home
- Create a safe space: A crate or a designated room can help the dog feel secure during the transition.
- Stock essential supplies: Food, water bowls, bedding, chew toys, and basic grooming tools.
- Set up a routine: Dogs thrive on consistency—establish regular feeding, walking, and bedtime schedules.
Once the rescue arrives, training is crucial to help the dog adjust to its new environment and establish healthy habits. Below are practical steps you can take right from day one.
A. Start with Basic Commands
- “Sit”: Use a treat as a lure, hold it above the dog’s nose, and say “sit.” When the back of the head lowers, reward immediately.
- “Stay”: Once the dog sits, open your palm toward them, say “stay,” and take one step back. If they stay, give a treat and praise.
- Repeat each command 5–10 times per session, keeping training sessions short (5–10 minutes) to avoid fatigue.
B. Establish House Rules Early
- No Jumping: Use a “down” cue or place the dog on a mat before greeting people.
- Leash Etiquette: Keep leashes short and use a harness if the dog pulls. Reward calm walking with treats.
- Use consistent verbal cues so the dog associates each word with its action.
C. Manage Separation Anxiety
If your rescue shows signs of anxiety when left alone, implement gradual desensitization:
- Short Absences: Leave for 5 minutes, then return and reward calmness.
- Use Interactive Toys: Puzzle feeders or chew toys can occupy the dog while you’re away.
- Background Noise: A TV or radio on low volume may mask sudden sounds that trigger anxiety.
D. Build Socialization Skills
Expose your rescue to a variety of people, dogs, and environments gradually:
- Arrange short playdates with calm, vaccinated dogs.
- Take walks through parks, busy streets, or quiet neighborhoods.
- Avoid overwhelming situations; if the dog shows signs of stress (cowering, whining), retreat to a calmer setting.
E. Use Positive Reinforcement
Rescue dogs often respond best to reward-based training:
- Treats: Choose small, tasty treats that can be given quickly.
- Praise: A soft voice and gentle petting reinforce good behavior.
- Never use punishment or harsh corrections; these can erode trust and exacerbate fear.
F. Seek Professional Guidance When Needed
If you encounter persistent behavioral issues (e.g., aggression, severe anxiety), consult a certified dog trainer or veterinary behaviorist. Early intervention often prevents long‑term problems.
G. Celebrate Milestones
Keep a training journal to record progress and setbacks. Celebrate small victories—every successful “sit” or calm walk is a step toward a confident, well‑adjusted companion.
By thoughtfully choosing the right rescue for your life and implementing consistent, compassionate training after adoption, you give your new dog the best chance at a happy, harmonious
Preparing Your Home
Adopting a rescue can be one of the most rewarding experiences, but it also comes with unique challenges. The key to a smooth transition is preparing your home environment so that both you and your new companion feel safe, comfortable, and ready to learn together.
1. Create a Safe, Dog‑Friendly Space
- Set up a designated area: Choose a quiet corner or spare room where the dog can retreat when overwhelmed. Place a soft bed, a blanket, and some chew toys to make it inviting.
- Remove hazards: Keep small objects, electrical cords, toxic plants, and loose rugs out of reach. Consider childproof locks on cabinets that might contain cleaning supplies or medications.
- Provide consistent temperature: Dogs are sensitive to extreme heat or cold. Ensure the room has proper ventilation or heating, especially during seasonal changes.
2. Establish a Routine Before They Arrive
Rescue dogs often thrive on predictability. Draft a simple schedule that covers feeding times, walks, and bedtime. Even if you are busy, try to keep the core activities consistent.
Sample Daily Schedule:
| Time | Activity |
|---|---|
| 7:00 AM | Morning walk & breakfast |
| 10:00 AM | Short play session (tug, fetch) |
| 12:30 PM | Lunch & bathroom break |
| 3:00 PM | Training drill or quiet time in their space |
| 6:30 PM | Evening walk & dinner |
| 9:00 PM | Bedtime routine (leash off, bedtime snack) |
3. Introduce Training Tools Early
- Loyalty collar or harness: Choose a comfortable, well-fitting harness that allows you to guide the dog without causing discomfort.
- Clicker (optional): Clickers help reinforce positive behavior by marking the exact moment of correct action. Pair it with treats for immediate feedback.
- Training treats: Small, high‑value snacks (e.g., pieces of chicken or cheese) work best for short training sessions.
4. Start Basic Obedience Training Immediately
Even before the dog settles into their new home, begin teaching foundational commands. This establishes you as a reliable leader and reduces confusion.
Key Commands to Teach:
- “Sit” – Use a treat to lure them upward while saying “sit.” Reward when they sit.
- “Stay” – After the dog sits, hold out your palm and say “stay,” then step back. Return and reward if they stay.
- “Come” – Call their name followed by “come.” Reward with a treat or affection when they arrive.
- “Leave it” – Present a tempting item, say “leave it,” and give a reward for ignoring it.
5. Gradual Socialization
Rescue dogs may have had limited exposure to people or other animals. Introduce them slowly:
- Controlled visits: Invite one calm friend or family member for a short, supervised visit.
- Neighborhood walks: Take the dog on short strolls in low‑traffic areas before exploring busier streets.
- Use positive reinforcement to reward calm behavior around new stimuli.
6. Manage Separation Anxiety Early
Many rescues develop anxiety when left alone. Start by leaving them in their safe space for brief periods (5–10 minutes) and gradually increase the duration while rewarding calmness.
Tactics:
- Leave a timer: Place an audible timer so they know it’s only a short wait.
- Background noise: Play soft music or leave the TV on to mask sudden noises.
- Interactive toys: Puzzle feeders keep their mind occupied and reduce boredom.
7. Keep Records and Stay Consistent
Document each training session, noting what worked and what didn’t. This log helps you track progress and adjust strategies as needed.
Tip: Use a simple notebook or an app to jot down dates, commands practiced, duration, and the dog's response.
8. Seek Professional Help When Needed
If you encounter persistent behavior issues—such as excessive barking, aggression, or severe anxiety—consult a certified dog trainer or veterinary behaviorist. Early intervention can prevent problems from escalating.
By thoughtfully preparing your home and starting foundational training right away, you lay the groundwork for a healthy, happy relationship with your rescue dog. Consistency, patience, and positive reinforcement are the cornerstones of success—turning an uncertain adoption into a joyful partnership that lasts a lifetime.
Initial Vet Visit
The first veterinary appointment is a critical step in ensuring your rescued dog’s health and setting the stage for effective training. Below, we break down what to expect, how to prepare, and key take‑aways that tie directly into your training plan.
1. Pre‑Visit Checklist
- Documentation: Bring any paperwork you received from the rescue organization—medical records, vaccination history, and behavioral notes.
- Health History: Note any recent illnesses, injuries, or unusual behaviors that could signal underlying conditions.
- Questions List: Write down questions about nutrition, deworming schedules, flea/tick prevention, and recommended training aids (e.g., harnesses, clickers).
2. What the Vet Will Do
- Physical Examination: The vet checks weight, heart rate, breathing, skin condition, and dental health.
- Vaccination Review: Confirm core vaccines (distemper, parvovirus, rabies) are up to date; discuss boosters if needed.
- Parasite Screening: Blood tests for heartworm or tick-borne diseases, especially in dogs rescued from the outdoors.
- Behavioral Observation: Briefly note how your dog reacts to handling—this helps tailor a training approach that accommodates any fear or aggression.
3. Post‑Visit Action Plan
After the appointment, you’ll receive a care sheet with specific instructions:
- Medication Schedule: Record dosages and timing for any prescribed meds.
- Follow‑up Appointments: Mark dates for boosters or check‑ups.
- Behavioral Recommendations: If the vet notes anxiety, they may suggest gradual exposure training or consulting a certified trainer.
4. Linking Vet Care to Training
Your dog’s health directly influences their learning ability and motivation. Here’s how to integrate vet recommendations into your training routine:
- Nutrition & Energy: A balanced diet will provide consistent energy levels for daily training sessions.
- Medication Compliance: If your dog is on pain medication, avoid intense exercises that might aggravate discomfort. Opt for short, positive reinforcement drills instead.
- Parasite Prevention: Regular deworming keeps the dog’s digestive system healthy, which in turn improves focus during training.
5. Practical Training Tips Right After the Vet Visit
- Keep Sessions Short: The first few days after a vet visit can be stressful for your dog. Aim for 5–10 minute training sessions to avoid fatigue.
- Use Positive Reinforcement: Treats, praise, and gentle petting reinforce desired behaviors without adding pressure.
- Start with Basic Commands: Focus on “sit,” “stay,” and “come.” These commands build confidence and create a foundation for more advanced training.
- Observe Body Language: Watch for signs of discomfort—whining, stiff posture, or avoidance—and pause the session if needed.
6. Sample One‑Week Training Plan
| Day | Training Focus | Duration | Reward Type |
|---|---|---|---|
| Monday | Sit & Stay (basic) | 5 minutes | Small treat + verbal praise |
| Tuesday | Come to Name Call | 5 minutes | Favorite chew toy |
| Wednesday | Heel Walk (short distance) | 7 minutes | High‑value treat + clicker |
| Thursday | Sit & Stay with Distractions | 6 minutes | Small treat + petting |
| Friday | Review All Commands | 10 minutes | Mixed rewards (treats, toys) |
Remember, the goal is consistency and patience. By combining thorough vet care with a structured, compassionate training plan, you’ll help your rescue dog thrive both physically and behaviorally.
Basic Commands
Teaching your rescued dog basic commands is the cornerstone of a safe and harmonious relationship. These simple words become a language that keeps your pet calm, focused, and well‑behaved in everyday life.
| Command | What It Means | How to Teach (Step‑by‑Step) | Common Pitfalls & Fixes |
|---|---|---|---|
| SIT | The dog sits down, lowering its hindquarters while keeping the front legs straight. |
|
|
| STAY | The dog remains in the same position until released. |
|
|
| COME | The dog returns to you on cue. |
|
|
| D O W N | The dog lies flat on its belly, staying relaxed. |
|
|
| LEAVE IT | The dog ignores or stops approaching an object or food. |
|
|
Training Tips for Rescue Dogs
- Start Small: Rescue dogs often have limited attention spans; keep sessions short (5–10 minutes) and frequent.
- Use High‑Value Treats: Start with treats that your dog loves, then gradually reduce treat size as the behavior becomes reliable.
- Consistency Across Family: Everyone in the household must use the same commands and reward structure to avoid confusion.
- Positive Reinforcement Only: Avoid punishment; redirect negative behaviors with treats or a short walk away from the trigger.
- Patience & Calmness: A stressed owner can transfer anxiety. Keep your tone upbeat and calm even if progress is slow.
Common Challenges & How to Overcome Them
- Jumping Up on People: Use the “Sit” command before greeting. Reward only when all four paws are down.</li
House Training
Adopting a rescue dog is an act of compassion that brings a lot of joy—and a whole new set of training challenges. Unlike puppies raised in controlled environments, rescues often come with past trauma, unclear histories, and established habits that may not align with your home’s routines. The key to successful house training lies in patience, consistency, and creating a safe environment where the dog feels comfortable learning.
1. Establish a Routine Quickly
- Feed on a schedule: Offer meals at the same times each day—usually two or three hours apart—to help regulate bathroom habits.
- Set a consistent walk time: Even if the dog is anxious, take them out first thing in the morning and again after dinner. This consistency cues their body to know when to eliminate.
- Create a designated potty area: If you have a yard, use a specific corner or bring an outdoor potty mat for indoor dogs.
2. Use Positive Reinforcement
Rescue dogs thrive on reward-based training. Here’s how to apply it effectively:
- Timing is everything: Praise and give a treat immediately after the dog successfully eliminates in the correct spot.
- Keep rewards small but tasty: High-value treats (like chicken or cheese) can be used sparingly to avoid overfeeding.
- Gradual transition from treats to verbal praise: Once the behavior is consistent, reduce treat frequency and rely more on enthusiastic “Good job!”
3. Manage Accidents with Calm Consistency
Accidents are inevitable during training. Here’s how to handle them without creating anxiety:
- Avoid punishment: Yelling or physical corrections can reinforce fear.
- Clean thoroughly: Use enzymatic cleaners to eliminate odor cues that might attract the dog back to the same spot.
- Reinforce new behavior: After cleaning, immediately place the dog in their designated potty area and reward them if they use it again.
4. Leverage House Training Tools
Tools can support your efforts but should never replace consistency:
- Poop bags & mat: Handy for off-leash training in the yard or on walks.
- Crate training: A well-fitted crate acts as a den, encouraging the dog to hold their bladder until released outside.
- Dog cameras or smart feeders: Monitor behavior during your absence and maintain feeding schedules automatically.
5. Address Behavioral Root Causes
Rescue dogs may have underlying fears that manifest as house training issues:
- Separation anxiety: If the dog is anxious when left alone, they might eliminate inside to signal distress.
- Medical conditions: Urinary tract infections or digestive issues can cause frequent accidents. A vet check-up is essential if accidents persist.
- Lack of socialization: Dogs that haven’t been exposed to varied environments may be hesitant to go outside. Gradual exposure with calm encouragement helps build confidence.
6. Sample House Training Schedule (Puppy & Adult Rescue)
| Time | Activity |
|---|---|
| 7:00 AM | Morning walk + potty in designated area |
| 8:00 AM | Breakfast (followed by a short walk) |
| 10:30 AM | Short play session; monitor for signs of need to eliminate |
| 12:00 PM | Lunch + quick potty break |
| 3:00 PM | Training session (commands, recall) + treat reward |
| 5:30 PM | Dinner + walk outside for bathroom |
| 8:00 PM | Evening walk; final potty before bed |
7. Practical Tips for Common Obstacles
- Noisy environment: Use a calming scent (like lavender) or play soft music to reduce stress during walks.
- Outdoor weather: In hot climates, limit bathroom time to cooler parts of the day; in cold, use insulated mats.
- Multi-dog households: Separate potty times for each dog to avoid confusion and accidents.
8. Celebrate Milestones!
Every successful elimination outside is a step forward. Keep a training log: note the time, location, and reward given. Over weeks, you’ll see patterns that help refine your approach. Remember, each rescue dog’s learning curve varies—celebrate small victories to keep motivation high for both of you.
9. Resources & Further Reading
- Rescue.org – Support and training guides
- Dog Training Zone – House Training for Rescues
- Local canine behaviorists often offer workshops tailored to rescue dogs.
By combining a predictable routine, positive reinforcement, and an understanding of your rescue dog’s unique history, you’ll create a foundation that supports successful house training and fosters a trusting bond. Patience is the secret ingredient—give yourself and your new companion time to adjust, and watch as they grow into a well-behaved member of your household.
Leash Training
After you’ve settled your rescue into its new home, leash training is the next essential step for safety, confidence, and a strong bond between you and your dog.
1. Choose the Right Equipment
- Collar or harness: For most rescues, a well-fitted leash‑supporting harness is safer than a collar, especially if they have neck injuries or are prone to pulling.
- Leash length: A 4–6 ft. leash gives enough freedom for exploration while keeping you in control. For first sessions, use a shorter 2‑ft. leash to prevent runaway situations.
- Reward treats: Small, soft, high‑value snacks (like cheese or hot dogs) keep the dog’s attention and reinforce good behavior.
2. Start Inside the House
- Place the harness on your dog while they’re relaxed.
- Attach the leash but let it slack; this teaches them that the leash isn’t a threat.
- Walk in a quiet room, rewarding every step forward with treats and praise.
3. Gradual Exposure to Outside
Once your dog is comfortable indoors:
- Choose a low‑traffic area: A backyard or a quiet sidewalk works best for the first outside session.
- Maintain calmness: Dogs pick up on our nervous energy. Speak softly and keep your pace steady.
- Use “heel” commands: Gently tug the leash to encourage staying beside you, rewarding with treats when they match your pace.
4. Handling Pulling and Resistance
- No sudden stops: Abrupt halts can startle a rescue; instead, slow down gradually or change direction smoothly.
- Positive reinforcement over punishment: If your dog pulls, stop walking. Wait until the leash slackens, then resume. This teaches that pulling won’t get them where they want to go.
- Use a “stop” cue: A firm “no” or “stop” with a gentle tug can interrupt pulling behavior without scaring the dog.
5. Consistency and Patience
Rescue dogs often carry past trauma, so learning leash manners takes time. Aim for 5–10 minute sessions, 2–3 times daily, gradually increasing duration as confidence grows.
6. Common Scenarios & Solutions
| Scenario | Solution |
|---|---|
| Dog pulls toward a squirrel or other stimulus | Use the “look at me” cue; reward for eye contact. If pulling continues, pause and walk in the opposite direction. |
| Dog darts away when you try to turn around | Practice turning slowly while rewarding for staying beside you. Use a short leash during early turns. |
| Dog shows fear of the leash itself | Introduce the leash gradually—let them sniff, then wear it without attaching, and finally attach with treats. |
7. Transitioning to a Longer Leash
Once your dog reliably walks on a short leash, introduce a longer one in a controlled setting. Keep the environment low‑stimulus until they demonstrate consistent behavior.
8. Safety Checks
- Inspect harness and collar for wear; replace if frayed or loose.
- Make sure the leash is not tangled; knots can slip during walks.
- Use a reflective collar or harness for early morning or evening strolls.
9. Reinforcing Good Behavior on Public Walks
When you’re in more crowded areas, keep treats handy and use them to reward calmness. If your dog gets distracted, gently guide them back with a soft “heel” command and treat.
10. When to Seek Professional Help
If pulling persists after several weeks of consistent training, consider a certified canine behaviorist or a professional trainer who specializes in rescue dogs. They can assess underlying anxiety or fear issues that may require tailored strategies.
Remember: Leash training isn’t just about obedience; it’s an opportunity to build trust and give your rescue dog the confidence they need to explore safely. Consistency, patience, and positive reinforcement are your best tools.
Advanced Skills
Adopting a rescue dog is an act of compassion, but it also brings unique training challenges and opportunities. Unlike dogs raised in a stable home environment, rescues may have experienced trauma, inconsistent care, or gaps in socialization. Understanding these factors and approaching training with patience, consistency, and positive reinforcement can help your new companion thrive.
1. Build Trust Before You Begin Training
- Establish a routine: Rescue dogs often feel more secure when they know what to expect. Feed, walk, and bedtime schedules should be consistent every day.
- Create safe spaces: Provide a quiet corner with a comfortable bed or crate where the dog can retreat if overwhelmed.
- Use calm body language: Avoid sudden movements or loud voices. Sit at their level, let them sniff your hand before approaching, and use soft tones.
2. Start with Basic Obedience Commands
Begin with simple commands that build confidence and reinforce a positive relationship.
- Sit: Hold a treat above the dog’s nose, then move it back over their head. As they follow the treat, say “Sit” and reward immediately.
- Stay: Once your dog sits, open your palm toward them and say “Stay.” Take one step backward; if they hold position, return and reward. Gradually increase distance and duration.
- Come: Use a long leash or a safe indoor space. Say the dog’s name followed by “Come,” then give a treat when they approach. Celebrate enthusiastically to reinforce the behavior.
3. Address Common Rescue Behaviors
Rescues may exhibit fear, aggression, or avoidance. Tailor training to each issue:
- Fear of strangers: Practice “Leave it” and “Drop it” with low-value items first, then progress to higher-value treats while gradually introducing new people.
- Over-excitement or jumping: Use the “Place” command—teach your dog to go to a designated spot (e.g., a mat) and stay there until released. This redirects energy safely.
- Barking or whining: Identify triggers (doorbell, other dogs). Reward silence and use “Quiet” cues once the barking stops. Avoid yelling, which can reinforce anxiety.
4. Socialization Strategies
Rescues often lack exposure to diverse environments. Introduce them gradually:
- Dog parks and trails: Start with a quiet park or a fenced yard, allowing your dog to observe other dogs from a distance before initiating play.
- Community events: Attend pet-friendly festivals on calm days. Keep the leash short initially; reward calm behavior around crowds.
- Household members and pets: Use controlled introductions—let the dog sniff a blanket with your scent, then gradually allow direct interaction under supervision.
5. Consistent Positive Reinforcement
Rescue dogs respond best to rewards that feel meaningful. Choose treats they enjoy but avoid overfeeding.
- Treats: Use small, soft items (e.g., cheese cubes) for quick rewards. Switch flavors to maintain interest.
- Praise and petting: Combine verbal praise (“Good job!”) with gentle strokes to reinforce the behavior.
- Timing: Deliver rewards immediately after the desired action so the dog links the cue to the outcome.
6. Training Tools & Resources
- Clicker training: A clicker provides a consistent sound that marks correct behavior, making it easier for dogs to learn timing.
- Training books and videos: “The Rescue Dog Handbook” by Dr. Lisa McDonald and the YouTube channel “Rescue Dog Training” offer step‑by‑step guidance.
- Professional help: If you encounter persistent aggression or severe anxiety, consult a certified animal behaviorist.
7. Patience & Persistence
Training a rescue dog is a marathon, not a sprint. Celebrate small victories and stay consistent. Over time, your dog will grow more confident, obedient, and integrated into your family life.
8. Practical Checklist for New Owners
- Set up a daily routine (feeding, walks, playtime).
- Create safe spaces and use calm body language.
- Teach basic commands with positive reinforcement.
- Address specific behaviors gradually and compassionately.
- Socialize in controlled environments.
- Use consistent rewards (treats, praise).
- Track progress: keep a training log.
- Seek professional help if needed.
By investing time and compassion into training after adoption, you’re not just teaching commands—you’re building a lasting bond that transforms your rescue dog’s life.
Managing Behavior Issues
Rescue dogs often arrive with a mix of fears, anxieties, and sometimes aggressive behaviors that can make the transition into a new home challenging. Understanding the root causes of these issues and applying consistent, compassionate training strategies will help you build trust, reduce stress, and create a harmonious relationship.
1. Identify the Trigger
- Fear of Loud Noises: Many rescues have been exposed to thunderstorms or fireworks. Use a noise desensitization protocol: play recordings at low volume while offering treats, gradually increasing intensity over weeks.
- Aggression Toward People: This may stem from guarding behavior or past abuse. Avoid direct eye contact and use a calm tone; reward approach with high-value food.
- Resource Guarding (food, toys): Observe the dog’s body language when you bring items into the home. If the dog tenses, practice “hand‑over” exercises: offer a treat in exchange for the item before eating.
2. Establish Consistent Routines
Rescue dogs thrive on predictability. Set fixed times for meals, walks, and bedtime. Use a consistent command (“sit,” “stay”) to reinforce expectations. Inconsistency can heighten anxiety, leading to more behavioral outbursts.
3. Use Positive Reinforcement
Avoid punishment; it often exacerbates fear or aggression. Instead, reward desired behaviors with treats, praise, or play:
- “Sit” on command during a walk: Give a treat when the dog sits before you start moving.
- Approach to strangers: If the dog remains calm while a new person approaches, reward immediately.
4. Implement Desensitization & Counter‑Conditioning
These techniques help reshape negative associations:
- Desensitization: Gradually expose the dog to a trigger at a distance where they are comfortable.
- Counter‑conditioning: Pair the trigger with something positive (treats, affection) so the dog learns it’s safe.
5. Leverage Professional Help When Needed
If aggression or severe anxiety persists after several weeks of consistent training, consult a certified animal behaviorist or a veterinary behavior specialist. They can design a tailored program and rule out medical issues that might be influencing behavior.
6. Practical Daily Exercise Plan
| Time | Activity | Goal |
|---|---|---|
| Morning (7:00‑8:00 AM) | Short walk + “sit” & “stay” practice at the door. | Calm start to day, reinforce obedience. |
| Midday (12:30 PM) | Food training: offer treat only after dog sits on command. | Reduce food guarding. |
| Evening (6:00‑7:00 PM) | Play fetch + “leave it” drill with a toy. | Channel energy positively, reinforce impulse control. |
7. Monitor Progress & Adjust Accordingly
Keep a behavior journal noting triggers, reactions, and successful interventions. Celebrate small victories—each “sit” or calm approach is progress. If a particular method isn’t working, tweak the reward type or timing.
Key Takeaways
- Patience and consistency are essential; rescue dogs need time to adjust.
- Positive reinforcement builds trust far better than punishment.
- Professional guidance can accelerate progress for complex issues.
- Daily routines, structured exercise, and gradual exposure create a safe environment that encourages confident behavior.
Exercise Needs
After you adopt a rescue dog, one of the most important things you’ll need to plan for is a consistent exercise routine. Rescue dogs often come from varied backgrounds—some may have been active in shelters, while others might have spent years indoors or with limited mobility. Understanding your dog’s unique history and current physical condition will help you design an exercise program that promotes health, reduces behavioral issues, and strengthens the bond between you.
Assessing Your Dog’s Physical Condition
- Veterinary Check‑up: Before starting any vigorous activity, have a vet exam to rule out injuries, arthritis, or heart problems. The vet may recommend specific exercises or precautions.
- Age & Breed Considerations: Large breeds often need slower, joint‑friendly workouts, while smaller breeds can handle more brisk sessions. Puppies require less intensity but frequent short bursts of play.
- Weight Status: Overweight dogs may need low‑impact activities such as walking or swimming to avoid stress on joints.
Building a Gradual Routine
Most rescue dogs benefit from a progressive schedule that starts with short, easy walks and gradually increases in length and intensity. Here’s a sample week for a medium‑sized dog:
| Day | Activity | Duration |
|---|---|---|
| Mon, Wed, Fri | Leash walk around the block + short play session | 15–20 minutes |
| Tues, Thurs | Indoor fetch or tug (if space allows) | 10–12 minutes |
| Sat | Longer walk or light jog if the dog is comfortable | 25–30 minutes |
| Sun | Rest day or optional gentle stroll | 10 minutes |
Types of Exercise to Incorporate
- Leash Walks: The most accessible form—use them for daily cardio and mental stimulation.
- Play Sessions: Fetch, tug‑of‑war, or hide‑and‑seek help burn energy and reinforce training commands.
- Swimming: Ideal for overweight dogs or those with joint issues; always supervise and use a doggy life jacket if necessary.
- Agility Basics: Simple obstacles like tunnels or low jumps can be introduced once the dog is comfortable with basic obedience.
Signs Your Dog Needs More Exercise (or Less)
Watch for:
- Persistent restlessness, pacing, or whining after a walk
- Lack of interest in play or new toys
- Excessive barking or destructive behavior at home
- Joint pain, limping, or reluctance to move during activity
Practical Tips for Success
- Create a Schedule: Consistency helps reduce anxiety. Use a calendar app or physical planner.
- Use Positive Reinforcement: Reward with treats, praise, or extra playtime after each session.
- Mix It Up: Vary routes and activities to keep the dog mentally engaged.
- Hydration & Weather: Bring water on walks; avoid hot pavement or extreme temperatures.
- Record Progress: Note how long the dog can walk before needing a break—this will help track improvements.
Remember, every rescue is unique. By tailoring exercise to your dog’s specific needs and gradually building up their stamina, you’ll help them lead a healthier, happier life while easing any lingering anxieties from their past.
Grooming Basics
When you bring a rescue into your home, grooming becomes more than just keeping your pet looking good—it’s an essential part of their health and well‑being. Rescue dogs often come from shelters where they may have received minimal or inconsistent care, so establishing a routine early on can prevent many common issues.
1. Start with a Gentle Introduction
- Use calm, low‑pitch voice tones: Dogs respond to tone more than volume. Speak softly while brushing to create a positive association.
- Introduce tools gradually: Let your dog sniff the brush or grooming mitt before you begin. This reduces fear of new objects.
- Reward immediately: Offer treats, praise, or a favorite toy right after each successful step to reinforce good behavior.
2. Establish a Grooming Schedule
| Dog Size/Coat Type | Brushing Frequency | Bathing Frequency | Special Care Notes |
|---|---|---|---|
| Small, short‑haired (e.g., Chihuahua) | 2–3 times per week | Every 4–6 weeks | Use a mild dog shampoo; avoid over‑washing. |
| Medium, medium‑haired (e.g., Beagle) | 2–3 times per week | Every 4–6 weeks | Check for mats in ear flaps. |
| Large, long‑haired (e.g., Labrador Retriever) | 3–4 times per week | Every 6–8 weeks | Use a detangling spray for shedding. |
| Specialty coats (e.g., Poodle, Schnauzer) | Daily brushing | Every 4–6 weeks | Professional grooming recommended every 8–12 weeks. |
3. Nail Care Tips
- Check nail length: A quick snap of a nail should not touch the pad beneath it.
- Use a pet‑safe nail clipper: Avoid cutting too close to the quick; if you’re unsure, trim only half an inch at a time.
- Reward after each cut: This reduces anxiety for future sessions.
4. Ear Cleaning and Dental Hygiene
- Ears: Inspect weekly for wax build‑up, redness or odor. Use a vet‑approved ear cleaner with cotton balls—never insert anything deeper than the outer ear canal.
- Mouth: Brush once or twice per week with a dog‑specific toothbrush and toothpaste. For rescue dogs that may be nervous, start by brushing just the gums and gradually work toward full mouth cleaning.
5. Dealing with Common Rescue Issues
| Issue | Possible Cause in Rescues | Grooming Remedy |
|---|---|---|
| Matted fur | Long periods of neglect or improper brushing. | Use a detangling spray, comb from ends to root. Consider professional help if mats are severe. |
| Skin irritation | Allergies or infection from unsupervised exposure. | Switch to hypoallergenic shampoo; consult a vet for medicated treatments. |
| Dry, flaky skin | Lack of proper nutrition or environmental dryness. |
6. Practical Training Integration
Grooming can double as training time, reinforcing obedience cues while the dog remains calm:
- "Sit" before brushing: The dog stays still and is less likely to panic.
- "Stay" during a bath: Use a treat‑based reward system to maintain focus.
- Introduce new commands gradually: For example, while trimming nails, ask for "drop paw" to reinforce the command with a positive outcome.
7. Safety and Health Checks
- Inspect for parasites: After brushing or bathing, look for fleas, ticks, or signs of mange.
- Check the eyes: Clean any discharge with a damp cloth; if redness persists, seek veterinary care.
- Observe behavior changes: A sudden reluctance to groom may indicate pain or illness—consult your vet promptly.
8. Resources for Further Learning
- DogTime Grooming Guide
- PetMD Bathing Safety Tips
- Local rescue organizations often offer free grooming workshops—check your community board or website.
By combining a consistent, gentle routine with training cues and professional resources, you’ll help your rescued dog thrive both physically and emotionally. Consistency is key—over time, grooming becomes an enjoyable bonding activity that reinforces trust and confidence in their new home.
Feeding Guidelines
Adopting a rescue dog often means you’re stepping into a new routine that may differ significantly from what your pet was used to. One of the most important aspects of that routine is nutrition. A well‑balanced diet not only keeps your dog healthy but also helps reduce stress, support recovery from past traumas, and establish trust between you and your new companion.
1. Assess Their Current Diet
- Check the label: If the rescue center provided food, note the brand, formula (adult, senior, or puppy), and any special ingredients.
- Observe eating habits: Does your dog eat quickly, slowly, or seem hesitant? This can hint at digestive sensitivity or anxiety around food.
- Ask for records: If available, request a feeding history or any known allergies from the shelter staff.
2. Transition to Your Own Food Gradually
A sudden change in diet can cause gastrointestinal upset. Follow this 7‑day transition plan:
- Day 1–2: Mix 75% shelter food with 25% your chosen brand.
- Day 3–4: Switch to a 50/50 blend.
- Day 5–6: Use 25% shelter food and 75% new food.
- Day 7: Feed only your selected brand.
3. Choose the Right Food Formula
Consider the following factors when selecting a formula:
- Age & size: Puppies need higher protein and calories; large breeds benefit from joint‑supporting ingredients.
- Health history: If your dog had allergies or digestive issues, look for limited‑ingredient or grain‑free options.
- Activity level: Active dogs require more energy-dense food; sedentary dogs need a balanced calorie intake to avoid weight gain.
4. Establish Feeding Schedules
Consistency helps reduce anxiety and promotes digestive regularity.
- Two meals per day: Morning and evening, roughly 12 hours apart.
- Portion control: Use the feeding chart on the dog food bag as a starting point; adjust based on weight changes observed over 4–6 weeks.
- Water access: Fresh water should be available at all times. Consider a pet fountain to encourage drinking.
5. Monitor Weight & Body Condition
Use the Body Condition Score (BCS) chart: a score of 4–6 out of 9 is ideal. Record weight weekly and adjust portions accordingly.
6. Treats & Rewards
- Limit treats to 10% of daily calories.
- Select low‑calorie, high‑fiber options (e.g., freeze‑dried chicken strips).
- Avoid table scraps or foods toxic to dogs such as chocolate, grapes, onions, and xylitol.
7. Special Considerations for Rescue Dogs
Rescue dogs may have experienced food scarcity or irregular feeding patterns:
- Gradual introduction of new foods: Use small taste tests before fully transitioning.
- Use of a calm, consistent voice: This can help reinforce the idea that mealtime is safe and predictable.
- Professional vet check‑up: Within the first month, schedule a wellness exam to rule out hidden health issues.
8. Practical Tips & Resources
- ASPCA Feeding Guide
- The Kennel Club – Dog Food & Nutrition
- Keep a feeding log: date, time, amount, and any behavioral notes.
By paying careful attention to these guidelines, you’ll help your rescue dog settle into their new home with confidence, health, and a sense of security that comes from knowing when and what they can expect at meal times.
Traveling with Your Dog
Adopting a rescue is an incredibly rewarding experience, but it also comes with unique training challenges. Rescue dogs often carry past trauma, confusion about their place in the world, or simply lack of basic obedience. By approaching training with patience, consistency, and positive reinforcement, you can help your new companion feel safe, confident, and ready for adventures—whether that means a weekend hike or a trip across town.
1. Build Trust Before Commands
- Establish a routine: Dogs thrive on predictability. Feed, walk, and play at the same times each day to create a sense of stability.
- Use gentle body language: Avoid looming over or making sudden movements. Let your dog approach you when comfortable.
- Reward calm behavior: Offer treats, praise, or a favorite toy whenever the dog displays relaxed postures (e.g., lying down calmly, eye contact). This reinforces that being near you is safe.
2. Start with Basic Obedience
Begin training in a low‑distraction environment—your living room or backyard—and gradually introduce more complex settings.
- “Sit”: Hold a treat above the dog’s nose, then slowly move it back over their head. As they follow the treat, say “sit.” When they sit, reward immediately.
- “Stay”: Once “sit” is reliable, add a cue like “stay.” Open your palm toward the dog and step backward. If they remain seated, give a treat; if not, calmly bring them back to the position and try again.
- “Come” (Recall): Use a long leash or a safe enclosed space. Say the dog’s name followed by “come.” When they approach, reward enthusiastically. This is crucial for safety when traveling outside.
3. Socialize Safely
Rescue dogs may have had limited exposure to other animals and people. Gradual socialization helps them adapt without becoming fearful or aggressive.
- Controlled introductions: Invite a friend with a calm dog for short, supervised playdates. Keep the first session brief (5–10 minutes) and monitor body language closely.
- Positive human interactions: Encourage strangers to offer treats or gentle petting rather than approaching abruptly.
- Gradual exposure to crowds: Start with quiet parks, then move to busier locations as confidence grows. Use a short leash and maintain control until the dog demonstrates calm behavior.
4. Address Common Behavioral Issues
Rescues may exhibit anxiety, aggression, or destructive chewing. These behaviors often stem from past neglect or abuse.
| Behavior | Possible Cause | Training Tip |
|---|---|---|
| Barking at strangers | Fear of unknown people | Desensitize by gradually increasing proximity while rewarding calmness. |
| Chewing on furniture | Lack of outlets for chewing or boredom | Provide durable chew toys and use positive reinforcement when the dog chooses the appropriate item. |
| Jumping up on people | Excitement or lack of impulse control | Teach “down” and “place” commands; reward only when the dog stays seated. |
5. Prepare for Traveling
Once your rescue has mastered basic obedience, you can start training them for travel scenarios:
- Car safety: Use a dog seat belt or crate. Begin with short rides and gradually extend duration.
- Leash etiquette in public: Teach “heel” so the dog walks beside you without pulling. Practice in low‑to‑high traffic areas.
- Handling vet visits: Bring a familiar blanket or toy to reduce anxiety during check‑ups.
6. Consistency and Patience: The Cornerstones of Success
Training a rescue is an ongoing process that requires dedication. Set aside 10–15 minutes daily for short, focused sessions rather than long, tiring workouts. Celebrate small victories—each “sit” or calm moment builds confidence for both you and your dog.
Resources to Keep in Mind
- ASPCA Rescue Training Guides
- The Kennel Club – Dog Training Resources
- Local dog‑training classes or certified behaviorists for personalized guidance.
By combining trust‑building, structured obedience training, and gradual exposure to new environments, your rescue dog can transition from a shelter pup to a confident companion ready for all the adventures you plan together.
Conclusion
Adopting a rescue dog is an act of compassion and commitment—one that doesn’t end when you bring your new companion home. The transition to a safe, loving environment is only the first step; effective training ensures that both you and your rescue thrive together. Below are practical strategies, real‑world examples, and expert tips for building a strong, respectful bond with your newly adopted dog.
- Keep the first days quiet: Allow the dog to explore its new space at its own pace. Limit visitors, loud noises, and abrupt changes that could trigger anxiety.
- Establish routines quickly: Dogs feel secure when they know what to expect. Feed, walk, and bedtime schedules should be consistent from day one.
- Use positive reinforcement: Reward calm behavior with treats, praise, or gentle petting. This helps the dog associate you with safety rather than fear.
- Daily “bonding time”: Spend at least 15–20 minutes each day doing something enjoyable—tug, gentle play, or simply sitting together on the couch.
- Introduce new experiences gradually: If your rescue is wary of cars, start with short walks in quiet areas and slowly increase exposure to traffic while rewarding calmness.
- Use a calm voice and slow movements: Avoid sudden gestures that might be perceived as threatening. A soft tone encourages cooperation.
Training fundamentals—sit, stay, come, leash walk—are essential for safety and harmony. Here’s a step‑by‑step approach:
- Choose the right environment: Begin in a distraction‑free area (your living room or backyard). Gradually move to busier spots.
- Use short, frequent sessions: Keep training sessions under 5 minutes; repeat them 3–4 times daily. Dogs with past trauma may get overwhelmed if sessions are too long.
- Keep commands consistent: Use the same word and hand gesture for each command. Mixing terms can confuse a rescue still processing new information.
- Reward immediately: Give treats or praise right after the desired behavior to create a clear cause‑effect link.
Example: Teaching “Sit” with a Former Shelter Dog
A shelter dog named Luna was hesitant around strangers. Her owner began by holding a treat above her nose and moving it back toward her tail while saying, “sit.” When Luna’s hindquarters lowered, she immediately received the treat and praise. After 10–12 repetitions, Luna could sit on cue even when greeted by unfamiliar people.
- Separation anxiety: Gradually increase alone time—start with a minute in another room and slowly extend to longer periods. Leave comforting items (a blanket, a worn t-shirt) nearby.
- Jumping or excessive barking: Teach an alternative behavior like “down” or “quiet.” Use a cue word paired with a reward each time the dog follows the new command.
- Fear of dogs: Introduce other dogs slowly. Start with a calm, well‑trained companion at a distance; reward your rescue for remaining composed. Gradually reduce distance over weeks.
If you encounter persistent issues—aggression toward people or other animals, severe fear responses, or medical concerns—consult professionals:
- Certified dog trainers: Look for trainers with experience in rescue dogs and a focus on positive reinforcement.
- Behaviorists: For complex behavioral problems rooted in trauma.
- Veterinary behavior specialists: If medical issues (e.g., pain, thyroid dysfunction) might be influencing behavior.
Rescue dogs often require more time to build confidence than puppies or purebred companions. Celebrate small wins—a successful “stay” during a walk, a calm greeting from strangers—and adjust your training plan as needed. Remember that progress is not always linear; patience and consistency are the keys.
Practical Takeaway
- Start with a calm environment and consistent routine.
- Use positive reinforcement and short, frequent sessions.
- Address specific anxieties or fears with gradual exposure and reward-based training.
- Seek professional help when behavior exceeds your comfort level.
By blending empathy with structured training, you’ll create a lasting partnership that honors your rescue’s past while building a bright future together. Training isn’t just about commands—it’s about trust, communication, and mutual respect. Happy training!
FAQ
1. What are the first steps I should take when bringing my rescue dog home?
The initial week is all about building trust and establishing routine.
- Keep a consistent schedule: Feed, walk, and bedtime at the same times each day.
- Create a safe space: A crate or a quiet corner with a blanket and a few toys.
- Introduce basic commands early: Use short, positive sessions (5–10 minutes) for “sit,” “stay,” and “come.”
- Observe body language: Look for signs of anxiety (whining, shaking) or excitement (tail wagging fast).
2. How do I handle a rescue dog that has fear-based aggression?
Fear aggression is common in rescues that have been abused or neglected. The key is to avoid triggers and use positive reinforcement.
- Identify triggers: Loud noises, unfamiliar people, sudden movements.
- Use a calm voice and slow approach: Move at the dog’s pace; never force contact.
- Reward calm behavior: Offer treats or praise when the dog remains relaxed near the trigger.
- Consider professional help: A certified trainer with experience in fear aggression can provide a tailored desensitization plan.
3. What training methods are most effective for older rescue dogs?
Older dogs may have established habits, but they’re still highly trainable with patience.
- Short, frequent sessions: 5–7 minutes, 2–3 times per day keeps them engaged without fatigue.
- Use high-value treats: Soft cheese or commercial “breakfast” treats to motivate learning.
- Focus on functional commands: “Leave it,” “Wait,” and “Heel” are useful for everyday safety.
- Incorporate enrichment toys: Puzzle feeders help maintain mental stimulation while reinforcing good behavior.
4. How can I train my rescue dog to walk nicely on a leash?
A loose-leash walk is a hallmark of well-trained dogs and reduces stress for both parties.
- Select the right equipment: A front-clip harness or head collar prevents pulling without causing pain.
- Start in a low-distraction area: Backyard, quiet park, or home hallway.
- Use the “Reward Walk” technique: Move forward slowly; stop every few steps and reward with a treat. Repeat until the dog follows without pulling.
- Introduce the “Stop & Go” cue: When the dog pulls, halt; wait for them to relax, then resume walking.
5. What should I do if my rescue has a strong prey drive or is prone to chasing?
Prey instincts can be managed with targeted training and environmental control.
- Use “Leave it” consistently: Practice with small toys, then gradually increase the difficulty (e.g., a moving toy).
- Enclose the yard or use a long leash during playtime: Prevents running off chasing squirrels.
- Channel energy into interactive games: Fetch with a rubber ball, tug‑and‑release, or scent work puzzles.
6. How do I help my rescue dog adjust to other pets in the household?
Gradual introductions and positive reinforcement are essential for harmony.
- Start with scent swapping: Exchange bedding or rub a towel on each pet to familiarize them with each other's smell.
- Use controlled visual introductions: Allow the dogs to see each other from a distance while on a leash, rewarding calm behavior.
- Plan short supervised interactions: Keep sessions brief and end on a positive note.
- Observe body language for signs of stress or dominance.
7. When should I seek professional training help?
If you’re facing persistent behavior issues, such as severe aggression, compulsive behaviors, or extreme anxiety, a certified trainer can offer specialized strategies.
- Behavioral assessment by a board‑certified veterinary behaviorist.
- Personalized training plan focusing on desensitization and counter‑conditioning.
- Regular progress reviews to adjust techniques as needed.
8. What are some common mistakes new owners make when training rescue dogs?
Avoid these pitfalls to ensure a smoother training journey:
- Using punishment or aversive tools: These can erode trust and exacerbate fear.
- Inconsistent commands or cues: One owner says “sit,” another says “down.” Consistency is key.
- Overloading the dog with too many tasks at once: Start simple, then gradually add complexity.
- Neglecting to celebrate successes: Small victories build confidence and motivation.
9. How can I keep my rescue dog mentally stimulated throughout the day?
Mental
Categories
- AI & Enrichment Play
- Broiler Farming
- Broiler Farming Tips
- Canine Wellness & Longevity
- Cat
- Cat & Human Connection
- Cat Adoption & Rescue
- Cat Breeds
- Cat Breeds & Personalities
- Cat Care & Health
- Cat Grooming & Hygiene
- Cat Lifestyle & Environment
- Cat Myths & History
- Cat Nutrition & Diet
- Cat Products & Reviews
- Cat Training & Behavior
- Comparison
- Consumer Awareness
- Dog
- Dog Accessories & Products
- Dog Adoption & Rescue
- Dog Breed & Lifestyle Trends
- Dog Breeding & Puppies
- Dog Entertainment & Media
- Dog Fashion & Trends
- Dog Fun & Lifestyle
- Dog Grooming & Hygiene
- Dog History & Culture
- Dog Myths, Science & Future Tech
- Dog News & Trends
- Dog Nutrition & Food
- Dog Psychology & Emotions
- Dog Safety & Security
- Dog Sports & Activities
- Dog Technology & Innovation
- Dog Training for Modern Owners
- Dog Travel & Adventure
- Dog Travel, Adventure & Culture
- Economic and Market Insights
- Educational Content
- FAQs
- Feeding Alternatives
- Festivals & Seasonal Ideas
- Fun & Entertainment
- General Knowledge
- General Pig Farming
- Health & Disease Management
- Housing and Environment
- Kittens
- Market Insights
- Miscellaneous
- Miscellaneous
- Motivational
- pig
- Pig Breeding
- Pig Breeds
- Pig Farming Stories and Inspiration
- Pig Health and Care
- Pig Nutrition
- Pig Products
- Profitability & Business
- Puppy Care
- Puppy Predictable Topics Reinvented
- Regional Focus
- Rescue & Adoption Buzz
- Senior Cats
- Senior Dog Care
- Smart Dog Tech & Gadgets
- Sustainability
- Sustainable & Eco-Friendly Dog Products
- Tech & Innovations
- Working & Service Dogs
- Broiler Feed66 products
- Country Feed33 products
- Pig Feed66 products
- Product22 products
- Raw Materials99 products
Products
-
 Fish Meal
₹1,999.00 – ₹2,999.00Price range: ₹1,999.00 through ₹2,999.00Rated 0 out of 5
Fish Meal
₹1,999.00 – ₹2,999.00Price range: ₹1,999.00 through ₹2,999.00Rated 0 out of 5 -
 FATTENING BROILER FEED
₹2,299.00 – ₹2,349.00Price range: ₹2,299.00 through ₹2,349.00Rated 0 out of 5
FATTENING BROILER FEED
₹2,299.00 – ₹2,349.00Price range: ₹2,299.00 through ₹2,349.00Rated 0 out of 5 -
 LAYER COUNTRY FEED
₹1,549.00 – ₹1,649.00Price range: ₹1,549.00 through ₹1,649.00Rated 0 out of 5
LAYER COUNTRY FEED
₹1,549.00 – ₹1,649.00Price range: ₹1,549.00 through ₹1,649.00Rated 0 out of 5 -
 COUNTER BROILER FEED
₹1,199.00 – ₹1,299.00Price range: ₹1,199.00 through ₹1,299.00Rated 0 out of 5
COUNTER BROILER FEED
₹1,199.00 – ₹1,299.00Price range: ₹1,199.00 through ₹1,299.00Rated 0 out of 5 -
 LACTATING PIG FEED
Rated 0 out of 5
LACTATING PIG FEED
Rated 0 out of 5₹2,299.00Original price was: ₹2,299.00.₹1,740.00Current price is: ₹1,740.00. -
 Maize
Rated 0 out of 5
Maize
Rated 0 out of 5₹1,650.00Original price was: ₹1,650.00.₹1,300.00Current price is: ₹1,300.00. -
 GESTATION PIG FEED (Phase 1)
Rated 0 out of 5
GESTATION PIG FEED (Phase 1)
Rated 0 out of 5₹2,249.00Original price was: ₹2,249.00.₹1,699.00Current price is: ₹1,699.00. -
 Pre Starter Broiler Feed
₹2,399.00 – ₹2,499.00Price range: ₹2,399.00 through ₹2,499.00Rated 0 out of 5
Pre Starter Broiler Feed
₹2,399.00 – ₹2,499.00Price range: ₹2,399.00 through ₹2,499.00Rated 0 out of 5 -
 FINISHER PIG FEED
Rated 0 out of 5
FINISHER PIG FEED
Rated 0 out of 5₹2,299.00Original price was: ₹2,299.00.₹1,749.00Current price is: ₹1,749.00. -
 Broiler Premix
Rated 0 out of 5
Broiler Premix
Rated 0 out of 5₹820.00Original price was: ₹820.00.₹699.00Current price is: ₹699.00.
Socialization
Socializing a rescue dog after adoption is one of the most rewarding yet challenging tasks you’ll face as a new owner. Rescue dogs often come from uncertain backgrounds, and they may have experienced neglect, abuse, or simply lack exposure to various stimuli. A well‑socialized dog will be confident, comfortable around people and other animals, and less likely to develop fear‑based or aggressive behaviors.
Why Socialization Matters
Key Socialization Areas & Practical Steps
People Exposure
Introduce your rescue to a variety of people—children, adults, seniors, and individuals wearing hats or sunglasses. Encourage gentle petting and talk in a calm voice.
Other Dogs & Animals
Controlled introductions to other dogs are essential. Use a neutral location, keep both dogs on leashes initially, and allow them to sniff each other at their own pace.
Environments & Sensory Stimuli
Expose your dog to various sounds (vacuum cleaner, traffic, lawn mower), textures (carpet, tile, grass), and visual stimuli (moving objects, crowds).
Travel & Vehicle Exposure
Many rescue dogs are unaccustomed to car rides. Start with short trips in a quiet vehicle, gradually increasing duration and complexity.
Handling & Grooming
Teach your dog to accept handling of ears, paws, tail, and mouth. This is critical for vet visits and grooming sessions.
Training Techniques That Support Socialization
When to Seek Professional Help
If your rescue dog displays persistent aggression, severe fear responses, or difficulty adjusting despite consistent socialization efforts, consider consulting a certified animal behaviorist or a professional trainer experienced with rescue dogs. Early intervention can prevent the escalation of problematic behaviors.
Practical Checklist for New Owners
Remember, socialization is an ongoing process—especially for rescue dogs who may need extra time to build trust. Patience, consistency, and positive reinforcement are your best tools for turning a once‑scarred companion into a confident, well‑adjusted member of the family.