
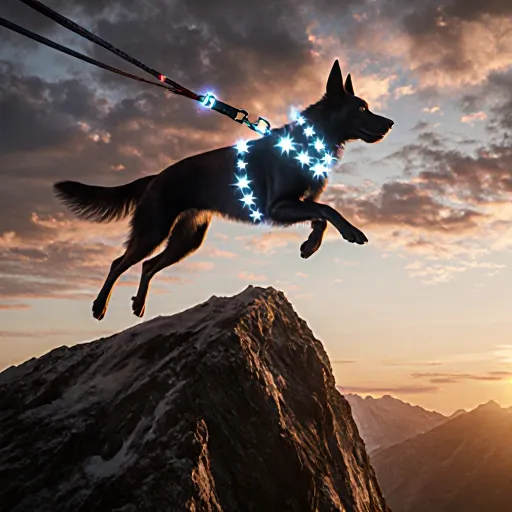
Unleash Peak Performance in Your Pup!
Summit Sprint Secrets: Elevate Dog Training Beyond Limits
Table of Contents
- Introduction to Outdoor Dog Training
- Choosing the Right Adventure Activities
- Assessing Your Dog’s Physical Readiness
- Basic Obedience Skills for Outdoor Success
- Leash Mastery and Loose‑Line Walking
- Introducing Your Dog to Trail Etiquette
- Training for Water Crossings and Lakes
- Handling Wildlife Encounters Safely
- Building Endurance with Long‑Distance Hikes
- Pack Management: Gear, Food, and Hydration
- Emergency Preparedness and First Aid Basics
- Mental Stimulation During Outdoor Sessions
- Advanced Agility for Trail Challenges
- Conclusion: Bringing It All Together
- FAQ – Common Questions About Outdoor Dog Training
Introduction to Outdoor Dog Training
Outdoor dog training transforms the natural world into an engaging learning environment for both you and your canine companion. By taking lessons beyond the confines of a fenced yard or indoor space, you expose your dog to a variety of stimuli—different terrains, sounds, people, and other animals—that can accelerate their socialization and obedience skills.
Why Train Outdoors?
- Real‑World Context: Commands practiced in the park or on a trail are more likely to hold when your dog encounters similar situations outside.
- Increased Stimulation: Varied sights, smells, and sounds challenge your dog's focus and reinforce impulse control.
- Physical Conditioning: Walking, running, or hiking builds stamina, strength, and joint health—essential for active breeds.
Key Principles of Outdoor Training
- Start Small: Begin with short walks in familiar parks. Keep sessions under 20 minutes to avoid fatigue.
- Use High‑Value Rewards: Treats that your dog rarely gets indoors (e.g., freeze‑dried liver, small pieces of chicken) maintain motivation.
- Maintain a Leash or Recall System: Even the most well‑trained dogs can be distracted. A retractable leash or a reliable recall command (“Come”) is essential for safety.
- Practice Core Commands: Sit, stay, heel, and leave it should be reinforced frequently before adding new tricks.
- Introduce Distractions Gradually: Start with gentle background noise (traffic, birds) then progress to louder stimuli like other dogs or people running.
Practical Exercise Examples
| Exercise | Setup | Goal | Progression Tips |
|---|---|---|---|
| Trail Recall | Walk a moderate trail; call your dog every 10–15 feet. | Teach reliable recall in varying terrain. | Increase distance, add distractions (other dogs), then reduce reward size to build consistency. |
| Heel on Uneven Ground | Walk on a gravel path while maintaining the “heel” position. | Encourage steady pace beside you despite uneven footing. | Use a clicker or verbal cue to mark correct heel; reward after several strides. |
| Leave It with Natural Stimuli | Present a fallen leaf, small rock, or stick on the ground. | Train your dog to ignore irrelevant objects while still being engaged. | Increase object variety and reduce reward size gradually. |
Safety & Etiquette Tips
- Check Weather: Avoid extreme heat or cold; bring water for both you and your dog.
- Respect Wildlife: Keep your dog on a leash near wildlife to prevent accidental encounters.
- Leave No Trace: Clean up after your dog; use waste bags and dispose properly.
Next Steps: Training Dogs for Outdoor Adventures
Once your dog masters basic commands outdoors, you can begin preparing them for more demanding activities such as hiking, camping, or water sports. The principles outlined here—structured practice, gradual exposure to distractions, and consistent reward systems—form the foundation for a confident, well‑behaved companion ready to explore any adventure.
Choosing the Right Adventure Activities
When you’re planning an adventure trip—whether it’s a weekend hike in the mountains or a long‑distance trail run—selecting activities that match both your skill level and your dog’s abilities is key to a safe, enjoyable experience. Below are practical guidelines, real‑world examples, and training tips to help you pick the right adventures for you and your canine companion.
1. Assess Your Dog’s Physical Condition
- Age & Breed: Young dogs or breeds with joint issues (e.g., Dachshunds, Bulldogs) may struggle on steep terrain. Older dogs benefit from flatter routes and more frequent breaks.
- Health History: Dogs with asthma, heart conditions, or chronic pain need low‑impact activities like beach walks or gentle trail strolls.
- Weight & Conditioning: A well‑conditioned dog can handle longer distances and higher elevations. Use a simple fitness test: walk your dog for 30 minutes on flat ground; if they recover quickly, they’re ready for more demanding adventures.
2. Match Activity Intensity to Training Level
Use the Canine Adventure Readiness Scale (CARS)—a quick self‑assessment with three tiers:
- Novice: Basic obedience, leash training, short walks.
- Intermediate: Advanced commands, off‑leash recall in open areas, moderate endurance.
- Advanced: Complex scent work, high‑altitude hiking, multi‑day pack trips.
Select activities that fall within your dog’s current tier. For example, a novice dog can enjoy a 2–3 km nature trail with plenty of shaded rest spots; an advanced dog might tackle a 10+ km mountain route with elevation gain.
3. Understand the Environment and Its Challenges
| Terrain Type | Key Considerations | Recommended Training Focus |
|---|---|---|
| Rocky / Uneven Ground | Risk of ankle injuries, slips. | Stair climbing drills, balance exercises, positive reinforcement for careful footing. |
| Sandy / Soft Soil | Excessive exertion, heat retention. | Short bursts of activity, acclimatization walks during cooler parts of the day. |
| Wet / Marshy Areas | Puddle jumping, risk of infection. | Water tolerance training, use of waterproof boots, regular skin checks. |
4. Practical Training Exercises for Outdoor Readiness
- Desensitization to Trail Sounds: Play recordings of rushing water, wind in trees, and distant wildlife while rewarding calm behavior.
- Off‑Leash Recall on Open Grounds: Start with a short distance, gradually increase. Use high‑value treats or toys as incentives.
- Pack Carrying: Attach a light backpack (10% of body weight) and walk for 15–20 minutes to build core strength.
- Obstacle Courses: Create a mini course with logs, low walls, and tunnels to improve agility and confidence.
5. Sample Adventure Plans by Skill Level
Novice Dog – “Beach Day” (2 km)
- Morning walk on a flat boardwalk; practice "stay" at the water’s edge.
- Short splash sessions with a treat‑based game of fetch.
- Cool down with a relaxed stretch and plenty of fresh water.
Intermediate Dog – “Forest Trail” (5 km)
- Start with a leash walk; gradually transition to off‑leash recall after 2 km.
- Introduce scent work by hiding treats under leaves or rocks.
- Use a whistle cue for "come" during busy sections.
Advanced Dog – “Mountain Expedition” (12 km, 800 m elevation gain)
- Pre‑trip conditioning: 3–4 weeks of uphill walks with a weighted pack.
- Daybreak start to avoid midday heat; schedule rest stops every 2–3 km.
- Emergency protocol: carry a first aid kit, dog‑specific hydration formula, and a GPS locator.
6. Safety Checklist Before Each Adventure
- Vaccinations up to date (including rabies, DHPP).
- Microchip or ID tags with current contact info.
- Proper gear: leash, harness, reflective vest for low light.
- Water bottle and collapsible bowl; aim for 1 L per 10 kg body weight per day.
- First aid kit tailored to dogs (bandages, antiseptic wipes, tweezers).
By carefully evaluating your dog’s health, matching activities to their training level, and preparing with targeted exercises, you’ll ensure that every adventure is a safe, rewarding experience for both of you.
Assessing Your Dog’s Physical Readiness
Before you set out on any outdoor adventure, it’s crucial to evaluate whether your dog is physically equipped for the demands of the activity. A well‑prepared dog will enjoy the experience and stay safe, while an under‑conditioned animal can suffer from fatigue, injury, or even heat stress.
1. Baseline Health Check
- Veterinary Examination: Schedule a pre‑trip check‑up to rule out underlying conditions such as heart disease, joint problems, or respiratory issues. Discuss your planned activity and ask for any specific recommendations.
- Vaccination & Parasite Control: Ensure up‑to‑date vaccines (especially rabies) and deworming. Outdoor environments expose dogs to ticks, fleas, and wildlife pathogens.
2. Cardiovascular Endurance
A dog’s heart and lungs need to sustain increased activity levels during hikes or runs. Test endurance by:
- Baseline Walk: Take your dog for a moderate walk (15–20 minutes) on flat terrain. Observe breathing rate, gait, and overall enthusiasm.
- Progressive Increase: Gradually add distance or slight inclines over weeks. A good indicator is a steady heart rate that returns to baseline within 2–3 minutes of rest.
3. Musculoskeletal Strength
Strong joints and muscles reduce injury risk on uneven trails.
- Weight‑Bearing Tests: Have your dog walk up a gentle hill or step. Look for limping, stiffness, or hesitation.
- Resistance Training: Incorporate light obstacle courses—like low jumps and weave poles—in training sessions to build coordination and muscle tone.
4. Thermoregulation & Hydration
Dogs cannot sweat through their skin; they rely on panting and licking to cool down.
- Heat Tolerance: Test in a warm environment for short periods (5–10 minutes) while monitoring for excessive panting or drooling.
- Hydration Plan: Carry at least 1 liter of water per 10 kg of body weight. Use collapsible bowls and consider electrolyte supplements on longer trips.
5. Sensory Awareness
A dog’s senses help navigate terrain, detect predators, and find food.
- Hearing: Expose your dog to various sounds (wind, water, distant animals) to ensure they react appropriately without becoming overly anxious.
- Vision & Olfaction: Practice scent‑tracking games and obstacle courses that require visual discrimination in low light or dense foliage.
6. Practical Assessment Checklist
| Assessment Area | What to Observe | Ideal Result |
|---|---|---|
| Veterinary Health | No chronic conditions, up‑to‑date vaccines | Clear medical clearance |
| Cardiovascular Endurance | Breathing returns to baseline quickly | Heart rate < 80% of max for activity duration |
| Musculoskeletal Strength | No limping on inclines or obstacles | Smooth gait, confident jumps |
| Heat Tolerance | Moderate panting, no collapse | Stable body temperature, calm demeanor |
| Sensory Awareness | Responsive to sounds and scents, good focus on trail | Alert but not anxious, follows cues reliably |
7. Training Tips for Different Adventures
- Canoeing or Kayaking: Practice floating on a calm pond and walking on a dock to build balance and core strength.
- Mountain Biking with a Trailer: Start with short, flat rides in a safe area; gradually introduce mild hills and uneven trails.
- Camping Overnight: Train your dog to sleep in its own bed or crate, away from sleeping bags, to establish boundaries and reduce anxiety.
By systematically assessing these areas, you’ll create a solid foundation that enables your dog to thrive during outdoor adventures. Remember, each dog is unique—tailor the training intensity and duration to fit their breed, age, and health profile. Happy exploring!
Basic Obedience Skills for Outdoor Success
Before you head into the backcountry, ensure your dog has mastered a set of fundamental commands that will keep both of you safe and make the adventure more enjoyable. These skills are the foundation upon which all advanced outdoor training is built.
Core Commands Every Outdoor Companion Should Know
- Come (Recall): The most critical command for safety. Practice in increasingly distracting environments—parks, streets, and eventually the woods.
- Stay: Keeps your dog from darting off or getting into trouble while you’re busy with gear or a trail crossing.
- Heel (Walk on a Loose Leash): Essential for hiking; prevents pulling and keeps you in sync on uneven terrain.
- Leave It / Drop It: Prevents ingestion of hazardous items like plants, trash, or wildlife.
- Wait (Hold Position): Useful at trail intersections, near streams, or when you need a moment to assess the environment.
Practical Training Tips for Outdoor Contexts
1. Start Small, Scale Up
Begin training in a quiet backyard or fenced yard. Once your dog consistently obeys commands on cue, introduce mild distractions—children playing, nearby traffic, or passing vehicles.
2. Use Real-World Rewards
While treats are great for indoor sessions, outdoors you’ll want to incorporate high-value items like a favorite toy, a special snack, or even the promise of a cool drink after a hike.
3. Leash Length Matters
Practice “heel” with a 6–8 foot leash in open spaces before transitioning to shorter leashes (3–5 feet) on trails where your dog needs more guidance but still has some freedom.
4. Positive Reinforcement is Key
Avoid punishment-based methods. Instead, reward correct behavior immediately—verbal praise (“Good girl!”), a quick pat, or a treat. Consistency builds trust and reduces anxiety.
5. Incorporate “Leave It” with Nature’s Challenges
During hikes, present your dog with tempting objects (e.g., fallen leaves, interesting stones). Say “leave it,” wait for compliance, then reward. This helps prevent curiosity-driven accidents.
6. Practice Recall on a Long Lead
Simulate emergency situations by using a long lead (20–30 feet) in open areas. Call your dog’s name and command “come.” When they return, reward enthusiastically. This builds the mental association between recall and positive outcomes.
7. Keep Sessions Short but Frequent
Dogs have limited attention spans—especially after a run or climb. Aim for 5–10 minute sessions with multiple repetitions, then give them a break.
Sample 30‑Minute Training Routine
- Warm‑Up (5 min): Light leash walk around the yard; praise for walking beside you.
- Recall Drills (8 min): Use a long lead in an open field. Call, reward, and repeat 6–8 times.
- Heel Practice (5 min): Walk along a fence line; give “heel,” reward for staying within one foot of you.
- Leave It / Drop It (5 min): Present a treat, say “leave it.” When they comply, hand them the treat later. Repeat with a toy.
- Stay/Wait (4 min): Stand still while your dog stays on a short leash. Increase duration gradually.
- Cool‑Down & Review (3 min): Praise and offer a final treat; recap the commands verbally.
Common Mistakes to Avoid
- Inconsistent Commands: Using “come” one day and “here” another can confuse your dog. Stick to one word.
- Neglecting Leash Tension: A slack leash during heel training gives the dog a false sense of freedom. Keep it taut but not painful.
- Over‑Reinforcing Bad Behavior: If your dog jumps for attention, ignore them until they calm down before rewarding.
Leash Mastery and Loose‑Line Walking
A well‑trained leash is the foundation of any successful outdoor adventure. Leash mastery means your dog can walk calmly beside you, respond to cues, and stay safe in a variety of environments—from quiet trails to bustling city parks.
Step 1: Choosing the Right Equipment
- Leash Length: Start with a 4–6 ft retractable leash for controlled training, then transition to a 6–8 ft fixed‑length when your dog is comfortable.
- Harness vs. Collar: For high‑pull breeds or dogs prone to neck injuries, a front‑clip harness (e.g., Ruffwear Front Range) distributes pressure evenly and reduces strain.
- Material Matters: Nylon is lightweight but can fray; consider durable polyester or leather for long‑term use.
Step 2: Teaching the “Heel” Position
The heel position keeps your dog close without pushing. Use a combination of treats and verbal cues:
- Start Indoors: Place treats in your hand, let your dog sniff, then walk forward while saying “heel” softly.
- Reward Immediately: When the dog stays within a foot of you, give a treat and praise.
- Gradual Increase: Extend distance slowly—5 ft, 10 ft—while maintaining the cue. Add distractions gradually (e.g., other dogs, traffic).
Step 3: Managing Pulling and Rebounding
Common issues:
- Pulling: Stop walking when the leash pulls. Wait for slack, then resume. Consistency reinforces that pulling yields no progress.
- Rebounding: When your dog lunges forward, pause and wait for calm before moving again. Use a “sit” or “stay” cue to reset focus.
Step 4: Incorporating Environmental Challenges
Outdoor adventures introduce variables like uneven terrain, wildlife scents, and unpredictable traffic. Practice in small increments:
- Sidewalks & Side‑by‑Side: Walk parallel to a busy sidewalk; use a high‑value treat to maintain focus.
- Trail Blending: On a trail, mix in “leave it” commands when encountering deer or other animals.
- Traffic Awareness: Teach your dog to stop and look left/right before crossing. Use a short leash for safety until confidence builds.
Practical Tips for Long‑Term Success
- Keep training sessions under 10 minutes but frequent—multiple times a day—to avoid fatigue.
- Use positive reinforcement consistently; avoid punishment or leash jerks.
- Record progress with a phone video to spot patterns and adjust techniques.
- Rotate treats: mix kibble, cheese squares, and commercial rewards so the dog stays motivated.
Mastery of the leash not only enhances safety but also strengthens the bond between you and your canine companion. With patience, consistency, and these practical steps, your dog will become a confident partner on any outdoor adventure.
Loose‑line walking is the next level after basic leash control. It allows your dog to explore, sniff, and enjoy the environment while keeping them safely on a short line that won’t entangle or tug excessively.
Why Loose Line Is Essential for Outdoor Adventures
- Reduced Risk of Tripping: A loose line prevents sudden pulls that could cause you to lose balance, especially on uneven trails.
- Encourages Natural Exploration: Dogs can investigate scents and sights without being forced into a rigid path.
- Improved Focus: Training with a loose line teaches your dog to respond to cues rather than relying on the leash as a constant tugging tool.
Technique: The “Pause‑and‑Resume” Method
This method trains dogs to maintain a short, relaxed distance from you while staying responsive.
- Start with a Short Leash: Use a 2–3 ft leash to begin. Keep it slightly slack (no more than an inch).
- Set the Cue: Say “loose” or use a hand signal when you want your dog to relax.
- Pause When Tension Occurs: If the leash tightens, stop walking. Wait for the dog to return to a relaxed state before proceeding.
- Reward Calmness: Offer treats or affection when the dog maintains slackness for at least 5 seconds.
Common Mistakes and How to Avoid Them
- Using a Retractable Leash Incorrectly: Retract too quickly—this can cause the dog to pull. Instead, let the leash extend gradually as you walk.
- Ignoring Body Language: A tense body signals discomfort. Watch for stiff shoulders or tail tension and correct early.
- Over‑Rewarding Pulls: Treats given during pulling reinforce bad behavior. Only reward when the leash is loose.
Practical Exercises
- The “Circle” Drill: Walk in a small circle with your dog, rewarding each time they stay within a 2‑foot radius without pulling.
- “Stop & Go” on Trails:</strong
Introducing Your Dog to Trail Etiquette
Before you and your four‑legged friend hit the trail, it’s essential to teach basic trail etiquette. This not only keeps other hikers safe but also protects wildlife and preserves the natural environment.
1. Keep Your Dog on a Leash (or in a Carrier)
- Leash Length: Use a short leash (4–6 ft) for beginners, then gradually increase as your dog gains confidence and control.
- Harness vs. Collar: A harness reduces strain on the neck and is safer for dogs that pull.
- Carriers for Sensitive Trails: If a trail is highly sensitive (e.g., wetlands, nesting sites), consider using a backpack carrier or a pet stroller to avoid disturbing the habitat.
2. Respect Wildlife and Natural Habitats
Your dog’s nose is a powerful tool that can easily disturb wildlife. Keep your dog away from:
- Bird nesting areas – stay at least 100 ft away.
- Water sources – keep dogs off the bank to protect aquatic life.
- Vegetation and plant communities – avoid trampling fragile plants.
3. Practice “Leave No Trace” Principles
Teach your dog to pick up after themselves:
- Carry a Waste Bag: Use biodegradable bags and dispose of waste in designated bins.
- Clean Up Immediately: Even if you’re on a long hike, stop for a minute to collect any dropped items or waste.
4. Yield to Hikers and Other Trail Users
A common rule: when approaching another hiker, let them go first. If your dog is excited, use a short leash and calmly keep the dog behind you until they pass.
5. Use Proper Signage and Trail Markers
Many trails have signage indicating “Dogs Allowed” or “Dogs Not Allowed.” Follow these signs strictly. If a trail is marked as no‑dog, consider an alternative route.
6. Train for Controlled Excitement
During the first few hikes, keep training sessions short and positive:
- Reward-Based Training: Use treats or a favorite toy to reinforce calm behavior.
- Practice Commands on Trails: “Sit,” “Stay,” and “Leave It” are essential for managing excitement.
- Gradual Exposure: Start with quiet trails, then move to busier ones as your dog adapts.
7. Know the Trail’s Specific Rules
Some parks have unique regulations (e.g., dogs must be muzzled in certain areas). Always check the park’s website or visitor center before heading out.
8. Prepare for Emergencies
- First Aid Kit: Include items for both you and your dog (bandages, tweezers, antiseptic wipes).
- Identification: Ensure your dog’s collar has up‑to‑date ID tags and a microchip.
9. Practice “No Bark” on Trails
Barking can disturb wildlife and other hikers. Use positive reinforcement to train quiet behavior, especially in high‑traffic areas.
10. Post-Hike Clean-Up Routine
- Inspect Gear: Check leashes, harnesses, and waste bags for wear.
- Reward Your Dog: Celebrate a successful hike with extra playtime or treats.
- Reflect on the Experience: Note what went well and areas to improve for next time.
By following these guidelines, you’ll help create safe, enjoyable trails for everyone while ensuring your dog remains a responsible trail companion. Happy hiking!
Training for Water Crossings and Lakes
Water crossings are a common element of many outdoor adventures, from hiking with streams to kayaking across lakes. Even the most confident swimmer can panic if they’re not properly trained or equipped. Below is a step-by-step guide that blends practical exercises, safety gear recommendations, and real‑world examples so you can confidently lead your dog through any water obstacle.
1. Assess Your Dog’s Natural Inclination
- Swim Test: Place a sturdy flotation device (e.g., a life jacket or a small pool float) in a shallow, calm area. Observe whether your dog is willing to step onto it and stay afloat.
- Behavioral Indicators: A dog that licks water or follows fish will often be more comfortable in deeper environments.
2. Introduce a Life Jacket Early
A properly fitted life jacket (LF) is your first line of defense. Choose one that covers the chest and belly for buoyancy, not just the neck. Test it by putting your dog on it in shallow water; they should float without struggling.
Example:
“When we reached Lake Tahoe during our backcountry trek, we had a 6‑month‑old retriever who hadn’t yet learned to swim. We fitted him with a lightweight LF and let him practice in the shore’s shallow zone for 15 minutes before attempting the deeper part of the lake. He stayed calm, and we never had to rescue him.” – OutdoorDogAdventures.com
3. Build Confidence with Gradual Exposure
- Step 1: Water Familiarization – Let your dog walk through a shallow stream or puddle while on the leash, rewarding calm behavior.
- Step 2: Jump and Float – Encourage them to jump onto a floating board. Use treats or a favorite toy as motivation.
- Step 3: Controlled Crossings – Once they’re comfortable, have them cross a narrow bridge or a small stream with the LF on. Keep sessions short and repeat daily.
4. Teach “Leave It” and “Stay” in Water
These commands are critical when your dog is distracted by fish, birds, or currents.
- “Leave It” Drill: Place a treat on the ground at water level. When your dog tries to reach it, say “leave it” and offer a high-value reward elsewhere.
- “Stay” Drill: Have your dog lie in shallow water, then step back 5–10 feet while calling “stay.” Gradually increase distance.
5. Incorporate Positive Reinforcement
Use high‑value treats (e.g., hot dogs or cheese) and enthusiastic praise. The goal is to associate water with fun, not fear.
6. Practice Rescue Scenarios
Even a well-trained dog can panic if the water becomes rough. Simulate a rescue by letting your dog slip from the LF for a few seconds and then re‑putting it on while you calmly guide them back to shore.
7. Safety Gear Checklist
- Life Jacket (LF) – Size fit, snug but not restrictive.
- Floatation Aid – Inflatable ring or board for extra support.
- Rescue Line – A short nylon line attached to the LF that can be used in an emergency.
- First‑Aid Kit – Waterproof container with basic supplies.
8. Know When to Abort
If your dog shows signs of exhaustion, panic, or the water is too turbulent, retreat and reassess. Safety always trumps adventure.
9. Real‑World Success Story
“During a weekend trek in the Adirondacks, we had to cross a rapid stream that was about 4 ft deep. Our German Shepherd, who had been trained with the steps above, confidently swam across while wearing his LF. He even returned to fetch a floating stick for us—proof that proper training can turn a risky crossing into a memorable moment.” – DogAdventureBlog.com
10. Summary & Quick Tips
- Start with shallow water and a life jacket.
- Use treats, toys, and positive reinforcement.
- Gradually increase difficulty while maintaining short sessions.
- Always have safety gear ready and know your dog’s limits.
With patience, consistency, and the right equipment, you’ll be able to guide your canine companion safely across streams, rivers, and lakes—turning every water crossing into an adventure they’ll love.
Handling Wildlife Encounters Safely
When you’re out exploring the wilderness with your dog, chances are you’ll come across wildlife—whether it’s a curious deer, a skittish rabbit, or even larger predators. Proper preparation and training can keep both you and your pet safe while preserving the natural behavior of local fauna.
1. Understand Local Wildlife Risks
- Identify common species: Learn which animals are prevalent in the area (e.g., raccoons, bears, coyotes). Each has different behaviors and threat levels.
- Know seasonal patterns: Some animals become more active during certain times of year—bear activity peaks in late spring when they’re fattening up for hibernation.
- Check wildlife alerts: Before heading out, check local park or forest service websites for recent sightings or advisories.
2. Train Your Dog to Respond to Wildlife
A well-trained dog is less likely to run off or chase wildlife, which can provoke dangerous reactions.
a) Basic Recall and Leash Control
- Practice “come” in a controlled environment with distractions.
- Use a long lead or training line during early outdoor sessions to give your dog space while keeping control.
b) “Leave It” Command for Food and Threats
This command helps prevent dogs from approaching potentially dangerous animals or scavenging food that could attract predators.
c) Desensitization to Animal Scents
- Expose your dog to animal scents (e.g., a piece of deer meat wrapped in foil) while rewarding calm behavior.
- Gradually increase exposure time and distance until your dog remains composed.
3. Practical Field Strategies
- Keep a safe distance: Maintain at least 50–100 yards from wildlife unless you have clear evidence they’re not a threat.
- Stay calm and steady: Dogs read human body language. Speak softly and avoid sudden movements that could startle animals.
- Use scent masking: Carry a small amount of citrus or mint to mask your dog’s scent if you’re in bear country.
- Have a backup plan: Know how to use a whistle, bear spray, or a loud voice to deter aggressive animals.
4. Post-Encounter Checklist
- Check your dog for injuries or bites—treat promptly if needed.
- Clean any contaminated areas with mild soap and water.
- Document the encounter (date, location, species) to help local authorities track wildlife patterns.
5. Resources for Further Learning
- National Park Service Wildlife Guides
- Bear Safety Information
- Local dog training clubs often host workshops on outdoor safety and wildlife encounters.
By combining solid training with informed behavior, you can enjoy the outdoors confidently while protecting both your dog and the wildlife that shares these spaces.
Building Endurance with Long‑Distance Hikes
Training a dog for long‑distance hikes is more than just increasing mileage; it’s about creating a balanced program that develops cardiovascular fitness, muscular strength, joint stability, and mental resilience. Below you’ll find a step‑by‑step guide, practical examples, and key points to keep in mind when preparing your canine companion for extended outdoor adventures.
1. Assess Your Dog’s Baseline
- Health Check: Start with a veterinary exam to rule out joint problems, heart issues, or other conditions that could limit endurance.
- Current Activity Level: Note how far and fast your dog can comfortably walk today. Use this as the “base mileage” for your training plan.
2. Gradual Mileage Increase
A common rule of thumb is the “10‑% rule”: increase total weekly mileage by no more than 10 % from one week to the next. This reduces injury risk while building stamina.
| Week | Base Walk (mi) | Total Weekly Mileage (mi) |
|---|---|---|
| 0 | 3 | 3 |
| 1 | 3.5 | 4.5 |
| 2 | 4 | 6 |
| 3 | 4.5 | 7.5 |
| 4 | 5 | 9 |
3. Incorporate Hill Work and Terrain Variety
- Hills build leg strength and improve cardiovascular capacity.
- Different surfaces (grass, gravel, dirt) train the paws to handle varied traction.
Example: If you’re in a region with rolling hills, add a “hill repeat” session once a week: walk uphill for 2 minutes, jog down slowly, repeat 5 times. This simulates the push and pull of trail hiking.
4. Strength Training & Conditioning
- Body‑weight exercises: Sit‑to‑stand reps (10–15) improve hind‑leg power.
- Resistance bands: Attach a light band to your dog’s collar and walk backward; this trains the muscles used in uphill climbing.
5. Core Stability
A strong core reduces fatigue and prevents injury during long hikes. Use “balance board” walks or simple core‑engaging games like tug‑of‑war with a controlled pace.
6. Mental Toughness & Focus
- Introduce mild distractions (other dogs, sounds) gradually so your dog learns to stay focused.
- Use positive reinforcement: treats and praise after completing challenging sections keep motivation high.
7. Nutrition & Hydration Strategy
Long hikes require sustained energy:
- Pre‑hike snack: A small, easily digestible meal (e.g., boiled chicken and rice) about 1–2 hours before.
- On‑the‑go treats: High‑calorie chews or gels designed for dogs to prevent energy dips.
- Water: Carry a portable water bowl and refill every 30–45 minutes. Consider a collapsible water bottle with a built‑in filter if you’ll be in remote areas.
8. Gear & Equipment
- Harness: A well‑fitted harness distributes pressure evenly and reduces strain on the neck.
- Backpack (optional): For dogs that can carry a light load, use a backpack to practice carrying gear similar to what you’ll bring.
- Paw protection: If hiking in hot or icy terrain, consider paw wax or booties.
9. Recovery & Rest Days
After a hard session, give your dog at least one full rest day. Use gentle walks or play sessions to keep circulation going without overexerting.
10. Monitor for Signs of Overtraining
- Excessive panting beyond the normal trail pace.
- Drooling, limping, or reluctance to continue.
- Loss of appetite or dehydration signs (dry gums, sunken eyes).
If any of these appear, cut back mileage and give extra rest. Always consult your vet if you’re unsure.
Sample 8‑Week Training Plan
| Week | Long Walk (mi) | Hill Work | Strength/Conditioning |
|---|---|---|---|
| 1 | 2 | No | 10 Sit‑to‑Stand reps |
| 2 | 3 | No | 12 Sit‑to‑Stand reps |
| 3 | 4 | 1 hill repeat (5×) | 10 resistance band walks |
| 4 | 5 | No | 15 Sit‑to‑Stand reps |
| 5 | 6 | 1 hill repeat (7×) | 12 resistance band |
Pack Management: Gear, Food, and Hydration
- Leash & Harness: A sturdy, adjustable harness that distributes pressure evenly is essential. For trail runs or hikes, choose a lightweight but durable model with a quick‑release buckle for emergencies.
- Collar & ID Tags: Even if your dog is microchipped, a reflective collar with up-to-date contact information increases safety during low‑visibility conditions.
- Backpack or Vest: For longer outings, a small pack (5–10 lb) can carry treats, water, and first aid supplies. Look for breathable fabric, padded straps, and a secure attachment point to prevent shifting weight.
- Boots & Paw Protection: In rocky or icy terrain, dog boots shield paws from cuts and temperature extremes. Train your dog to walk in them gradually, rewarding with treats each step.
- First‑Aid Kit: Include gauze, antiseptic wipes, tweezers, and a small pair of scissors. Practice applying a bandage during training sessions so the dog becomes accustomed to the feel.
- Pre‑Trip Nutrition: Feed your dog a balanced meal 4–6 hours before departure. Avoid high-fat or overly large meals that can cause gastric upset during exertion.
- On‑Trail Snacks: Carry portable, energy‑dense treats (e.g., freeze‑dried meat sticks) to reward good behavior and provide quick calories during breaks.
- Meal Timing: Schedule small meals every 4–6 hours if the outing lasts more than 8 hours. This helps maintain steady energy levels and reduces the risk of hypoglycemia.
- Training with Food: Use treats to reinforce commands like “sit,” “stay,” or “heel” while on uneven terrain. Gradually reduce treat frequency once the behavior is reliable.
- Water Source Planning: Map out water points along your route. If natural sources are scarce, bring a collapsible water bowl and at least 1 L of water per dog for every 4 km (or 3 mi) traveled.
- Hydration Pack: A small water bladder with a built‑in straw can keep the dog hydrated without needing to stop frequently. Train your dog to drink from it in a controlled environment before heading out.
- Signs of Dehydration: Monitor for dry gums, lethargy, or a decreased skin elasticity test (pulling back on the belly). If any signs appear, halt activity and offer water immediately.
- Cooling Techniques: In hot climates, use a wet towel around the neck or provide an evaporative cooling mat at rest stops. Teach your dog to recognize these cues by rewarding calm behavior near the towel.
Practical Tip: During training hikes, carry a “gear‑check” list and review it with your dog before each segment. This routine builds consistency, ensures safety, and reinforces the importance of each item for successful outdoor adventures.
Emergency Preparedness and First Aid Basics
When you head out on hiking, camping, or any outdoor adventure with your dog, the last thing you want is an unexpected injury or medical emergency that could put both of you at risk. Below is a practical guide to preparing for emergencies and handling basic first aid situations while keeping your canine companion safe.
1. Build a Comprehensive First‑Aid Kit
- Bandages & Gauze: Include elastic bandages, sterile gauze pads, and adhesive tape to dress wounds of all sizes.
- Tweezers & Scissors: For removing splinters or cutting off loose gauze.
- Antiseptic Solution: Use povidone‑iodine or chlorhexidine wipes to clean cuts and scrapes.
- Hydrogen Peroxide (3%): For cleaning wounds; avoid overuse as it can damage tissue if applied too often.
- Temperature‑Sensitive Bandages: Cold packs or gel packs for swelling, heat pads for muscle aches.
- Veterinary Contact Info: A list of nearby emergency vets and their phone numbers in the area.
- Medications (Vet‑Prescribed): Anti‑nausea, pain relievers, or anti‑inflammatory drugs you’ve been given for your dog’s specific condition.
- Emergency Identification: A copy of your dog’s microchip number and medical history in case the animal is separated from you.
2. Know Your Dog’s Common Outdoor Hazards
Different environments pose distinct risks. Understanding them helps you act pre‑emptively.
- Heatstroke: Keep your dog hydrated, avoid midday sun, and use a cooling vest if needed.
- Poor Trail Conditions: Watch for loose rocks or uneven ground that could cause sprains or fractures.
- Wildlife Encounters: Be prepared to protect your dog from snakes, insects, or aggressive animals.
- Ingested Toxins: Know which plants or foods are poisonous to dogs (e.g., certain berries, chocolate, onions).
3. Basic First‑Aid Procedures
A. Minor Cuts and Scrapes
- Wash your hands with soap and water.
- Rinse the wound gently with clean water.
- Apply antiseptic wipes or solution.
- Cover with a sterile gauze pad and secure with an elastic bandage.
B. Sprains and Strains
- Stop the activity immediately to prevent further injury.
- Apply a cold pack for the first 24–48 hours to reduce swelling.
- Wrap with an elastic bandage once the swelling has subsided, ensuring it is snug but not restrictive.
C. Heatstroke
- Move your dog to a shaded area and offer cool water—do NOT give ice water as it can cause shock.
- Apply cool (not cold) compresses or a wet towel to the neck, paws, and belly.
- Seek veterinary help immediately if the dog shows signs of vomiting, seizures, or disorientation.
D. Poisoning Symptoms
If you suspect your dog has ingested something toxic: keep them calm, do NOT induce vomiting unless instructed by a vet, and call your local poison control hotline or emergency veterinarian right away.
4. Training Your Dog to Respond to Emergencies
Training isn’t just about obedience; it’s about building trust so that in an emergency, you can calmly manage the situation together.
- Calm Handling Drill: Practice gently handling your dog’s paws, ears, and mouth while they are relaxed. This reduces stress during a real first‑aid scenario.
- Recall on Cue: A strong “come” command is essential if you need to get the dog away from danger or toward a safe spot.
- Desensitization to Bandages: Gradually introduce bandage materials during training sessions, rewarding calm behavior.
5. Practical Tips for Outdoor Adventure Planning
- Create an emergency contact sheet with your dog’s name, microchip number, and vet details.
- Carry a lightweight, waterproof first‑aid manual tailored for dogs.
- Plan routes that allow easy evacuation if you or your dog become injured.
- Check the weather forecast and trail conditions before heading out.
By combining thorough preparation, knowledge of common hazards, basic first‑aid skills, and targeted training, you’ll be equipped to keep your adventurous canine safe and healthy on every outdoor excursion.
Mental Stimulation During Outdoor Sessions
While physical exercise is essential for a healthy dog, mental stimulation keeps their brain active and prevents boredom‑induced behaviors such as chewing or digging. Below are proven techniques to enrich your dog's mind during outdoor adventures.
1. Scent Games: “Find It” on the Trail
- How it works: Hide a treat or a scented object (e.g., a piece of cloth with a strong odor) along the trail and let your dog sniff it out.
- Practical tip: Start with obvious hiding spots, then increase difficulty by placing items under leaves, behind rocks, or in shallow puddles.
- Training cue: Use a consistent verbal cue like “search” and reward immediately once the dog locates the scent.
2. Obstacle Course with Natural Elements
- How it works: Create a mini agility course using logs, fallen branches, or low cliffs. Incorporate commands such as “jump,” “crawl,” and “trot” to challenge both body and mind.
- Practical tip: Keep the obstacles safe—check for sharp edges or unstable surfaces before encouraging your dog.
- Training cue: Pair each obstacle with a distinct command; for example, “over” for jumps, “under” for crawls.
3. Interactive Games: The Classic “Follow the Leader”
- How it works: While walking, occasionally change direction or speed and ask your dog to mirror you. This trains focus and responsiveness.
- Practical tip: Use a high‑value treat as a lure when the dog hesitates, then gradually phase out treats as they master the behavior.
4. Puzzle Toys in Nature
- How it works: Carry lightweight puzzle toys (e.g., treat-dispensing balls) that your dog can solve on the go.
- Practical tip: Choose durable, weather‑proof designs. Fill with small kibble or peanut butter for extra motivation.
5. Teach New Tricks Using Outdoor Settings
- How it works: Use the natural environment as a teaching aid—teach “sit” before a tree, “stay” while you set up a campfire, or “leave it” near a trail marker.
- Practical tip: Keep training sessions short (5–10 minutes) to avoid fatigue and maintain enthusiasm.
6. Mindful Observation Sessions
- How it works: Pause every few minutes to observe wildlife, sounds, or the changing scenery. Encourage your dog to “look” at different points using a cue like “watch.”
- Practical tip: This improves attentiveness and reduces anxiety by giving the dog purposeful focus.
7. Use of Positive Reinforcement & Clicker Training
- How it works: Pair a click sound with a reward to mark desired behaviors instantly, helping your dog understand exactly what you want.
- Practical tip: Keep the clicker small and lightweight; practice in familiar indoor settings before using outdoors.
8. Gradual Exposure to New Stimuli
- How it works: Introduce unfamiliar sounds (e.g., distant traffic, other dogs) gradually, rewarding calm behavior.
- Practical tip: Use a “leave it” command to help the dog ignore distractions and focus on you.
9. Tracking Games: Follow Your Footprints
- How it works: Create a simple trail of footprints using a safe, non‑toxic marker or natural materials (e.g., broken twig). Let the dog follow the pattern.
- Practical tip: End with a treat at the final footprint to reinforce completion.
10. Reflection & Cool‑Down Periods
- How it works: After intense activity, sit in a quiet spot and talk softly to your dog. This helps them process the experience and relax mentally.
- Practical tip: Use this time to review training cues and provide gentle praise for good behavior.
By weaving these mental stimulation techniques into your outdoor sessions, you’ll not only keep your dog physically fit but also intellectually engaged. A well‑stimulated mind leads to a calmer, more obedient companion—perfect for any adventurous outing!
Advanced Agility for Trail Challenges
Once your dog masters basic obedience and simple agility drills, you can start training them for the dynamic demands of trail running and multi‑terrain courses. Advanced agility isn’t just about speed; it’s about confidence, problem solving, and adaptability in unpredictable outdoor environments.
1. Transitioning from Indoor to Outdoor Courses
- Environmental Variety: Introduce new surfaces (grass, gravel, mud) gradually so your dog learns to adjust footing without hesitation.
- Noise Tolerance: Use recordings of traffic, wind, or wildlife during practice runs to desensitize your dog to distractions.
- Variable Lighting: Practice in early morning, midday, and late afternoon to acclimate the pup’s vision and reaction times.
2. Building Physical Resilience
- Hill Workouts: Incorporate uphill and downhill sprints to strengthen quadriceps, hamstrings, and calf muscles.
- Plyometrics: Add box jumps or small platform hops that mimic natural leaps over logs or rocks.
- Core Strength: Use balance boards or weighted vests (light weight only) to improve stability during uneven terrain turns.
3. Mental Agility Training
Advanced agility requires quick decision making. Train with these drills:
- Obstacle Choice: Set up a series of parallel obstacles and reward the dog for choosing the correct one based on a cue.
- Time Pressure: Use a timer or countdown app to encourage faster problem solving while maintaining accuracy.
- Distraction Games: Hide treats behind objects, then ask your dog to retrieve them while navigating obstacles.
4. Trail-Specific Obstacle Design
Design courses that mimic real trail challenges:
- Log Crossings: Vary width and height; practice with both straight and angled log placements.
- Water Puddles: Use shallow pools to simulate creek crossings, teaching your dog to step carefully without slipping.
- Rock Climbing: Build a small rock wall or stack sturdy logs; emphasize controlled climbing and descent.
5. Safety & Equipment Checklist
| Item | Purpose |
|---|---|
| Collapsible Harness | Provides support without restricting movement. |
| High‑Visibility Vest | Improves visibility during dawn/dusk runs. |
| First Aid Kit | For quick treatment of minor injuries or blisters. |
| Water Bottle & Hydration Pack | Maintains hydration during long sessions. |
6. Sample Weekly Training Plan
Monday: Warm‑up jog + basic obstacle run (tunnels, low jumps).
Wednesday: Hill repeats + core stability drills.
Friday: Trail simulation: log crossings, water puddles, and rock wall with timed decision points.
Sunday: Long slow run focusing on endurance and mental focus.
7. Common Pitfalls & How to Avoid Them
- Over‑exertion: Monitor heart rate; rest after any signs of fatigue or overheating.
- Inconsistent Commands: Use the same cue words for each obstacle to prevent confusion.
- Neglecting Foot Care: Inspect paws daily for cuts or abrasions, especially after muddy runs.
8. Resources & Further Reading
- Canine Journal – Trail Running Dog Training Guide
- Outdoor Pets – Advanced Agility Tips for Dogs
- Dog Agility Training Organization – Hands‑On Workshops
By integrating these advanced techniques into your routine, you’ll equip your dog to tackle trail challenges with confidence, agility, and safety. Remember, consistency, positive reinforcement, and regular health checks are the keys to a successful outdoor adventure partnership.
Conclusion: Bringing It All Together
Training a dog for outdoor adventures isn’t just about teaching them to obey commands—it’s about building a partnership rooted in trust, communication, and shared enthusiasm for the great outdoors. By integrating the fundamentals of obedience, agility, scent work, and environmental acclimation, you create a well‑rounded companion ready to tackle trails, campsites, and wilderness challenges.
1. Consistency Across Contexts
- Use the same cues. Whether you’re on a leash in the park or off‑lead at a campsite, the word “come” should always mean return to you.
- Maintain reward timing. Treats and praise should be immediate after the desired behavior—especially in noisy outdoor settings where distractions abound.
2. Gradual Exposure to Natural Stimuli
Start with familiar environments (your backyard) before moving to more complex terrains. Incorporate sounds like birds, wind, and distant traffic gradually so your dog learns not to freeze or react negatively.
3. Building Endurance Through Structured Exercise
- Long walks. Gradually increase distance, mimicking the pace of a hike.
- Interval training. Alternate brisk walking with short bursts of running to simulate uphill climbs or sprints around obstacles.
- Recovery periods. Teach your dog to rest on cue—vital for preventing fatigue during long treks.
4. Scent Work as a Natural Skill
Use scent games (e.g., “find the treat” in a meadow) to strengthen focus and encourage your dog to use their nose rather than rely solely on visual cues. This is especially useful for tracking or navigation tasks during adventures.
5. Safety First: Health, Gear, and Preparation
- Vaccinations & microchipping. Keep records up to date before heading into remote areas.
- Proper harnesses and leashes. A well‑fitted harness reduces strain on the neck and provides better control.
- Water and food. Carry enough for both you and your dog; dehydration can quickly become a safety hazard.
6. Practice, Review, and Celebrate
Schedule regular “training sessions” during your outdoor trips—short drills that reinforce commands in real settings. After each adventure, review what worked and what didn’t; adjust the training plan accordingly.
Think of training as a continuous dialogue: you speak with treats, praise, and consistency; your dog responds with focus, confidence, and loyalty. The more aligned you are, the smoother your outdoor adventures will be—turning every trail into an enjoyable journey for both of you.
FAQ – Common Questions About Outdoor Dog Training
- What is the first step to start training my dog for outdoor adventures?
-
The foundation is a solid basic obedience routine—commands like sit, stay, come, and heel. Once your dog reliably follows these cues indoors, you can begin transferring them to the outdoors. Start with short walks in low‑traffic areas, rewarding calm behavior and gradually increasing exposure to distractions such as other dogs, traffic, or wildlife.
- How do I keep my dog focused when there are so many stimuli?
-
- Use high‑value treats: Choose something your dog loves but doesn't get often (e.g., small cubes of cheese or a few drops of tuna).
- Practice the “look at me” cue: Hold the treat close to your face and ask for eye contact; reward immediately. Repeat until it becomes a natural response.
- Gradual exposure: Start with a quiet trail, then slowly introduce louder sounds or moving objects, always rewarding focus.
- Is leash training necessary for hiking?
-
Yes. A short, sturdy leash (4–6 ft) gives you control while allowing your dog to explore safely. Train “loose‑leash” walking by rewarding moments when the leash stays slack and encouraging a gentle pull only if they drift too far ahead.
- How do I prevent my dog from getting into trouble on trails?
-
- Positive reinforcement: Praise and treat for staying close to you or turning back when you command.
- Use a “back up” cue: Teach your dog to step backward toward you, which can be useful if they approach a dangerous area.
- Manage the environment: Avoid trails with known hazards (e.g., steep drop‑offs, loose rocks) until your dog demonstrates confidence and obedience.
- What should I do if my dog shows fear or anxiety during a hike?
-
Pause the activity. Use calm, reassuring tones and give them a treat to reset their emotional state. If they still seem uneasy, consider shorter routes or different times of day when crowds are lighter.
- Can I train my dog for more advanced activities like mountain biking or trail running?
-
Absolutely—once basic obedience and loose‑leash skills are solid, you can add sport-specific commands. For mountain biking, practice a “stay” command while the bike passes; for trail running, introduce a “leave it” cue to prevent your dog from grabbing objects.
- How often should I train outdoors?
-
Consistency beats length. Short, focused sessions (10–15 min) every other day are more effective than long, infrequent training. Pair each session with a fun walk or playtime to keep the experience positive.
- What gear should I bring for outdoor dog training?
-
- Collar and leash: A flat‑plate collar or harness with a short leash.
- Training treats: Small, high‑value snacks that are easy to carry.
- First aid kit: Basic supplies for both you and your dog.
- Water & bowl: Hydration is key; bring a collapsible bowl and water.
- How do I handle wildlife encounters during training?
-
Keep your dog on a short leash, maintain eye contact, and give a firm “leave it” command. If the animal is aggressive, back away slowly while keeping the dog close to you. Always supervise closely in areas known for predators.
- Is it okay to let my dog roam freely after training?
-
Only if you’re absolutely sure they understand recall and can reliably come when called, even from a distance or with distractions. In most public trails, it’s safer—and often required by law—to keep them leashed.
Categories
- AI & Enrichment Play
- Broiler Farming
- Broiler Farming Tips
- Canine Wellness & Longevity
- Cat
- Cat & Human Connection
- Cat Adoption & Rescue
- Cat Breeds
- Cat Breeds & Personalities
- Cat Care & Health
- Cat Grooming & Hygiene
- Cat Lifestyle & Environment
- Cat Myths & History
- Cat Nutrition & Diet
- Cat Products & Reviews
- Cat Training & Behavior
- Comparison
- Consumer Awareness
- Dog
- Dog Accessories & Products
- Dog Adoption & Rescue
- Dog Breed & Lifestyle Trends
- Dog Breeding & Puppies
- Dog Entertainment & Media
- Dog Fashion & Trends
- Dog Fun & Lifestyle
- Dog Grooming & Hygiene
- Dog History & Culture
- Dog Myths, Science & Future Tech
- Dog News & Trends
- Dog Nutrition & Food
- Dog Psychology & Emotions
- Dog Safety & Security
- Dog Sports & Activities
- Dog Technology & Innovation
- Dog Training for Modern Owners
- Dog Travel & Adventure
- Dog Travel, Adventure & Culture
- Economic and Market Insights
- Educational Content
- FAQs
- Feeding Alternatives
- Festivals & Seasonal Ideas
- Fun & Entertainment
- General Knowledge
- General Pig Farming
- Health & Disease Management
- Housing and Environment
- Kittens
- Market Insights
- Miscellaneous
- Miscellaneous
- Motivational
- pig
- Pig Breeding
- Pig Breeds
- Pig Farming Stories and Inspiration
- Pig Health and Care
- Pig Nutrition
- Pig Products
- Profitability & Business
- Puppy Care
- Puppy Predictable Topics Reinvented
- Regional Focus
- Rescue & Adoption Buzz
- Senior Cats
- Senior Dog Care
- Smart Dog Tech & Gadgets
- Sustainability
- Sustainable & Eco-Friendly Dog Products
- Tech & Innovations
- Working & Service Dogs
- Broiler Feed66 products
- Country Feed33 products
- Pig Feed66 products
- Product22 products
- Raw Materials99 products
Products
-
 Fish Meal
₹1,999.00 – ₹2,999.00Price range: ₹1,999.00 through ₹2,999.00Rated 0 out of 5
Fish Meal
₹1,999.00 – ₹2,999.00Price range: ₹1,999.00 through ₹2,999.00Rated 0 out of 5 -
 FATTENING BROILER FEED
₹2,299.00 – ₹2,349.00Price range: ₹2,299.00 through ₹2,349.00Rated 0 out of 5
FATTENING BROILER FEED
₹2,299.00 – ₹2,349.00Price range: ₹2,299.00 through ₹2,349.00Rated 0 out of 5 -
 LAYER COUNTRY FEED
₹1,549.00 – ₹1,649.00Price range: ₹1,549.00 through ₹1,649.00Rated 0 out of 5
LAYER COUNTRY FEED
₹1,549.00 – ₹1,649.00Price range: ₹1,549.00 through ₹1,649.00Rated 0 out of 5 -
 COUNTER BROILER FEED
₹1,199.00 – ₹1,299.00Price range: ₹1,199.00 through ₹1,299.00Rated 0 out of 5
COUNTER BROILER FEED
₹1,199.00 – ₹1,299.00Price range: ₹1,199.00 through ₹1,299.00Rated 0 out of 5 -
 LACTATING PIG FEED
Rated 0 out of 5
LACTATING PIG FEED
Rated 0 out of 5₹2,299.00Original price was: ₹2,299.00.₹1,740.00Current price is: ₹1,740.00. -
 Maize
Rated 0 out of 5
Maize
Rated 0 out of 5₹1,650.00Original price was: ₹1,650.00.₹1,300.00Current price is: ₹1,300.00. -
 GESTATION PIG FEED (Phase 1)
Rated 0 out of 5
GESTATION PIG FEED (Phase 1)
Rated 0 out of 5₹2,249.00Original price was: ₹2,249.00.₹1,699.00Current price is: ₹1,699.00. -
 Pre Starter Broiler Feed
₹2,399.00 – ₹2,499.00Price range: ₹2,399.00 through ₹2,499.00Rated 0 out of 5
Pre Starter Broiler Feed
₹2,399.00 – ₹2,499.00Price range: ₹2,399.00 through ₹2,499.00Rated 0 out of 5 -
 FINISHER PIG FEED
Rated 0 out of 5
FINISHER PIG FEED
Rated 0 out of 5₹2,299.00Original price was: ₹2,299.00.₹1,749.00Current price is: ₹1,749.00. -
 Broiler Premix
Rated 0 out of 5
Broiler Premix
Rated 0 out of 5₹820.00Original price was: ₹820.00.₹699.00Current price is: ₹699.00.