
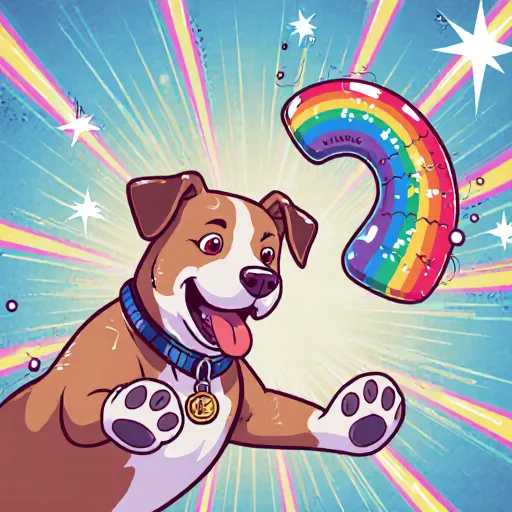
Turn Playtime Into Adventure!
Whirlwind Paws: Craft Irresistible Fetch Toys Now!
Table of Contents
- DIY Treat‑Dispensing Kibble Ball
- Homemade Tug Rope from Old T-Shirts
- Puzzle Box with Hidden Snacks
- Water‑Proof Plush Toy with a Secret Compartment
- Interactive Laser Chase Mat
- DIY Scented Ball for Nose Work Games
- Recycled Bottle Fetch Toy
- Soft Cardboard Maze Runner
- Squeaky Sock Toy with a Twist
- DIY Frozen Treat Ice Cube Game
- Personalized Name Tag Ball
- DIY Agility Ladder from PVC Pipes
- Portable Food‑Dispensing Frisbee
- Conclusion: Safe & Fun Playtime Ideas
- FAQ – Common Questions About DIY Dog Toys
DIY Treat‑Dispensing Kibble Ball
If you’re looking for a fun way to keep your pup mentally stimulated and physically active, a homemade treat‑dispensing kibble ball is the perfect project. This simple toy can be made with materials you already have at home, it’s safe for dogs of all sizes, and it offers endless opportunities for customization.
What You’ll Need
- 1 sturdy plastic bottle (a 2‑liter soda or water bottle works well)
- 1 clean, dry tennis ball or a small rubber ball (the size should fit snugly inside the bottle’s opening)
- A pair of scissors or a sharp knife
- Dog-safe treats or kibble (small pieces for larger dogs, bigger chunks for smaller breeds)
- Optional: a small piece of non‑toxic paint or permanent marker to decorate the bottle for added visual appeal.
Step‑by‑Step Instructions
- Prepare the Bottle: Remove any labels and rinse the plastic bottle thoroughly. Dry it completely before proceeding.
- Create the Opening: Using scissors or a knife, carefully cut a hole near the top of the bottle that is slightly larger than the diameter of your ball. The hole should be deep enough so the ball can slide in but not fall out.
- Insert the Ball: Slide the ball into the opening. It should rest against the inner wall of the bottle, creating a seal that will prevent treats from falling through immediately.
- Load Treats: While holding the ball in place, pour your dog’s favorite kibble or small treats into the bottle. Fill it about 3/4 full to ensure there’s enough room for the ball to move freely.
- Seal the Top: If you’re using a plastic bottle with a cap, re‑attach it so that the ball can still roll inside but the treats are sealed in. For bottles without caps, you can cover the top with a small piece of duct tape or an extra layer of plastic to keep the kibble from spilling.
- Optional Decoration: Give your treat‑dispensing ball a personal touch by painting or drawing on it. Make sure any paint is pet‑safe and non‑toxic if you choose to use it.
How It Works
The ball rolls around inside the bottle as your dog pushes against it with their nose or paws. Each roll allows a small amount of kibble to escape, encouraging your pup to keep interacting with the toy until all treats are consumed.
Safety Tips & Variations
- Size Matters: For large breeds, use a bigger bottle and larger ball. Small dogs may find it easier if you cut a slightly smaller opening or use a more compact toy like a plastic container with holes.
- Avoid Sharp Edges: Make sure the cut edges are smooth to prevent cuts on your dog’s mouth or paws.
- Monitor Playtime: Never leave your dog unsupervised with a treat‑dispensing toy if they have a tendency to chew through plastic. Some dogs may try to gnaw at the bottle, which can create choking hazards.
- Cleaning Routine: Wash the bottle and ball after each use in hot soapy water or run it through the dishwasher (if safe for your materials) to prevent bacterial buildup.
Creative Variations
You can transform this basic concept into a variety of toys:
- Interactive Puzzle Ball: Instead of kibble, fill the bottle with puzzle pieces or small squeaky toys. The dog will have to roll the ball around to get them out.
- Water‑Dispenser Edition: Fill a clear plastic container with water and add floating treats that drift when the ball moves. Great for hot days!
- Flavor Fusion: Mix kibble with shredded, dog‑safe fruits (like apple or banana) to create a tasty treat mix.
Why Your Dog Will Love It
This toy combines the mental challenge of figuring out how to get the treats with the physical benefit of encouraging active play. The repetitive rolling motion can also help calm anxious dogs by providing a focus point.
Final Thoughts
Creating a treat‑dispensing kibble ball is quick, inexpensive, and an excellent way to repurpose everyday household items into a safe, engaging toy for your dog. Try experimenting with different bottle sizes, ball types, and treats until you find the perfect combination that keeps your pup entertained for hours.
Homemade Tug Rope from Old T-Shirts
If you’re looking for a durable, eco‑friendly toy that encourages healthy chewing and interactive play, a tug rope made from old t‑shirts is a perfect choice. This DIY project uses materials you already have at home and can be completed in under an hour.
Materials Needed
- 4–6 plain cotton or blend t‑shirts (preferably with long sleeves for extra length)
- Scissors or a rotary cutter
- A sewing machine or strong needle and thread (optional, but adds durability)
- Optional: a small amount of fabric glue for added security
Step‑by‑Step Instructions
- Prepare the Shirts: Lay each shirt flat and cut off the sleeves, leaving only the torso. If you want a thicker rope, use shirts with heavier fabric.
- Cut into Strips: Using scissors or a rotary cutter, slice each shirt lengthwise into strips that are 2–3 cm wide. The more strips you have, the stronger the final rope will be.
- Tie the First Loop: Take four strips and tie them together in a loose knot. This creates a “base loop” that will hold all other strips.
- Add Strips One at a Time: Slide each new strip over the existing rope, wrapping it around the base loop. The key is to keep the tension consistent so the rope doesn’t fray.
- Secure the Ends: Once you’ve added all strips, tie a tight knot at both ends of the rope. For extra security, sew over each knot or apply a small dab of fabric glue.
Tips for Longevity
- Choose Quality Fabric: Shirts made from natural fibers (cotton, bamboo) tend to be more chew‑resistant than synthetic blends.
- Pre‑Wash: Wash the shirts before cutting to remove any sizing or chemicals that could irritate your dog’s skin.
- Check for Loose Threads: Inspect the rope regularly; if you notice fraying, re‑tuck or re‑sew the affected section.
Safety Considerations
Always supervise your dog while playing with homemade toys. If your pet tends to swallow large pieces, consider cutting the rope into shorter sections and tying them together with a secure knot that cannot be easily pulled apart.
Variations & Creative Ideas
- Color‑Coded Rope: Use shirts of different colors to create a visually appealing, multi‑texture toy. This also helps you track which dog is playing with which rope.
- Double‑Layered Rope: For extra strength, weave two ropes together by tying them side by side before adding the final knot.
- Adding a Treat Dispenser: Insert small pockets between the strips to hide treats and encourage problem‑solving play.
Related DIY Projects
Want more fun dog toys? Check out our guide on “Fun DIY Dog Toys You Can Make at Home,” which includes:
By turning everyday items into engaging playthings, you not only save money but also give your furry friend a safe and stimulating environment.
Puzzle Box with Hidden Snacks
If you want a toy that keeps your pup mentally stimulated and gives them a tasty reward at the same time, a Puzzle Box with Hidden Snacks is perfect. It’s simple to make, inexpensive, and can be customized for any dog size or skill level.
What You’ll Need
- Sturdy cardboard box (shoe box or small shoebox works great)
- A pair of scissors or a craft knife
- Non‑toxic duct tape or packing tape
- Dog treats or kibble pieces (small enough to fit inside the box but large enough to keep your dog interested)
- Optional: A rubber ball, tennis ball, or a small squeaky toy to add extra fun
Step‑by‑Step Instructions
- Prepare the Box: Open the cardboard box and remove any sharp edges. If you want extra durability, wrap the interior with duct tape.
- Create Pockets: Cut a small slit (about 1–2 inches wide) along one side of the box. This will be your “pocket” where treats can drop out when the dog nudges or pushes it.
- Add a Puzzle Layer: If you want to increase difficulty, cut a smaller rectangle from the same cardboard and place it inside the box. Tape it loosely so that it moves around when pushed.
- Insert Treats: Fill the pockets with treats or kibble. For an extra challenge, hide some treats behind the puzzle layer so your dog has to manipulate the interior to get them out.
- Optional Add‑Ons: Place a rubber ball or squeaky toy inside the box to keep your dog engaged while they’re figuring it out.
- Secure the Box: Tape the lid shut (if you’re using a shoebox) so that treats don’t spill out until the puzzle is solved.
How It Works
Your dog will sniff the box, discover the pocket or hidden compartment, and use its paws, nose, or teeth to manipulate it. Each time they successfully get a treat, their brain receives a reward signal, reinforcing problem‑solving behavior.
Tweaking Difficulty Levels
- Beginner: Use a single pocket and place all treats inside it. The dog can simply pull the pocket out with one paw.
- Intermediate: Add a second pocket on the opposite side of the box or create a small “maze” by cutting several slits that intersect.
- Advanced: Use multiple layers, add a rotating cardboard disk inside the box, or attach a small wooden block that must be slid to reveal treats.
Safety Tips
- Always supervise your dog when they’re playing with homemade toys.
- Use non‑toxic materials only. Avoid any sharp edges or loose paper pieces that could be swallowed.
- If you notice your dog chewing on the cardboard, consider replacing it with a more durable material like plastic or rubber.
Real‑World Examples
Case Study: Bella the Border Collie
- Age: 2 years old, medium size.
- Problem: Bored quickly with simple treat puzzles.
- Solution: A three‑layer cardboard puzzle box. The top layer was a sliding door that revealed a hidden compartment on the second layer.
- Result: Bella spent over 15 minutes solving the puzzle each time, significantly reducing destructive chewing at home.
Case Study: Max the Miniature Schnauzer
- Age: 1 year old, small size.
- Problem: Too quick to finish treats; needed a slower reward system.
- Solution: A single pocket box with a long, narrow slit that required Max to push the box slowly and carefully.
- Result: Max’s treat consumption slowed down, and he showed increased focus during play sessions.
Creative Variations
- Water‑Proof Version: Use a plastic storage bin instead of cardboard. Cut slits in the lid and fill with water‑proof treats or small fish-shaped dog biscuits.
- Interactive Ball Puzzle: Insert a tennis ball inside a cardboard tube, cut holes for treats to fall out when the ball rolls around.
- Weighted Box: Add a small stone or heavy object inside the box so it stays in place on uneven surfaces.
Final Thoughts
A Puzzle Box with Hidden Snacks is an excellent way to combine mental stimulation, physical activity, and tasty rewards. With just a few household items, you can create a custom toy that adapts to your dog’s skill level and keeps them entertained for hours.
Water‑Proof Plush Toy with a Secret Compartment
If you’re looking for a fun, functional toy that can double as a hidden treat holder, this DIY project is perfect. The plush is fully water‑proof so your pup can splash around in the backyard or swim in the pool without ruining the stuffing. And with a secret compartment, you can keep treats or small toys safe and dry.
Materials You’ll Need
- Water‑proof fleece or canvas fabric (about 2 × 4 inches per side)
- Heavy‑weight cotton batting or polyester fill
- Fabric glue or a sewing machine with waterproof thread
- Velcro fastener (hook and loop) or small zipper for the compartment lid
- Elastic band (optional, to keep treats inside)
- Scissors, ruler, fabric marker, needle & thread
Step‑by‑Step Instructions
- Create the Base Shape: Cut two identical rectangles from your water‑proof fabric. For a medium‑sized toy, use 6 × 8 inches.
- Add the Hidden Compartment: On one of the rectangles, cut an extra flap (about 1.5 × 3 inches) that will serve as the lid. Sew a small zipper or attach Velcro to this flap so it can open and close easily.
- Sew the Outer Shell: Place the two main rectangles right‑side‑up, with the zipper/Velcro flap on one side. Sew around the edges, leaving a 1 inches gap at the top for stuffing.
- Insert Fill and Secure: Stuff the toy with cotton batting or polyester fill until it’s firm but still flexible. Fold the top seam over to hide the opening, then sew securely.
- Seal the Compartment: Insert a small elastic band inside the flap’s pocket so treats can’t slip out. Attach the zipper/Velcro and test the closure.
- Finish the Edges: Trim any loose threads, apply fabric glue along seams for extra waterproofing, and let dry completely.
Practical Tips
- Choosing the Right Fabric: Look for fabrics labeled “water‑proof” or “water‑repellent.” A thicker canvas will hold up better against splashes.
- Safety First: Avoid small detachable parts that could be chewed off and swallowed. All seams should be reinforced with double stitching.
- Customizing the Design: Add a simple embroidered face or use contrasting fabric for the ears to make each toy unique.
- Cleaning: When the toy gets dirty, wipe it down with a damp cloth. The water‑proof fabric will repel most liquids.
Use Cases
• Fetch & Treat Combo: Toss the plush in the yard and let your dog discover the hidden treats inside. • Pool Companion: The water‑proof nature makes it safe for splashing around in a kiddie pool. • Travel Buddy: Pack one along with your dog’s usual chew toys for an extra surprise during trips.
Takeaway
This water‑proof plush toy with a secret compartment blends playfulness, practicality, and durability. By following the steps above, you can create a custom treat holder that your dog will love and that can withstand even the most enthusiastic splashes.
Interactive Laser Chase Mat
The Laser Chase Mat is a versatile, low‑maintenance toy that encourages your pup to run, jump, and stay mentally sharp—all while you can relax or multitask. By combining the excitement of laser light with a durable, washable surface, you give your dog a safe way to chase without risking damage to furniture or walls.
How It Works
- Laser Source: A small, battery‑powered LED emits a focused beam that moves across the mat’s surface.
- Mat Material: Typically made of high‑density rubber or non‑skid fabric to prevent slipping and ensure the light reflects evenly.
- Movement Pattern: Many mats come with programmable microcontrollers (e.g., Arduino) that allow you to set random, zigzag, or linear patterns. You can also manually flick the laser for spontaneous play.
Benefits for Your Dog
- Physical Exercise: Encourages sprinting, lunges, and agility drills.
- Cognitive Stimulation: The unpredictable path trains problem‑solving skills.
- Stress Relief: Releasing pent-up energy helps reduce barking and destructive behavior.
DIY Laser Chase Mat Ideas
You don’t need to buy a commercial product. With a few household items, you can create your own laser mat that’s both fun and budget‑friendly.
- Materials:
- Large flat piece of non‑skid rubber or thick canvas (≈ 3 ft × 4 ft)
- Small LED laser pointer (red, green, or blue)
- 12V battery pack or USB power source
- Arduino Nano or ESP32 microcontroller (optional for programmable patterns)
- Conductive paint or copper tape (to create a circuit path)
- Velcro strips or rubber bands (for mounting the laser securely)
- Step‑by‑step Assembly:
- Mounting the Laser: Attach the laser to a small stand using Velcro. Position it so the beam is angled 45° toward the mat, ensuring it stays within the play area.
- Circuit Path: Paint or tape a thin conductive line around the edge of the mat. Connect one end to the positive terminal of your battery pack and the other to the negative terminal via the laser’s power pins.
- Programming (Optional): If using an Arduino, upload a simple “random walk” sketch that toggles the laser on/off at 0.5‑second intervals. Connect the laser’s data pin to a digital output and control it with PWM for variable intensity.
- Testing: Power up the system and observe the beam. Adjust the angle if it drifts off the mat or gets too bright.
- Safety Tips:
- Avoid pointing the laser at your dog’s eyes; keep the beam on the floor only.
- Use a low‑power LED (≤ 5 mW) to prevent eye injury.
- Cover the mat when not in use to avoid accidental exposure by children or other pets.
- Enhancements:
- Add scent markers (e.g., dried herbs) along the circuit path for olfactory enrichment.
- Incorporate small treats that drop when your dog reaches a certain point, rewarding success.
- Use a waterproof mat to allow outdoor sessions in rain or after walks.
Practical Usage Tips
- Duration: Limit play sessions to 10–15 minutes to avoid overstimulation.
- Supervision: Keep an eye on your dog for signs of frustration or fatigue.
- Cleaning: Wipe the mat with a damp cloth weekly. Replace any worn conductive lines promptly.
By creating your own Interactive Laser Chase Mat, you give your dog endless entertainment while staying hands‑free and cost‑effective. Happy chasing!
DIY Scented Ball for Nose Work Games
A scented ball is a simple, yet highly effective tool for nose work training. It gives your dog a clear goal—find the scent—and rewards them with a fun, interactive toy once they succeed. Below you’ll find step‑by‑step instructions on how to create one at home, along with practical tips and ideas for using it in different games.
Materials Needed
- A soft, durable rubber ball (size depends on your dog’s breed; a 4–5 in. ball works well for small‑to‑medium dogs)
- Pet‑safe scented oil or essential oil blend (e.g., lavender, citrus, or vanilla – use only in moderation to avoid overwhelming the dog)
- A clean cotton ball or microfiber cloth
- Kitchen scale (optional but handy for measuring scent amount)
- Plastic zip‑lock bag or resealable container for storage
Step‑by‑Step Guide
- Prepare the Scent: Dilute 1–2 drops of essential oil in 1 tsp. of water (or use a pet‑safe scented spray). This keeps the scent from being too strong.
- Apply to Cotton: Soak the cotton ball or cloth in the diluted scent solution, then wring it out so it’s damp but not dripping.
- Wrap the Ball: Roll the scented cotton around the rubber ball. If you’re using a small dog, wrap tightly; for larger dogs, use less cotton to avoid making the ball too heavy.
- Secure (Optional): For extra durability, place the wrapped ball inside a small zip‑lock bag and seal it. This prevents the scent from dissipating too quickly during play.
Practical Tips & Safety Notes
- Essential Oil Safety: Never use oils that are toxic to dogs (e.g., tea tree, eucalyptus). Stick to pet‑safe blends and keep the amount small.
- Check for Allergies: If your dog has a history of allergies or skin sensitivities, test the scent on a small area first.
- Replace Frequently: Scented balls lose potency after 2–3 days. Keep a spare ready for continuous training sessions.
- Size Matters: For large breeds, use a larger ball or add less cotton to keep the weight manageable.
Game Ideas Using Your DIY Scented Ball
- Find & Fetch: Hide the scented ball under a blanket, in a small box, or inside a toy. Let your dog sniff around and retrieve it. Reward with praise and a treat.
- Hide‑and‑Seek Trail: Create a short trail of scent by placing multiple scented balls along a path. Have the dog follow the trail to reach the final ball.
- Obstacle Course Challenge: Place the scented ball at the finish line of an obstacle course. The dog must navigate hurdles, weave poles, and tunnels before reaching it.
- “Which One?” Game: Hide two identical balls—one scented, one unscented—in separate boxes. Ask your dog to choose the scented one. This sharpens discrimination skills.
Fun DIY Dog Toy Ideas (Inspiration)
If you enjoyed making a scented ball, consider these additional home‑made toys that can complement nose work training:
- Chew‑Proof Tunnels: Build a tunnel from cardboard or PVC and line it with the scented cotton. Dogs love crawling through them.
- Interactive Puzzle Box: Create a wooden box with hidden compartments where you can hide treats or scent swabs.
- DIY Tug Rope: Braided natural fibers like hemp or jute make strong, eco‑friendly tug toys.
Conclusion
Crafting a scented ball is an inexpensive, quick way to enrich your dog’s training routine. By pairing scent with play, you encourage mental stimulation and strengthen the bond between you and your pet. Try out the steps above, adjust scents to suit your dog's preferences, and watch them thrive in nose work games!
Recycled Bottle Fetch Toy
This simple yet effective fetch toy turns an ordinary plastic bottle into a durable, squeaky companion for your dog’s playtime. It’s inexpensive, eco‑friendly, and can be customized to suit different sizes and chewing habits.
Materials Needed
- 1–2 empty plastic bottles (e.g., water or soda bottles)
- A pair of sturdy scissors or a utility knife
- Strong adhesive tape (duct tape or packing tape) or hot glue gun
- Squeakers, small bells, or rubber balls for added noise
- Optional: dog‑safe paint or permanent markers to decorate
Step‑by‑Step Instructions
- Clean the bottle: Remove labels and rinse thoroughly. Dry completely to avoid moisture buildup.
- Create the fetch shape: Cut a small “mouth” opening near the top of the bottle, leaving enough material for the dog’s teeth to grip. For larger dogs, use a bigger bottle; for smaller breeds, cut a smaller section.
- Add noise: Insert a squeaker or small bell inside the bottle. If you prefer a silent toy, place a rubber ball instead.
- Secure the closure: Tape the bottle’s neck tightly with duct tape to ensure no liquid leaks during play. For extra durability, wrap an additional layer of tape around the base.
- Decorate (optional): Use dog‑safe paint or permanent markers to add fun patterns or your pet’s name. Avoid any sharp edges that could injure your dog.
Practical Tips for Longevity and Safety
- Check for cracks: Inspect the bottle before each use; replace if you see any fractures, especially around the neck area.
- Size matters: Match the bottle size to your dog’s mouth width. A too‑small toy can become a choking hazard.
- Monitor chewing intensity: If your dog is an aggressive chewer, consider reinforcing the bottle with a layer of rubber or a commercial chew sleeve.
- Clean regularly: Wash the toy in warm soapy water after every few sessions to prevent bacterial growth.
Why This Toy Works
The bottle’s rigid structure resists crushing, while the added noise keeps dogs engaged. By repurposing household waste, you’re also giving your pet a fun activity that aligns with sustainable living.
Fun DIY Dog Toys You Can Make at Home
- Tennis Ball Treat Puzzle: Poke holes into a tennis ball and fill it with kibble for mental stimulation.
- Cotton Rope Tug Toy: Weave old T‑shirts into a sturdy rope for tug‑of‑war games.
- Bamboo Stick Frisbee: Carve a smooth frisbee from bamboo sticks for a lightweight alternative to plastic discs.
Explore these creative projects to keep your dog entertained while you practice upcycling and DIY craftsmanship. Happy crafting!
Soft Cardboard Maze Runner
The Soft Cardboard Maze Runner is a versatile, low‑cost dog toy that turns everyday cardboard into an engaging obstacle course. By combining layers of soft cardboard, treats, and simple design tricks, you can create a stimulating maze that keeps your pup mentally sharp and physically active.
Why Choose Cardboard?
- Eco‑friendly: Recycled cardboard reduces waste.
- Safe texture: Soft cardboard is gentle on teeth and gums, unlike hard plastic or metal toys.
- Customizable: Easy to cut, fold, and shape into any layout.
- Cost‑effective: Most households already have a stack of boxes.
Materials Needed
- Large cardboard boxes (e.g., moving boxes or grocery bags)
- Scissors or utility knife
- Marker or pen for labeling sections
- Non‑toxic glue or double‑sided tape
- Dog treats, kibble, or small toys for rewards
- Optional: fabric or rubber liners for added grip
Step‑by‑Step Construction Guide
- Flatten and Prepare: Unbox the cardboard and flatten it. Remove any stiff cardboard that might splinter.
- Create Maze Walls: Cut strips about 2–3 cm wide and up to 30 cm long. These will become your maze walls.
- Build a Base: Use a large, sturdy piece of cardboard as the base. Ensure it’s flat enough for your dog to walk on comfortably.
- Assemble Walls: Attach wall strips to the base using glue or tape. Leave gaps between walls for passages—typically 5–7 cm wide so a medium‑sized dog can squeeze through.
- Add Treat Stations: At the end of each passage, place a small treat or kibble packet. This encourages exploration and rewards problem solving.
- Optional Gripping Layer: Lay a thin piece of rubber matting over the maze to prevent slipping if your dog’s paws are slick.
- Secure Edges: Reinforce corners with extra tape or glue to keep the structure from collapsing during play.
Practical Tips for Success
- Start Simple: For first‑time users, begin with a single passage and gradually add more complexity as your dog becomes comfortable.
- Use Scented Treats: A treat’s aroma can guide the dog through tricky turns—great for scent training.
- Rotate Maze Layouts: Change wall positions weekly to keep novelty high and prevent boredom.
- Supervise Play: Always monitor your dog during initial sessions to ensure no sharp edges or loose parts are ingested.
- Clean Regularly: Wash any removable treat pockets with mild soap, or replace cardboard sections that become damp or moldy.
Advanced Variations
- Multi‑Level Maze: Stack two layers of cardboard with a small ramp connecting them. Use a weighted base to keep the structure stable.
- Interactive Puzzle: Insert pull‑tabs or sliding doors that reveal hidden treats when manipulated.
- Theme‑Based Mazes: Paint or cover walls with dog‑safe colors and designs (e.g., bone patterns) to add visual interest.
Safety Considerations
Always use non‑toxic, pet‑friendly adhesives. Avoid small detachable pieces that could be chewed off and swallowed. Ensure the maze is placed on a stable surface so it doesn’t tip over during enthusiastic play.
Conclusion
The Soft Cardboard Maze Runner offers an affordable, eco‑friendly way to enrich your dog’s life. By tailoring wall heights, passage widths, and reward placements, you can create endless variations that challenge both mind and body—making it a staple addition to any DIY dog toy collection.
Squeaky Sock Toy with a Twist
Looking for a quick, inexpensive, and safe way to keep your pup entertained? A simple sock can become a multi‑sensory toy when you add a squeaker, some yarn, and a twist of creativity. This “Squeaky Sock Toy with a Twist” is perfect for dogs who love chewing, biting, and the satisfying sound of a squeak.
Why It Works
- Texture Variety: The soft cotton sock provides gentle chewing while the attached yarn or twine offers a firmer texture that can help clean teeth.
- Squeak as Reward: Dogs are naturally attracted to the sound of squeakers; it encourages repeated play and can reduce destructive behavior elsewhere in your home.
- Customizable Size: Use a small or large sock depending on your dog's size. The twist allows you to adjust the toy’s thickness for different chewing habits.
Materials Needed
- Old cotton socks (no elastic at the cuff)
- Dog‑safe squeaker or a small plastic ball with a squeak inside
- Strong, non‑toxic yarn or twine (cotton or jute work well)
- Scissors
- Optional: dog‑friendly fabric paint for decoration
Step‑by‑Step Instructions
- Prepare the Sock: Cut off any elastic at the cuff to ensure a snug fit. If you’re using a sock with a heel, remove it for a smoother shape.
- Insert the Squeaker: Slide the squeaker into the open end of the sock. Make sure it’s secure; if needed, tie a small knot in the yarn around the squeaker to hold it in place.
- Add Yarn Twists: Take a length of yarn (about 12–18 inches) and wrap it tightly around the sock’s body. Twist the yarn at least three times before securing with a final knot near the cuff. This creates an “extra” grip for your dog.
- Decorate (Optional): Use fabric paint to add patterns, colors, or your dog's name. Let it dry completely before use.
- Final Check: Ensure there are no loose threads or small parts that could be swallowed. Trim any excess yarn and double‑check knots for security.
Safety Tips
- Use only non-toxic, pet‑safe materials; avoid wool if your dog is prone to allergies.
- Inspect the toy regularly. Replace it if the yarn frays or the squeaker breaks off.
- Avoid attaching small plastic pieces that could be chewed away and swallowed.
Variations for Different Play Styles
- “Double‑Squeak” Version: Add a second squeaker at the opposite end of the sock for double the excitement.
- “Water‑Proof” Twist: Coat the yarn with a thin layer of clear, pet‑safe silicone sealant so your dog can play in the backyard without losing fibers.
- “Flavor‑Infused” Sock: Sprinkle a little dried kibble or peanut butter inside the sock before tying the final knot to entice taste‑seeking dogs.
Practical Advice for Long‑Term Use
Rotate this toy with others in your dog’s play rotation to keep them mentally stimulated. After each play session, wash the sock with mild detergent and air dry; this removes scent buildup that might otherwise attract unwanted chewing.
Fun DIY Dog Toys You Can Make at Home
While the Squeaky Sock Toy is a quick fix, consider pairing it with other homemade toys to create a full play kit:
- Paw‑Print Puzzle: A treat‑dispensing puzzle made from a cardboard box and fabric.
- Bottle Crunch: Empty plastic bottles filled with kibble or treats, sealed with a sock for safe chewing.
- Tug‑String: Two thick yarn pieces tied together with a small wooden block in the middle.
With these simple projects, you can keep your dog entertained, healthy, and happy—all while saving money and reducing waste.
DIY Frozen Treat Ice Cube Game
A simple yet effective way to keep your pup cool and entertained is the Frozen Treat Ice Cube Game. By freezing flavored treats or kibble inside an ice cube, you give your dog a refreshing reward that lasts for hours. This game not only keeps them hydrated but also engages their sense of smell and taste, making it a multi‑sensory experience.
Why It Works
- Cooling effect: Dogs cannot sweat to cool down; they rely on panting. A cold treat helps lower body temperature.
- Long‑lasting reward: As the ice melts slowly, the dog has to work for a longer period, providing mental stimulation.
- Encourages healthy habits: You can hide small portions of kibble or low‑fat treats inside, making mealtime more fun.
Materials Needed
- A reusable silicone ice cube tray (12–15 mm cubes).
- Dog‑safe flavored treats: peanut butter, pumpkin puree, or plain yogurt (no xylitol).
- Optional: a small piece of kibble or freeze‑dry dog food.
Step‑by‑Step Instructions
- Prepare the filling: Mix about 1 tbsp of peanut butter with 2 tbsp of plain yogurt until smooth. If you want a thicker texture, add a pinch of ground flaxseed.
- Fill the tray: Spoon ~½ cup of the mixture into each cube compartment. For extra challenge, tuck a small kibble piece in the center of some cubes.
- Freeze: Place the tray in the freezer for at least 4–6 hours or until completely solid.
- Serve: Remove the frozen treats and let your dog chew. Use a clean spoon or hand to offer one cube at a time, encouraging them to play with it before swallowing.
Safety Tips
- Never use xylitol‑containing peanut butter; it’s toxic to dogs.
- Check for allergies: if your dog has food sensitivities, start with a small amount of the mixture.
- Always supervise during play, especially if the treat melts quickly and could become slippery on the floor.
Creative Variations
- Veggie Boost: Add pureed sweet potato or pumpkin for extra vitamins.
- Flavor Combo: Mix in a splash of low‑sodium chicken broth for a savory twist.
- Chill & Play: Freeze the cubes inside a shallow bowl and let your dog scoop them out with their paws, mimicking a natural scavenger hunt.
Link to Related DIY Dog Toys
For more fun ideas that combine playtime and enrichment, check out our “Fun DIY Dog Toys You Can Make at Home” guide. These toys complement the Frozen Treat Ice Cube Game by providing chewable, interactive options that keep your pet engaged during warm weather.
Personalized Name Tag Ball
A personalized name tag ball is not only a fun, interactive toy that keeps your pup entertained, but it also adds an extra layer of safety and identification. By combining a durable tennis ball with a custom name tag, you can ensure that even if your dog gets loose, their name and contact details are always within reach.
Materials You’ll Need
- 1–2 standard tennis balls (rubber or rubber‑coated foam)
- High‑quality outdoor paint or permanent marker for the ball surface
- A small, lightweight metal or plastic tag (e.g., a keychain or a dog ID tag base)
- Lithium‑ion battery and LED light (optional, for visibility at night)
- Clear, waterproof sealant spray
- Strong adhesive tape or zip ties
Step‑by‑Step Guide
- Clean the Ball: Wash the tennis ball with mild soap and water, then let it dry completely. This ensures paint adheres properly.
- Paint a Base Color: Use a bright color that contrasts with your dog’s coat for visibility. Apply 2–3 thin coats of outdoor paint, allowing each to dry before the next.
- Add Your Dog’s Name: Once the base is dry, use a permanent marker or paint to write your dog’s name in large, block letters on the ball. For extra flair, add a small graphic (e.g., paw prints) around the lettering.
- Attach the Tag: Drill a tiny hole near the top of the ball using a small drill bit or use a pre‑made hole if available. Thread a piece of sturdy nylon rope or zip tie through the hole and secure it to the metal/plastic tag. If you’re adding an LED light, attach the battery pack to the tag and connect the wiring to the LED.
- Seal Everything: Once all components are in place, spray a thin coat of clear waterproof sealant over the entire ball. This protects the paint, name, and tag from moisture and wear.
Practical Tips for Longevity
- Choose a Durable Tag: Stainless steel or high‑density plastic tags are less likely to corrode or break during play.
- Use UV‑Resistant Paint: Sunlight can fade paint; opting for UV-resistant formulas keeps the name visible longer.
- Regular Inspection: Check the tag attachment and sealant every month. Replace any worn components promptly.
Safety Considerations
Make sure the tag’s weight is balanced on the ball to avoid causing uneven wear or a dangerous spin. Avoid using small, detachable parts that could be swallowed if your dog chews aggressively. If you’re uncertain about your dog’s chewing habits, consider a softer foam ball instead of a rubber one.
Fun DIY Dog Toy Ideas for Inspiration
- Water‑proof Treat Dispenser: Hollow out a tennis ball and fill it with kibble. Seal the opening so treats slowly fall out as your dog rolls it around.
- Bark‑Activated Light Ball: Attach an LED that lights up when the ball vibrates from barking or jumping.
- Training Puzzle Ball: Cut small notches into a rubber ball and hide training cues inside each notch. The dog must sniff out and solve each puzzle to get a treat.
By following these steps, you’ll create a personalized name tag ball that’s both functional and fun—perfect for keeping your dog safe while giving them an engaging toy they can’t resist!
DIY Agility Ladder from PVC Pipes
If you’re looking for a low‑cost way to keep your dog active and mentally stimulated, building an agility ladder out of PVC pipe is a fantastic option. It’s lightweight, easy to assemble, and can be customized to fit any space or training level.
Materials You’ll Need
- PVC pipe (1‑inch diameter): About 4–6 feet in length for each rung.
- PVC elbows (90°): Four corners plus any bends you want to add.
- PVC T‑junctions: For attaching rungs and creating a stable frame.
- PVC cement or solvent welding kit: To permanently bond joints.
- Drill with a 1/4” bit: If you plan to add handles or attachments.
- Sandpaper (120 grit): Smooth any rough edges.
- Paint or non‑toxic primer (optional): For a splash of color and extra grip.
Step‑by‑Step Assembly
- Design the layout: Decide how many rungs you want (4–6 is common for beginners). Sketch a simple rectangle or square to keep proportions consistent.
- Create the base frame: Cut two pieces of PVC pipe to your desired height. Attach them with T‑junctions at each end, then insert elbows at the corners to form a sturdy “U” shape. Cement all joints for stability.
- Add the rungs: Measure equal spacing along the vertical pipes (e.g., every 18 inches). Insert horizontal PVC pieces and secure them with T‑junctions or elbows, depending on your design. Make sure each rung is flush with the outer edges to avoid tripping.
- Reinforce: If you want extra durability, add a crossbeam between opposite rungs using short PVC sections and cementing them in place.
- Finish: Sand all rough spots. Paint the ladder with non‑toxic primer or paint if desired; bright colors not only look good but also help your dog see the rungs clearly.
Practical Training Tips
- Start slow: Let your dog walk through the ladder once to get used to the new texture and spacing.
- Use treats or a favorite toy as motivation: Place a treat at each rung’s end, encouraging them to step carefully.
- Incorporate other agility elements: Combine the ladder with PVC tunnels or weave poles for a full obstacle course. This is where our Fun DIY Dog Toys You Can Make at Home section comes in handy.
- Keep it safe: Always supervise training sessions to ensure your dog doesn’t slip or get stuck. If you notice any wobbling, reinforce the joints immediately.
Linking It All Together: Fun DIY Dog Toys You Can Make at Home
Once your agility ladder is set up, consider adding homemade toys that complement the training:
- DIY Kibble Ball: Fill a rubber ball with kibble and seal it. Your dog will have to navigate the ladder while chasing the treat.
- PVC Pipe Tug Rope: Wrap braided rope around PVC tubes, creating a sturdy tug toy that can be hung from the top rung.
- Interactive Puzzle Box: Use a small PVC box with sliding compartments to hide treats. Encourage your dog to use the ladder to reach the puzzle and earn rewards.
By combining an agility ladder with these simple, homemade toys, you’ll provide both physical exercise and mental stimulation—all while saving money and enjoying a creative project together.
Portable Food‑Dispensing Frisbee
A classic Frisbee can be transformed into a portable snack dispenser that keeps your pup entertained while you’re on the go. This DIY toy is lightweight, easy to clean, and perfect for training or just a fun outdoor play session.
Materials You’ll Need
- 1 sturdy plastic Frisbee (the kind that’s thick enough to hold food)
- 2-3 small rubber bands or elastic cords
- Optional: a small piece of felt or foam for cushioning the interior
- Food-safe adhesive or hot glue gun (if you want a permanent seal)
Step‑by‑Step Instructions
- Clean and Dry: Wash the Frisbee with mild soap, rinse thoroughly, and let it dry completely. A clean surface ensures your dog’s food stays fresh.
- Create a Central Hole: Use a small drill bit or a metal nail to make a hole in the center of the Frisbee that is slightly larger than the diameter of the rubber band you’ll use. The hole should be deep enough to allow a thin strip of food (like kibble or shredded carrots) to slide through.
- Insert Rubber Band: Thread one rubber band around the inner edge of the Frisbee and pull it tight so that when the Frisbee is flipped, the band will press against the inside of the rim. This creates a simple “clamp” mechanism that holds the food in place until your dog pulls on it.
- Optional Cushioning: If you want to prevent sharp edges from damaging kibble or making your dog’s mouth uncomfortable, cut a small square of felt or foam and glue it around the inner rim with food‑safe adhesive. This also helps the rubber band stay in place.
- Test the Mechanism: Place a handful of kibble into the hole and flip the Frisbee over. The rubber band should press against the rim, holding the kibble inside. When you pull on the rim with your hand (or let your dog tug), the food should slide out smoothly.
- Cleaning Routine: After each use, rinse the Frisbee under warm water and wipe it down with a damp cloth. Let it air dry before storing.
Practical Tips for Use
- Portability: Because it’s just a plastic Frisbee, you can carry it in your backpack or attach it to a leash with a small clip.
- Training Aid: Use the dispenser during “sit” or “stay” drills. Place the Frisbee on the ground and encourage your dog to retrieve the food while maintaining the command.
- Food Variety: While kibble works best, you can experiment with small pieces of wet food, freeze‑dried treats, or even shredded veggies for a healthier option.
- Safety Check: Periodically inspect the rubber band and rim for wear. Replace any frayed parts to avoid accidental ingestion.
Advanced Variations
If you want an even more challenging toy, consider adding a second hole on the opposite side of the Frisbee so that food can be dispensed from two angles. This encourages your dog to twist and turn the disc in different ways, providing extra mental stimulation.
“Creating a portable food‑dispensing Frisbee is an excellent way to keep your pup engaged during walks or trips to the park. The simple mechanism encourages natural foraging behavior while also promoting physical activity.” – DogTime
Conclusion: Safe & Fun Playtime Ideas
After exploring the variety of homemade dog toys and the creative ways you can keep your pup entertained, it’s clear that a little imagination goes a long way. The key to successful playtime is not just about providing any toy, but one that aligns with your dog’s personality, size, and chewing habits while ensuring safety.
1. Match the Toy to Your Dog’s Personality
- Gentle Chewers: Opt for softer toys such as stuffed plushies or fabric balls. The DIY Sock Ball recipe is perfect because it can be filled with treats and will gently wear down over time.
- Aggressive Chewers: Durable rubber or nylon-based toys are essential. A homemade Recycled Bottle Cruncher (a sturdy plastic bottle filled with kibble) offers both durability and an exciting crunch sound that keeps them engaged.
- Interactive Play Seekers: Puzzle-style toys like the Puzzle Treat Box or a simple treat-filled cardboard box encourage problem-solving and prolong play sessions.
2. Safety First: Inspect Before Every Use
Even homemade toys can become hazards if they break apart. Always:
- Check for loose threads, frayed fabric, or cracked plastic before each session.
- Avoid small parts that could be swallowed—ensure all pieces are larger than your dog’s mouth size.
- Use pet-safe materials (non-toxic dyes, food-grade rubber) and avoid adhesives that might leach chemicals.
3. Rotate Your Dog’s Toy Collection
Just like humans get bored with the same routine, dogs benefit from variety. Store a few toys in separate bags or bins and rotate them weekly to keep your pup’s interest high and reduce destructive chewing on any single item.
4. Incorporate Play into Daily Routines
- Morning Energizer: A quick game of fetch with a homemade ball can kickstart their day.
- Midday Brain Teaser: Drop the puzzle treat box during a midday walk break.
- Evening Wind-Down: Gentle tugging on a sturdy rope or plush toy helps calm them before bedtime.
5. Use Playtime to Strengthen Your Bond
The best part of DIY toys is that they give you the chance to bond with your dog while being creative together. Involve your pup in “tasting” sessions—let them sniff and test each new toy before play. This not only builds trust but also helps you gauge their preferences.
6. Keep a Play Log
Track which toys are most effective, how long they last, and any signs of wear or damage. A simple spreadsheet or notebook can help you refine your DIY toy list over time and ensure you’re always providing the safest options.
By following these practical tips—matching toys to personality, prioritizing safety, rotating playthings, integrating play into daily life, bonding through interactive fun, and keeping a log—you’ll create an engaging, safe, and endlessly entertaining environment for your canine companion. Happy crafting and happy playing!
FAQ – Common Questions About DIY Dog Toys
- What materials are safest for homemade dog toys?
The best choice is non-toxic, food‑grade silicone, natural rubber, or sturdy cotton and hemp fabrics. Avoid synthetic dyes, small plastic parts that can be chewed off, and any treated wood or metal. Always check the label on store‑bought items to confirm they are pet safe.
- How do I know if a toy is too small for my dog?
A good rule of thumb: the toy should be at least one-third the length of your dog's snout. If it can fit entirely in their mouth, it’s likely too small and could pose a choking hazard.
- Can I reuse a toy that my dog has chewed up?
Only if you’re sure no harmful fragments remain. Inspect the toy for splintered wood or torn fabric; trim any frayed edges and wash it thoroughly before giving it back to your pup.
- How often should I replace a homemade toy?
Inspect toys every week. Replace them when you notice wear, loose stitching, or broken parts. A good practice is to rotate toys weekly so your dog stays mentally stimulated without overusing any single item.
- What are some quick DIY ideas for busy pet owners?
- Tennis Ball Treat Dispenser: Poke a hole in the ball, insert kibble, and seal with a rubber band. Great for interactive play.
- Cotton Rope Tug: Weave two or three strands of cotton rope together, knot securely, and tie at both ends. Perfect for tug‑of‑war sessions.
- Water Bottle Crunch Toy: Place a clean plastic water bottle inside a sock; knot the sock’s end. The crunching sound keeps dogs engaged during long walks.
- How can I make my dog’s chewing less destructive?
Offer a variety of textures: rubber, nylon, and natural fibers. Rotate toys to maintain novelty, and always supervise playtime. Consider incorporating training treats into the toy for positive reinforcement.
- Do homemade toys affect my dog’s dental health?
Yes—chewing on firm, textured materials can help reduce plaque buildup. Look for toys labeled “dentally beneficial” or use a natural rubber chew with a rough surface to aid cleaning.
- What should I do if my dog is allergic to certain fabrics?
Test a small patch of the fabric on your dog’s skin before making a toy. If itching, redness, or swelling occurs, discard that material and try hypoallergenic options like organic cotton or bamboo.
- How can I keep my DIY toys clean?
Wash cotton or hemp toys in mild detergent and air dry. For silicone or rubber items, rinse with warm soapy water; some are dishwasher safe. Regular cleaning prevents bacterial growth and keeps treats from sticking.
- Where can I find more DIY dog toy tutorials?
Check out the “Fun DIY Dog Toys You Can Make at Home” guide on our blog for step‑by‑step instructions, printable patterns, and safety tips. You’ll also find video demos on our YouTube channel.
Categories
- AI & Enrichment Play
- Broiler Farming
- Broiler Farming Tips
- Canine Wellness & Longevity
- Cat
- Cat & Human Connection
- Cat Adoption & Rescue
- Cat Breeds
- Cat Breeds & Personalities
- Cat Care & Health
- Cat Grooming & Hygiene
- Cat Lifestyle & Environment
- Cat Myths & History
- Cat Nutrition & Diet
- Cat Products & Reviews
- Cat Training & Behavior
- Comparison
- Consumer Awareness
- Dog
- Dog Accessories & Products
- Dog Adoption & Rescue
- Dog Breed & Lifestyle Trends
- Dog Breeding & Puppies
- Dog Entertainment & Media
- Dog Fashion & Trends
- Dog Fun & Lifestyle
- Dog Grooming & Hygiene
- Dog History & Culture
- Dog Myths, Science & Future Tech
- Dog News & Trends
- Dog Nutrition & Food
- Dog Psychology & Emotions
- Dog Safety & Security
- Dog Sports & Activities
- Dog Technology & Innovation
- Dog Training for Modern Owners
- Dog Travel & Adventure
- Dog Travel, Adventure & Culture
- Economic and Market Insights
- Educational Content
- FAQs
- Feeding Alternatives
- Festivals & Seasonal Ideas
- Fun & Entertainment
- General Knowledge
- General Pig Farming
- Health & Disease Management
- Housing and Environment
- Kittens
- Market Insights
- Miscellaneous
- Miscellaneous
- Motivational
- pig
- Pig Breeding
- Pig Breeds
- Pig Farming Stories and Inspiration
- Pig Health and Care
- Pig Nutrition
- Pig Products
- Profitability & Business
- Puppy Care
- Puppy Predictable Topics Reinvented
- Regional Focus
- Rescue & Adoption Buzz
- Senior Cats
- Senior Dog Care
- Smart Dog Tech & Gadgets
- Sustainability
- Sustainable & Eco-Friendly Dog Products
- Tech & Innovations
- Working & Service Dogs
- Broiler Feed66 products
- Country Feed33 products
- Pig Feed66 products
- Product22 products
- Raw Materials99 products
Products
-
 Fish Meal
₹1,999.00 – ₹2,999.00Price range: ₹1,999.00 through ₹2,999.00Rated 0 out of 5
Fish Meal
₹1,999.00 – ₹2,999.00Price range: ₹1,999.00 through ₹2,999.00Rated 0 out of 5 -
 FATTENING BROILER FEED
₹2,299.00 – ₹2,349.00Price range: ₹2,299.00 through ₹2,349.00Rated 0 out of 5
FATTENING BROILER FEED
₹2,299.00 – ₹2,349.00Price range: ₹2,299.00 through ₹2,349.00Rated 0 out of 5 -
 LAYER COUNTRY FEED
₹1,549.00 – ₹1,649.00Price range: ₹1,549.00 through ₹1,649.00Rated 0 out of 5
LAYER COUNTRY FEED
₹1,549.00 – ₹1,649.00Price range: ₹1,549.00 through ₹1,649.00Rated 0 out of 5 -
 COUNTER BROILER FEED
₹1,199.00 – ₹1,299.00Price range: ₹1,199.00 through ₹1,299.00Rated 0 out of 5
COUNTER BROILER FEED
₹1,199.00 – ₹1,299.00Price range: ₹1,199.00 through ₹1,299.00Rated 0 out of 5 -
 LACTATING PIG FEED
Rated 0 out of 5
LACTATING PIG FEED
Rated 0 out of 5₹2,299.00Original price was: ₹2,299.00.₹1,740.00Current price is: ₹1,740.00. -
 Maize
Rated 0 out of 5
Maize
Rated 0 out of 5₹1,650.00Original price was: ₹1,650.00.₹1,300.00Current price is: ₹1,300.00. -
 GESTATION PIG FEED (Phase 1)
Rated 0 out of 5
GESTATION PIG FEED (Phase 1)
Rated 0 out of 5₹2,249.00Original price was: ₹2,249.00.₹1,699.00Current price is: ₹1,699.00. -
 Pre Starter Broiler Feed
₹2,399.00 – ₹2,499.00Price range: ₹2,399.00 through ₹2,499.00Rated 0 out of 5
Pre Starter Broiler Feed
₹2,399.00 – ₹2,499.00Price range: ₹2,399.00 through ₹2,499.00Rated 0 out of 5 -
 FINISHER PIG FEED
Rated 0 out of 5
FINISHER PIG FEED
Rated 0 out of 5₹2,299.00Original price was: ₹2,299.00.₹1,749.00Current price is: ₹1,749.00. -
 Broiler Premix
Rated 0 out of 5
Broiler Premix
Rated 0 out of 5₹820.00Original price was: ₹820.00.₹699.00Current price is: ₹699.00.