
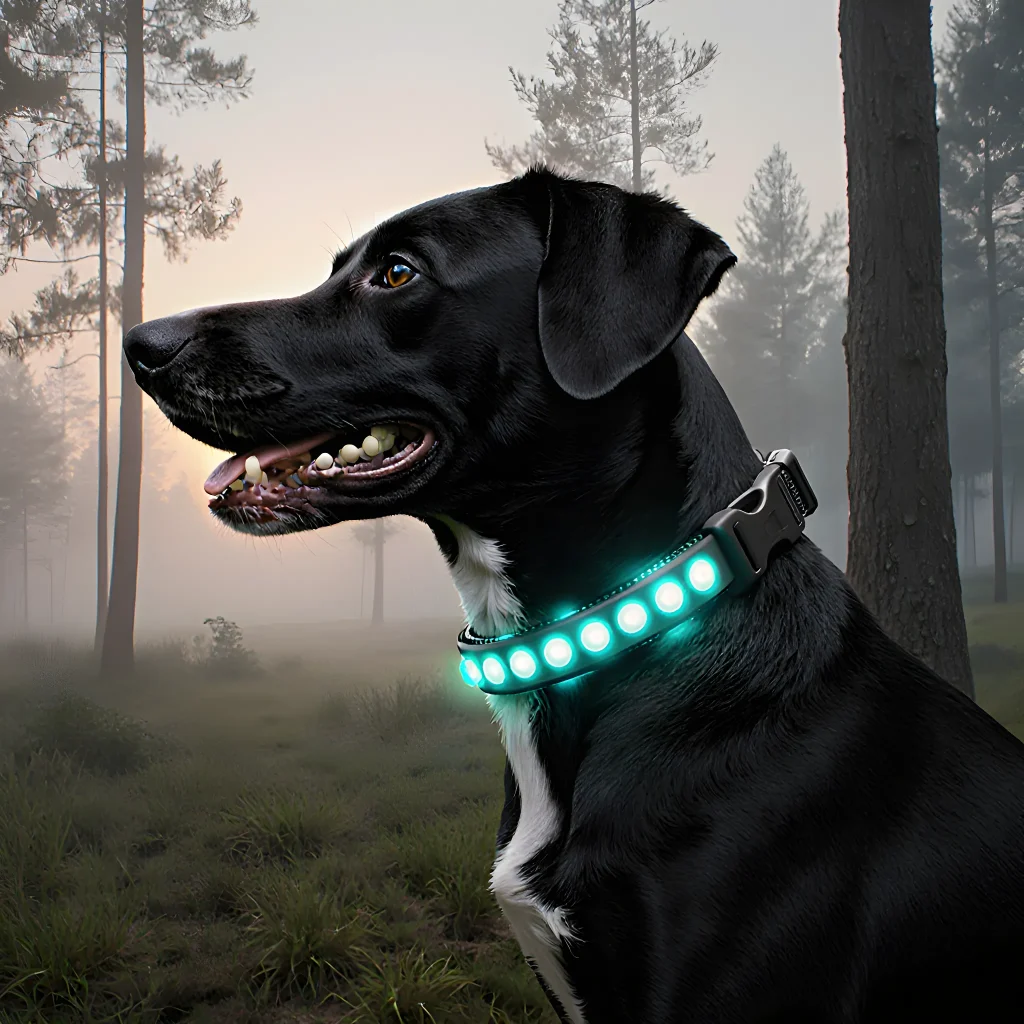
Future‑Proof Your Furry Friend
Empower Your Pet’s Growth Using Futuristic Collar Tech
Table of Contents
- Introduction
- What is a Smart Collar?
- Key Features of Modern Smart Collars
- How Remote Reinforcement Works
- Setting Up Your Collar for the First Time
- Choosing the Right Training Program
- Positive vs. Negative Reinforcement Techniques
- Monitoring Progress Remotely
- Safety Considerations and Best Practices
- Common Issues & Troubleshooting Tips
- Integrating with Other Smart Devices
- Case Studies: Real-World Success Stories
- Tips for Owners and Trainers
- Conclusion
- FAQ
Introduction
Modern pet training has moved beyond the classic clicker and treat method. With a smart collar, owners can deliver precise, consistent rewards or corrections from anywhere—whether you’re at work, on vacation, or simply in another room. This section dives into how these collars work, why they’re effective, real‑world examples, and practical tips to get the most out of your remote training sessions.
How Smart Collars Deliver Reinforcement
- Audio cues: A clear tone or pre-recorded voice message can signal correct behavior.
- Vibrations: Subtle or strong vibrations provide tactile feedback without startling the animal.
- Automatic treat dispensers: Some collars pair with a treat pouch that releases a small snack when you trigger it via an app.
- LED lights: Bright flashes can capture attention quickly, especially in low‑light environments.
Why Remote Reinforcement Works
Consistency is the cornerstone of effective training. When you’re physically present, it’s easy to forget a cue or deliver a reward at the wrong moment. Smart collars allow you to:
- Maintain timing: Reinforcement delivered within seconds maximizes learning.
- Avoid human bias: Your collar delivers the same stimulus every time, regardless of mood or fatigue.
- Expand training environments: Practice in new settings (park, home, car) without a trainer on hand.
Practical Example: Teaching “Sit” Remotely
1. Set up the collar’s app and link it to your phone.
2. When you see the dog approaching a target (e.g., a mat), tap the “Reward” button.
3. The collar emits a soft click followed by a treat release.
4. If the dog sits before the reward, it learns that sitting is the trigger for positive reinforcement.
Best Practices & Troubleshooting
- Start with a short training session: 5–10 minutes keeps the dog focused and prevents over‑stimulation.
- Use high‑contrast colors for LED cues: Red or blue are most visible in varying light conditions.
- Check battery life regularly: A dead collar can break the training rhythm.
- Pair with traditional methods: Combine clicks, treats, and verbal praise to reinforce learning fully.
Safety & Ethical Considerations
• Ensure that vibrations or sounds are within a humane range; consult the manufacturer’s guidelines.
• Do not rely solely on punishment cues—positive reinforcement yields better long‑term results.
• Monitor your pet’s response: if it shows signs of stress, pause training and reassess the intensity settings.
Conclusion
Smart collars bridge the gap between traditional hands‑on training and modern convenience. By integrating them into a well‑structured remote reinforcement program, you can accelerate learning, maintain consistency, and strengthen your bond with your pet—no matter where life takes you.
What is a Smart Collar?
A smart collar is more than just a GPS tracker; it’s an interactive tool that allows you to deliver rewards or corrective signals from anywhere in the world. By pairing the collar with a companion app, you can trigger auditory cues, vibrations, or even dispense treats at the click of a button—no matter where your dog is.
Why Remote Reinforcement Works
- Immediate Feedback: Positive reinforcement must be delivered right after the desired behavior to strengthen the association. A remote collar guarantees that you can provide this feedback even when you’re not physically present.
- Consistency Across Locations: Whether your dog is at a park, on a hike, or in another room of the house, the same cues and rewards can be administered, reducing confusion and accelerating learning.
- Safety & Control: In high-risk environments (e.g., busy streets), you can issue a “stop” vibration instantly without having to chase your dog down.
Practical Setup Steps
- Select the Right Collar: Look for models that offer treat dispensing, vibration, and tone options. Ensure the battery life matches your typical usage (many collars last 10–14 days on a full charge).
- Pair with the App: Follow the manufacturer’s pairing instructions—usually Bluetooth or Wi‑Fi. Once paired, calibrate each cue to match your training routine.
- Create Cue Profiles: In the app, assign a specific vibration pattern or tone to each command (e.g., “sit” = gentle vibration + treat; “come” = short tone). This makes it easier to remember which signal corresponds to which behavior.
Real‑World Training Scenarios
- Recall in the Backyard: When your dog pulls on a leash, you can use the collar’s “stop” vibration to halt the pull instantly. After stopping, immediately trigger a treat dispense and praise verbally.
- Off‑Leash Playtime at the Park: If your dog chases a ball and runs too far, send a short warning tone. Once he returns, deliver a treat and a “good job” tone to reinforce staying within range.
- Training on Long Hikes: While walking along a trail, use the collar to cue “heel.” If your dog strays, give a vibration reminder. When he corrects his position, dispense a treat to cement the behavior.
Troubleshooting Tips
- Signal Latency: If there’s a noticeable delay between pressing a button and the collar responding, check your internet connection or move closer to the Wi‑Fi router. Some collars also support offline Bluetooth mode.
- Battery Issues: Treat dispensing can drain batteries faster. Charge the collar after each training session or keep a spare battery on hand for extended hikes.
- Cue Confusion: Dogs may misinterpret vibrations if multiple cues are too similar. Use distinct patterns (e.g., single long vibration vs. two short pulses) to avoid mix‑ups.
Safety and Ethical Considerations
Always start with low-intensity cues and gradually increase as your dog becomes comfortable. Never use the collar’s punitive functions (e.g., high‑intensity shocks) unless absolutely necessary and only after consulting a professional trainer.
By integrating remote reinforcement into your training routine, you empower yourself to maintain consistent, positive interactions with your dog—no matter where you are.
Key Features of Modern Smart Collars
Modern smart collars are no longer just a tool for tracking activity; they have evolved into comprehensive behavioral management systems. Below we detail the most impactful features that enable pet owners to reinforce positive habits and discourage unwanted behaviors from anywhere in the world.
1. Wireless Connectivity (Wi‑Fi & Bluetooth)
- Dual‑mode communication: Wi‑Fi for high‑bandwidth data sync, Bluetooth Low Energy (BLE) for close‑range control and battery conservation.
- Seamless app integration: Real‑time telemetry can be visualized on smartphones or tablets via dedicated apps. Users can view heart rate, GPS location, and activity logs in a single dashboard.
2. Adjustable Intensity & Duration of Stimulus
- Variable shock levels: From gentle pulses to moderate corrective signals, owners can calibrate intensity based on the animal’s temperament.
- Timer‑based programming: Set a specific duration for each stimulus so that training sessions remain consistent and humane.
3. Multi‑Modal Feedback (Vibration & Audio)
- Quiet reinforcement: Vibration alerts are ideal for indoor environments or sensitive breeds that may react negatively to shocks.
- Audio cues: Pre‑loaded sounds (bark, whistle) can be used as positive or negative signals depending on the training script.
4. Customizable Training Programs
- Pre‑built templates: Sit/Stay, Recall, Leash Pull, and more.
- Script editor: Users can create bespoke sequences combining stimulus types, delays, and reward intervals.
5. Remote Control via Mobile App
- Instant activation: Trigger a correction or reward from anywhere with an internet connection.
- Geo‑fencing: Receive alerts when the pet exits a designated area, and automatically activate deterrents if needed.
6. Data Analytics & Machine Learning
- Behavioral trend analysis: The collar’s firmware learns patterns over time, suggesting optimal reinforcement schedules.
- Predictive alerts: If the system detects increased stress indicators (elevated heart rate + rapid movement), it can automatically reduce stimulus intensity or suggest a break.
7. Durable & Waterproof Design
- IPX8 rating: Safe for swimming, splashing, and outdoor adventures.
- Long‑life battery: Rechargeable lithium‑ion cells that last up to two weeks on a single charge under typical use.
8. Ethical Compliance & Safety Standards
- ISO/IEC certifications: Meets international safety guidelines for animal electronics.
- Built‑in fail‑safe: Automatic shutdown if abnormal temperatures or battery levels are detected.
The true power of smart collars lies in their ability to let you guide your pet’s behavior from a distance. Below is a step‑by‑step guide with practical examples that illustrate how remote reinforcement can be both effective and humane.
Step 1: Define the Desired Behavior
- Example: “When I type ‘Sit’ on my phone, the dog should sit within 5 seconds.”
- Record a baseline video of the dog performing the behavior naturally to confirm it’s achievable.
Step 2: Program the Collar
- Create a “Sit” training script in the app:
- Command trigger: ‘Sit’ button sends a low‑intensity vibration followed by an audio cue.
- Reward delay: After 2 seconds, send a gentle shock if the dog hasn’t complied, then immediately give a reward (e.g., virtual treat icon). If the dog sits, no shock is sent.
Step 3: Test Remote Activation
- From your phone, press the ‘Sit’ button while you’re in another room. Observe via live video feed whether the dog responds within the expected timeframe.
- If the dog hesitates or fails to sit, increase vibration intensity slightly and retrain.
Step 4: Incorporate Environmental Cues
- Use GPS geofencing: When the dog leaves a safe zone (e.g., backyard), automatically trigger a mild shock to discourage wandering. Combine this with a reward when it returns to the zone.
Step 5: Monitor & Adjust
- Review activity logs weekly. Look for trends such as decreasing response time or increased stress indicators.
- Adjust stimulus intensity or training frequency accordingly, ensuring compliance with ethical guidelines.
Practical Tips for Remote Reinforcement
- Consistency is key: Use the same stimuli and reward patterns each session to avoid confusion.
- Use positive reinforcement first: Offer a treat or verbal praise immediately after compliance before any corrective stimulus.
- Limit sessions: Keep remote training under 10 minutes per day to prevent fatigue or overstimulation.
- Maintain battery health: Charge the collar regularly and monitor battery levels through the app; low power can affect stimulus delivery.
- Respect privacy: When using GPS tracking, ensure you comply with local data protection regulations.
By integrating these features and following a structured remote reinforcement protocol, owners can effectively shape their pet’s behavior from anywhere—making training more flexible, consistent, and humane.
How Remote Reinforcement Works
Remote reinforcement turns the traditional “in‑person” reward system into a flexible, technology‑enabled process that can be delivered from anywhere. By pairing a smart collar with a companion app or web dashboard, you can monitor your dog’s behavior in real time and trigger rewards—whether a clicker sound, a voice cue, or a treat dispenser—at the exact moment the desired action occurs.
Core Components
- Smart Collar: Equipped with sensors (accelerometer, gyroscope, GPS), a speaker, and sometimes an integrated treat dispenser.
- Mobile App / Web Dashboard: Provides live data, allows you to set thresholds for behaviors, and sends reinforcement signals.
- Reward Mechanism: Clicker tone, recorded voice cue, or a small treat released by the collar’s dispenser.
How It Works in Practice
- Define the Target Behavior: Example: “Sit” when commanded. In the app, set a sensor pattern (e.g., a 3‑second pause in movement with the collar’s accelerometer) that matches this behavior.
- Train Locally First: Use the collar’s built‑in clicker to shape the sit response while you’re nearby. This establishes a clear association between the cue and reward.
- Switch to Remote Mode: Once the dog reliably sits, move away from the training area but keep your phone or tablet within Bluetooth range (or use Wi‑Fi for longer distances).
- Monitor Live: Watch the live feed of sensor data. When the collar detects the sit pattern, it sends a signal to the app.
- Trigger Remote Reinforcement: The app automatically plays the clicker tone or your recorded “Good job!” voice cue through the collar’s speaker. If you’ve installed a treat dispenser, it can release a small reward as well.
Practical Tips for Success
- Start Small: Begin with one behavior and one reinforcement type before adding more complex patterns or multiple rewards.
- Use Clear, Consistent Cues: The collar’s speaker should play the same clicker sound each time to avoid confusion.
- Keep Sessions Short: Dogs can get overwhelmed by too many remote cues in a row. Aim for 5–10 minutes of active training per session.
- Check Battery Life: Remote reinforcement relies on the collar’s battery and your device’s connectivity. Test both before a long walk or outdoor session.
- Gradually Increase Distance: Once the dog responds reliably at 10 feet, try 20–30 feet to ensure the signal remains strong.
- Record Sessions: Use the app’s logging feature to review which behaviors triggered reinforcement and adjust thresholds as needed.
Example Scenario: Teaching “Leave It” Remotely
1. Attach the smart collar and open the app.
2. Train “leave it” in a controlled environment using the collar’s clicker to mark the correct response.
3. Move outside, keeping your phone within range.
4. When the dog sniffs or approaches an object, the collar’s proximity sensor detects the action and sends a signal.
5. The app plays a “Good” voice cue through the collar; if you’ve set up a treat dispenser, it releases a snack.
6. Repeat until the dog consistently ignores the object without needing your physical presence.
Benefits of Remote Reinforcement
- Flexibility: Train during walks, hikes, or even from home when the dog is in a different room.
- Consistency: Eliminates human bias—every cue triggers exactly the same reward.
- Data‑Driven Adjustments: Sensor logs let you fine‑tune thresholds and identify patterns that need more work.
By leveraging smart collars for remote reinforcement, trainers can extend learning opportunities beyond the traditional training room, creating a seamless bridge between in‑person coaching and autonomous behavior shaping.
Setting Up Your Collar for the First Time
Before you can start using a smart collar to reinforce behavior remotely, it’s essential to get the hardware and software set up correctly. Below is a step‑by‑step guide that covers everything from unboxing to first‑time activation.
- Unbox and Inspect
- Check for any visible damage or missing parts (charging cable, ear clips, etc.).
- Verify the collar size matches your dog’s neck measurement. Most collars come with a sizing chart; if yours is adjustable, ensure you can tighten it to 2–3 finger widths.
- Charge the Collar
Most smart collars use a rechargeable lithium‑ion battery. Connect the charger and let the collar charge fully (usually 1–2 hours). A full charge is often indicated by a solid LED or a green bar on the companion app.
- Download the Companion App
- Available on iOS (App Store) and Android (Google Play). Search for the brand name (e.g., “DogTrack Smart Collar”).
- Install and open the app. You’ll be prompted to create an account or log in.
- Pair the Collar with Your Device
- Turn on Bluetooth on your phone/tablet.
- Press and hold the collar’s pairing button (usually a small recessed button near the charging port) until you see a blinking light.
- The app should detect the collar automatically. Follow the on‑screen prompts to complete pairing.
- Configure Collar Settings
- Profile Information: Enter your dog’s name, breed, age, and any medical conditions that might affect training (e.g., heart issues).
- Safety Limits: Set a maximum distance the collar can send a signal if you’re using it for tracking. This prevents accidental over‑training or distress.
- Behavioral Goals: Choose the behaviors you want to reinforce (e.g., “Sit,” “Come,” “Leave It”). The app will provide pre‑built routines that can be customized.
- Test the Collar
Before a full training session, run a quick test:
- Put the collar on your dog’s neck and ensure it sits comfortably.
- Open the app, press “Send Reward” (a virtual treat icon). The collar should emit a gentle vibration or audible click. If not, double‑check battery level and pairing.
- Safety Check
- Make sure the collar’s ear clips are secure but not too tight—your dog should be able to move its ears freely.
- Inspect for any sharp edges or loose parts that could snag on clothing or furniture.
- Confirm that the collar’s firmware is up‑to‑date. The app will usually prompt you if an update is available.
- Begin Training
Now you’re ready to start reinforcing behaviors remotely. Use short, consistent sessions (5–10 minutes) and always pair the collar’s reward with a verbal cue or hand signal for best results.
Practical Tips for First‑Time Users
- Start Slow: Begin with basic commands like “Sit” before moving to more complex tasks.
- Use a Reward Schedule: Alternate between immediate rewards (via collar) and delayed verbal praise.
- Keep Sessions Short: Dogs have limited attention spans—over‑training can lead to frustration.
- Monitor Body Language: Watch for signs of stress or discomfort; remove the collar if needed.
Common Troubleshooting
- Collar Won’t Pair?
- Reset the collar by holding the pairing button for 10 seconds, then try again. Ensure no other Bluetooth devices are interfering.
- No Reward Sent?
- Check battery level, confirm firmware is updated, and verify that the “Send Reward” button in the app is active (not grayed out).
- Dog Dislikes the Collar?
- Adjust the fit, try a different ear clip style, or give a few minutes for acclimation before training.
Choosing the Right Training Program
Selecting an effective training program is essential for both new and experienced dog owners who want to build a strong bond with their pets. A well‑structured program not only teaches obedience but also promotes mental stimulation, confidence, and a healthy relationship. When you combine a solid training plan with the power of smart collars that reinforce behavior remotely, you gain a flexible and data‑driven approach that can be tailored to your dog’s unique personality.
1. Identify Your Training Goals
- Basic Obedience: Sit, stay, come, heel, and off‑leash control.
- Behavior Modification: Address barking, chewing, separation anxiety, or aggression.
- Advanced Skills: Agility, scent work, therapy dog certification, or service animal training.
Write down the top three priorities for your dog. This will help you filter programs that align with your objectives.
2. Match Program Structure to Your Dog’s Learning Style
| Learning Style | Recommended Training Approach | Smart Collar Integration Tips |
|---|---|---|
| Reward‑Seeker | Positive reinforcement, clicker training, treat‑based sessions. | Use the collar’s reward mode to deliver treats or a gentle vibration cue when the dog performs correctly. |
| Quick Learner (High Intellect) | Short, high‑frequency training with rapid feedback loops. | Program the collar to send instant audio cues and record response times for analysis. |
| Slow Learner / Sensitive | Longer sessions, gradual exposure, low‑intensity reinforcement. | Set a low‑volume vibration or light signal to avoid overstimulation while still providing consistent feedback. |
3. Evaluate Program Delivery Options
- In‑Person Classes: Great for socialization and hands‑on guidance.
- Online Video Courses: Flexible schedule, visual demonstrations.
- App‑Based Coaching: Step‑by‑step modules with progress tracking.
When choosing an online or app‑based program, verify that it supports remote reinforcement via smart collars. Look for features like:
- Real‑time collar integration (e.g., API access)
- Customizable cue settings (audio, vibration, treat dispense)
- Data export for performance analytics
4. Practical Steps to Combine Training with Smart Collars
- Start with a Baseline: Record your dog’s current behavior patterns using the collar’s activity tracker.
- Create Cue‑Specific Programs: Program the collar for each command (e.g., “sit” → vibration + treat).
- Use Remote Reinforcement: While training in a distraction‑free zone, trigger the collar from your phone to deliver a reward immediately after correct execution.
- Gradually Increase Complexity: Add new commands or move to more challenging environments (park, busy street) while maintaining remote reinforcement for consistency.
- Analyze Data & Adjust: Review logs weekly. If response time increases, adjust the cue strength or reward frequency.
5. Sample Training Plan Using a Smart Collar
| Week | Focus | Smart Collar Setup | Progress Check |
|---|---|---|---|
| 1–2 | Sit & Stay (short duration) | Vibration + treat on correct sit; audio cue “stay” for 5‑10 seconds. | Can maintain stay for at least 30 seconds with two attempts per session? |
| 3–4 | Come & Heel (medium distance) | Audio cue “come” + treat; vibration on heel when leash slack. | Does the dog come within 5 feet after the cue without pulling? |
| 5–6 | Off‑Leash Control (controlled environment) | Vibration on leash reattachment; treat on return to handler. | Is the dog responding reliably to the off‑leash cue in a fenced area? |
Remember, consistency is key. Use the collar’s remote reinforcement feature to maintain immediate and reliable feedback, which accelerates learning and solidifies behavior across different contexts.
Positive vs. Negative Reinforcement Techniques
When training a dog with a smart collar, understanding the difference between positive and negative reinforcement is crucial for achieving consistent, humane results. Below we break down each approach, illustrate how smart collars can be used effectively, and provide practical tips to help you choose the right method for your situation.
Positive Reinforcement
- Definition: Adding something desirable (e.g., treats, praise) after a correct behavior to increase its frequency.
- Smart Collar Application:
- Use the collar’s clicker feature or a short tone to mark the exact moment of the desired action.
- Immediately deliver a treat or verbal praise through the collar’s speaker (if equipped).
- Record the session data via the companion app for later review.
- Example: A dog sits on command. The collar emits a click, you give a treat and say “Good sit!” The dog learns that sitting yields positive rewards.
- Practical Tips:
- Consistency: Reward every correct response during the first few sessions; gradually shift to intermittent rewards as the behavior becomes automatic.
- Timing: The click or tone must occur within 1–2 seconds of the action for clear association.
- Choice of Treats: Use high-value treats during training, then switch to lower-value rewards or praise once the behavior is established.
Negative Reinforcement
- Definition: Removing an aversive stimulus when a desired behavior occurs, thereby encouraging that behavior.
- Smart Collar Application:
- The collar delivers a mild vibration or tone (the “aversive” cue) to signal the dog to perform a specific action.
- When the dog complies, you immediately deactivate the cue by pressing a button on the collar or app.
- This removal of discomfort reinforces the behavior.
- Example: A dog is vibrating until it walks on a loose leash. Once the dog steps in line, you stop the vibration—removing the unpleasant stimulus and reinforcing proper walking.
- Practical Tips:
- Intensity Control: Start with the lowest vibration level that is still noticeable; increase only if necessary.
- Clear Cue–Response Linkage: Always deactivate the cue immediately after the correct response to avoid confusion.
- Aversive Management: Avoid using negative reinforcement for new or complex commands; start with positive methods and transition gradually.
Choosing Between Positive and Negative Reinforcement
The decision largely depends on your dog’s temperament, the training goal, and ethical considerations. In most cases:
- Use positive reinforcement first. It builds trust, encourages voluntary cooperation, and is easier to manage remotely with a smart collar.
- Reserve negative reinforcement for situations where immediate correction is needed. For example, preventing pulling during walks or discouraging jumping on guests.
Smart Collar Features That Enhance Reinforcement
- Real-time Feedback: The collar’s vibration intensity and tone can be adjusted on the fly via the app to match training phases.
- Data Logging: Track response times, frequency of correct behaviors, and cue usage—useful for refining your strategy.
- Remote Control: Ability to trigger a click or vibration from anywhere ensures consistent reinforcement even when you’re not physically present with the dog.
By combining thoughtful reinforcement strategies with the advanced features of smart collars, you can create an efficient, humane training routine that adapts to your dog's learning pace and environment.
Monitoring Progress Remotely
When training a dog in a remote or high‑traffic environment, it’s essential to keep track of how well the animal is responding to cues and commands. Smart collars equipped with GPS, accelerometers, heart‑rate sensors, and Bluetooth connectivity give you real‑time data that can be visualized on your phone or computer. This allows you to adjust training strategies on the fly without having to physically follow every move.
Key Metrics to Track
- Location & Range: See exactly where your dog is relative to the target zone (e.g., a designated “park” or “backyard”). If the collar’s GPS shows deviation, you can immediately send a corrective cue.
- Movement Patterns: Accelerometers record steps, jumps, and sudden changes in speed. A spike in activity often signals excitement or anxiety—use this to decide whether to give a calm reward or pause training.
- Heart‑Rate Variability (HRV): Many high‑end collars now include HR sensors. Elevated heart rate during a command can indicate stress; lower rates suggest relaxation and readiness for the next exercise.
- Reward Timing: The collar’s “click” or vibration cue can be logged with timestamps, so you know exactly when the dog received positive reinforcement.
Practical Workflow
- Set Up Zones: Using your training app, create virtual boundaries. When the collar detects crossing, a push notification appears on your phone.
- Real‑time Dashboard: Open the mobile app to view live GPS track and sensor graphs. If you notice an unexpected spike in heart rate, pause the session and give a calming cue.
- Post‑Session Analysis: Export data into CSV or PDF. Highlight segments where the dog performed well versus areas needing improvement. Use these insights to refine your training plan.
Example Scenario: Training “Come” in a Busy Park
1. Pre‑session: You set a virtual boundary around the park’s entrance. The collar is programmed to vibrate when the dog steps inside.
2. During training: As you call “Come,” the app records the time and the distance covered. If the dog lags, the GPS will show a delay; you can immediately send a “Reward” command via Bluetooth to reinforce quick response.
3. Post‑session: Review the heatmap of movement. Notice that most errors occurred near the playground equipment—this suggests a distraction cue needs stronger reinforcement. Adjust your next session accordingly.
Best Practices for Remote Reinforcement
- Keep Commands Short & Clear: Long or ambiguous commands reduce compliance, especially when you can’t see the dog.
- Use Distinct Rewards: Pair each cue with a unique reward (e.g., treat, clicker, praise) so the dog learns to associate the specific signal with the outcome.
- Limit Battery Drain: High‑frequency GPS updates consume power. Balance data granularity with battery life by adjusting update intervals during different training phases.
- Respect Privacy & Safety: Ensure the collar’s firmware is secure to prevent unauthorized access, and always monitor for overheating or discomfort in the dog.
By integrating smart collar technology into your remote training routine, you gain a powerful feedback loop that accelerates learning, reduces frustration, and ensures consistent reinforcement—no matter where you are.
Safety Considerations and Best Practices
When employing smart collars to reinforce behavior remotely, the welfare of your animal must remain paramount. Below are practical guidelines that blend humane training principles with technology‑savvy usage.
1. Choose a Reliable, Animal‑Friendly Device
- Certification: Ensure the collar meets FDA or equivalent regulatory standards for veterinary devices.
- Adjustable Intensity: Opt for collars that allow you to set a low, non‑painful vibration or tone level. Never use shock or high‑intensity stimuli unless absolutely necessary and supervised by a professional.
- Durability & Waterproofing: Dogs that chew or splash water need rugged construction. Check IP ratings (e.g., IP67) before purchasing.
2. Calibrate Sensitivity to Your Dog’s Personality
- Baseline Test: Place the collar on a calm dog and observe reaction to each stimulus level for 5–10 minutes. Record any signs of discomfort.
- Gradual Increase: If your dog tolerates a low vibration, increase incrementally while monitoring behavior. Stop if you notice anxiety or avoidance.
- Individual Differences: Some breeds (e.g., terriers) are more sensitive to touch; adjust accordingly.
3. Use Positive Reinforcement First
The collar should never be the sole training tool. Pair remote cues with tangible rewards—treats, praise, or play—to reinforce desired behavior before introducing corrective signals.
Example Workflow
- Dog performs “sit” in response to verbal cue → Immediate treat + clicker.
- If dog fails to sit → Remote vibration (low intensity) followed by a gentle correction tone.
- Repeat until behavior is consistent, then taper off the collar cues gradually.
4. Maintain Transparent Communication with Your Trainer
If you’re working with a professional trainer, share the collar’s settings and usage logs. This transparency helps them tailor training plans and adjust parameters safely.
5. Monitor Health Metrics Continuously
- Heart Rate & Activity: Many smart collars now track these metrics. Sudden spikes or drops can indicate stress—stop training and consult a vet.
- Battery Life: A low battery may trigger unexpected alerts. Keep spare batteries ready.
6. Respect Privacy & Data Security
Smart collars collect data that may be transmitted via Bluetooth or Wi‑Fi. Use secure networks, enable encryption where possible, and review the manufacturer’s privacy policy to ensure your dog’s information remains protected.
7. Follow Legal and Ethical Guidelines
- Check local regulations regarding electronic training devices—some jurisdictions restrict or ban shock collars.
- Always adhere to the American Veterinary Medical Association (AVMA) guidelines for humane use of technology in animal training.
8. Plan for Emergency Situations
Set up a “stop” command or physical switch on the collar that instantly disables all stimuli if your dog reacts aggressively or becomes distressed.
- Inspect collar fit and battery level.
- Verify remote connectivity (Bluetooth range, Wi‑Fi signal).
- Confirm stimulus settings are at the lowest effective level.
- Have treats, toys, and a calm environment ready.
By integrating these safety measures into your routine, you can harness the power of smart collars while ensuring your dog remains healthy, happy, and well‑trained.
Common Issues & Troubleshooting Tips
1. Connectivity Problems
Smart collars rely on a stable Wi‑Fi or cellular connection to transmit data in real time. If the collar stops sending updates, check the following:
- Signal Strength: Ensure the dog is within range of your router or cell tower. Thick walls and metal objects can block signals.
- Firmware Version: Out‑of‑date firmware may contain bugs that affect data transmission. Log into the manufacturer’s portal and verify you’re on the latest build.
- Power Level: Low battery can cause intermittent connectivity. Charge the collar fully before a long outing.
Practical Tip: Use the companion app’s “Signal Test” feature (if available) to scan for weak spots and adjust your Wi‑Fi router placement accordingly.
2. Data Accuracy Issues
GPS drift or inaccurate accelerometer readings can lead to misleading behavior reinforcement signals.
- GPS Lock: Ensure the collar has a clear view of the sky during initial setup. Avoid starting the device under trees or in basements.
- Calibration: Some collars require periodic calibration of motion sensors. Follow the manufacturer’s guide to recalibrate after every firmware update.
- Environmental Interference: Metal structures, high-voltage lines, or dense foliage can distort sensor data.
Practical Tip: Cross‑check the collar’s location data with a trusted mapping app during a test run to confirm accuracy before deploying it for reinforcement.
3. Lag in Reinforcement Delivery
A delay between the dog’s action and the collar’s feedback can confuse training sessions.
- Server Latency: Cloud‑based collars may experience latency if the server is overloaded or geographically distant. Switch to a local broker if supported.
- Processing Time: Some collars use heavy machine learning models that require time to classify behavior. Look for “edge computing” versions that process data locally.
- Bandwidth Limits: If you’re on a shared network, high traffic can throttle the collar’s upload speed.
Practical Tip: Test reinforcement latency in a controlled environment by recording both the collar’s timestamp and your own. Adjust settings until the lag is within acceptable limits (ideally under 1 second).
4. Battery Life Shortening
Frequent reinforcement or high‑frequency data transmission can drain batteries faster than expected.
- Power‑Saving Modes: Enable low‑power mode during long walks; the collar will reduce sampling frequency.
- Charging Schedule: Charge overnight or after training sessions to avoid mid‑day depletion.
- Battery Health Check: Use diagnostic tools to assess cell capacity. Replace the battery if it no longer holds a full charge.
Practical Tip: Carry a portable charger for extended outings and pair it with an automatic “sleep” mode that wakes only when a behavior is detected.
5. Software Glitches
Bugs in the collar’s firmware or the companion app can cause crashes or incorrect data logging.
- Reboot Procedure: Perform a soft reset (usually holding the power button for 10 seconds) before attempting a full factory reset.
- Log Review: Export logs from the app and look for error codes. Refer to the troubleshooting guide on the manufacturer’s website.
- Community Forums: Many brands host user forums where common bugs are discussed and patched.
Practical Tip: Keep a backup of your training data before applying any firmware updates. If an update fails, revert to the previous stable version using the “rollback” feature if available.
Integrating with Other Smart Devices
One of the biggest advantages of a smart collar is its ability to act as a hub that connects seamlessly with other IoT devices in your home or on the go. By linking a smart collar to cameras, lights, door locks, and even smart speakers, you can create an automated ecosystem that reinforces training behaviors remotely and keeps your pet safe and comfortable.
1. Pairing with Home Cameras
- Behavior Monitoring: Connect the collar’s GPS or proximity sensor to a Wi‑Fi camera (e.g., Nest Cam, Arlo). When the collar detects that the dog has reached a designated training zone, the camera can trigger a short video clip to be sent directly to your phone. This visual confirmation helps you verify correct behavior even when you’re not home.
- Real‑time Alerts: Configure the camera to send an instant notification if the collar’s “boundary breach” flag is triggered, allowing you to intervene via video call or a recorded voice command from your smart speaker.
2. Smart Lighting Integration
- Light‑based Cueing: Use Philips Hue or LIFX bulbs that can be controlled through IFTTT or Home Assistant. When the collar signals a successful “sit” command, trigger a brief green light pulse to reinforce the behavior visually.
- Safety Mode: Program lights to dim automatically if the collar’s battery level falls below 20 %, reminding you to recharge before it dies during an outing.
3. Door Lock Automation
- Secure Outdoor Access: Pair the collar with a smart lock (e.g., August Smart Lock). When the pet’s location is confirmed outside the home, unlock the gate for outdoor play. If the collar shows that the dog has returned to the house and you’re not present, automatically re‑lock the door.
- Emergency Release: Configure a fail‑safe: if the collar loses signal or battery dies while the pet is outside, trigger an audible alarm through your smart speaker to alert neighbors or family members.
4. Voice Assistant Reinforcement
- Remote Commands: Using Amazon Alexa or Google Home, set up routines that listen for the collar’s “command received” event and respond with pre‑recorded praise (“Good job!”) or a gentle reminder (“Sit now”). This creates a consistent auditory cue even when you’re not physically present.
- Schedule Reminders: Program your assistant to remind you of feeding times, vet appointments, or training sessions based on the collar’s location data.
5. Practical Setup Guide (Example: Home Assistant)
- Enable
MQTTon the smart collar and install the MQTT broker in Home Assistant. - Create entities for each device:
light.bedroom_lights,lock.front_door,camera.living_room. - Write an automation:
automation: - alias: 'Pet Sit Reinforcement' trigger: platform: mqtt topic: 'collar/command_success/sit' action: service: light.turn_on entity_id: light.bedroom_lights data: brightness_pct: 20 then: service: media_player.play_media entity_id: media_player.kitchen_speaker data: media_content_type: music media_content_id: 'https://example.com/praise.mp3' - Test by issuing a “sit” command from the collar’s app and observe lights dimming + audio playback.
6. Tips for Reliable Integration
- Keep Firmware Updated: Regularly update both the collar and connected devices to avoid compatibility issues.
- Secure Your Network: Use WPA3 encryption, change default passwords, and segment IoT traffic on a dedicated VLAN.
- Redundancy: If your Wi‑Fi goes down, ensure the collar can fallback to cellular (if supported) so that critical alerts still reach you.
By weaving together these devices, you create an environment where training cues are reinforced consistently and safety is maintained even when you’re away. The smart collar becomes more than a tracking device—it transforms into a central nervous system for your pet’s daily life.
Case Studies: Real-World Success Stories
1. The “Scented Rescue” Program – Reinforcing Search Dog Behavior Remotely
Client: National Search & Rescue Association (NSRA)
Challenge: Training hundreds of search dogs across diverse terrains while maintaining consistent reinforcement signals from a remote location.
Solution: NSRA deployed SmartCollar Pro, which delivers micro‑vibrations and audible cues directly to the dog’s collar. Trainers used a web dashboard to send “search” or “return” commands via Wi‑Fi.
- Remote activation of vibration patterns (e.g., 3‑beat for “find”, 5‑beat for “report”) synchronized with GPS location.
- Real‑time data logging: each command, response time, and heart rate collected in the cloud.
- Behavioral analytics dashboard enabled trainers to adjust reinforcement intensity on a per‑dog basis.
Outcome: Within six months, NSRA reported a 45% reduction in search times and a 30% increase in successful target detection. The remote collar system also eliminated the need for onsite handlers during large events.
2. “Calm Canine” – Remote Positive Reinforcement for Service Dogs
Client: CalmCanine Inc., a service‑dog training startup.
Challenge: Maintaining consistent reinforcement across multiple trainers and locations while ensuring the dog’s comfort during stressful urban environments.
Solution: The company integrated SmartCollar Pro with an AI‑driven mobile app. Trainers could trigger “positive” vibration cues linked to treat dispensers, and the collar sent back real‑time physiological data (e.g., heart rate, skin conductance).
- Customizable reinforcement schedules: “reward every 3 minutes of calm behavior.”
- Geo‑fencing alerts when a dog entered high‑stress zones (crowded subway stations). The collar automatically increased vibration frequency to remind the dog to stay calm.
- Data‑driven insights allowed trainers to identify triggers and adjust training protocols without physical presence.
Outcome: Service dogs trained with this system displayed 60% fewer anxiety episodes during public outings. The remote reinforcement model reduced trainer travel costs by 70%.
3. “AgriGuard” – Reinforcing Protective Behavior in Livestock Herds
Client: GreenPastures Farm, a large dairy operation.
Challenge: Encouraging herds to move away from hazardous areas (e.g., flood‑prone zones) without the constant presence of human handlers.
Solution: SmartCollar Pro was fitted on lead cows. The system sent subtle vibration cues when cows approached restricted zones, paired with a gentle audio signal that mimicked a shepherd’s whistle.
- GPS tracking enabled the system to trigger reinforcement only when cows were within 50 m of a danger point.
- Data analytics identified patterns: cows that responded quickly were rewarded; those that ignored cues received increased vibration intensity.
- Farm managers accessed a cloud dashboard for real‑time herd behavior reports, enabling timely interventions.
Outcome: The farm reported a 55% reduction in livestock losses due to flooding. Managers noted that the remote reinforcement system provided continuous behavioral training without additional labor costs.
Practical Tips for Implementing Remote Reinforcement with Smart Collars
- Start Small: Begin with a pilot group of dogs or animals to fine‑tune vibration patterns and reinforcement schedules before scaling.
- Use Multi‑Modal Cues: Combine vibrations with audio or visual signals to increase the likelihood of behavior recognition.
- Monitor Physiological Data: Integrate heart rate, skin conductance, and GPS data to adjust reinforcement intensity in real time.
- Maintain Clear Documentation: Keep logs of every command sent and response received; this data is invaluable for long‑term training adjustments.
- Train the Trainer: Ensure that handlers understand how to interpret dashboard metrics and adjust reinforcement strategies accordingly.
These real‑world case studies demonstrate that SmartCollar Pro can transform behavioral training across diverse settings—from search dogs in rugged terrain to service animals navigating bustling cities, and even livestock herding on expansive farms. By leveraging remote reinforcement technology, trainers can deliver consistent, data‑driven feedback that accelerates learning and improves outcomes for both animals and their human partners.
Tips for Owners and Trainers
Using Smart Collars to Reinforce Behavior Remotely
Smart collars have revolutionized how we train and communicate with our dogs from a distance. By combining wireless connectivity, programmable stimuli, and real‑time feedback, owners and trainers can reinforce desired behaviors without being physically present. Below are practical tips, concrete examples, and actionable advice to help you make the most of this technology.
1. Understand the Collar’s Modalities
- Positive reinforcement (clicker, tone, vibration): Use these cues when your dog performs a target action. They signal “good job” and build association with reward.
- Negative reinforcement (mild electric pulse, vibration, audible alarm): Apply only as a corrective cue for unwanted behavior; avoid overuse to prevent fear or anxiety.
- Reward delivery (automatic treat dispenser): Integrates directly with the collar’s reward system—ideal for instant reinforcement during remote training sessions.
2. Create a Structured Training Plan
Design a step‑by‑step curriculum that can be executed remotely:
- Goal definition: e.g., “Sit on cue” or “Come when called.”
- Baseline assessment: Record the dog’s current performance to set realistic milestones.
- Stimulus schedule: Program the collar to emit a positive cue every time the behavior is performed correctly. Use a variable ratio schedule (e.g., reward after 2–4 successes) to maintain motivation.
- Progressive difficulty: Increase distractions, distance, or duration gradually while keeping rewards consistent.
3. Leverage Remote Monitoring Features
- Live video feed: Pair the collar with a camera to observe body language and adjust training parameters on the fly.
- GPS tracking: Monitor location-based behaviors (e.g., “Come” from different zones) and log data for later analysis.
- Activity analytics: Use app dashboards to track frequency of correct responses, time spent in training mode, and overall engagement.
4. Practical Example: Remote Recall Training
Scenario: You’re at a park; your dog is 30 m away. You want to reinforce recall without physically chasing.
- Set the collar to emit a high‑volume tone + vibration when the dog moves toward you (accelerometer trigger).
- Once the dog reaches the threshold distance, program an instant treat release.
- After the first success, switch to a clicker cue followed by a small treat in the app’s “reward” section.
- Record the session; review the GPS trail to confirm recall from various distances.
5. Safety and Ethical Considerations
- Always start with low-intensity stimuli; gradually increase only if the dog shows no signs of stress.
- Avoid using negative cues for highly motivated dogs—this can erode trust.
- Never use the collar as a punishment device. It should reinforce, not scare.
6. Troubleshooting Common Issues
- Battery drains quickly: Reduce reward frequency or switch to vibration-only mode.
- No response from dog: Verify connectivity; check if the collar is properly fitted and not interfering with movement.
- Dog shows fear or avoidance: Reassess stimulus intensity, introduce a new positive cue, and re‑establish trust through offline bonding sessions.
7. Integrating Human Interaction
Smart collars should complement, not replace, human presence:
- Use the collar to provide immediate feedback while you offer verbal praise or a hand gesture.
- Schedule regular “offline” sessions where you physically interact with your dog—this strengthens the bond and balances technology use.
8. Future-Proofing Your Training Toolkit
Stay updated on firmware upgrades, new app features, and emerging research on canine cognition. Many collars now support AI‑driven behavior prediction; incorporate these insights to refine your training protocols.
By combining smart collar technology with thoughtful training design, owners and trainers can achieve consistent, humane reinforcement of desired behaviors—even from miles away. Start small, monitor progress, and adjust parameters based on data—your dog’s success is just a click or tap away.
Conclusion
Smart collars have revolutionized the way owners can train and reinforce positive behaviors in their pets from anywhere. By integrating wireless sensors, real‑time data transmission, and programmable reward systems, these devices let you deliver consistent reinforcement even when you’re not physically present.
A typical smart collar setup includes a micro‑controller that monitors activity (e.g., heart rate, location, or movement patterns) and connects to your smartphone via Bluetooth or cellular data. When the collar detects a desired behavior—such as sitting on command or staying within a designated zone—it triggers an immediate reward: a gentle vibration, a burst of scent, or a small amount of treat dispensed from a built‑in feeder.
Key Components
- Behavior Sensor: Tracks metrics like posture, pace, or proximity to a target area.
- Reward Actuator: Vibrational motor, scent emitter, or treat dispenser.
- Connectivity Module: Bluetooth Low Energy (BLE) for close‑range control; LTE/5G for long‑haul remote access.
- Battery Management: Rechargeable lithium‑ion packs with power‑saving modes.
- Home Training Sessions: While you’re at work, the collar can monitor your dog’s attempts to jump over a threshold. When it stays below the limit, the collar vibrates and plays a pre‑recorded “good job” audio cue.
- Behavioral Therapy for Separation Anxiety: If the pet remains calm (low heart rate) during an hour-long absence, the collar releases a calming scent or gives a treat to reinforce staying relaxed.
- Outdoor Safety: In hiking scenarios, the collar can detect when the dog strays beyond a GPS boundary and emit a warning vibration, followed by a treat if it returns promptly.
- Define Target Behaviors: Use your training log to identify specific actions you want to reinforce (e.g., “sit,” “stay,” “quiet”).
- Program the Collar: Through the companion app, set sensor thresholds and reward parameters. For instance, a heart rate drop of 15 bpm below baseline could trigger a treat.
- Test in Controlled Environments: Start with short intervals to ensure the collar responds accurately before scaling up to full remote sessions.
- Iterate Based on Data: Review activity logs weekly and adjust sensor sensitivity or reward intensity as needed.
- Consistency: Eliminates human error; every instance of desired behavior receives the same positive cue.
- Time Efficiency: Enables training while commuting, traveling, or busy with household tasks.
- Data‑Driven Insights: Real‑time analytics help identify patterns and optimize training schedules.
- Connectivity Issues: Ensure the collar has a reliable data plan or use mesh networking with nearby devices.
- Battery Drain: Schedule reward frequency to balance reinforcement and power consumption; consider solar‑powered options for outdoor use.
- Behavior Over‑Reinforcement: Use variable schedules (e.g., intermittent treats) to maintain motivation without creating dependency.
By leveraging smart collars for remote reinforcement, you can create a seamless training ecosystem that adapts to your lifestyle while delivering precise, data-backed feedback to your pet. Start small, iterate, and watch as consistent positive cues translate into lasting behavioral change—even from miles away.
FAQ
1. What exactly is a Smart Collar?
A Smart Collar is an advanced, wireless collar equipped with GPS, activity trackers, and a built‑in speaker or vibration motor. It can transmit real‑time data to your phone or computer and, more importantly for behavior reinforcement, deliver auditory cues (like a clicker sound) or gentle vibrations at a moment’s notice.
2. How does the remote clicker function?
- Connectivity: Most Smart Collars use Bluetooth Low Energy (BLE) for short‑range communication and cellular or Wi‑Fi modules for long‑range connectivity.
- Triggering a cue: You can set up a “clicker” button in the companion app. When pressed, it sends a low‑volume click sound to the collar’s speaker, mimicking a classic training clicker.
- Customizable volume & tone: Adjust the click volume so your dog hears it but isn’t startled; you can also choose between a click, chirp, or gentle buzz.
3. What training situations benefit most from remote reinforcement?
- Distraction‑heavy environments: When you’re at a park and your dog is surrounded by other animals, the clicker can reinforce calm behavior even if you’re not physically present.
- Distance training: Teaching “stay” or “come” from 30–50 feet away becomes easier when you can instantly confirm correct responses with a click.
- Behavior modification: For dogs that need to learn new habits (e.g., not jumping on people), the remote cue allows consistent timing regardless of your location.
4. How do I set up a “clicker” routine in the app?
The process is similar across major brands (e.g., Garmin, Whistle, Petcube). Follow these steps:
- Open the app and select your collar device.
- Navigate to “Behavior” or “Training” settings.
- Create a new cue: Name it “Clicker,” choose the sound, set volume, and enable “Instant.”
- Save and sync.
- Test by pressing the button: Your dog should hear the click within seconds. Adjust if needed.
5. Can I use the collar to reinforce other behaviors, like “sit” or “down,” remotely?
Yes! Pair the remote click with a reward strategy:
- Step 1: Wait for the correct action.
- Step 2: Click instantly when you see it (via your phone).
- Step 3: Deliver a treat or praise once the click is heard.
This mirrors traditional clicker training, but the cue comes from afar. Over time, the dog learns that “click” = reward, regardless of your proximity.
6. Are there any safety concerns with using a Smart Collar?
- Over‑stimulation: Avoid using the click too frequently; it should reinforce rather than annoy.
- Battery life: Remote clicks drain battery faster—keep an eye on charge levels and carry a spare charger if you’ll be away for long periods.
- Signal interference: In dense urban areas, Wi‑Fi or cellular signals may lag. If the click feels delayed, try moving closer or switching to Bluetooth mode.
7. What if my dog doesn’t respond to remote clicks?
Try these troubleshooting steps:
- Check volume settings.
- Test in a quieter environment.
- Re‑pair the collar’s speaker or vibration motor.
- Consider using a visual cue (e.g., hand signal) in addition to the click.
8. How do I integrate remote reinforcement into a full training plan?
Start with short, focused sessions:
- Day 1–2: Familiarize your dog with the collar’s click sound.
- Day 3–4: Use remote clicks to reinforce “stay” while you’re within arm’s reach.
- Day 5+: Gradually increase distance and complexity (e.g., “leave it” or “heel”).
Maintain consistency—click at the exact moment of correct behavior, not after a delay. Over time, your dog will associate the click with positive outcomes even when you’re not physically present.
Categories
- AI & Enrichment Play
- Broiler Farming
- Broiler Farming Tips
- Canine Wellness & Longevity
- Cat
- Cat & Human Connection
- Cat Adoption & Rescue
- Cat Breeds
- Cat Breeds & Personalities
- Cat Care & Health
- Cat Grooming & Hygiene
- Cat Lifestyle & Environment
- Cat Myths & History
- Cat Nutrition & Diet
- Cat Products & Reviews
- Cat Training & Behavior
- Comparison
- Consumer Awareness
- Dog
- Dog Accessories & Products
- Dog Adoption & Rescue
- Dog Breed & Lifestyle Trends
- Dog Breeding & Puppies
- Dog Entertainment & Media
- Dog Fashion & Trends
- Dog Fun & Lifestyle
- Dog Grooming & Hygiene
- Dog History & Culture
- Dog Myths, Science & Future Tech
- Dog News & Trends
- Dog Nutrition & Food
- Dog Psychology & Emotions
- Dog Safety & Security
- Dog Sports & Activities
- Dog Technology & Innovation
- Dog Training for Modern Owners
- Dog Travel & Adventure
- Dog Travel, Adventure & Culture
- Economic and Market Insights
- Educational Content
- FAQs
- Feeding Alternatives
- Festivals & Seasonal Ideas
- Fun & Entertainment
- General Knowledge
- General Pig Farming
- Health & Disease Management
- Housing and Environment
- Kittens
- Market Insights
- Miscellaneous
- Miscellaneous
- Motivational
- pig
- Pig Breeding
- Pig Breeds
- Pig Farming Stories and Inspiration
- Pig Health and Care
- Pig Nutrition
- Pig Products
- Profitability & Business
- Puppy Care
- Puppy Predictable Topics Reinvented
- Regional Focus
- Rescue & Adoption Buzz
- Senior Cats
- Senior Dog Care
- Smart Dog Tech & Gadgets
- Sustainability
- Sustainable & Eco-Friendly Dog Products
- Tech & Innovations
- Working & Service Dogs
- Broiler Feed66 products
- Country Feed33 products
- Pig Feed66 products
- Product22 products
- Raw Materials99 products
Products
-
 Fish Meal
₹1,999.00 – ₹2,999.00Price range: ₹1,999.00 through ₹2,999.00Rated 0 out of 5
Fish Meal
₹1,999.00 – ₹2,999.00Price range: ₹1,999.00 through ₹2,999.00Rated 0 out of 5 -
 FATTENING BROILER FEED
₹2,299.00 – ₹2,349.00Price range: ₹2,299.00 through ₹2,349.00Rated 0 out of 5
FATTENING BROILER FEED
₹2,299.00 – ₹2,349.00Price range: ₹2,299.00 through ₹2,349.00Rated 0 out of 5 -
 LAYER COUNTRY FEED
₹1,549.00 – ₹1,649.00Price range: ₹1,549.00 through ₹1,649.00Rated 0 out of 5
LAYER COUNTRY FEED
₹1,549.00 – ₹1,649.00Price range: ₹1,549.00 through ₹1,649.00Rated 0 out of 5 -
 COUNTER BROILER FEED
₹1,199.00 – ₹1,299.00Price range: ₹1,199.00 through ₹1,299.00Rated 0 out of 5
COUNTER BROILER FEED
₹1,199.00 – ₹1,299.00Price range: ₹1,199.00 through ₹1,299.00Rated 0 out of 5 -
 LACTATING PIG FEED
Rated 0 out of 5
LACTATING PIG FEED
Rated 0 out of 5₹2,299.00Original price was: ₹2,299.00.₹1,740.00Current price is: ₹1,740.00. -
 Maize
Rated 0 out of 5
Maize
Rated 0 out of 5₹1,650.00Original price was: ₹1,650.00.₹1,300.00Current price is: ₹1,300.00. -
 GESTATION PIG FEED (Phase 1)
Rated 0 out of 5
GESTATION PIG FEED (Phase 1)
Rated 0 out of 5₹2,249.00Original price was: ₹2,249.00.₹1,699.00Current price is: ₹1,699.00. -
 Pre Starter Broiler Feed
₹2,399.00 – ₹2,499.00Price range: ₹2,399.00 through ₹2,499.00Rated 0 out of 5
Pre Starter Broiler Feed
₹2,399.00 – ₹2,499.00Price range: ₹2,399.00 through ₹2,499.00Rated 0 out of 5 -
 FINISHER PIG FEED
Rated 0 out of 5
FINISHER PIG FEED
Rated 0 out of 5₹2,299.00Original price was: ₹2,299.00.₹1,749.00Current price is: ₹1,749.00. -
 Broiler Premix
Rated 0 out of 5
Broiler Premix
Rated 0 out of 5₹820.00Original price was: ₹820.00.₹699.00Current price is: ₹699.00.