
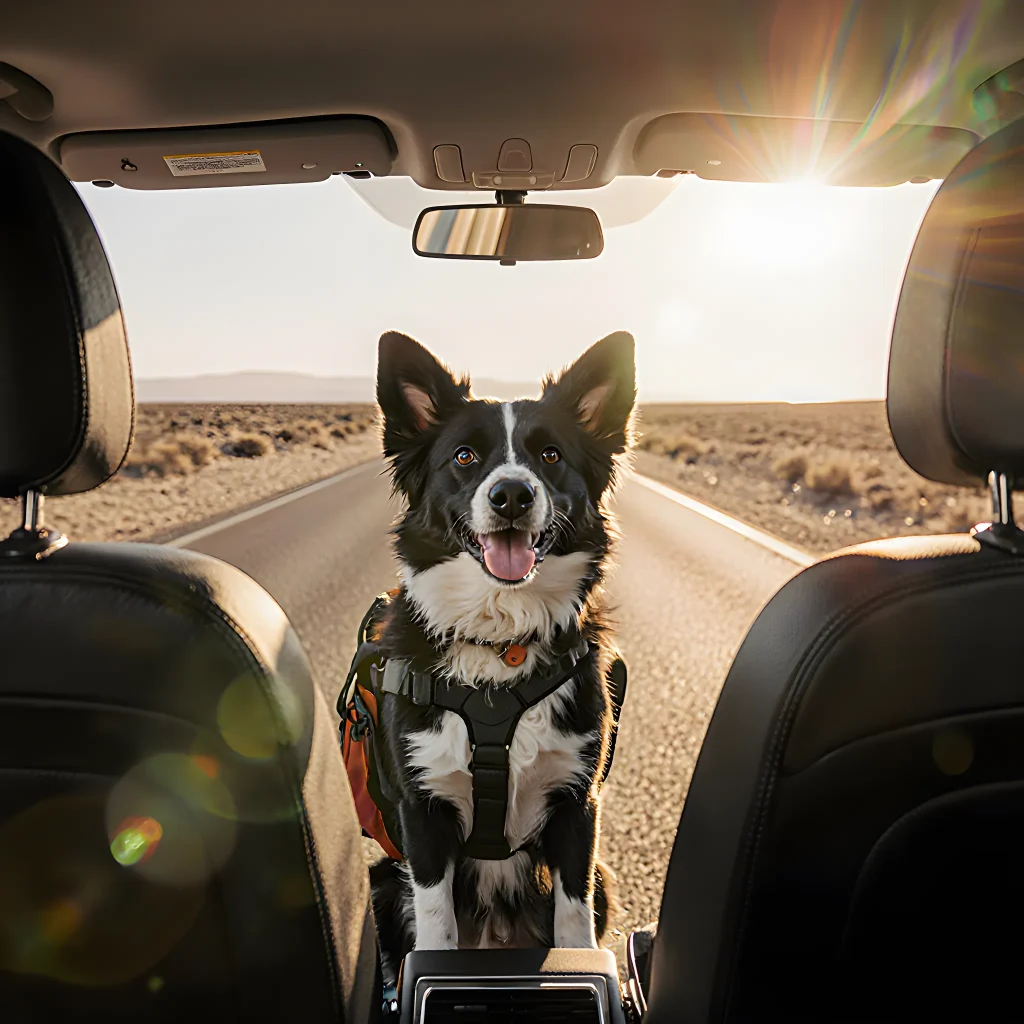
Capture Your Dog’s Adventure in Style
Dog‑Friendly Frames: Secrets of Scenic Snapping on the Road
Table of Contents
- Choosing the Right Camera for Travel
- Packing Essentials for Your Dog and Gear
- Safety First: Keeping Your Dog Comfortable in New Environments
- Timing Your Shots: Best Light Conditions While Traveling
- Framing the Adventure: Composition Tips with a Furry Friend
- Capturing Movement: Techniques for Action Shots
- Using Filters and Lenses on the Go
- Managing Noise and Distractions in Busy Locations
- Creative Angles: Low, High, and Side Shots with Dogs
- Editing Basics for Travel Photos
- Storing Your Memories Safely While Abroad
- Sharing Your Journey: Social Media and Storytelling Tips
- Legalities and Permissions for Dog Photography in Public Spaces
- Conclusion
- FAQ
Choosing the Right Camera for Travel
When you’re packing for a trip with your furry friend, the camera you bring can make or break your adventure photography. The goal is to find a balance between image quality, portability, and durability without compromising on battery life.
1. Size Matters: Compact vs. Mirrorless
- Compact Point‑and‑Shoot: Ideal for quick snapshots of spontaneous moments—think dog catching a frisbee or a sunset over the dunes. Modern compacts (e.g., Sony RX100 series, Canon G7X Mark III) offer 1‑inch sensors and optical zooms up to 30×, delivering excellent image quality in a pocket‑friendly form.
- Mirrorless Systems: If you’re aiming for high‑resolution landscapes or low‑light portraits of your pup at night, a mirrorless camera (e.g., Sony A7C, Fujifilm X‑T4) gives you larger sensors and interchangeable lenses while still being lighter than DSLRs.
2. Lens Selection: Flexibility on the Go
The lens you choose can be as important as the body itself. For traveling with dogs:
- Wide‑Angle (16–35 mm): Captures expansive scenes—think a beach with your dog in the foreground.
- Standard Zoom (24–70 mm): Versatile for street photography, candid shots, and portraits. A 24–70 mm kit lens often fits most travel scenarios.
- Prime Lens (35–50 mm): Offers superb low‑light performance and a shallow depth of field—great for isolating your dog from busy backgrounds.
3. Durability & Weather Sealing
Traveling with pets often means unpredictable weather: rain, sand, or mud. Cameras with robust build quality and weather sealing (e.g., Olympus OM‑D E-M10 Mark IV, Panasonic Lumix G9) can withstand splashes from puddles or a stray paw print in the dirt.
4. Battery Life & Power Management
Long trips mean fewer charging opportunities. Look for:
- High‑capacity batteries (e.g., Canon LP-E6N, Sony NP-FZ100).
- Built‑in USB charging or a portable power bank compatible with your camera.
- Energy‑saving settings like turning off the viewfinder when not needed.
5. User Interface & Ergonomics for Quick Shots
Your dog might dart into frame at any moment. A camera with intuitive controls and a quick‑access menu can help you capture those fleeting expressions:
- Fast autofocus (e.g., Sony’s Real‑Time Eye AF) that locks onto your pet’s eyes.
- Touchscreen or rear‑view display for easy framing while holding the camera with one hand.
- A comfortable grip to reduce fatigue during extended shooting sessions.
6. Practical Packing Tips
- Carry a small, waterproof camera bag with padded compartments for lenses and accessories.
- Pack spare memory cards in a sealed pouch—dogs love chewing on plastic.
- Include a lens cleaning kit (lens cloth, micro‑fiber swabs) to keep dust from fur or sand off your optics.
7. Sample Setup for Different Travel Scenarios
| Scenario | Recommended Camera | Lens Choice | Key Feature |
|---|---|---|---|
| Road Trip with Dog Park Stops | Canon EOS M50 Mark II (Mirrorless) | 24–70 mm f/4 IS STM | Image Stabilization for handheld shots |
| Mountain Trekking with Long Hikes | Olympus OM‑D E-M10 Mark IV (Compact System) | 12–40 mm f/2.8 | Weather Sealing & Lightweight Build |
| Urban Exploration at Night | Sony A7C (Full‑Frame Mirrorless) | 35 mm f/1.8 | Low‑Light Performance & Fast Aperture |
Choosing the right camera is less about brand prestige and more about matching your travel style, pet’s behavior, and the environments you’ll encounter. By focusing on size, lens flexibility, durability, battery life, and ergonomics, you can ensure that every adventure with your four‑legged companion ends up captured in stunning detail.
Packing Essentials for Your Dog and Gear
When you’re planning a photo‑savvy adventure with your canine companion, the right gear can make or break both your experience and the quality of the images you capture. Below is an expanded checklist that blends photography needs with dog comfort and safety.
1. Dog‑Friendly Backpack
- Size & Weight: Choose a pack that can hold all essentials without exceeding 10–15% of your dog’s body weight.
- Ventilation: Look for mesh panels or breathable fabrics to keep your pup cool.
- Compartments: Separate pockets help organize water, treats, and a small first‑aid kit.
2. Hydration System
A collapsible water bowl or an integrated hydration bladder keeps your dog hydrated on the go. Many backpacks now feature a built‑in water reservoir that can be attached to a drinking tube for easy access.
3. Food & Treats
- Meal Packs: Pre‑portion meals into lightweight containers or reusable silicone bags.
- Training Treats: Keep a small stash for rewarding good behavior during photo shoots.
4. First Aid Kit
Include basics such as gauze, antiseptic wipes, tweezers (for ticks), and any prescribed medication. A quick reference guide to common dog emergencies can also be handy.
5. Camera Gear & Accessories
- Camera Body & Lenses: Choose a lightweight DSLR or mirrorless system with at least one prime lens (e.g., 50mm) for flattering portraits.
- Tripod & Gimbal: Compact options help stabilize shots, especially in low light.
- Extra Batteries & Memory Cards: Pack at least two spare batteries and two memory cards to avoid missing moments.
- Lens Cleaning Kit: A microfiber cloth, lens cleaning solution, and a small brush keep your optics dust‑free.
6. Protective Clothing & Accessories
Weather can change quickly in natural settings. Pack a waterproof jacket or rain poncho for both you and your dog, as well as a light hat to shield from the sun.
7. Safety & Identification
- ID Tags & Microchip: Ensure your dog’s collar has up‑to‑date identification.
- Reflective Gear: For early morning or evening shoots, reflective vests and collars improve visibility.
8. Training Tools
A lightweight clicker or a set of soft training commands helps keep your dog calm during long photo sessions.
9. Portable Shelter & Shade
If you’re shooting in open areas, bring a collapsible tarp or shade cloth to protect both the camera equipment and the dog from harsh sun.
10. Documentation & Permissions
- Park Permits: Some locations require permits for photography; check in advance.
- Photography Passes: If you’re shooting in a national park, ensure you have the appropriate pass that allows both pets and cameras.
Practical Packing Tips
- Layer Your Load: Place heavier items at the bottom of the pack to maintain balance.
- Keep Essentials Accessible: Store water, treats, and your camera in quick‑access pockets.
- Test Your Pack: Before heading out, walk with the full load to gauge comfort and adjust straps as needed.
By combining thoughtful dog care with essential photography gear, you’ll be ready to capture stunning images while keeping your furry friend safe and comfortable. Happy shooting!
Safety First: Keeping Your Dog Comfortable in New Environments
When you’re traveling with your four‑legged companion, the excitement of new sights can quickly turn into stress if their comfort isn’t prioritized. Below are practical steps—rooted in both general pet care and photography best practices—to ensure your dog remains relaxed, safe, and camera‑ready.
1. Prepare a Portable Comfort Kit
- Familiar Blanket or Toy: Bring something that smells like home to reduce anxiety.
- Water & Food Bowls (Collapsible): Keep hydration and meals at hand; avoid over‑feeding before a shoot.
- First Aid Essentials: Bandages, tweezers for ticks, and a small supply of any medication your vet recommends.
2. Use the “Sit‑Stand” Technique for Long Walks
Just as photographers practice “stop‑and‑shoot,” let your dog take short breaks every 10–15 minutes during long trips or photo sessions. This prevents fatigue and keeps them alert.
3. Keep the Environment Cool and Ventilated
- Shade & Airflow: Choose shaded spots for outdoor shoots; use a portable fan if indoors.
- Temperature Monitoring: Dogs are more prone to heatstroke than humans. Aim to keep the ambient temperature below 80°F (27°C) during active sessions.
4. Practice “Photographic Patience”
Just as you’d frame a shot, give your dog time to acclimate to new surroundings. Use short bursts of focus: capture a quick pose, then let them explore before the next shot.
5. Leash and Harness Safety First
- Proper Fit: Ensure harnesses are snug but not restrictive; avoid collars on dogs with long necks.
- Leash Length: A 4–6 ft leash offers control without limiting movement during a dynamic shoot.
6. Hydration Breaks—A Photographer’s Golden Rule
Just as you’d refill your camera battery, keep water within reach for both you and your dog. Offer small sips every 20–30 minutes during long sessions.
7. Mindful Lighting Techniques
- Golden Hour: Shoot early morning or late afternoon to avoid harsh midday glare that can be uncomfortable for dogs.
- Reflectors and Diffusers: Use them to soften light, preventing eye strain on your dog’s pupils.
8. Quick‑Check Routine Before Each Shot
Pause to ensure no signs of distress: panting excessively, drooling, or pacing. If any symptoms appear, postpone the shoot and offer a calm environment.
9. Post‑Shoot Recovery
- Cool Down: A gentle walk after intense photoshoots helps lower heart rate.
- Stretching: Simple leg stretches (e.g., “doggie yoga”) can prevent muscle stiffness.
10. Use Positive Reinforcement Throughout
Treats, praise, and gentle petting during the session not only motivate your dog but also create a positive association with new places—a key to stress‑free travels.
By integrating these comfort strategies into your travel photography routine, you’ll capture stunning images while ensuring your dog’s well‑being remains top priority. Safe travels and happy shooting!
Timing Your Shots: Best Light Conditions While Traveling
One of the most common questions new travel photographers ask is, “When should I take photos to get the best light?” The answer varies depending on your location, time of year, and whether you’re shooting a landscape or a candid moment with your four‑legged companion. Below are practical guidelines and real‑world examples that will help you make the most of natural light while exploring new destinations with your dog.
1. The Golden Hours (Sunrise & Sunset)
- Why it matters: During the first and last hour after sunrise or before sunset, sunlight is longer, softer, and warmer. Reflections from your dog’s fur are more flattering, shadows are shorter, and colors appear richer.
- Practical tip: Use a phone app like PhotoPills to calculate exact sunrise/sunset times for your travel destination. Arrive 15–20 minutes early so you can set up without rushing.
- Example shot: A golden‑hour portrait of your dog sitting on a cliff with the sun behind them, creating a halo effect around their ears.
2. Midday – The “Hard Light” Challenge
- Why it matters: Midday light is intense and produces strong shadows. While landscapes can look dramatic, dog portraits may come out with harsh highlights.
- Practical tip: Find shade: a tree, building, or even a parked car can provide diffused lighting. Use a reflector (or a white foam board) to bounce light back onto your dog’s face and reduce shadows.
- Example shot: Your dog in the shade of a large banyan tree with their eyes bright and clear, while the background is softly blurred by the dappled sunlight.
3. Overcast Days – The Even Light Advantage
- Why it matters: Cloud cover acts as a giant diffuser, eliminating harsh shadows and creating even illumination across your dog’s face.
- Practical tip: Take advantage of this natural softbox by shooting close‑ups. Set your aperture to f/5.6–f/8 for a good depth of field while keeping the background slightly blurred.
- Example shot: A close‑up of your dog’s nose and whiskers in a misty forest, with every detail clearly visible thanks to the diffused light.
4. Blue Hour – The Atmospheric Mood
- Why it matters: After sunset but before the sky fully darkens, colors shift toward blues and purples. This is ideal for capturing atmospheric shots of your dog against a twilight backdrop.
- Practical tip: Use a tripod to keep your camera steady during low light. Shoot in RAW to retain maximum dynamic range for post‑processing.
- Example shot: Your dog silhouetted against the city skyline, with the sky turning a deep indigo and subtle stars beginning to appear.
5. Timing Tips for Specific Dog Activities
- Leash‑walking: Aim for early morning or late afternoon when the light is softer, allowing you to capture both you and your dog in a single frame without harsh shadows.
- Beach scenes: Midday is often best at the beach because the sand reflects light evenly. Use a polarizing filter to reduce glare off the water and sand.
- Urban exploration: Golden hour provides dramatic silhouettes against skyscrapers, while overcast days are great for candid street photography featuring your dog’s playful expressions.
6. Quick Checklist Before You Snap
- Check the weather forecast—cloud cover or rain can drastically change lighting.
- Know your camera settings: ISO should stay low (100–400) during good light, increase only when necessary.
- Bring a reflector or a piece of white foam board for quick diffusing.
- Always keep a spare battery and memory card handy; travel days can be long!
By understanding how light behaves at different times of day and in various weather conditions, you’ll not only capture stunning landscapes but also heart‑warming moments with your canine companion. Remember: the best lighting is often just a few minutes before sunrise or after sunset—plan ahead, arrive early, and let the natural glow work its magic.
Framing the Adventure: Composition Tips with a Furry Friend
When you’re out exploring new places with your canine companion, the goal is to capture both the adventure and the bond between you two. Good composition turns an ordinary snapshot into a story that viewers can feel. Below are proven techniques—adapted from seasoned travel photographers—to help you frame the perfect shot every time.
1. Use the Rule of Thirds, but Let Your Dog Break It
Place your dog on one of the intersecting points of the grid to create a natural focal point. If they’re running toward the camera, position them at the bottom third and let the horizon line sit in the top third. This balance keeps the frame from feeling too heavy on one side.
2. Capture Motion with a Shallow Depth of Field
Set a wide aperture (f/2.8–f/4) to blur the background and make your dog pop. A slightly slower shutter speed (around 1/125s for running dogs, 1/250s for quick bursts) will freeze motion while still giving that soft backdrop you love.
3. Pay Attention to the Background
Before you snap, scan the scene for distracting elements—billboards, bright lights, or crowds. A clean background lets your dog be the hero of the image. If you’re in a bustling market, angle your shot so the vendor stalls become subtle textures rather than clutter.
4. Experiment with Angles – Get Low!
Get down to your dog’s eye level or even lower. This perspective shows the world from their point of view and adds depth. You’ll also get a more intimate look at their expression—whether they’re sniffing, wagging, or simply gazing into the distance.
5. Use Leading Lines to Guide the Viewer’s Eye
Roads, pathways, or natural formations can lead the eye toward your dog. Position them near the start of a leading line so the viewer follows the journey from left to right (or top to bottom). This technique works well in coastal hikes where waves create subtle lines.
6. Include Human Elements for Scale and Storytelling
A hand reaching out, a backpack slung over your shoulder, or a pair of shoes beside the path helps viewers gauge size and adds narrative depth. Make sure these elements are in focus; otherwise, they’ll distract from the main subject.
7. Mind the Light – Golden Hours Are Your Best Friend
Soft, warm light during sunrise or sunset reduces harsh shadows on your dog’s fur and highlights their features. Position them so the sun is behind you (for a backlit silhouette) or in front of them (to illuminate their face). If shooting midday, look for dappled shade under trees to avoid squinting eyes.
8. Use Props Wisely – Treats and Toys as Story Beats
A favorite chew or a bright frisbee can add color contrast and suggest playfulness. Hold the prop slightly out of focus so it frames your dog without stealing attention. Remember to keep the prop clean—no muddy paw prints in the frame!
9. Shoot in Burst Mode for Action Shots
When your dog is sprinting or leaping, use continuous shooting (10–15 fps). This increases the chance of landing that perfect freeze-frame where every muscle is defined and the tail is mid‑air.
10. Review & Refine on the Spot
After each burst, glance at the screen. Check for sharpness, exposure, and whether your dog’s eyes are focused. If something looks off—maybe a shadow on their face or an unwanted background element—adjust composition or lighting before moving on.
Practical Takeaway: Combine these techniques with patience. Your dog’s natural curiosity often leads to the most authentic moments, so give them space to explore and capture those candid interactions. Happy shooting!
Capturing Movement: Techniques for Action Shots
Action photography is all about freezing the moment or deliberately blurring motion to convey speed and energy. When your subject is a dog on the move, you’ll need a mix of technical settings, timing tricks, and a bit of patience.
1. Choose the Right Shutter Speed
- Fast Action (e.g., running or jumping): Use at least 1/1000 s to freeze the motion completely.
- Slight Blur for Motion: If you want a sense of movement, try 1/125 s to 1/250 s. The subject will be sharp while the background shows streaks.
- Tip: Many modern DSLRs and mirrorless cameras have an “action” or “sports” mode that automatically sets a high shutter speed.
2. Adjust Aperture for Depth of Field
A wider aperture (lower f‑number) gives a shallow depth of field, isolating the dog from background distractions. For dynamic shots where you want more of the scene in focus, use f/5.6–f/8.
3. Use Continuous Autofocus (AI Servo / AF‑C)
- Set your camera to continuous autofocus so it keeps tracking a moving subject.
- Switch to “back‑focus” or “face detection” if available, ensuring the dog’s face stays sharp as it moves.
4. Pre‑Focus and Anticipate
Set a focus point in the area where you expect your dog to move. If it starts running toward that spot, your camera will already be locked on. This reduces the need for manual adjustments during the action.
5. Burst Mode & Frame Rate
- Activate burst mode (continuous shooting) to capture multiple frames per second.
- With a frame rate of 10–12 fps, you can choose the best moment after the shoot.
6. Use a Fast Memory Card
High burst rates generate large amounts of data quickly. A UHS‑II or CFexpress card with at least 200 MB/s write speed will prevent buffer overflow and dropped frames.
7. Compose for Movement
- Rule of Thirds: Place the dog slightly off‑center to create a dynamic frame.
- Leading Lines: Use paths, fences, or shoreline lines that guide the viewer’s eye toward the moving subject.
- Low Angle: Shooting from ground level makes the dog appear larger and more powerful.
8. Timing: The “Golden Moment”
For a running dog, capture when it’s mid‑stride or at the apex of a jump—when its body is fully extended and muscles are visibly flexed. For playful interactions, wait for the moment of surprise or excitement in its expression.
9. Use Natural Light Wisely
- Early morning or late afternoon provides soft, warm light that reduces harsh shadows.
- If shooting midday, use a reflector or small diffuser to soften glare on the dog’s fur.
10. Post‑Processing Tips
- Crop for Impact: Tighten the frame around the action to eliminate distractions.
- Sharpen Selectively: Increase sharpness on the dog’s eyes and ears while keeping motion blur subtle in the background.
- Adjust Contrast & Saturation: Enhance fur colors without oversaturating.
Practical Example: Capturing a Dog Jumping Over a Fence
Set your camera to 1/2000 s, f/5.6, ISO 400 (adjust if light is low). Position the lens at eye level with the fence in the background. Use continuous autofocus and burst mode. As the dog approaches, pre‑focus on the spot just beyond the fence. Release the shutter as it leaps; let the camera capture a series of frames. In post‑processing, select the frame where the dog’s body is fully extended and its eyes are bright.
Quick Checklist for Travel Sessions
- Camera on battery pack / spare batteries
- Fast memory card (UHS-II or higher)
- Portable tripod or monopod for stability during low light bursts
- Reflector/diffuser for controlling harsh midday light
With these techniques, you’ll be able to capture striking action shots that showcase your dog’s personality and energy, whether you’re strolling through a city park or exploring rugged trails.
Using Filters and Lenses on the Go
When you’re out exploring new destinations with your four‑legged companion, having the right gear in a compact kit can make all the difference. Below are practical ways to choose filters and lenses that keep your camera light, versatile, and ready for every photo opportunity.
1. Keep Your Lens Selection Minimal
- Prime 35mm (or 28mm in smaller formats): This focal length is a true “all‑purpose” lens. It captures wide scenes like parks and city streets while still allowing you to zoom in on your dog’s expressive face.
- Zoom 24–70mm: If you have the space, this kit zoom covers most situations—from sweeping landscapes at sunrise to close‑up portraits during a picnic. Look for a lightweight model with image stabilization.
2. Choose Filters That Are Travel‑Friendly
Filters are great for protecting your lens and enhancing specific shots, but you don’t want a bulky rack of accessories when you’re hiking or strolling down a beach promenade.
- UV Filter: A single UV filter protects the front element from scratches, dust, and accidental bumps while traveling. It also slightly reduces haze on long distance shots.
- Polarizing Filter (if you have a prime lens): A lightweight circular polarizer can cut glare off wet grass or water surfaces—perfect for beach days with your pup. Keep it in a small zip‑lock pouch to avoid losing it.
3. Practical Tips for Using Filters on the Go
- Always store filters in a dedicated case or sleeve. A clear plastic bag works, but a small metal or nylon filter holder keeps them from scratching each other.
- Know when to remove them. In low light or during fast‑moving scenes (like chasing after a frisbee), the extra glass can reduce image sharpness. Switch to an unfiltered mode for quick, spontaneous shots.
- Use the filter’s ring as a quick reference. Many filters have a small notch that aligns with your camera’s focus ring—this helps you keep track of which filter is on and where it should be removed.
4. Lens Selection for Different Travel Scenarios
| Scenario | Recommended Lens | Why It Works |
|---|---|---|
| Urban Exploration | 28mm or 35mm Prime | Wide field of view for street scenes; low distortion keeps your dog’s features natural. |
| Mountain Hiking | 24–70mm Zoom (with a 24mm setting) | Captures expansive vistas and lets you zoom in on distant landmarks or the dog's silhouette against the sky. |
| Beach & Water Activities | Prime 35mm + Polarizer | Polarizer reduces glare from water; prime lens offers sharpness and minimal distortion. |
5. Practical Workflow for the Traveling Photographer
Here’s a quick “on‑the‑go” workflow that balances gear, speed, and image quality:
- Start with your prime lens (35mm) and UV filter.
- Attach the polarizer only if you’re heading to a reflective surface or expecting bright sunlight.
- Switch to the zoom lens for wide landscape shots, then back to the prime for dog portraits.
- Always keep your filter holder in the same pocket or bag so it’s easy to grab and replace.
By keeping your gear set minimal yet versatile, you’ll spend less time managing equipment and more time capturing those memorable moments with your canine travel buddy.
Managing Noise and Distractions in Busy Locations
When you’re out exploring a bustling city, hiking trail, or crowded beach with your canine companion, the world can feel like an audio‑visual overload. For photographers who rely on clear shots of their dogs in natural settings, learning how to control noise and distractions is essential. Below are practical strategies, real‑world examples, and actionable tips that will help you keep both you and your dog focused while still capturing stunning images.
1. Understand Your Dog’s Sensory Profile
- Noise sensitivity: Some dogs react strongly to car horns, construction equipment, or loud music. If your pup is prone to startle responses, consider using a noise‑reducing harness (e.g., a “quiet collar” that dampens sudden sounds).
- Visual distractions: Bright lights, moving crowds, and flashing billboards can divert attention. Keep your camera’s focus on the dog’s eyes or nose rather than the background.
2. Choose Your Gear Wisely
Noise from equipment can be a problem when shooting in public places:
- Use a quiet shutter mechanism. Many DSLRs and mirrorless cameras have a silent or “click‑free” mode that eliminates the audible click of the shutter. This reduces startling your dog during a quick burst of shots.
- Opt for a fast prime lens (e.g., 50mm f/1.8). A wide aperture lets you shoot in lower light without increasing ISO, thus avoiding the noise and grain that can accompany high‑speed electronic shutters.
- Carry a tripod or monopod with a silent locking mechanism. This allows steady shots while keeping your hands free to calm your dog if needed.
3. Plan Your Timing and Route
When possible, shoot during quieter times:
- Early morning or late afternoon. Traffic is lighter, crowds thin out, and the light is softer—ideal for portrait shots of your dog.
- Hidden corners or alleys. These spots often have fewer people but still provide interesting urban textures.
4. Train Your Dog to Stay Focused
Short training sessions before you head out can pay off big time:
- “Look at me” command. Teach your dog to lock eyes with you on cue. This will help keep them centered in the frame even when surrounding noise spikes.
- “Stay” or “wait.” A firm pause can give you a moment to adjust settings without the dog darting away.
5. Use Visual Anchors and Props
Give your dog something interesting to look at that’s not part of the background noise:
- Bright toys or a colorful bandana. These stand out against busy streets and can attract your dog's attention back to you.
- Reflective surfaces (e.g., a shiny collar). Light can bounce off these, drawing the dog’s gaze while adding visual interest.
6. Manage Your Own Stress Levels
A calm photographer translates to a calmer dog:
- Breathe deeply before each shot. This reduces your own anxiety, which your dog can sense.
- Take micro‑breaks. Step back for a moment, shake out the camera, and check in with your pup. A quick stretch can reset both of you.
7. Post‑Processing to Reduce Distractions
If you still end up with noisy background elements:
- Use selective blur (bokeh). A wide aperture will naturally soften the background, drawing focus to your dog.
- Clone or heal unwanted objects. Small distractions like a passing bus can be removed in Photoshop without altering the overall scene.
8. Real‑World Example: Capturing a Golden Retriever at Times Square
Times Square is notoriously loud and crowded, yet many photographers successfully capture dogs here by following these steps:
- Arrive during the early morning rush. The crowd is still forming but noise levels are lower.
- Use a silent shutter mode on an iPhone or DSLR. This keeps the dog from being startled by camera clicks.
- Hold a reflective collar. The dog’s eyes catch the reflection, providing a natural focal point.
- Capture in bursts. A burst mode ensures you get at least one sharp frame before the dog moves.
By anticipating distractions and equipping yourself with both gear tricks and behavioral cues, you can consistently capture beautiful images of your traveling companion—even amidst a city’s chaos.
Creative Angles: Low, High, and Side Shots with Dogs
When you’re traveling with your four‑legged friend, the camera angles you choose can make a huge difference in how engaging your photos look. Below are practical tips for mastering low, high, and side shots—each with examples that show how to capture personality, movement, and scenery.
Low Shots
Why use them? Low angles put the dog in a heroic light, making them appear larger than life and emphasizing their stature against urban or natural backdrops.
- Tip 1: Get on Their Level – Kneel or lie flat on the ground to shoot from the dog’s eye level. This creates intimacy and allows you to capture their face with the same perspective as a human subject.
- Tip 2: Use Natural Light Wisely – In bright daylight, avoid shooting directly into the sun; instead, position your dog so that the light falls on one side of their body. This adds depth and reduces harsh shadows.
- Example: Beach Sunset – Position yourself on a sandy beach at sunset. Let the golden hour glow illuminate your dog's fur while the horizon stretches behind them. The low angle captures both the dog’s silhouette and the expansive sky.
High Shots
Why use them? Shooting from above gives a unique perspective, revealing patterns in fur or coat colors and contextualizing the dog within their surroundings.
- Tip 1: Use a Ladder or Rooftop – If you’re traveling with accommodations that have balconies or rooftops, use them to get a bird’s‑eye view of your dog playing in a courtyard or park.
- Tip 2: Keep the Lens Focus on the Dog’s Face – Even from above, make sure the subject remains sharp. A shallow depth of field (f/2.8–4) will blur the background and keep attention on your pup.
- Example: City Street – From a rooftop overlooking a bustling street, capture your dog standing on a narrow balcony while cars pass below. The high angle showcases both urban life and the dog’s calm presence.
Side Shots
Why use them? Side or profile shots are great for showing movement, posture, and the dog’s silhouette against scenic backdrops.
- Tip 1: Follow Their Movement – When your dog is running or jumping, position yourself slightly behind and to the side. This captures dynamic motion while keeping their face visible.
- Tip 2: Pay Attention to Composition – Use the rule of thirds; place the dog’s head on a vertical line so that the background (mountain range, forest, or city skyline) provides contrast.
- Example: Mountain Trail – While hiking, take a side shot of your dog leaping over a fallen log. The mountain ridge in the distance frames the action and adds depth to the image.
Practical Shooting Checklist
- Use a Fast Lens (f/2.8–4) – Low light conditions during travel are common; a wide aperture helps capture sharp images quickly.
- Employ Burst Mode – Dogs move unpredictably. Shoot in burst mode to ensure you get the perfect expression or action moment.
- Keep Your Dog Comfortable – Use treats, toys, or a favorite blanket to keep your dog relaxed. A calm subject yields better shots regardless of angle.
- Respect Local Rules – Some parks have restrictions on dogs in certain areas. Always follow leash laws and clean up after your pet.
Experimenting with low, high, and side angles while traveling not only adds variety to your photo collection but also tells a richer story of the places you visit and the adventures you share with your dog. Happy shooting!
Editing Basics for Travel Photos
Once you’ve captured those stunning shots of your adventures—whether it’s a sunrise over the mountains or a candid moment with your canine companion—you’ll want to bring out the best in each image. Editing is where raw footage transforms into memorable memories that feel vivid and authentic.
1. Start With the Right Software
- Lightroom Classic / Lightroom CC: Great for batch processing, color grading, and non‑destructive edits.
- Capture One Pro: Offers precise color control—ideal if you’re working with RAW files from high‑end cameras.
- GIMP or Darktable: Free alternatives that still pack powerful editing tools.
2. Basic Workflow Steps
- Import & Organize: Use keyword tags like “dog,” “beach,” “mountain” to quickly locate shots in future sessions.
- White Balance Adjustment: For travel photos, lighting can be unpredictable. Use the white balance selector or manually tweak the temperature and tint sliders until skin tones look natural.
- Exposure & Contrast: A quick lift of exposure can rescue under‑exposed shots from the beach’s glare; a slight contrast boost adds depth to forest scenes.
- Color Correction: Enhance vibrant hues without oversaturation—especially useful for landscapes. The HSL panel allows you to target specific colors (e.g., greens in foliage, blues in sky).
- Sharpness & Noise Reduction: Apply sharpening selectively on the subject (your dog or the main landmark) while reducing noise in shadows.
3. Dog‑Specific Editing Tips
When editing photos featuring dogs, keep these nuances in mind:
- Focus on Eyes: Use the sharpening tool to bring out the sparkle in your dog’s eyes—this draws viewers into the moment.
- Softening Fur: A gentle blur (e.g., Gaussian Blur) applied only to fur can reduce distracting texture while preserving detail around the face.
- Background Simplification: If the background is cluttered, use selective color or the radial filter to subtly dim it, making your dog pop.
4. Practical Example: Sunset Beach Shot with Your Dog
Imagine a photo of your golden retriever chasing waves at sunset.
- White Balance: Shift the temperature slightly warmer to emphasize the orange glow.
- Exposure: Slightly increase exposure by +0.2 EV to brighten the dog’s fur without blowing out the sky.
- Contrast & Clarity: Add +10 contrast and +15 clarity for a punchy look.
- Vibrance: Increase vibrance by +20 to enhance the sunset hues while keeping skin tones natural.
- Selective Sharpening: Apply a sharpness mask around the dog’s face and paws.
5. Export Settings for Web & Print
- Web (JPEG): Resolution 72 dpi, quality 80–90%, size 2048×1536 px.
- Print (TIFF/PNG): Resolution 300 dpi, no compression for archival prints.
6. Consistency Across Your Portfolio
Create a preset or template that applies your favorite adjustments—especially useful when you’re editing multiple photos from the same trip. This ensures a cohesive look across all images featuring your travel adventures with dogs.
By mastering these basic editing techniques, you’ll transform raw captures into polished stories that showcase both the beauty of your destinations and the joy shared with your four‑legged friends.
Storing Your Memories Safely While Abroad
When you’re on a multi‑day adventure with your dog, the sheer volume of photos can quickly become overwhelming. Between scenic landscapes, candid moments, and that priceless “tail‑wag” shot at the beach, it’s easy to lose track of where everything is stored. Below are practical steps—rooted in photography best practices—to ensure your memories stay intact and accessible, no matter how far you roam.
1. Use a Dedicated Portable Hard Drive or SSD
- Why it matters: A dedicated drive keeps all your images in one place, reducing the risk of accidental deletion from phones or laptops.
- Tips for traveling dogs: Choose an external SSD with a rugged case (e.g., SanDisk Extreme Pro) that can withstand bumps when you’re hiking with your pup. Pack it in a separate compartment so it doesn’t get wet if your dog’s leash gets soaked.
- Practical advice: Back up every night to the drive before you head out for the day. If you have time, copy everything to two drives—one on the go and one at home.
2. Leverage Cloud Storage with Mobile Apps
- Why it matters: Cloud services (Google Photos, iCloud, Dropbox) automatically sync photos as soon as you’re connected to Wi‑Fi, so you never lose a shot.
- Tips for traveling dogs: Turn on “High Quality” settings to save space. Create albums titled by location or date (e.g., “Paris – June 2025”) and add your dog’s name as a tag.
- Practical advice: Enable “Auto‑upload” on your phone, but double‑check that the upload is complete before you put the device in a backpack or kennel bag. Keep a backup of the cloud folder on an external drive for redundancy.
3. Organize with Metadata and Keywords
- Why it matters: Properly tagged photos are easier to search later, especially when you’ve taken thousands of pictures.
- Tips for traveling dogs: Use keyword “dog” or your dog’s name. Add tags like “trail,” “beach,” or “city” to capture context.
- Practical advice: On a laptop, use Lightroom or Apple Photos to edit metadata on batches of images—this saves time and keeps your library clean.
4. Protect Physical Media in Weather‑Proof Cases
- Why it matters: Exposure to rain, humidity, or extreme temperatures can corrupt data.
- Tips for traveling dogs: Use a waterproof camera bag (e.g., Peak Design Everyday V2) and place the drive in an insulated pouch inside. Keep your dog’s leash and treats separate to avoid accidental spills.
- Practical advice: Check seals regularly; replace any cracked or warped cases before you head out on a long trek.
5. Maintain Backup Hierarchies (3‑2‑1 Rule)
The classic rule states: keep three copies of your data, stored on two different media types, with one copy offsite. For traveling dogs:
- Copy 1: Original photos on your camera’s SD card.
- Copy 2: External SSD or portable hard drive kept in a separate bag from the camera.
- Copy 3: Cloud backup with automatic uploads. If you’re hiking, sync when you reach a Wi‑Fi hotspot.
6. Use Backup Apps for Smartphones
- Why it matters: Many travelers rely on phones for quick shots; losing your phone can mean lost memories.
- Tips for traveling dogs: Install a backup app like Google One Backup or Microsoft OneDrive. Enable “Photo & Video” backup and set it to Wi‑Fi only to conserve data.
- Practical advice: Keep your phone in a waterproof case and place it in a small pouch near the dog’s leash—this keeps both devices safe from splashes or accidental drops.
7. Periodically Review & Delete Unwanted Shots
Storing everything can lead to clutter, making it harder to find that one perfect image of your dog leaping over a puddle. Schedule a 15‑minute review every night:
- Delete duplicates or blurry photos.
- Move the best shots to dedicated folders.
- Archive older trips to an external drive you’ll use less frequently.
8. Secure Your Devices with Passwords and Encryption
When traveling, devices can get misplaced or stolen. Protect your memories by:
- Enabling a strong lock screen (PIN, pattern, fingerprint).
- Encrypting external drives using tools like VeraCrypt.
- Keeping a list of recovery keys in a safe place—outside the device.
By following these steps, you’ll ensure that every photo capturing your dog’s adventures—from sunrise hikes to late‑night park visits—is safely stored and easily retrievable. Happy travels!
Sharing Your Journey: Social Media and Storytelling Tips
Once you’ve captured those unforgettable moments with your canine companion, it’s time to share the adventure. A well‑crafted story not only showcases the photo but also invites your audience into the experience. Below are practical strategies for turning a series of images into a compelling narrative on platforms like Instagram, Facebook, and TikTok.
1. Create a Consistent Visual Theme
- Color Palette: Stick to 2‑4 complementary colors across all photos (e.g., earthy tones for hiking scenes). This makes your feed instantly recognizable.
- Filters & Editing Style: Apply the same filter or editing preset to maintain a cohesive look. Tools like Lightroom presets, VSCO, or even Instagram’s native filters can help.
- Layout Grid: Use the 3‑column grid rule on Instagram: alternate between single shots and double‑wide collages to keep the feed dynamic yet balanced.
2. Tell a Story Arc
Every great post has an arc—beginning, middle, and end. Think of your journey as a mini‑film:
- Setup (Hook): Start with a dramatic arrival shot—a dog’s silhouette against sunrise or a bustling city street.
- Conflict (Challenge): Show the struggle—traversing rough terrain, navigating crowded markets, or dealing with weather.
- Resolution (Reward): End with the payoff—a breathtaking view from the summit, a calm moment by a lake, or a joyful reunion after a long hike.
3. Use Captions Strategically
- Storytelling Hook: Start with an intriguing question or statement (“Ever wondered what it feels like to chase sunrise with your pup?”).
- Context & Detail: Provide essential details—location, gear used, the dog’s breed and temperament.
- Call‑to‑Action (CTA): Encourage engagement: “Tag a fellow traveler who needs this inspiration!” or “Share your own trail photo in the comments.”
4. Leverage Hashtags Wisely
Mix broad and niche tags to maximize reach:
| Broad | #TravelWithDogs, #AdventureLife, #DogLovers |
|---|---|
| Niche | #HikingPaws, #CanineCampers, #FidoOnTheTrail |
| Location‑Specific | #YosemiteDogs, #ParisPups, #SaharaSnouts |
5. Incorporate Video & Stories for Immersion
- Short Clips: A 15‑second reel of your dog leaping over a stream can be more engaging than a still.
- Story Highlights: Create themed highlights (e.g., “Trails,” “Urban Explorations”) to keep new followers oriented.
- Live Q&A: Host a live session on Instagram or Facebook, answering questions about traveling with dogs—gear, safety, and itinerary tips.
6. Engage Authentically
Respond to comments within the first hour of posting. A simple “Thanks for sharing!” or a quick photo reply shows that you value your community. This builds loyalty and encourages repeat interaction.
7. Collaborate with Like‑Minded Brands & Influencers
- Product Reviews: Feature dog-friendly gear (hydration packs, travel beds) with honest reviews.
- Shoutouts: Tag and thank brands that provide sponsorships or free samples; they’ll often repost your content.
- Crossover Posts: Partner with other pet‑travel bloggers for a joint photo challenge or giveaway.
8. Track Performance & Iterate
Use analytics tools (Instagram Insights, Facebook Analytics) to see which posts drive the most engagement. Pay attention to:
- Engagement Rate: Likes + comments ÷ impressions.
- Best Posting Times: When your audience is most active.
- Story Completion Rates: How many viewers watch the entire story sequence.
Adjust captions, hashtags, and posting schedules based on these metrics for continuous improvement.
Practical Example: “Sunrise at Lake Tahoe with Bella”
- Photo 1: Bella’s silhouette against the sunrise—caption: “First light, first paws.”
- Photo 2 (Collage): A series of shots—Bella drinking from a water bottle, a close‑up of her tongue lolling, and the lake’s reflection.
- Video Reel: Bella leaping over a small log with upbeat music. CTA: “Tag someone who loves early mornings!”
- Story Sequence: 3 slides—planning (packing gear), journey (mountain trail), arrival (sunrise). Add location stickers and a poll (“Ready for tomorrow’s hike?”).
By weaving these elements together, you’ll create a memorable social media presence that showcases not just the destination but also the joy of traveling with your four‑legged friend.
Legalities and Permissions for Dog Photography in Public Spaces
When you’re out exploring new cities or scenic trails with your four‑legged companion, it’s easy to get caught up in the excitement of snapping that perfect shot. But before you press shutter, check the local rules that govern photography and animal presence in public places. Understanding these guidelines will keep you out of legal trouble, respect other visitors, and protect your furry friend.
1. Public vs. Private Property
- Public spaces (parks, beaches, streets): Generally free to photograph, but some municipalities impose restrictions on professional or commercial use.
- Private property (businesses, private gardens, event venues): Always ask for permission. Even a quick “Hi, can I take a photo of my dog?” can save you from being asked to leave.
2. Commercial vs. Personal Use
If your images will appear on a commercial website, in advertising, or sold as prints, many cities require a commercial photography permit. Check the city’s licensing office or tourism board for application forms and fees. For personal blogs or social media posts, most places allow “non‑commercial” photography without a permit, but always read the fine print.
3. Animal Welfare Regulations
- No–leash zones: In many parks dogs must be on a leash. Some places also require muzzles for certain breeds.
- Heat‑related safety: Local ordinances may forbid outdoor activities during extreme heat to protect pets. Keep water, shade, and cool spots handy.
4. Photography Etiquette in Crowded Areas
When you’re on a busy trail or in a bustling city square, remember that other visitors value their privacy. Use the following guidelines to stay respectful:
- Ask before photographing strangers’ pets. Even if it’s just a quick snapshot, a polite request goes a long way.
- Keep your dog under control. A well‑behaved dog reduces the risk of accidents or disturbances.
- Respect “no photography” signs. These often indicate privacy concerns for residents or event organizers.
5. Specific Examples by Region
- New York City: The NYC Parks Department allows dog photography in parks but requires a permit for commercial use.
- San Diego Beaches: Dogs are allowed on many beaches, but the city mandates that dogs be leashed between 10 am and 6 pm. Commercial photography requires a permit from the City of San Diego.
- London’s Royal Parks: Photography is permitted; however, commercial use (e.g., for ads) needs a license from The Crown Estate.
6. Practical Steps Before You Shoot
- Research the location: Google “photography rules + city name” or visit the official tourism website.
- Contact local authorities: Call the parks office or tourism board to confirm any permits required.
- Carry documentation: Keep a copy of your permit (if applicable) and a note from property owners if you’re on private land.
- Check dog‑specific rules: Verify leash, muzzle, or vaccination requirements before heading out.
7. Tips for Traveling with Dogs & Photography
The same precautions that keep your photos legal also make traveling smoother:
- Pack a dog passport with up‑to‑date vaccination records; some parks require proof.
- Use a portable water bowl and stay hydrated—both for you and your pup.
- Bring a camera strap or harness attachment so you can keep both hands free to manage your dog.
- Plan shots during golden hour (early morning or late afternoon) when lighting is soft, and the park tends to be less crowded.
Remember: When in doubt, ask! A quick conversation with a park ranger, property manager, or fellow dog owner can clarify rules and ensure you capture those memorable moments without any legal hiccups.
Conclusion
Capturing the joy and adventure of a road trip or a mountain hike with your canine companion can be one of the most rewarding aspects of travel. By combining thoughtful preparation, patience, and a few practical tricks, you’ll not only protect your gear but also create lasting memories that showcase both you and your dog in their best light.
1. Gear Checklist – Keep It Simple & Durable
- Camera Bag with Dog‑Friendly Padding: A padded, waterproof bag protects the camera while giving you a secure place to stash treats and leashes.
- Lens Cleaning Kit: A microfiber cloth, lens wipes, and a portable cleaning brush keep lenses free of paw prints or dirt.
- Portable Power Bank: Dogs often lead you through less accessible spots where outlets are scarce; a high‑capacity bank ensures your camera stays powered.
2. Timing & Lighting – The Golden Hours Are Your Friend
Early mornings and late afternoons provide soft, warm light that flatters fur textures and reduces harsh shadows on the dog’s face. Use a timer or remote shutter release to avoid the camera shake that can occur when you’re holding your dog in one hand and the camera in the other.
3. Composition Techniques – Let Your Dog Be the Star
- Rule of Thirds: Position your dog off‑center to create a more dynamic frame.
- Eye Level Shots: Shoot at the dog’s eye level or slightly below. This perspective captures their personality and makes the viewer feel connected.
- Action Shots with Blur: Use a slower shutter speed (1/30s to 1/60s) while the dog runs toward you, then lock focus on the eyes for a balanced motion blur effect.
4. Safety & Comfort – Prioritize Your Dog’s Well‑Being
Always keep a water bowl and cooling mat nearby during hot days. Use a reflective vest or harness with a built‑in light if you’re shooting in low visibility. Remember, the best photos come from relaxed dogs, so give them plenty of breaks and positive reinforcement.
5. Post‑Processing – Enhance Without Overdoing
- Crop & Straighten: Remove any distracting background elements that take focus away from the dog.
- Adjust Exposure & Contrast: Slightly brighten the image to bring out fur details, but avoid over‑saturating the colors.
- Noise Reduction: If you shot in low light with a high ISO, apply selective noise reduction only on the background to keep the dog’s texture crisp.
6. Sharing & Storytelling – Build a Visual Narrative
Create a photo series that follows your journey: arrival shots, scenic landscapes with your dog in the foreground, and candid moments of play. Pair each image with short captions that highlight key experiences—like the smell of pine trees or the taste of local treats your pup enjoyed.
7. Final Checklist Before You Go
- Camera fully charged and batteries swapped.
- All lenses cleaned and protected.
- Treats, water, and a spare leash in the bag.
- A backup memory card or an external hard drive for quick uploads.
By integrating these practical steps into your travel routine, you’ll capture beautiful, authentic moments that honor both your adventurous spirit and your loyal four‑legged friend. Happy shooting—and enjoy every wagging tail along the way!
FAQ
- What camera settings work best for shooting dogs on the move?
-
Dogs are notoriously fast and unpredictable, so a high shutter speed is essential to freeze action. Aim for at least 1/500 s when capturing running or jumping shots. For handheld shooting, use continuous autofocus (AI‑Focus or Servo Mode) so the camera can lock onto moving subjects. If you’re using a DSLR or mirrorless system, set your aperture to f/4–f/5.6 for enough depth of field while keeping the exposure bright.
- ISO: Keep it low (100‑400) in daylight; increase only if lighting is poor to avoid noise.
- Aperture: f/4–f/5.6 gives a nice background blur but still keeps the dog sharp.
- White Balance: Auto works well, but you can set “Cloudy” or “Shade” for warmer tones on outdoor shots.
- How do I keep my dog calm during a shoot?
-
The key is to make the camera a part of the play routine. Bring a favorite toy or treat and use it as a reward for staying still or following your commands.
- Pre‑shoot warm‑up: Let the dog sniff, stretch, and get comfortable with the camera’s flash (if you plan to use one).
- Use a quick flash: A single burst of 1/500 s can freeze a jump without startling the animal.
- Short sessions: Keep each shoot under 10–15 minutes so your dog doesn’t get bored or tired.
- What accessories should I bring for a travel photography trip with my dog?
-
- Leash & harness: A lightweight, quick‑release leash is ideal.
- Portable water bowl and collapsible dish: Hydration keeps your pup alert.
- Camera bag with padded compartments: Protects gear from moisture and dirt.
- Reflective or colored bandana: Helps the dog stand out against natural backdrops.
- First‑aid kit for pets: Include a small styptic pencil, gauze, and any medications your dog needs.
- How can I incorporate my dog's personality into the photos?
-
The best shots capture genuine expressions. Observe how your dog reacts to different stimuli:
- Playful moments: Throw a ball or frisbee and snap while it’s mid‑air.
- Relaxed poses: Capture the dog lying on its side with eyes half‑closed for a candid look.
- Interaction shots: Include yourself in the frame to show companionship.
Use a shallow depth of field to isolate your dog from busy backgrounds, or shoot wide‑angle during scenic travel shots to add context.
- What post‑processing techniques enhance photos of dogs taken while traveling?
-
- Crop for emphasis: Remove distracting elements and bring the dog closer to the viewer.
- Color correction: Adjust white balance if the scene has a strong color cast (e.g., sunset). Use Lightroom’s “Temperature” slider.
- Sharpen selectively: Apply a subtle sharpening mask on the dog’s face and eyes to make them pop.
- Noise reduction: If shooting at high ISO, use a mild noise‑reduction filter to keep textures crisp.
- Are there any legal or ethical considerations when photographing dogs in public places?
-
Always respect local regulations and private property. Some parks require a permit for commercial photography, and others prohibit pets altogether. If you’re using a tripod or large equipment, make sure it doesn’t obstruct pathways or wildlife.
- Ask permission: When photographing in front of people’s homes or businesses, politely ask before taking photos.
- Keep the dog safe: Avoid busy streets and ensure your dog is on a leash unless you’re certain it can’t run off.
Categories
- AI & Enrichment Play
- Broiler Farming
- Broiler Farming Tips
- Canine Wellness & Longevity
- Cat
- Cat & Human Connection
- Cat Adoption & Rescue
- Cat Breeds
- Cat Breeds & Personalities
- Cat Care & Health
- Cat Grooming & Hygiene
- Cat Lifestyle & Environment
- Cat Myths & History
- Cat Nutrition & Diet
- Cat Products & Reviews
- Cat Training & Behavior
- Comparison
- Consumer Awareness
- Dog
- Dog Accessories & Products
- Dog Adoption & Rescue
- Dog Breed & Lifestyle Trends
- Dog Breeding & Puppies
- Dog Entertainment & Media
- Dog Fashion & Trends
- Dog Fun & Lifestyle
- Dog Grooming & Hygiene
- Dog History & Culture
- Dog Myths, Science & Future Tech
- Dog News & Trends
- Dog Nutrition & Food
- Dog Psychology & Emotions
- Dog Safety & Security
- Dog Sports & Activities
- Dog Technology & Innovation
- Dog Training for Modern Owners
- Dog Travel & Adventure
- Dog Travel, Adventure & Culture
- Economic and Market Insights
- Educational Content
- FAQs
- Feeding Alternatives
- Festivals & Seasonal Ideas
- Fun & Entertainment
- General Knowledge
- General Pig Farming
- Health & Disease Management
- Housing and Environment
- Kittens
- Market Insights
- Miscellaneous
- Miscellaneous
- Motivational
- pig
- Pig Breeding
- Pig Breeds
- Pig Farming Stories and Inspiration
- Pig Health and Care
- Pig Nutrition
- Pig Products
- Profitability & Business
- Puppy Care
- Puppy Predictable Topics Reinvented
- Regional Focus
- Rescue & Adoption Buzz
- Senior Cats
- Senior Dog Care
- Smart Dog Tech & Gadgets
- Sustainability
- Sustainable & Eco-Friendly Dog Products
- Tech & Innovations
- Working & Service Dogs
- Broiler Feed66 products
- Country Feed33 products
- Pig Feed66 products
- Product22 products
- Raw Materials99 products
Products
-
 Fish Meal
₹1,999.00 – ₹2,999.00Price range: ₹1,999.00 through ₹2,999.00Rated 0 out of 5
Fish Meal
₹1,999.00 – ₹2,999.00Price range: ₹1,999.00 through ₹2,999.00Rated 0 out of 5 -
 FATTENING BROILER FEED
₹2,299.00 – ₹2,349.00Price range: ₹2,299.00 through ₹2,349.00Rated 0 out of 5
FATTENING BROILER FEED
₹2,299.00 – ₹2,349.00Price range: ₹2,299.00 through ₹2,349.00Rated 0 out of 5 -
 LAYER COUNTRY FEED
₹1,549.00 – ₹1,649.00Price range: ₹1,549.00 through ₹1,649.00Rated 0 out of 5
LAYER COUNTRY FEED
₹1,549.00 – ₹1,649.00Price range: ₹1,549.00 through ₹1,649.00Rated 0 out of 5 -
 COUNTER BROILER FEED
₹1,199.00 – ₹1,299.00Price range: ₹1,199.00 through ₹1,299.00Rated 0 out of 5
COUNTER BROILER FEED
₹1,199.00 – ₹1,299.00Price range: ₹1,199.00 through ₹1,299.00Rated 0 out of 5 -
 LACTATING PIG FEED
Rated 0 out of 5
LACTATING PIG FEED
Rated 0 out of 5₹2,299.00Original price was: ₹2,299.00.₹1,740.00Current price is: ₹1,740.00. -
 Maize
Rated 0 out of 5
Maize
Rated 0 out of 5₹1,650.00Original price was: ₹1,650.00.₹1,300.00Current price is: ₹1,300.00. -
 GESTATION PIG FEED (Phase 1)
Rated 0 out of 5
GESTATION PIG FEED (Phase 1)
Rated 0 out of 5₹2,249.00Original price was: ₹2,249.00.₹1,699.00Current price is: ₹1,699.00. -
 Pre Starter Broiler Feed
₹2,399.00 – ₹2,499.00Price range: ₹2,399.00 through ₹2,499.00Rated 0 out of 5
Pre Starter Broiler Feed
₹2,399.00 – ₹2,499.00Price range: ₹2,399.00 through ₹2,499.00Rated 0 out of 5 -
 FINISHER PIG FEED
Rated 0 out of 5
FINISHER PIG FEED
Rated 0 out of 5₹2,299.00Original price was: ₹2,299.00.₹1,749.00Current price is: ₹1,749.00. -
 Broiler Premix
Rated 0 out of 5
Broiler Premix
Rated 0 out of 5₹820.00Original price was: ₹820.00.₹699.00Current price is: ₹699.00.