
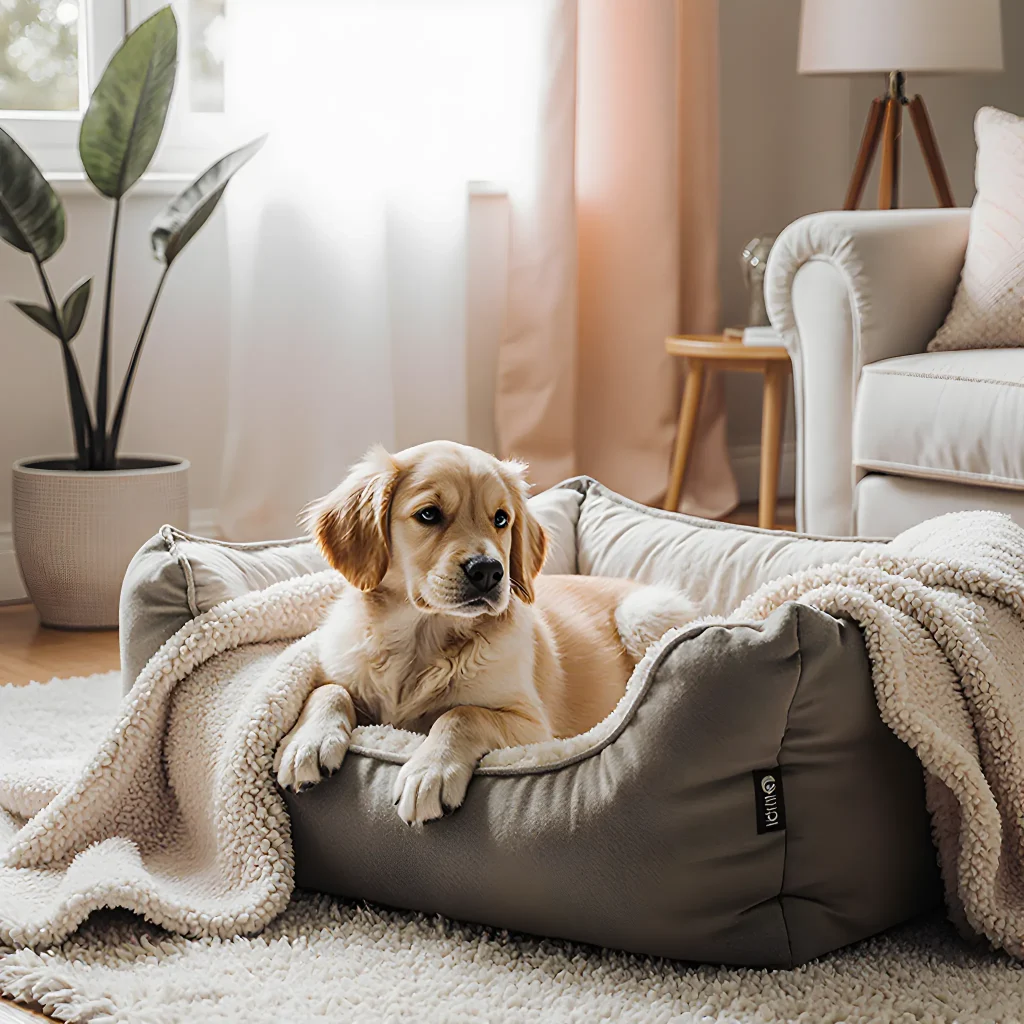
Ready Your Home for a Pawsitive Welcome!
Heart‑Healing Homes: Prep Yours for a New Furry Friend
Table of Contents
- Introduction
- Understanding Rescue Dogs
- Mental Health Preparation for Your Home
- Safety Assessment of Your Living Space
- Making the Home Child‑ and Pet‑Friendly
- Cleaning and Deodorizing the House
- Creating Safe Zones for the New Dog
- Storage of Toxic Items and Hazardous Materials
- Setting Up Pet Areas and Bedding
- Food, Water, and Feeding Routine Setup
- Exercise Plans and Daily Routines
- Training Tools and Resources
- Healthcare Preparations: Vet Visits & Vaccinations
- Introducing the Rescue Dog to Family Members
- Conclusion and Next Steps
- FAQ
Introduction
Bringing a rescue dog into your life is an exciting and rewarding experience, but it also requires thoughtful preparation to ensure a smooth transition for both you and the new family member. Below are detailed steps, practical examples, and actionable tips to help you create a welcoming, safe, and comfortable environment.
1. Clean and Declutter Your Space
- Deep‑clean floors and surfaces: Use pet‑safe cleaners on hardwood, tile, or carpet to remove any lingering odors or stains that might be intimidating for a nervous dog.
- Remove hazardous items: Store small objects, loose wires, and toxic plants out of reach. A rescue may be curious and prone to chewing or ingesting dangerous things.
- Create a “safe zone”: Designate a quiet corner with a cozy dog bed, blankets, and their favorite toys. This space will serve as a retreat where the dog can feel secure.
2. Set Up Essential Supplies
A well‑equipped home eases the first days for both of you. Here’s a checklist:
- Food and water bowls: Stainless steel or ceramic bowls are durable and easy to clean.
- High‑quality dog food: Consult your veterinarian for a recommendation based on the rescue’s age, breed, and health status.
- Toys: Offer a mix of chew toys (rubber or nylon), plush toys, and interactive puzzle toys to keep their mind engaged.
- Collar, leash, and ID tags: Make sure the collar fits snugly but comfortably. Attach an updated ID tag with your contact information.
- Grooming tools: Brush, nail clippers, ear cleaner, and a mild dog shampoo will help maintain their hygiene.
3. Plan Your Dog’s Daily Routine
Rescue dogs often thrive on predictability. Draft a simple schedule that includes:
- Morning walk and bathroom break (within 30 minutes of arrival)
- Breakfast at the same time each day
- Playtime or training session for 10–15 minutes in the afternoon
- Evening walk and bedtime routine
4. Introduce Your Dog to Family Members and Other Pets
Take a gradual approach:
- One person at a time: Let the dog meet each family member in a calm setting, allowing them to sniff and observe without pressure.
- Use positive reinforcement: Reward calm behavior with treats or praise.
- Safe introductions with other pets: Keep the rescue on a leash during initial meetings. Observe body language for signs of stress (flattened ears, tucked tail).
5. Safety Check Your Home
Dog‑proofing isn’t just about removing hazards—it’s also about setting up safe boundaries.
- Secure trash cans: Use child‑proof lids or store them in a cabinet.
- Cover electrical outlets: Outlet covers prevent accidental chewing.
- Create a “no‑go” zone: If you have fragile items or a high‑traffic area, consider using baby gates to keep the dog away until they’re more settled.
6. Prepare for Medical Care
Rescue dogs often come with unknown medical histories. Steps to take:
- Schedule a vet visit within the first week: A comprehensive exam, vaccinations, and a microchip implantation are essential.
- Gather any existing records: If you received paperwork from the rescue organization, bring it to the appointment.
- Set up an emergency plan: Know the nearest 24‑hour animal clinic and have your phone numbers handy.
7. Build a Bond Through Training
Consistent, gentle training builds trust and establishes clear communication.
- Start with basic commands: Sit, stay, come, and down are foundational for safety.
- Use short, positive sessions: Keep each training block under five minutes to avoid frustration.
- Leverage treats you already have: Small pieces of chicken or cheese can be highly motivating.
8. Be Patient and Observe
Every rescue dog is unique, with its own pace for adjusting to new surroundings.
- Watch body language: A relaxed posture, wagging tail, and eye contact indicate comfort.
- Adjust your expectations: Some dogs may take weeks or months to fully acclimate.
- Celebrate small victories: Each new behavior you notice should be acknowledged with praise or a treat.
By thoughtfully preparing your home and mind, you set the stage for a successful partnership. A rescue dog will thank you not only for the shelter they’ve found but also for the safe, loving environment that supports their healing and growth.
Understanding Rescue Dogs
Bringing a rescue dog into your life is an exciting and rewarding experience, but it also means you’re taking on the responsibility of creating a safe, comfortable, and welcoming environment. Below are practical steps to help you transform your home into a haven that supports a smooth transition for both you and your new canine companion.
1. Designate a Safe Space
- Choose a quiet room or corner: This will serve as the dog’s first “home” where they can retreat, rest, and get used to their surroundings.
- Equip it with essentials: A soft bed or crate, a water bowl, a few chew toys, and a blanket that smells like home.
- Keep the space low‑traffic: Avoid placing it near doors, staircases, or high‑noise areas to reduce anxiety.
2. Dog‑Proof Your Living Areas
- Cords & wires: Secure loose cables with cord covers or tape them along walls so the dog can’t chew on them.
- Trash & hazardous items: Store garbage bags and cleaning supplies in locked cabinets; keep small household objects (e.g., jewelry, coins) out of reach.
- Potted plants: Verify that any houseplants are non‑toxic or move them to a pet‑free zone.
3. Establish a Routine
- Feeding schedule: Offer meals at the same times each day; this predictability eases stress and aids digestion.
- Exercise & playtime: A consistent walk or play session (e.g., 20–30 minutes) helps expend excess energy and builds trust.
- Bedtime ritual: Create a calm wind‑down period with gentle petting, light music, or a short story read aloud.
4. Introduce the Dog to Household Members Gradually
- One person at a time: Let each family member interact with the dog separately before bringing them all together.
- Positive reinforcement: Reward calm behavior with treats or praise; avoid scolding for nervous reactions.
- Teach appropriate greetings: Show everyone to sit or lie down before approaching, and discourage jumping or barking at strangers.
5. Prepare for the First Night
- Keep familiar items nearby: A piece of clothing with your scent or a blanket from your bed can provide comfort.
- Use a light source: Place a nightlight in the dog’s sleeping area to prevent darkness‑induced anxiety.
- Minimize noise: Turn off loud appliances and consider playing soft background music or white noise.
6. Plan for Medical Care & Identification
- Veterinary visit: Schedule a check‑up within the first week to assess health, vaccinations, and microchip status.
- Microchip & ID tags: Ensure the dog’s collar has an up‑to‑date ID tag with your contact information; register or re‑register the microchip if needed.
- Emergency kit: Assemble a first‑aid kit containing bandages, antiseptic wipes, and any prescribed medications.
7. Build Bond Through Training & Interaction
- Basic obedience training: Teach simple commands like “sit,” “stay,” and “come” using short, frequent sessions (5–10 minutes).
- Socialization: Gradually expose the dog to different people, environments, and sounds in a controlled manner.
- Quality time: Spend at least 15–20 minutes each day engaging in gentle play or cuddling to reinforce attachment.
By thoughtfully preparing your home and establishing routines, you’ll create an environment that nurtures confidence, reduces stress, and lays the foundation for a lifelong bond with your rescue dog. Remember: patience, consistency, and love are the most powerful tools in helping your new companion feel truly at home.
Mental Health Preparation for Your Home
When you bring a rescue dog into your home, you’re not just adding a new pet—you’re opening up a whole new set of emotional dynamics. Rescue dogs often carry past trauma, uncertainty about their future, and sometimes a lingering fear of abandonment. The first step to creating a mentally healthy environment is recognizing that the house itself can either soothe or amplify these anxieties.
1. Keep the Space Calm
- Low-Noise Zones: Designate one room—preferably with minimal windows—as a “quiet sanctuary.” Use soft rugs, muted colors, and keep electronic devices off or at low volume.
- Consistent Lighting: Avoid sudden changes in lighting. Opt for warm, steady lights rather than bright fluorescents that can feel overstimulating.
2. Establish Predictable Routines
Dogs thrive on routine. A predictable schedule signals safety and reduces stress.
- Meal Times: Feed at the same times each day. Even if you’re busy, use an automatic feeder to maintain consistency.
- Walk Schedule: Plan walks for the same time slots—morning and evening are ideal as they bookend the day’s activities.
- Bedtime Rituals: End the day with a calm routine: a gentle brush, a short talk or song, then dim lights and a quiet corner for sleep.
3. Create Safe Retreat Areas
Rescue dogs need a place where they can “hide” without feeling abandoned. Build this space thoughtfully:
- Bedding: Use a deep dog bed or crate lined with blankets that smell like you.
- Crate Training: Treat the crate as a positive, not punitive, environment. Keep it in a low-traffic area and never use it for punishment.
- Elevated Spots: If your dog enjoys perching, provide safe elevated areas—like a sturdy cat tree or a dog-friendly loft—to give them a sense of control.
4. Manage Human Interaction Wisely
People’s bodies and voices can be intimidating for a rescue. Use these strategies to foster trust:
- Slow Approach: Let the dog initiate contact. Sit at their level, avoid direct eye contact initially, and let them sniff before petting.
- Gentle Voice: Speak in a calm, low tone. Avoid abrupt or loud noises that could startle them.
- Use positive reinforcement to associate your presence with rewards—treats, toys, or praise.
5. Introduce New Stimuli Gradually
Rescues often have heightened sensitivity to new smells, textures, and sounds. A step-by-step introduction helps:
- New Smells: Let them sniff a small cloth with your scent before introducing unfamiliar items.
- Different Surfaces: Allow them to walk on various floor types—carpet, tile, wood—in short bursts before full exposure.
- Background Noise: Play soft music or muted TV for a few minutes, gradually increasing volume as they acclimate.
6. Mindful Training Techniques
Training should be a bonding experience, not a source of fear.
- Short Sessions: Keep training to 5–10 minutes, ending on a positive note.
- Reward‑Based Methods: Use treats, praise, or play. Avoid punishment or forceful corrections.
- Consistency Across Family Members: Ensure everyone uses the same cues and rewards to avoid confusing signals.
7. Monitor Stress Indicators
Recognizing subtle signs of anxiety helps you intervene before it escalates.
- Body Language: Flattened ears, tucked tail, or dilated pupils can indicate stress.
- Behavioral Changes: Sudden aggression, excessive licking, or avoidance may signal discomfort.
- Physical Symptoms: Excessive drooling, panting, or trembling even in calm settings should be checked by a vet.
8. Build Your Support Network
Your mental health matters too. Caring for a rescue can be emotionally demanding.
- Vet Visits: Regular check‑ups and open communication with your veterinarian keep both you and your dog healthy.
- Rescue Community: Join local rescue groups or online forums to share experiences, tips, and emotional support.
- Professional Help: If you notice persistent anxiety in yourself or your dog, consider consulting a behaviorist or therapist.
9. Celebrate Milestones—Big and Small
Acknowledging progress reinforces positive change.
- Reward the first time they step into their new bed without hesitation.
- Celebrate when they greet a family member with calmness rather than barking.
- Keep a “Success Log”—a simple notebook noting daily wins to track improvement and stay motivated.
10. Revisit and Adjust as Needed
Rescues evolve; so should your home environment. Periodically reassess:
- Is the quiet sanctuary still effective, or does it need a new layout?
- Do new family members (children, other pets) introduce fresh stimuli that require additional safety measures?
- Are there changes in your dog’s health that alter their comfort needs?
By thoughtfully crafting a calm, predictable environment and responding with empathy, you create a foundation where both you and your rescue
Safety Assessment of Your Living Space
Before welcoming a rescue dog into your home, take the time to evaluate every room and common area for potential hazards. A thorough safety assessment not only protects your new companion but also reduces stress during the transition.
1. Identify Sharp or Pointed Objects
- Furniture edges: Use corner guards on sofas, tables, and chairs to prevent paw injuries.
- Decorations: Remove or secure loose picture frames, mirrors, and ornaments that could be knocked over.
- Kitchen appliances: Keep knives, scissors, and other sharp tools in child-proof drawers or cabinets.
2. Secure Loose Cords and Ties
Cords from blinds, curtains, and electronic devices can pose strangulation risks.
- Use cord covers or ties to bundle curtain rods.
- Store extension cords in a low cabinet or use zip ties to keep them out of reach.
- Replace long power strips with shorter ones that fit neatly on the floor.
3. Check for Toxic Plants and Household Items
Many common houseplants, cleaning products, and medications are toxic to dogs.
| Item | Toxicity Level |
|---|---|
| Aloe Vera | Moderate – can cause vomiting and diarrhea |
| Lavender (essential oil) | High – can lead to respiratory distress |
| Bleach | Very high – burns skin, eyes, and mucous membranes |
Keep all chemicals in locked cabinets and consider pet-safe alternatives for cleaning.
4. Create a Dog-Friendly Zone
- Bedding area: Place a crate or dog bed in a quiet corner with easy access to the outdoors.
- Water station: Install a bowl on a non-slip mat and refill it regularly.
- Food space: Keep dry food in an airtight container away from potential pests.
5. Evaluate Flooring for Slips
Rescue dogs may be cautious or disoriented; slippery floors can lead to falls.
- Add non-slip rugs in bathrooms and kitchens.
- Use carpet tape on hardwood surfaces where the dog frequently walks.
- Check for loose floorboards that could break under weight.
6. Test Doorways and Hallways
Ensure door frames are wide enough to accommodate a larger rescue dog without forcing them through tight spaces.
- Measure the width of each doorway; if less than 24 inches, consider widening or installing a sliding door.
- Install doorbell plates that allow easy access for the dog’s paws.
7. Plan an Escape Route
In case of emergencies, you’ll need a quick exit plan.
- Identify at least two windows or doors that can be opened quickly from the inside.
- Keep a small leash and collar in a visible spot near each exit.
- Mark an emergency contact number on your phone and store it in a waterproof pouch by the door.
8. Gradual Introduction to Household Sounds
Rescue dogs may have anxiety around loud noises.
- Play recorded household sounds (vacuum, dishwasher) at low volume for short periods.
- Use treats and positive reinforcement to associate these sounds with calmness.
- Gradually increase volume over several days while keeping the dog’s comfort in mind.
9. Final Checklist
Before the rescue arrives, run through this quick checklist:
- [ ] All hazardous items removed or secured.
- [ ] Dog-friendly zone set up.
- [ ] Flooring safe and non-slip.
- [ ] Doorways wide enough.
- [ ] Emergency exit plan ready.
- [ ] Household sounds introduced gently.
By systematically assessing your living space, you’ll create a welcoming environment that promotes safety, confidence, and happiness for your new rescue dog. Remember: the goal is to make the transition as seamless as possible, allowing both of you to bond quickly in a secure setting.
Making the Home Child‑ and Pet‑Friendly
If you’re bringing a rescue dog into your household—especially one that will share space with children or other pets—it’s essential to create an environment that is safe, comfortable, and conducive to a smooth transition. Below are practical steps, real‑world examples, and actionable tips to help you prepare.
1. Safety First: Secure the Environment
- Dog‑proof your living space: Remove or secure loose wires, cords, and any small objects that could be chewed or swallowed. Use cord covers or outlet protectors to prevent accidental strangulation.
- Secure hazardous areas: If you have stairs, install sturdy handrails and consider placing non‑slip mats on steps. Keep cleaning supplies, medications, and sharp tools out of reach.
- Check for allergens: Some dogs are sensitive to certain materials (e.g., certain types of carpet or synthetic fabrics). If you’re unsure, opt for natural fibers like cotton or wool that are less likely to irritate a new dog’s skin.
2. Create a Dedicated Dog Zone
- Choose a quiet corner: Set up a space away from high‑traffic areas where the dog can retreat when overwhelmed. A small room, hallway, or even a corner of a bedroom works well.
- Provide bedding and toys: Use a comfortable crate (if you plan to crate train) or a large dog bed with washable covers. Include a variety of chew toys—rubber bones, nylon ropes—to satisfy natural chewing instincts.
- Introduce scent: Place an old t‑shirt or blanket that smells like you in the dog’s zone. Dogs rely heavily on smell for comfort and orientation.
3. Gradual Introductions to Children and Other Pets
Rescue dogs often come with unknown histories, so it’s important to manage interactions carefully.
- Teach children “dog etiquette”: Show them how to approach calmly, avoid sudden movements, and respect the dog’s personal space. Use a simple script: “Slowly open your hand, let the dog sniff, then give a gentle pat.”
- Supervise initial meetings: Keep both the child and the rescue dog on leashes during their first encounters. This allows you to control the pace and intervene if necessary.
- Reward calm behavior: Use treats or praise when the dog remains relaxed around the child or other pets. Positive reinforcement helps establish trust.
4. Establish a Routine Quickly
Dogs thrive on predictability. A consistent schedule eases anxiety and accelerates bonding.
- Feeding times: Feed the dog at the same hours each day, using a measured portion to avoid overfeeding. Use a separate feeding area or table to prevent food fights with other pets.
- Exercise schedule: Plan daily walks (15–30 minutes depending on breed and age) in the morning or early evening. If you have children, involve them in short walk segments—this builds teamwork and helps your dog get used to their presence.
- Training sessions: Short, frequent training (5–10 minute blocks) focusing on basic commands (“sit,” “stay,” “come”) establishes hierarchy and mutual respect. Use clicker training if you’re comfortable; it’s highly effective for rescue dogs with uncertain backgrounds.
5. Health Check & Vet Visit Preparation
- Gather documentation: If the rescue organization provides medical records, bring them to your first vet visit. Note any behavioral concerns, dietary restrictions, or medication needs.
- Prepare a “dog emergency kit”: Include a first‑aid kit (bandages, antiseptic wipes), copies of vaccination records, and a list of emergency contacts (vet phone, poison control).
- Plan for a vet appointment within the first week: This ensures any underlying health issues are addressed promptly. Bring treats or a favorite toy to make the visit less stressful.
6. Address Potential Behavioral Challenges
Rescue dogs may exhibit fear, aggression, or separation anxiety. Here’s how you can mitigate these concerns:
- Desensitization: Gradually expose the dog to stimuli that trigger discomfort (e.g., loud noises, other animals) at a low intensity, rewarding calmness.
- Positive reinforcement training: Replace negative behavior with desired actions by offering treats and praise for good conduct.
- Professional help: If aggression or severe anxiety persists, consider enrolling in an obedience class or consulting a certified animal behaviorist.
7. Practical Tips for Ongoing Success
- Use baby gates: Keep the dog out of rooms where children play unsupervised or where you have fragile items.
- Rotate toys: Swap out a few chew toys every week to maintain interest and reduce boredom‑related chewing.
- Keep a “dog diary”: Note daily moods, any incidents, and progress. This log helps you spot patterns and adjust routines as needed.
- Be patient: Every rescue dog heals at its own pace. Celebrate small milestones—like sitting on command or greeting the family without barking—and keep your tone upbeat and supportive.
By taking these steps, you’ll create a welcoming, secure, and loving environment that helps your new rescue dog settle in comfortably while ensuring harmony with children and other pets. Remember: the goal is to build trust, establish routines, and provide consistent care—keys that lead to lasting companionship.
Cleaning and Deodorizing the House
Preparing your home for a rescue dog involves more than just setting up a cozy bed. A clean, odor‑free environment not only makes the transition smoother for the new pet but also helps prevent health issues that can arise from mold, mildew, or lingering smells. Below is a step-by-step guide to deep cleaning and deodorizing every corner of your home before your rescue dog arrives.
1. Declutter First
- Remove unnecessary items: Get rid of old bedding, toys, or any objects that might harbor bacteria or mold.
- Organize storage areas: Dogs can rummage through boxes and drawers. Keep potential hazards out of reach.
2. Thorough Vacuuming
- Use a HEPA filter vacuum: This traps fine particles, including pet dander that may already be present in the house.
- Vacuum upholstery and carpets: Pay special attention to high‑traffic areas and spots where the dog might sleep or play.
- Clean under furniture: Dust and crumbs can accumulate here; use attachments for tight spaces.
3. Deep Clean Hard Floors
Mopping hardwood, tile, or laminate with a mild, pet‑safe cleaner removes grime that vacuuming cannot reach. Avoid harsh chemicals like bleach or ammonia, which can be harmful if ingested by your new dog.
4. Wash All Textiles
- Bedding: Launder all blankets, pillows, and rugs in hot water with a gentle detergent.
- Fabric walls & curtains: If removable, wash them or use a fabric cleaner spray.
- Use a pet‑friendly fragrance-free shampoo if you prefer to keep the scent neutral.
5. Deodorize the Air
- Ventilate: Open windows and doors for at least 30 minutes daily during the cleaning process.
- Use activated charcoal or baking soda: Place open containers in rooms to absorb odors.
- Aerosol sprays: Choose pet‑safe, unscented options like a mixture of water and vinegar (1:3 ratio) for quick spot cleaning.
6. Clean the Bathroom & Kitchen
These areas are high‑risk for mold growth. Scrub tile grout, clean sinks with a pet‑safe disinfectant, and wipe down countertops to eliminate any residual bacteria that could affect your dog’s health.
7. Pay Attention to Hidden Spaces
- Under beds & sofas: Vacuum or use a handheld vacuum to remove dust bunnies.
- Inside cabinets: Wipe surfaces and check for hidden mold spots.
- Air vents & ducts: Consider hiring a professional if you suspect significant buildup.
8. Maintain a Clean Routine After Arrival
Once your rescue dog is home, keep up with the cleaning schedule:
- Daily: Spot‑clean droppings and vomitus.
- Weekly: Vacuum all floors and wash bedding.
- Monthly: Deep clean carpets, mop floors, and refresh air filters.
Practical Tips for Long‑Term Success
- Use pet‑friendly cleaning products: Avoid essential oils or strong fragrances that can trigger allergies.
- Keep a “no‑go” zone: Designate an area where the dog is not allowed until you’re sure it’s safe and clean.
- Invest in a good air purifier: A unit with a HEPA filter can keep airborne dander at bay, improving indoor air quality for both you and your new companion.
By following these steps, you'll create a welcoming, healthy environment that helps your rescue dog settle into their new home comfortably and safely.
Creating Safe Zones for the New Dog
When you bring a rescue dog into your home, one of the first things to consider is how to give them a space where they can feel secure and calm. A well‑designed safe zone not only helps the dog adjust but also reduces stress for everyone in the household.
1. Choose a Quiet Corner
Select an area that’s away from high traffic, loud appliances, or constant foot traffic. Ideal spots include:
- A spare bedroom or a part of the living room with minimal windows.
- A dedicated crate in a low‑traffic hallway.
- Under a piece of furniture (like a couch) where the dog can tuck in.
2. Use Comforting Bedding and Familiar Smells
Provide a comfortable bed, blanket, or crate pad. If possible, bring an item that carries your scent—such as a worn t-shirt—or a piece of bedding from their previous home to ease the transition.
Practical Tip:
- Place a small, soft toy with a familiar scent inside the safe zone.
- If you’re using a crate, line it with a towel or a blanket that’s been in your apartment for a while.
3. Keep the Environment Predictable
A rescue dog often benefits from routine. Keep their safe zone consistent:
- Always put them in the same spot after meals, walks, or training sessions.
- Use a consistent cue (“Go to your place”) so they learn what’s expected.
4. Gradually Expand Their Territory
Start by allowing the dog to explore only their safe zone. Once they seem comfortable, gradually open up more areas of the house in short increments:
- Open one door at a time.
- Use positive reinforcement (treats, praise) each time they enter a new space.
5. Use Calming Aids When Needed
If your rescue shows signs of anxiety—whining, pacing, or trembling—you can add calming aids:
- Thundershirt or pressure wrap for gentle restraint.
- Feliway (for cats) or Adaptil diffusers designed for dogs.
- A white‑noise machine or soft background music to mask sudden sounds.
6. Monitor and Adjust
Observe how the dog reacts over the first week:
- If they seem stressed even in their safe zone, consider moving it to a quieter spot.
- Check for signs of discomfort—such as excessive licking or chewing—and address any environmental hazards (sharp objects, loose wires).
7. Involve the Whole Family
Make sure everyone in your household knows how to respect the safe zone:
- Never force the dog out of their space.
- Use a consistent tone and body language when approaching them.
- Encourage family members to give treats or praise from a distance until the dog is comfortable.
Sample Safe‑Zone Setup
Crate in Living Room:
- Crate placed on a soft rug, with a blanket and a favorite toy inside.
- A small shelf behind the crate holds treats for positive reinforcement.
- Door to the hallway left slightly ajar so the dog can see family members but not feel exposed.
By thoughtfully preparing a safe zone, you provide your rescue dog with a haven that promotes calmness, builds trust, and sets the stage for a smooth integration into your home.
Storage of Toxic Items and Hazardous Materials
A safe environment is essential when you’re bringing a rescue dog into your home. Dogs are naturally curious and may chew or ingest items that can be harmful. Proper storage of toxic substances not only protects your new companion but also reduces the risk of accidental poisoning for family members and pets.
Common Household Toxins to Watch For
- Pesticides & Insecticides: These often contain organophosphates or carbamates that can cause vomiting, diarrhea, seizures, or respiratory distress.
- Cleaning Products: Bleach, ammonia, and commercial degreasers may irritate a dog’s skin, eyes, and mucous membranes.
- Medications (Human & Veterinary): Pain relievers like ibuprofen or acetaminophen can be lethal to dogs even in small amounts.
- Plants: Certain houseplants (e.g., philodendron, sago palm) release toxins when ingested.
- Essential Oils & Aromatics: Some oils (peppermint, tea tree) can cause gastrointestinal upset or neurological symptoms in dogs.
Practical Storage Solutions
- Lockable Cabinets: Store all chemicals and medications in a child‑proof, lockable cabinet. Consider a dedicated “pet safe” shelf that’s out of reach but still accessible to you.
- High Shelving Units: Place items on the topmost shelves or use a hanging storage system so your dog cannot climb onto them.
- Clear Labeling: Use bold, high‑contrast labels and keep the text in both English and any other language spoken at home. Add pictograms of “Do Not Feed” for quick visual reference.
- Separate Storage Areas: If possible, dedicate a small closet or pantry exclusively for hazardous materials—ideally one that’s locked from the rest of the house.
- First‑Aid Kit Accessibility: Keep a pet‑specific first aid kit within easy reach but separate from toxic substances. Include items such as activated charcoal, gauze, and a copy of your vet’s emergency contact information.
Daily Habits to Reduce Risk
- Check the Floor: Sweep or vacuum daily to remove pet hair and debris that could carry chemical residues.
- Use Dog‑Friendly Cleaning Products: Opt for non‑toxic, biodegradable cleaners whenever possible.
- Secure Trash Bins: Use bins with secure lids; store them in a location inaccessible to the dog.
- Educate Household Members: Ensure everyone knows which items are hazardous and how to handle them safely around pets.
Emergency Response Checklist
- Stop the exposure immediately – remove the dog from the area.
- Check for symptoms: vomiting, drooling, lethargy, seizures.
- Call your veterinarian or an emergency pet poison hotline (e.g., ASPCA Animal Poison Control).
- Have the product container and label ready to provide the exact substance name and dosage.
- Follow professional instructions—do not induce vomiting unless advised.
By implementing these storage strategies and habits, you create a safe haven that allows your rescue dog to explore and thrive without the hidden dangers of everyday household toxins.
Setting Up Pet Areas and Bedding
Creating a comfortable, safe space for your new rescue dog is one of the first steps toward building trust and fostering positive habits. Below are detailed guidelines, practical examples, and actionable tips to help you set up dedicated areas that cater to your dog’s physical and emotional needs.
1. Choose the Right Location
- Quiet Corner: Pick a spot away from high-traffic zones like front doors, staircases, or living rooms where you’ll be actively socializing with your dog. A quiet corner helps reduce overstimulation.
- Temperature Control: Dogs are sensitive to temperature extremes. Avoid placing the bed near drafty windows or radiators that might cause overheating or chills.
- Flooring Considerations: Soft carpets or dog-friendly rugs provide cushioning, while hardwood or tile can be slippery—add non-slip pads if necessary.
2. Selecting the Ideal Bedding
Different breeds and individual preferences call for varied bedding options:
| Bedding Type | Best For | Key Features |
|---|---|---|
| Memory Foam Mat | Large breeds, joint pain, older dogs | Pressure‑relief, supportive core, removable cover |
| Orthopedic Dog Bed | All ages with arthritis or mobility issues | High-density foam, water‑resistant lining |
| Wheeled Sofa Bed | Active dogs, small spaces | Easy to move, cushioned seat, storage cavity for toys or treats |
| Soft Blanket | Small breeds, puppies, warm climates | Lightweight, easy to wash, cozy texture |
3. Establish a Routine for Bedding Placement
- Nighttime: Place the bed in a consistent location each night so your dog learns where to rest.
- Daytime: If you’re away for long periods, consider a “rest zone” with a padded mat or crate inside. This prevents wandering and reduces anxiety.
4. Introduce the Bedding Gradually
Rescue dogs may be wary of new textures. Use these steps to ease them into their new spot:
- Invite with Treats: Toss a few favorite treats onto the bedding and let your dog investigate.
- Use Familiar Scents: Place an item that smells like you (e.g., a t-shirt) on or near the bed.
- Positive Reinforcement: Praise loudly and offer gentle petting when they approach or lie down.
5. Keep Bedding Clean and Fresh
A clean bed reduces odor buildup, prevents skin irritations, and signals that the space is safe.
- Washable Covers: Opt for removable covers that can be machine washed every week or two.
- Deep Clean: Once a month, wash the entire bed (foam, pads, etc.) if it’s washable; otherwise, use a pet-safe disinfectant spray.
- Dry Thoroughly: Ensure no dampness remains to avoid mold or mildew—especially in humid climates.
6. Add Complementary Accessories
- Soft Pillow: Adds extra comfort for dogs who like to nest.
- Toy Storage Box: Keeps favorite toys within reach and helps maintain a tidy space.
- •Heat‑Retaining Blanket (Winter): For breeds with thin coats or older dogs that get cold easily.
7. Monitor Your Dog’s Comfort Level
Observe how your dog uses the space over the first few weeks:
- If they avoid it, try repositioning or a different bedding type.
- Signs of comfort include relaxed body language, slow blinking, and willingness to rest for extended periods.
Practical Checklist
- Select a quiet, temperature‑controlled location.
- Choose bedding that matches breed size and health needs.
- Introduce the bed with treats and positive reinforcement.
- Keep the bedding clean: wash covers weekly; deep clean monthly.
- Add accessories for extra comfort and organization.
- Observe and adjust as needed based on your dog’s behavior.
By thoughtfully setting up a dedicated pet area with appropriate bedding, you’re laying the foundation for a calm, secure environment that encourages healthy habits and strengthens the bond between you and your rescue dog.
Food, Water, and Feeding Routine Setup
When you bring a rescue dog into your home, establishing a consistent feeding routine is essential for their physical health, emotional stability, and overall integration into the household. Below are practical steps, examples, and tips to help you create an effective food and water plan.
1. Selecting Appropriate Dog Food
- Age & Life Stage: Puppies, adult dogs, and seniors have different nutritional needs. Look for labels that specify “Puppy,” “Adult,” or “Senior.”
- Breed Size: Small‑breed formulas often contain more calories per gram than large‑breed formulas because small dogs burn energy faster.
- Health History: If the rescue had medical issues (e.g., allergies, kidney disease), choose a prescription or hypoallergenic diet recommended by their vet.
- Ingredients: Prioritize high‑quality proteins (chicken, beef, fish) and limit fillers like corn, wheat, and soy.
Example: A 25‑lb mixed‑breed rescue that was a stray for years might benefit from a grain‑free kibble with added omega‑3 fatty acids to support skin health. If the dog shows signs of food intolerance, switch to a limited‑ingredient diet.
2. Creating a Consistent Feeding Schedule
- Morning Meal: Serve at the same time each day (e.g., 7 am). This helps regulate digestion and establishes routine.
- Evening Meal: Offer a second meal around 5–6 pm. Keep the portion size consistent with your vet’s recommendation.
- Water Availability: Provide fresh water at all times; refill the bowl every 2–3 hours, especially during hot weather.
Tip: Use a feeding schedule chart to track portions and monitor weight changes. Adjust portions gradually if the dog is gaining or losing too much weight.
3. Gradual Transition from Previous Diet
If you have access to the rescue’s current food, start a 7‑day transition:
- Day 1–2: Mix 75% old food with 25% new food.
- Day 3–4: Increase to 50/50.
- Day 5–7: Shift to 100% new food.
This reduces the risk of gastrointestinal upset and helps the dog acclimate to a new palate.
4. Choosing Feeding Tools and Setting the Environment
- Feeding Bowls: Stainless steel or ceramic bowls are easy to clean and less likely to harbor bacteria.
- Elevated Feeders: For large breeds or dogs with joint issues, an elevated feeder can reduce strain on the neck and back.
- Quiet Feeding Area: Place the bowls in a calm corner away from high traffic. This encourages focused eating and reduces anxiety.
Example: A rescue dog that was previously left outside may feel more secure with a shaded indoor feeding area, such as a corner near a window with soft lighting.
5. Monitoring and Making Adjustments
- Weight Checks: Weigh the dog weekly for the first month, then monthly thereafter.
- Body Condition Score (BCS): Use a 9‑point scale to assess fat cover. Aim for a BCS of 4–5 for most dogs.
- Behavioral Signs: Watch for signs of hunger (sniffing, whining) or fullness (turning away). Adjust portions accordingly.
When the dog stabilizes at a healthy weight and shows good appetite, you can discuss long‑term dietary plans with your vet, including any necessary supplements.
6. Quick Tips for New Dog Parents
- Label all food containers and keep the feeding schedule in a visible place.
- Use a timer or phone alarm to remind you of meal times.
- Never leave dry kibble on the floor; this can attract pests.
- If you’re traveling, bring a small bag of food and a travel bowl.
By carefully planning your dog’s feeding routine—considering diet choice, schedule consistency, transition strategies, and monitoring—you lay the foundation for a healthy, happy rescue dog that feels safe and loved in its new home.
Exercise Plans and Daily Routines
Once you’ve set up a safe, welcoming environment in your home, it’s time to think about the day‑to‑day activities that will keep your rescue dog healthy, happy, and well‑adjusted. A structured routine provides predictability—something many rescued dogs crave—and helps prevent boredom, anxiety, and destructive behaviors.
1. Start with a Baseline Walk Routine
- Morning Walk (15–20 minutes): A short stroll right after breakfast gives your dog a chance to relieve themselves, stretch their legs, and get some fresh air.
- Evening Walk (30–45 minutes): A longer walk after dinner helps burn excess energy and encourages better sleep at night. Adjust the length based on breed size, age, and health status.
2. Structured Playtime Sessions
Rescue dogs often need mental stimulation to curb anxiety. Incorporate both interactive and solo play sessions.
- Toy Rotation: Keep a small pool of toys (e.g., chew toys, puzzle feeders) and rotate them every few days to maintain interest.
- Puzzle Feeders: Use treat-dispensing puzzles during meal times. This slows eating, engages problem‑solving skills, and reduces the urge to chew on household items.
- Fetch & Tug (10–15 minutes): Short bursts of fetch or tug can satisfy a dog’s natural prey drive without exhausting them.
3. Training Sessions: 5‑Minute Daily “Brain Breaks”
Even a quick, focused training session reinforces good behavior and strengthens the human–dog bond.
- Basic Commands: Sit, stay, come, heel. Keep each command practice to 5 minutes.
- New Trick Introduction: Teach a new trick (e.g., roll over) every week. Use positive reinforcement and keep the session light.
- Desensitization Drills: If your dog shows fear of household noises, practice exposing them to low‑volume sounds while rewarding calmness.
4. Rest & Recovery Zones
A dedicated resting area reduces stress and signals “safe zone” for the dog.
- Choose a Quiet Corner: Place a comfortable bed or crate in a low‑traffic spot.
- Use Calming Aids: Consider a pheromone diffuser (Adaptil) or a calming music playlist tailored for dogs.
- Limit Overnight Disturbances: Keep the dog’s sleeping area away from high-traffic areas like living rooms and bedrooms.
5. Gradual Socialization Schedule
Rescue dogs often need gentle exposure to new people, pets, and environments.
- Day 1–7: Familiar Faces Only: Allow visits from close family members and friends who understand the dog’s temperament.
- Week 2–4: Controlled Outdoor Walks: Introduce new routes, occasional parks, or a neighbor’s yard—always with supervision.
- After Month 1: Group Activities: Once your dog is comfortable, consider low‑density group classes (e.g., “Doggy Playdate” events) to build confidence.
6. Monitor and Adjust
Keep a simple log of walks, playtime, training sessions, and any signs of stress or health issues. This record helps you spot patterns and adjust the routine as your dog grows.
“Consistency is key for rescue dogs. A predictable schedule not only reduces anxiety but also builds trust between you and your new companion.” – Dr. Jane Smith, Veterinary Behaviorist
Training Tools and Resources
Preparing your home for a rescue dog is more than just cleaning up; it’s about creating an environment that promotes safety, comfort, and smooth learning. Below are essential tools, resources, and practical tips to help you set the stage for success.
1. Essential Training Tools
- Clicker: A small handheld device that produces a consistent click sound. It’s great for marking desired behavior instantly.
- Reward Treats: Small, soft treats (e.g., freeze-dried liver or commercial training biscuits) that the dog can finish quickly and that have high motivational value.
- Leash & Collar/Harness: A sturdy leash (4–6 ft) and a comfortable collar or harness for controlled walks and indoor training sessions.
- Training Pads & Crate: For housebreaking and creating a safe “home base.” Choose pads that fit your space and a crate size that allows the dog to stand, turn around, and lie down comfortably.
- Interactive Toys (e.g., Kongs, puzzle feeders): Stimulate mental engagement and reduce anxiety during downtime.
2. Home Safety Checklist
- Remove Hazards: Secure loose wires, remove toxic plants (e.g., lilies), and store cleaning supplies in child‑proof cabinets.
- Create a “Safe Zone”: Set up a crate or a small room with the dog’s bed, water bowl, toys, and a familiar blanket. This area should be free of distractions for the first few days.
- Secure Perimeter: Use baby gates to block off stairs or rooms that might be unsafe for a nervous pup.
- Temperature Control: Keep the house at a comfortable temperature (70–75°F). Avoid hot floors, especially during summer.
3. Establishing Routines Early
Rescue dogs thrive on predictability. Here’s how to set up a simple daily routine:
| Time | Activity |
|---|---|
| Morning (7:00 AM) | Potty break outside + short walk (10–15 min) |
| Mid‑morning (9:30 AM) | Training session (5–10 min) + treat reward |
| Noon (12:00 PM) | Meal time + bathroom break |
| Afternoon (3:00 PM) | Playtime or gentle exercise + crate rest |
| Evening (6:30 PM) | Long walk (15–20 min) + dinner |
| Night (8:00 PM) | Quiet time in safe zone, bedtime routine |
4. Practical Training Tips for the First Week
- Use Positive Reinforcement: Reward every successful attempt—whether it’s stepping into the crate or staying calm during a door opening.
- Keep Sessions Short: Aim for 5–10 minute sessions, 2–3 times per day. Over‑training can lead to frustration.
- Introduce Commands Gradually: Start with “Sit” and “Stay.” Use the clicker + treat to mark each correct response.
- Practice Desensitization: If your dog is scared of loud noises, play recorded traffic or fireworks at low volume while offering treats. Increase volume gradually over days.
- Monitor Body Language: Look for signs of stress—panting, lip licking, tail tucked—and give the dog a break before attempting further training.
5. Recommended Resources
- Dog Training Zone – Comprehensive videos on basic commands and crate training.
- The Kennel Club – Rescue Resources – Articles on adjusting to rescue dogs and behavior tips.
- Amazon – Training Tools (Clicker, Treats, Crates) – User reviews help you choose the best items for your dog’s size and temperament.
- YouTube: “Housebreaking a Rescue Dog” – Step‑by‑step visual guide.
- Local veterinary clinics often have handouts on first‑week care and can recommend reputable trainers in your area.
By combining these tools, safety measures, routines, and resources, you’ll lay a solid foundation for your rescue dog’s successful transition into your home. Remember, patience and consistency are key—every small step forward builds confidence and strengthens the bond between you and your new companion.
Healthcare Preparations: Vet Visits & Vaccinations
Once your rescue dog arrives, the first thing on your list should be a comprehensive vet check‑up. This not only ensures that your new companion is healthy but also gives you a baseline for future care.
1. Scheduling the Initial Vet Visit
- Timing: Ideally within the first week, but no later than 14 days after adoption to catch any early health issues.
- What to Bring: Adoption paperwork, vaccination records (if available), a list of medications you’re currently giving the dog, and a small sample of their food.
2. Core Vaccinations for Rescue Dogs
Rescue dogs often come with incomplete vaccination histories. Your vet will likely recommend the following core shots:
- Dog Distemper, Adenovirus (Canine Hepatitis), Parvovirus & Parainfluenza – commonly combined into a single DAPP or DA2P vaccine.
- Rabies – required by law in most states; the timing depends on local regulations and the dog's age.
- Bordetella (Kennel Cough) – especially important if the dog will be housed with other pets or visit kennels.
3. Non‑Core Vaccinations & Preventatives
Depending on your location, lifestyle, and the dog's exposure risk:
- Lyme Disease (Borrelia burgdorferi) – in tick‑prone areas.
- Piroplasmosis & Anaplasma – in regions with high tick prevalence.
- Canine Influenza – if the dog will be around other dogs or attend training classes.
- Heartworm Prevention – start monthly chewable or topical treatment immediately after vet visit.
- Flea & Tick Control – discuss spot‑on treatments, collars, and oral medications.
4. Routine Health Checks & Screening Tests
Beyond vaccinations, a thorough exam should include:
- Weight & Body Condition Score (BCS) – establish baseline to monitor future weight changes.
- Dental Examination – many rescue dogs have poor dental hygiene; early cleaning can prevent systemic disease.
- Bloodwork – CBC, chemistry panel, and thyroid testing (especially for older or larger breeds).
- Parasite Screening – fecal exams for internal parasites like roundworms and hookworms.
5. Creating a Home‑Friendly Environment for Medical Care
Your living space should support the dog’s health routine:
- Designated Vet Visit Area – a calm, quiet corner with a small crate or carrier that feels safe.
- Medication Storage – keep all meds in an airtight container at a consistent temperature; use child‑proof locks if necessary.
- Exercise & Play Zones – separate areas for walks, playtime, and rest to reduce stress during recovery periods.
6. Practical Tips for Ongoing Health Management
- Set a Calendar Reminder: Use your phone or an online calendar to track upcoming vaccinations, heartworm prevention doses, and vet appointments.
- Keep a Vet Logbook: Record all visits, medications administered, and any health concerns. This will be invaluable for future veterinarians.
- Monitor Daily Behavior: Watch for changes in appetite, energy level, or bathroom habits; report these to your vet promptly.
- Educate Family Members: Ensure everyone knows how to handle the dog during a medical visit and how to administer medications safely.
7. Sample Timeline for Your First Year
| Month | Action |
|---|---|
| Week 1–2 | Initial vet visit & core vaccinations. |
| Month 2 | First round of heartworm preventive; discuss diet and exercise plan. |
| Month 3–4 | Follow‑up bloodwork if indicated; start dental cleaning if needed. |
| Month 6 | Annual physical exam & vaccination booster. |
| Year 1 End | Comprehensive health review and update preventive care plan. |
By combining a proactive vet schedule with a thoughtfully prepared home environment, you’ll give your rescue dog the healthiest, happiest start possible. Remember, every dog is unique—always tailor these recommendations to your pet’s specific breed, age, and medical history.
Introducing the Rescue Dog to Family Members
A rescue dog’s first days in a new home are crucial for building trust and establishing healthy habits. When you introduce your new companion to each family member, aim for calm, consistency, and positive reinforcement.
- Start with the child who will share the most time. Let them gently pet the dog while you supervise. Use a soft voice and encourage slow, deliberate movements.
- Use “time‑outs” for anxious or overly excited reactions. If the dog shows signs of stress (cowering, growling softly), calmly guide everyone to step back and give the pup space.
- Teach a simple cue like “sit.” This helps the dog feel safe and gives you a tool for managing interactions.
Practical Tips for a Smooth Introduction
- Keep the first meeting short (5–10 minutes). Overloading the pup with people at once can be overwhelming. Gradually add more family members as the dog settles.
- Use treats and praise. Reward calm behavior during each interaction. This reinforces that being around humans is a positive experience.
- Maintain routine. Feed, walk, and play at the same times every day. Predictability reduces anxiety for both dog and family members.
- Assign “dog‑time” responsibilities. Let each person take turns feeding or walking. This builds ownership and helps them bond with the rescue.
Preparing Your Home for a Rescue Dog
A well-prepared environment eases transition pains. Below are essential steps to create a safe, welcoming space:
- Designate a quiet zone. Choose a corner or room with minimal foot traffic where the dog can retreat when overwhelmed.
- Secure loose wires and toxic plants. Hide or cover electrical cords; keep herbs like philodendron, foxglove, or rhododendron out of reach.
- Create a bedding area. Place a comfortable crate or dog bed with familiar blankets. The scent of home can calm nerves.
- Install baby gates or pet doors. Control the dog’s access to certain rooms until you’re confident in their behavior.
By combining patient introductions with a thoughtfully prepared home, your rescue dog will feel secure and loved—setting the stage for a lifelong bond.
Conclusion and Next Steps
Adopting a rescue dog is more than a decision—it’s a lifelong commitment to love, care, and patience. By thoroughly preparing your home, you give the new family member a smooth transition that lays the groundwork for a strong bond built on trust and security.
- Safety first: Keep hazardous items out of reach—clean up loose wires, secure heavy furniture, and double‑check that all doors and windows lock properly.
- Consistency matters: Dogs thrive on routine. Even a simple daily schedule for meals, walks, and bedtime helps the pup feel confident in its new environment.
- Patience is key: Expect an adjustment period. Your rescue may need time to acclimate to new smells, sounds, and family members—give them space while maintaining gentle boundaries.
By investing the effort now, you reduce stress for both your dog and yourself, creating a harmonious home that supports healthy behavior and emotional well‑being. The journey begins with preparation; it continues through training, socialization, and ongoing care.
- Dog‑proof your space:
- Remove or secure loose cords, electrical outlets, and any small objects that could be swallowed.
- Place non-slip mats in high‑traffic areas to prevent accidents.
- Store medications, cleaning supplies, and sharp tools out of reach.
- Create a safe zone:
- Select a quiet corner or room where the dog can retreat during stressful moments.
- Provide a comfortable bed, blankets, and toys that help them feel secure.
- Keep this area free of loud appliances or heavy foot traffic.
- Set up essential supplies:
- Purchase a high‑quality collar with an ID tag and a sturdy leash.
- Stock up on dog food, treats, waste bags, and a first‑aid kit tailored for pets.
- Consider a crate if you plan to use crate training—make it cozy but not restrictive.
- Plan an introduction routine:
- Schedule the first visit during calm hours of the day.
- Keep introductions short and positive, using gentle voices and slow movements.
- Introduce family members one at a time, allowing the dog to observe without feeling overwhelmed.
- Prepare for training and socialization:
- Set aside 10–15 minutes daily for basic commands such as “sit,” “stay,” and “come.”
- Enroll in a beginner obedience class if possible; group settings help with social learning.
- Gradually expose the dog to new environments—parks, busy streets, or neighbor homes—to build confidence.
- Arrange veterinary care:
- Schedule a comprehensive health checkup within 48 hours of adoption.
- Discuss vaccination schedules, parasite prevention, and any special dietary needs.
- Keep a record of all medical visits, medications, and microchip information for future reference.
- Establish ongoing support:
- Join local rescue or dog‑owner groups to share experiences and resources.
- Set up a routine of regular vet visits, grooming sessions, and mental enrichment activities.
- Stay flexible—every dog is unique; adjust your plans as you learn what works best for your new companion.
By following these steps, you create a welcoming environment that eases the rescue dog's transition and sets both of you up for a rewarding, long‑term relationship. The next phase is all about building trust through consistent care, gentle training, and plenty of love.
FAQ
Bringing a rescue dog into your life is an exciting yet demanding step. The environment you create in your home will set the tone for how quickly and comfortably your new companion adapts. Below are practical steps, real‑world examples, and expert tips to help you transform your living space into a welcoming, safe haven.
1. Declutter & Secure Your Living Space
- Remove hazards: Keep breakable items, cords, and small objects out of reach. Use child‑proof locks on cabinets that might contain toxic cleaners or medications.
- Create a safe zone: Designate a quiet corner with a soft bed, blankets, and some chew toys. This area will serve as the dog’s “safe haven” during stressful moments.
2. Choose Dog‑Friendly Furniture & Décor
- Durable fabrics: Opt for stain‑resistant and easy‑to‑wipe materials like leather, microfiber, or canvas for sofas and chairs.
- Dog beds & mats: Place a comfortable dog bed in a low‑traffic area. Consider orthopedic options if the rescue has joint issues.
3. Set Up a Structured Feeding Area
A consistent feeding routine helps reduce anxiety and establishes boundaries.
- Separate bowls: Use separate food and water bowls to avoid territorial disputes if you have multiple pets.
- Elevated platforms: For larger breeds or dogs with mobility issues, an elevated feeding station can reduce strain on joints.
4. Establish a Routine Schedule
Rescue dogs thrive on predictability. Here’s a sample daily routine you can adapt to your lifestyle:
| Time | Activity |
|---|---|
| 6:30 AM | Morning walk & bathroom break |
| 7:00 AM | Breakfast in the feeding area |
| 8:00 AM | Quiet time/bedtime for dog |
| 12:30 PM | Midday walk or play session |
| 6:00 PM | Dinner & evening walk |
| 9:00 PM | Bedtime routine (treats, calm music) |
5. Introduce a Gradual Transition Plan
A rescue dog may feel overwhelmed by a new environment. Use these tactics to ease the transition:
- Start with short visits: Keep initial home visits brief (10–15 minutes) and gradually increase duration.
- Use familiar scents: Place a blanket or towel from their previous shelter in the new home to provide comfort.
- Limit exposure to loud noises: Keep TVs, music, and doorbells at a moderate volume during the first few days.
6. Prepare for Training & Socialization
Training is essential not only for obedience but also for safety. Here’s how to set up an effective training environment:
- Choose a quiet room or backyard patch: This space should be free from distractions.
- Use positive reinforcement: Reward-based clicker training helps build trust quickly.
- Schedule short, frequent sessions: 5–10 minute intervals work best for new dogs with limited attention spans.
7. Keep Emergency Supplies on Hand
In case of accidents or sudden illnesses, be prepared with the following items:
- First‑aid kit tailored for pets (bandages, tweezers, antiseptic wipes)
- Copies of veterinary records and any known medical history
- A recent photo of your dog for identification in case they get lost
8. Encourage Socialization Gradually
Rescue dogs often need exposure to other people, animals, and environments.
- Controlled visits: Invite one or two trusted friends for short play sessions.
- Dog parks & community events: Once your dog demonstrates basic obedience, introduce them to a local park with other dogs on leashes.
- Use “doggy daycares” or professional trainers for structured socialization if needed.
9. Maintain Consistent Communication with Your Shelter
If you adopted through a rescue organization, keep in touch about any health changes or behavioral concerns. They may offer ongoing support or resources.
10. Celebrate Milestones!
Set small goals—like mastering “sit,” completing a 5‑minute walk without pulling, or learning to stay calm during a thunderstorm—and celebrate with treats, praise, and extra playtime. This reinforces positive behavior and strengthens the bond.
By thoughtfully preparing your home, you give your rescue dog the best chance for a smooth transition, healthy habits, and a lifetime of companionship.
Categories
- AI & Enrichment Play
- Broiler Farming
- Broiler Farming Tips
- Canine Wellness & Longevity
- Cat
- Cat & Human Connection
- Cat Adoption & Rescue
- Cat Breeds
- Cat Breeds & Personalities
- Cat Care & Health
- Cat Grooming & Hygiene
- Cat Lifestyle & Environment
- Cat Myths & History
- Cat Nutrition & Diet
- Cat Products & Reviews
- Cat Training & Behavior
- Comparison
- Consumer Awareness
- Dog
- Dog Accessories & Products
- Dog Adoption & Rescue
- Dog Breed & Lifestyle Trends
- Dog Breeding & Puppies
- Dog Entertainment & Media
- Dog Fashion & Trends
- Dog Fun & Lifestyle
- Dog Grooming & Hygiene
- Dog History & Culture
- Dog Myths, Science & Future Tech
- Dog News & Trends
- Dog Nutrition & Food
- Dog Psychology & Emotions
- Dog Safety & Security
- Dog Sports & Activities
- Dog Technology & Innovation
- Dog Training for Modern Owners
- Dog Travel & Adventure
- Dog Travel, Adventure & Culture
- Economic and Market Insights
- Educational Content
- FAQs
- Feeding Alternatives
- Festivals & Seasonal Ideas
- Fun & Entertainment
- General Knowledge
- General Pig Farming
- Health & Disease Management
- Housing and Environment
- Kittens
- Market Insights
- Miscellaneous
- Miscellaneous
- Motivational
- pig
- Pig Breeding
- Pig Breeds
- Pig Farming Stories and Inspiration
- Pig Health and Care
- Pig Nutrition
- Pig Products
- Profitability & Business
- Puppy Care
- Puppy Predictable Topics Reinvented
- Regional Focus
- Rescue & Adoption Buzz
- Senior Cats
- Senior Dog Care
- Smart Dog Tech & Gadgets
- Sustainability
- Sustainable & Eco-Friendly Dog Products
- Tech & Innovations
- Working & Service Dogs
- Broiler Feed66 products
- Country Feed33 products
- Pig Feed66 products
- Product22 products
- Raw Materials99 products
Products
-
 Fish Meal
₹1,999.00 – ₹2,999.00Price range: ₹1,999.00 through ₹2,999.00Rated 0 out of 5
Fish Meal
₹1,999.00 – ₹2,999.00Price range: ₹1,999.00 through ₹2,999.00Rated 0 out of 5 -
 FATTENING BROILER FEED
₹2,299.00 – ₹2,349.00Price range: ₹2,299.00 through ₹2,349.00Rated 0 out of 5
FATTENING BROILER FEED
₹2,299.00 – ₹2,349.00Price range: ₹2,299.00 through ₹2,349.00Rated 0 out of 5 -
 LAYER COUNTRY FEED
₹1,549.00 – ₹1,649.00Price range: ₹1,549.00 through ₹1,649.00Rated 0 out of 5
LAYER COUNTRY FEED
₹1,549.00 – ₹1,649.00Price range: ₹1,549.00 through ₹1,649.00Rated 0 out of 5 -
 COUNTER BROILER FEED
₹1,199.00 – ₹1,299.00Price range: ₹1,199.00 through ₹1,299.00Rated 0 out of 5
COUNTER BROILER FEED
₹1,199.00 – ₹1,299.00Price range: ₹1,199.00 through ₹1,299.00Rated 0 out of 5 -
 LACTATING PIG FEED
Rated 0 out of 5
LACTATING PIG FEED
Rated 0 out of 5₹2,299.00Original price was: ₹2,299.00.₹1,740.00Current price is: ₹1,740.00. -
 Maize
Rated 0 out of 5
Maize
Rated 0 out of 5₹1,650.00Original price was: ₹1,650.00.₹1,300.00Current price is: ₹1,300.00. -
 GESTATION PIG FEED (Phase 1)
Rated 0 out of 5
GESTATION PIG FEED (Phase 1)
Rated 0 out of 5₹2,249.00Original price was: ₹2,249.00.₹1,699.00Current price is: ₹1,699.00. -
 Pre Starter Broiler Feed
₹2,399.00 – ₹2,499.00Price range: ₹2,399.00 through ₹2,499.00Rated 0 out of 5
Pre Starter Broiler Feed
₹2,399.00 – ₹2,499.00Price range: ₹2,399.00 through ₹2,499.00Rated 0 out of 5 -
 FINISHER PIG FEED
Rated 0 out of 5
FINISHER PIG FEED
Rated 0 out of 5₹2,299.00Original price was: ₹2,299.00.₹1,749.00Current price is: ₹1,749.00. -
 Broiler Premix
Rated 0 out of 5
Broiler Premix
Rated 0 out of 5₹820.00Original price was: ₹820.00.₹699.00Current price is: ₹699.00.