
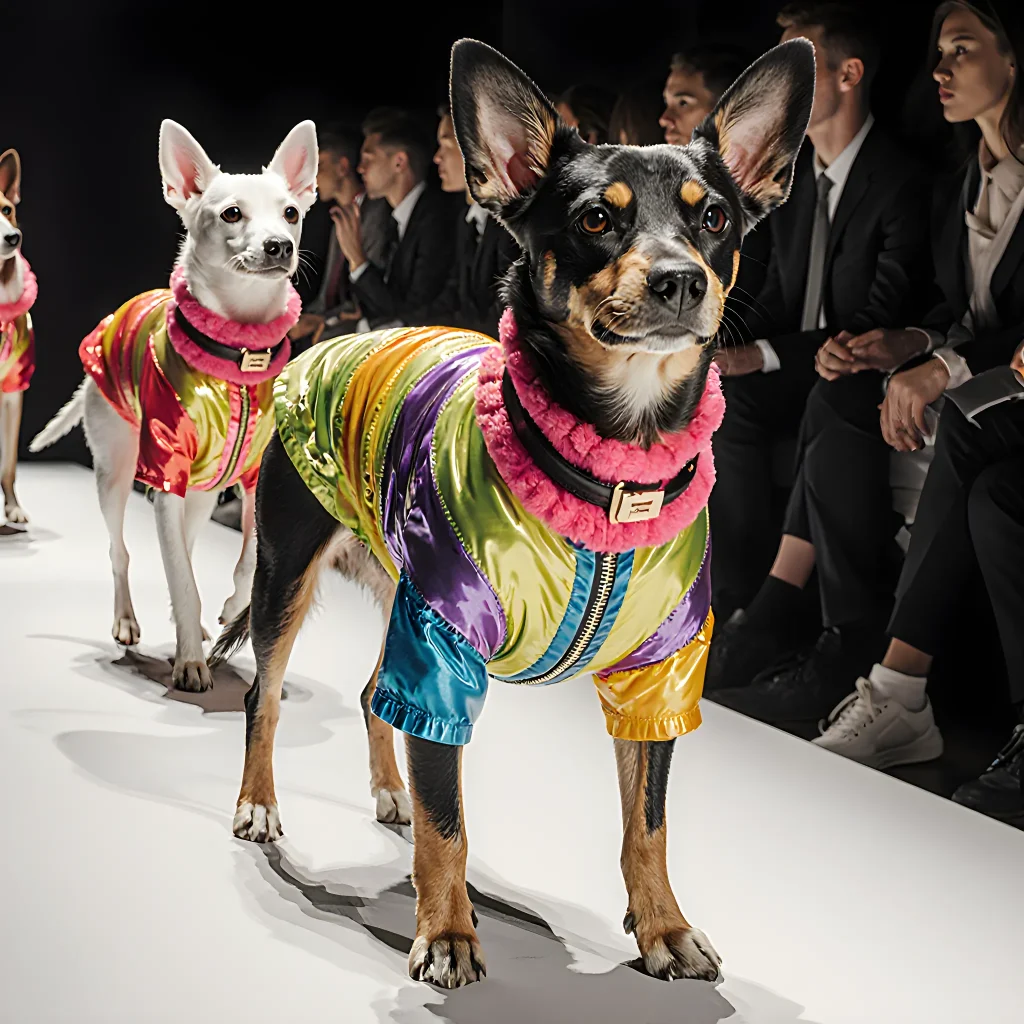
Stitch Up Your Dog’s Style
Canine Couture Craze: Sew Stunning Styles Now
Table of Contents
- Introduction
- Choosing the Right Fabric for Your Dog
- Measuring Your Canine Companion
- Basic Sewing Tools Every DIYer Needs
- Simple Sweater Design for Small Breeds
- Coat Ideas for Medium-Sized Dogs
- Raincoat Construction for All Sizes
- Adding Decorative Elements (Collars, Bowties, etc.)
- Safety Tips: Avoiding Sharp Edges and Loose Parts
- Color Coordination with Your Dog’s Coat
- Seasonal Outfit Variations (Summer vs. Winter)
- Maintenance: Washing and Storage of DIY Outfits
- Troubleshooting Common Sewing Issues
- Conclusion
- FAQ
Introduction
If you’re a pet parent who loves keeping your four‑legged friend stylish and comfortable, the idea of creating custom outfits from scratch can feel both exciting and daunting. Fortunately, with a few basic supplies and a little creativity, you can turn everyday fabrics into fashionable attire that’s tailored to your dog’s unique shape and personality.
Why DIY Over Store‑Bought?
- Fit is everything: Dogs come in all shapes—some have long backs, others are short‑legged. Ready‑made garments often feel too loose or too tight. By measuring your pup yourself, you can cut pieces that hug the body without restricting movement.
- Cost savings: A yard of inexpensive cotton or canvas can yield multiple outfits—think jackets, vests, and even seasonal accessories—at a fraction of retail prices.
- Personalization: Add your dog’s name in embroidery, choose colors that match their fur pattern, or incorporate fun motifs (bones, paw prints, or cartoon characters).
Essential Supplies You’ll Need
| Item | Why It Matters |
|---|---|
| Fabric (cotton, canvas, fleece) | Soft, breathable, and durable for active dogs. |
| Linen or measuring tape | Accurate measurements ensure a snug fit. |
| Sewing machine or needle & thread (heavy‑weight cotton thread) | Strong stitching keeps the garment intact during play. |
| Scissors, rotary cutter | Clean cuts reduce fraying and uneven edges. |
| Pattern paper or printable patterns | Helps layout pieces before cutting. |
| Zippers, Velcro, snap buttons | Easy closures for quick dressing and removal. |
| Add decorative flair without compromising comfort. |
Step‑by‑Step: Making a Simple Dog Vest
- Measure: Wrap the tape around your dog’s chest (just behind the front legs) and neck. Add an extra inch for seam allowance. Measure from the base of the ears to the base of the tail for length.
- Create a pattern: Draw a rectangle on paper using the chest width plus seam allowances, then add a small “U” shape at one end for the neck opening. Cut out the template.
- Cut fabric: Lay the pattern flat on your chosen material and trace around it. Cut two identical pieces—one for the front, one for the back.
- Sew seams: Join the sides of the front and back pieces with a straight stitch, leaving the neck and tail openings free.
- Add closures: Attach Velcro strips along the side seam or a zipper at the front for easy on/off. Make sure any fasteners are securely sewn to avoid snagging.
- Finish edges: Hem the raw edges with a zig‑zag stitch or by folding and stitching twice to prevent fraying.
- Decorate: Embroider your dog’s name on one side, add a paw print patch, or paint a simple pattern. Keep embellishments away from seams that might pull when the dog moves.
Practical Tips for Comfort and Safety
- Ventilation: Use breathable fabrics and avoid covering the chest too tightly—dogs breathe through their mouths.
- No loose parts: Remove any buttons or zippers that could detach and become choking hazards. If you need them, reinforce with double stitching.
- Test fit: Let your dog wear the vest for short periods initially to gauge comfort. Adjust if it feels restrictive around the hips or tail area.
- Seasonal variations: For winter, use thicker fleece; for summer, opt for light cotton or muslin. Add reflective strips for nighttime walks.
Beyond Vests: Expanding Your DIY Line
Once you’re comfortable with a basic vest, try these projects to diversify your dog’s wardrobe:
- Raincoat: A waterproof canvas jacket with Velcro pockets for treats.
- Bow‑tie or collar set: Coordinate the color of the collar with the outfit; add a decorative band.
- Bandana: Simple triangle cut, sewn together with a small button or elastic loop.
- Custom slippers: Soft felt soles for indoor paw protection.
Remember that every dog is different—experiment with sizes, fabrics, and styles until you find what works best. With practice, you’ll create outfits that not only look great but also keep your companion comfortable, safe, and proudly stylish on all walks of life.
Choosing the Right Fabric for Your Dog
If you’re embarking on a DIY dog fashion project, selecting the proper fabric is as crucial as picking the right pattern. A wrong material can lead to discomfort, allergic reactions, or even damage to your pet’s skin and coat. Below we break down key considerations, common fabrics, practical tips, and real‑world examples to help you make an informed choice.
1. Understand Your Dog’s Skin & Coat Needs
- Skin Sensitivity: Dogs with thin or sensitive skin (e.g., Bichon Frise, Cocker Spaniel) require fabrics that are breathable and non‑irritating.
- Coat Type: A double‑coated dog like a Siberian Husky may need extra insulation. Conversely, a short‑haired breed such as a Greyhound benefits from lightweight materials.
- Allergies & Conditions: If your dog has dermatological issues (eczema, hot spots), choose hypoallergenic fabrics and avoid synthetic blends that trap heat.
2. Fabric Categories & Their Benefits
| Fabric Type | Pros | Cons | Best For |
|---|---|---|---|
| Cotton (100% or cotton blends) | Soft, breathable, washable. | Can wrinkle; may not hold shape well in wet conditions. | Day‑time outfits, summer jackets. |
| Linen | Excellent breathability, lightweight. | Wrinkles easily; less durable than cotton. | Hot climates, casual collars. |
| Fleece (polyester) | Warm, plush, retains shape. | Can feel stiff initially; prone to pilling over time. | Winter coats, padded harnesses. |
| Wool blends (e.g., merino + polyester) | Excellent insulation, moisture‑wicking. | May feel itchy for some dogs; requires careful washing. | Cold weather jackets, stylish vests. |
| Polyester / Nylon | Durable, water‑repellent, easy to clean. | Can be less breathable; may cause overheating in hot climates. | Raincoats, outdoor gear. |
| Bamboo / Modal | Soft, anti‑bacterial, eco‑friendly. | Less common; higher price point. | Luxury sweaters, hypoallergenic collars. |
3. Practical Testing: The “Touch Test”
Before committing to a large fabric swatch, test it on your dog’s skin:
- Place a small piece of the fabric against a sensitive area (e.g., inside ear or belly).
- Observe for redness, itching, or irritation after 24 hours.
- If no reaction occurs, proceed to the next step; if irritation appears, choose an alternative material.
4. DIY Project Example: A Summer Cotton T-Shirt Vest
Materials:
- 100% cotton muslin (2 yards)
- Cordurox or canvas for the collar and sleeves (optional)
- Sewing machine, thread, needles
- Velcro fasteners or snap buttons
Step‑by‑step:
- Cut the muslin into a front and back panel using your dog’s measurements.
- Sew shoulder seams, leaving openings for the collar and sleeves.
- Add a lightweight collar from cordurox; attach with Velcro to keep it in place.
- Use snap buttons at the front to allow quick removal.
This simple design keeps your dog cool while being easy to put on and remove. The cotton fabric ensures breathability, making it ideal for hot days.
5. Maintenance & Care Tips
- Wash Cycle: Use a gentle cycle with mild detergent. Avoid bleach or harsh chemicals that can degrade fibers.
- Drying: Air‑dry whenever possible to prevent shrinkage. If using a dryer, choose low heat and remove promptly.
- Smoothing: For cotton or linen garments, steam lightly after washing to reduce wrinkles.
6. Safety & Comfort Checklist
Before finalizing your DIY outfit, run through this quick checklist:
- No loose threads or seams that could pull on the dog’s skin.
- Fasteners are secure but not overly tight; you should be able to slip a finger between the fastener and the dog’s body.
- The garment allows full range of motion (no restrictions on walking, jumping).
By carefully selecting the right fabric and following these guidelines, you’ll create stylish, functional, and comfortable outfits that your dog will love—and you’ll enjoy the satisfaction of a truly custom DIY project.
Measuring Your Canine Companion
Accurate measurements are the foundation of a comfortable, stylish dog outfit. Whether you’re crafting a cozy hoodie for winter or a breezy dress for summer, start with precise body dimensions to avoid ill-fitting garments that can cause discomfort or restrict movement.
Tools You’ll Need
- Flexible measuring tape: A soft, retractable tape is ideal for taking measurements around curves.
- Sharp scissors: Keep the tape clean and free of frayed edges.
- Notebook or digital device: Record each measurement as you go to avoid confusion later.
Key Measurements for DIY Dog Fashion
- Chest (Bust) Width: Measure from the base of the front legs, just behind the elbows, around the widest part of the chest. This determines how wide the garment’s body will be.
- Neck Circumference: Wrap the tape snugly around the neck at the point where you’d normally place a collar. Add 1–2 cm for ease if you want a looser fit or to allow room for a collar inside the garment.
- Body Length (from Neck to Tail Base): Measure along the spine from just below the ears down to where the tail begins. This length will guide how long the body of your outfit should be.
- Back Width: From the top of the shoulder to the base of the tail, this helps you decide on sleeve or armhole width if your design includes sleeves.
- Leg Circumference (Front and Hind): Measure around the widest part of each leg. For short-legged breeds, a single measurement may suffice; for long-legged dogs, you might need separate front and hind measurements to avoid excess fabric in the paws.
Step‑by‑Step Measuring Guide
1. Calming Your Dog: A relaxed dog takes easier measurements. Use treats, a calm voice, and gentle handling.
2. Neck Measurement: Place the tape snugly around the neck, ensuring it’s level. Record the length. If you’re planning to add a collar inside, note that extra 1–2 cm.
3. Chest Width: With your dog in a natural stance, measure across the chest just behind the elbows. This will be the width of the garment’s front panel.
4. Body Length: Starting at the base of the ears (or where you want the neckline to sit), run the tape down the spine to the tail base.
5. Leg Circumference: Wrap around each leg at its widest point. If your design includes sleeves, measure the front and hind legs separately; otherwise, use the larger of the two for a universal fit.
Practical Tips & Common Pitfalls
- Always add a little extra: For stretchy fabrics or when you’re unsure, give an additional 2–5 mm on each side. This prevents the outfit from feeling tight.
- Check for symmetry: If measurements differ significantly between left and right sides (e.g., chest width), double‑check to avoid asymmetrical garments.
- Use a ruler for accuracy: After taking a measurement, lay the tape flat on a ruler or measuring stick to confirm the exact number before recording.
- Re-measure after a bath: Moisture can cause slight swelling; if your dog has been recently bathed, re‑measure to ensure precision.
Example: Making a Cozy Hoodie for a Medium‑Sized Dog
Suppose you measured the following:
- Chest width: 45 cm
- Body length: 30 cm
- Neck circumference: 25 cm (add 2 cm for collar)
- Front leg circumference: 12 cm
Using a knit fabric, you’d cut the hoodie body at 45 cm wide and 30 cm long. Add a 5‑cm neck opening (25 + 2 + 3 for seam allowance). For sleeves, cut two pieces 12 cm in circumference and 20 cm long. Sew the front and back panels together, attach sleeves, and finish edges with a bias tape or elastic cuff.
Why Accurate Measurements Matter
A well‑fitted outfit allows your dog to move freely, reduces chafing, and ensures that decorative elements like collars or embroidery stay in place. It also gives you confidence that the final product will look polished—just like a ready‑made garment from a boutique.
Final Checklist Before Cutting
- Verify all measurements on paper.
- Confirm fabric type and stretchiness.
- Add seam allowances (typically 1–2 cm).
- Create a pattern or template if you’re working with complex shapes.
- Mark any placement of pockets, zippers, or decorative trim.
With these measurements in hand and a clear plan, you’re ready to start cutting and sewing. In the next section, we’ll walk through pattern drafting and fabric selection for your DIY dog fashion project.
Basic Sewing Tools Every DIYer Needs
If you’re venturing into the world of dog fashion—making collars, sweaters, and custom outfits for your furry friend—you’ll find that a solid set of sewing tools is just as essential as high‑quality fabric. Below we break down each tool, explain why it matters, give real‑world examples, and share practical tips to help you get the most out of every piece.
1. Scissors (Fabric & Utility)
- Fabric scissors have a curved blade that cuts cleanly through fabric without fraying edges—crucial when working with delicate materials like chiffon or fleece.
- Utility scissors are sharp and versatile, great for trimming thread, cutting out pattern pieces, or handling heavier fabrics such as canvas or denim.
Practical tip: Keep a pair of fabric scissors in your pocket for on‑the‑go adjustments. Replace blades every 6–12 months to maintain a clean cut and prevent ragged edges that can irritate a dog's skin.
2. Rotary Cutter & Cutting Mat
- A rotary cutter offers precise, straight cuts—especially useful for long pieces like dog coats or leggings.
- Pair it with a self‑healing cutting mat to protect surfaces and keep the blade in good shape.
Example: When creating a fitted sweater, use the rotary cutter to cut two identical sleeve shapes from a stretch knit. The straight edge ensures both sleeves match perfectly.
3. Seam Ripper
- A seam ripper is essential for correcting mistakes without damaging fabric.
- Select one with a comfortable grip and a sharp, flexible blade that can reach tight seams around a dog’s neck or limbs.
Practical tip: Keep the seam ripper in a small pouch on your sewing kit so you can quickly fix an uneven stitch without rummaging for a needle.
4. Thread, Needles & Thimble
- Thread: Choose a strong polyester or nylon thread for durability; consider a contrasting color to help you spot mistakes.
- Needles: A ballpoint or universal needle works well with most fabrics. For knits, use a larger eye needle (size 90/14).
- Thimble: Protects your finger when pushing the needle through tough materials.
Example: When sewing a fleece collar, a ballpoint needle and polyester thread provide a smooth stitch that resists fraying even after repeated washing.
5. Sewing Machine (Optional but Helpful)
- A basic household machine with straight‑stitch capability is ideal for quick projects.
- Look for machines with a built‑in zipper foot, buttonhole function, and adjustable stitch length.
Practical tip: For dog outfits that need extra strength—like harnesses or thick sweaters—use a machine stitch of 2–3 mm. Add a second stitch line for reinforced seams that can withstand a pup’s pulling.
6. Measuring Tools
- Tape measure: A flexible tape helps you record the dog’s neck, chest, and length measurements accurately.
- Ruler & straight edge: Useful for marking patterns or ensuring even hems.
Example: Measure your dog’s chest circumference to determine sleeve width for a fitted sweater. Add 1–2 inches of ease for comfort and movement.
7. Pattern Paper & Pencil
- Use pattern paper or tracing paper to copy or modify patterns before cutting the final fabric.
- A soft pencil (e.g., #2) allows easy erasing, while a fine-tip pen can be used for permanent markings once you’re satisfied with the fit.
Practical tip: Sketch a basic dog‑friendly pattern—such as a simple T‑shirt shape—on paper first. This helps you visualize how the design will look on a live model before cutting fabric.
8. Pins, Clips & Safety Pins
- Pins: Use straight pins for temporary holds or large fabric pieces; safety pins can secure delicate layers without leaving marks.
- Clips: Ideal for holding multiple layers together, especially when working with lightweight fabrics that might shift.
Example: When sewing a reversible dog jacket, clip the two fabric pieces together before stitching to keep them aligned and prevent mis‑seams.
9. Iron & Pressing Board
- A small iron with adjustable heat settings is essential for flattening seams and ensuring crisp hems.
- A pressing board protects your work surface and provides a flat base.
Practical tip: Use a low‑heat setting on knit fabrics to avoid melting. For cotton or canvas, use a higher heat but test first on a scrap piece.
10. Seam Gauge & Notcher
- A seam gauge helps you mark consistent seam allowances (typically 5–6 mm for dog apparel).
- A notcher creates small cuts that let fabric lay flat over seams, reducing bulk.
Example: When attaching a collar to a sweater, use the notcher along the seam line to allow the fabric to conform smoothly around your dog’s neck.
Practical Checklist for Your Dog Fashion Kit
- Fabric scissors & utility scissors
- Rotary cutter + cutting mat
- Se
Simple Sweater Design for Small Breeds
Choosing the right material
- Pima cotton or bamboo blends: These fabrics are soft, breathable, and less likely to irritate a dog's sensitive skin. They also have natural moisture‑wicking properties.
- Fleece or sherpa lining: For colder climates, add a thin fleece layer on the inside for extra warmth without bulk.
- Acrylic blends: Lightweight and resistant to shrinking, acrylic is great for quick dry‑time and easy care.
Key measurements you’ll need
- Neck circumference: Measure just behind the ears where the collar sits. Add 1–2 cm for seam allowance.
- Chest depth (chest to back): From the base of the neck across the chest to the highest point of the back, then add a small margin for ease.
- Length: From the base of the neck down to the desired coverage—usually just above the hips for small breeds.
Step‑by‑step pattern creation
- Create a simple rectangle on paper using the chest depth and length measurements. Add a vertical seam line at one end for the neck opening.
- Fold the rectangle in half lengthwise, ensuring that the shorter side becomes the front/back division. This creates a symmetrical pattern with two identical halves.
- Add a small notch (about 2 cm) at the top of each half to accommodate the collar or a simple button closure.
Cutting and sewing tips
- Use a sharp fabric scissors to keep edges clean. Trim any loose threads immediately.
- If you’re new to sewing, start with a straight stitch on a medium speed setting. Test the tension on a scrap piece first.
- Finish raw edges with a zig‑zag stitch or serger to prevent fraying—especially important for dogs that chew.
Finishing touches and safety checks
- Place the sweater on your dog (or a mannequin) and adjust the collar notch so it sits comfortably without digging into the neck.
- Check for any loose threads or exposed seams that could snag on furniture. Trim or reinforce as needed.
- Test the garment in a safe environment before full use: let your dog move around, run, and sit to ensure no restriction of movement.
Practical advice for small breeds
- Small dogs like Chihuahuas or Yorkshire Terriers often have delicate ears. Use a fabric with a smooth underside to avoid irritation.
- Because their bodies are proportionally smaller, avoid oversized patterns—use the “add a little extra” rule wisely to keep the sweater snug but not tight.
- Consider adding a detachable hood or ear flaps for added warmth during walks in wind or rain.
Reference: DIY Dog Fashion – Make Outfits at Home
For more detailed tutorials, patterns, and video guides, visit the “DIY Dog Fashion” section on our website. It includes step‑by‑step instructions for a variety of breeds, ensuring you can tailor each piece to your pet’s unique shape and personality.
Coat Ideas for Medium-Sized Dogs
Medium‑sized dogs—think breeds like the Border Collie, Australian Shepherd, Cocker Spaniel, or a mixed‑breed that falls between 30–50 lb—often need a balance between protection and comfort. Their coats should shield them from the elements without adding bulk or restricting movement. Below are several coat styles that work well for this size range, along with practical tips on how to make each one at home.
1. Lightweight Windbreaker
- Material: A breathable nylon or polyester blend (about 200–300 gsm). Look for a fabric that is wind‑tight but still allows moisture to escape.
- Fit: Cut the panel at shoulder height, leaving extra room at the belly and tail. Use elastic cuffs around the wrists and ankles to keep the wind in.
- DIY Tip: Attach a small Velcro strip along the front opening so you can easily put it on and take it off without tugging on your dog’s collar.
2. Insulated Fleece Layer
- Material: Soft fleece (200–250 gsm) or a quilted polyester fill for added warmth.
- Design: A simple “t‑shirt” cut with a low neckline. Add a hood if your dog is prone to cold ears.
- DIY Tip: Sew a small pocket on the back for a treat or a tiny flashlight—great for night walks!
3. Rain‑Proof Shell
- Material: Waterproof polyurethane‑coated canvas or PVC‑lined nylon.
- Features: A front zipper with a flap, reinforced stitching at the seams, and a hood that fits snugly over the ears.
- DIY Tip: Use a waterproof spray after sewing to seal any potential leaks. Check the seal by running a finger along the seam; if water beads rather than soaks in, you’re good.
4. Seasonal Color‑Block Vest
- Material: Combine two fabrics: a light cotton for breathability and a darker canvas for durability.
- Cut: A sleeveless vest that covers the chest, shoulders, and upper back. Leave a small opening at the belly to allow airflow.
- DIY Tip: Add reflective strips on the front and sides for visibility during early morning or late evening walks.
5. Custom Patterned Sweater
If you’re feeling crafty, create a knitted or crocheted sweater in your dog’s favorite colors or patterns. Medium‑sized dogs have enough space to accommodate intricate designs without being too tight.
- Yarn: Choose a soft, non‑allergenic yarn such as bamboo or merino wool (avoid worsted weight if your dog has sensitive skin).
- Pattern: A simple ribbed collar and cuffs with a loose body. Leave room for the tail to swing freely.
- DIY Tip: Use a “no‑seam” stitch or add a small safety tag at the seam to prevent irritation.
Practical Advice for All Coat Types
- Measure First: Always take accurate measurements of your dog’s chest circumference, neck length, and height from shoulder to ground. This ensures a comfortable fit.
- Test for Comfort: After finishing the coat, let your dog wear it in a low‑stress environment (e.g., at home) before taking them outdoors. Watch for signs of overheating or restricted movement.
- Maintenance: Wash each coat according to its material instructions—most nylon and polyester can be machine washed; fleece may need hand wash. Dry on low heat or air‑dry to avoid shrinking.
- Seasonal Rotation: Store your coats in a dry, cool place and rotate them seasonally: windbreakers for spring/fall breezes, insulated layers for winter, and rain shells for wet weather.
By following these guidelines, you can create stylish, functional dog coats that keep your medium‑sized companion comfortable and protected in any weather. Happy crafting!
Raincoat Construction for All Sizes
If you’re a dog lover who loves to mix style with practicality, building your own raincoat is the ultimate way to keep your pup dry and fashionable. Below we break down every step from choosing the right fabric to adding customizable details that suit any size—small, medium, or large.
Step 1: Choose Waterproof, Breathable Fabric
- Neoprene (PVC): Classic raincoat material—heavy, durable, and fully waterproof. Ideal for larger dogs.
- Nylon or Polyester Taffeta: Lightweight, easy to cut, and still keeps moisture out. Works well for small to medium breeds.
- Ripstop Fabric: Adds extra durability with minimal bulk—great for active pups who chew on their gear.
Tip: Look for fabrics that have a “waterproof rating” (e.g., 2000 mm) and are machine washable. If you’re in a humid climate, choose a breathable variant to prevent overheating.
Step 2: Accurate Measurements for All Sizes
- Neck circumference: Measure around the base of your dog’s neck, leaving a small gap for easy slipping on.
- Chest depth (from shoulder to belly): Needed for a snug fit that won’t slip down.
- Back length: From the base of the neck to the base of the tail.
- Belly width: For smaller dogs, this helps avoid bulkiness; for larger dogs, it ensures a smooth silhouette.
Print out a quick template and adjust the numbers to create a pattern that fits your dog’s shape. Remember: a slightly loose fit is safer than a tight one—your pup may move around a lot when wet.
Step 3: Cut Your Fabric with Precision
- Mark the pattern: Use chalk or fabric markers to outline each piece—front, back, and two sleeves.
- Add seam allowances: Add at least 1 cm (0.4 in) all around for stitching.
- Cut on grain: For nylon or polyester, cut along the fabric’s natural direction to avoid puckering.
For small dogs, you might want a tighter seam allowance to reduce bulk. For large dogs, consider adding a reinforced collar area to handle heavier loads.
Step 4: Sew with Strength and Style
- Use a heavy‑duty needle: A 90/12 or larger will handle thick neoprene without tearing.
- Back stitches for waterproof seams: Create a “zigzag” stitch with a waterproof thread (e.g., polyester) to keep the seam water‑tight.
- Reinforce stress points: Add double stitching at the collar, shoulders, and along the belly seam.
If you have a serger, it’s ideal for a clean finish on synthetic fabrics. For home sewing machines, use a “sewing machine stitch” with a slightly longer stitch length (3–4 mm) to reduce fabric fatigue.
Step 5: Include Practical Extras
- Circular or oval eyelets: Place them on the front panel to attach a lightweight leash.
- Velcro or snap fasteners: For easy removal—especially handy for puppies who may not sit still during dressing.
- Pockets: Add small, waterproof pockets for treats or a collar tag.
For large dogs, consider adding a “tail flap” that can be closed with a magnetic snap to keep rain out of the tail area.
Step 6: Finish with Style
- Color blocking: Pair a bright front panel (e.g., neon yellow) with a neutral back to create a “fashionable silhouette.”
- Patches or embroidery: Add a custom logo, your dog’s name, or fun patterns like paw prints.
- Reflective strips: Attach them for nighttime visibility—great for walks after rain.
Remember to test the coat in light drizzle before heading out on a full storm. Adjust any loose parts and add extra reinforcement where needed.
Practical Tips & Common Issues
- Issue: The coat is too heavy for a small dog. Solution: Switch to a lighter nylon or polyester and remove the inner lining.
- Issue: Seams are leaking. Solution: Apply a waterproof seam sealer (e.g., Seam Grip) before stitching.
- Issue: The coat slides off during a walk. Solution: Add an elastic band at the base of the neck or use a velcro strap.
With these steps, you can create a raincoat that fits any dog size while giving them a stylish look. Experiment with colors and patterns—your pup will not only stay dry but also become the talk of the park!
Adding Decorative Elements (Collars, Bowties, etc.)
Once you’ve chosen a base outfit for your pup—whether it’s a simple t‑shirt or a full coat—you can elevate the look with decorative accessories. These elements not only add flair but also personalize each dog’s style. Below are practical tips and step‑by‑step instructions for making collars, bowties, headbands, and more right at home.
1. DIY Dog Collars
A collar is both functional and fashionable. Use sturdy yet comfortable materials that can withstand chewing and daily wear.
- Materials: Leather strips (2–3 mm thick), canvas, nylon webbing, or recycled fabric.
- Tools: Scissors, sewing machine (or needle & thread for small projects), measuring tape, a buckle or snap fastener, and optional decorative studs or beads.
- Measure your dog’s neck circumference. Add an extra 1–2 inches for ease of fitting.
- Cut the material to length. If using fabric, fold in half and sew a seam along one side to create a tube.
- Sew or attach the buckle/fastener at one end. For a snap fastener, glue it on; for a buckle, use a strong thread or metal clip.
- Add decorative elements: stitch on a small charm, add a ribbon loop, or embed a bead at the center.
- Test fit and adjust as needed. Ensure no seams are loose to avoid choking hazards.
2. Homemade Bowties for Dogs
Bowties give an instant “dapper” look—perfect for formal events or photo shoots.
- Materials: Lightweight fabric (cotton, chiffon), elastic band or ribbon, safety pins or a small sewing kit.
- Tools: Scissors, measuring tape, needle & thread or hot glue gun.
- Cut two identical pieces of fabric into a “T” shape: the vertical part should be about 6–8 inches long and the horizontal part 4–5 inches wide.
- Sew the top corners together to create a loop that will sit around your dog’s neck. Leave the bottom open for an elastic or ribbon.
- Attach an elastic band (3–4 inches long) to each side of the loop, ensuring it fits snugly but not too tight.
- Add a decorative charm at the center if desired.
- Secure the bowtie with safety pins or sew the ends together. Test on your dog and adjust for comfort.
3. Headbands & Hair Accessories
Headbands are great for adding color without compromising a collar’s functionality.
- Materials: Soft fabric, felt, or even repurposed scarves.
- Tools: Scissors, elastic band (1–2 inches), needle & thread or glue.
- Cut a strip of fabric about 3 inches wide and long enough to wrap around the dog’s head (usually 8–10 inches).
- Sew an elastic band into one end so it can be slipped over the head.
- Add embellishments like small flowers, ribbons, or a tiny bell.
- Test fit on your pup; adjust elasticity for comfort.
4. Practical Tips for All Accessories
- Safety first: Avoid sharp edges and ensure all fasteners are secure to prevent choking.
- Comfort matters: Use soft, breathable fabrics, especially for collars that sit close to the skin.
- Durability: Reinforce seams with double stitching or use a sewing machine whenever possible.
- Personalization: Add your dog’s name in embroidery or on a tag for a custom touch.
- Cleaning: Choose washable fabrics and remove accessories before bathing.
By following these DIY steps, you can create stylish, personalized accessories that make every outfit pop—without breaking the bank. Happy crafting!
Safety Tips: Avoiding Sharp Edges and Loose Parts
When you’re crafting outfits for your four‑legged friend, safety should be as important as style. A well‑designed garment can look adorable, but if it contains sharp edges or loose pieces, it could cause cuts, choking hazards, or even lead to a dog falling off the couch. Below are practical steps and examples to keep your DIY dog fashion projects safe.
1. Choose the Right Fabric
- Smooth fabrics: Opt for cotton blends, polyester, or nylon—materials with minimal seams that can snag fur or skin.
- Avoid rough textures like burlap or heavy canvas unless you plan to cover them with a softer lining.
- Test the fabric by running your hand over it; if it feels abrasive, consider replacing it.
2. Inspect All Fasteners Before Use
- Buttons: Replace any that are cracked or have exposed metal. If you use plastic buttons, ensure they’re the dog‑friendly type (soft, rounded corners).
- Zippers: Choose small “dog” zippers with a built‑in guard to prevent teeth from catching on the zipper pull.
- Lace or ribbons: If you use decorative ties, ensure they’re long enough to be tied securely and not left dangling. A good rule: tie them so that no part can reach the dog’s mouth.
3. Secure Loose Parts with Double‑Sided Tape or Velcro
If a piece of trim or a decorative element might slip off, attach it to the garment using double‑sided tape (non‑toxic) or hook‑and‑loop fasteners. This keeps the embellishment in place while still allowing easy removal for washing.
4. Check Seam Placement
- Place seams away from areas where the dog’s head, neck, and ears are exposed. A seam that runs along a collar should be inside the garment or hidden by a decorative band.
- If you’re sewing a hood, ensure the seam does not interfere with the dog’s vision or cause pressure on the ears.
5. Test for Choking Hazards
Before putting the outfit on your dog, lay it flat and look for any small parts—buttons, clips, or decorative tassels—that could detach. Gently tug on each piece; if it comes loose easily, reattach securely.
6. Use Protective Covers for Edges
- Apply a thin layer of felt or foam to any raw edges that might catch on the dog’s fur or skin.
- For collars or harnesses made from fabric, sew an inner lining of soft cotton to cushion contact points.
7. Monitor Your Dog During Initial Wear
Observe how your pet reacts when wearing a new outfit. If they try to chew on the garment or show signs of discomfort, remove it immediately and reassess for hidden hazards.
8. Wash and Inspect After Each Use
- After washing, inspect all fasteners and seams again; detergent can loosen stitches or cause buttons to break.
- Dry the garment fully before the next use to prevent mildew that could irritate your dog’s skin.
Example Project: A Simple Cotton Dress with a Soft Lining
- Select a lightweight cotton blend and a matching soft lining material.
- Sew the outer fabric together, leaving an opening for the neck. Line the inside with the softer fabric.
- Attach a small, rounded button at the back of the dress using a double‑sided tape for extra security.
- Add a decorative ribbon that is tied securely and cut to a length that won’t hang off the dog’s body.
- Inspect all seams and edges; apply felt padding where necessary.
By following these safety guidelines, you’ll create outfits that are not only stylish but also comfortable and secure for your canine companion. Happy crafting!
Color Coordination with Your Dog’s Coat
When you’re designing outfits for your canine companion, the coat color is a crucial starting point. Think of it as a neutral canvas that can either highlight or mute certain hues. Below are practical guidelines and real‑world examples to help you choose colors that complement both your dog’s fur and your own style.
1. Understand the Base Color Palette
- Light coats (white, cream, light brown): These work well with bold, saturated colors—think royal blue, emerald green, or deep burgundy. The contrast adds visual interest without overwhelming the dog.
- Medium coats (medium brown, tan, gray): Soft pastels such as blush pink, mint green, or light lavender look great. You can also go for jewel tones—amethyst or sapphire—for a touch of drama.
- Dark coats (black, charcoal, dark brown): Rich, warm colors like mustard yellow, burnt orange, and terracotta create striking contrast. Alternatively, cool neutrals such as navy blue or forest green can provide an understated elegance.
2. Use the Color Wheel to Your Advantage
Complementary colors (opposites on the wheel) produce high contrast and vibrant outfits—perfect for photoshoots. Analogous colors (adjacent on the wheel) create a harmonious, understated look suitable for everyday wear.
3. Practical DIY Tips from “DIY Dog Fashion: Make Outfits at Home”
- Start with a Sketch: Draw a simple outline of the garment you plan to create (e.g., a vest or collar). Label sections where you’ll incorporate color blocks.
- Select Fabric Swatches: Gather small pieces of fabric in your chosen colors. Test them against a section of your dog’s coat using a light‑to‑dark comparison chart.
- Choose the Right Fasteners: Metal buckles or snap buttons can act as accent points—pick ones that match or contrast with your color scheme.
- Layer Wisely: For multi‑layer outfits, keep the outer layer in a dominant color and use lighter hues for inner layers. This prevents the dog’s coat from getting lost in a sea of colors.
4. Color Combinations That Work Across Seasons
| Season | Coat Color | Suggested Outfit Colors |
|---|---|---|
| Spring | Light to Medium | Pale teal, lilac, soft yellow |
| Summer | Medium to Dark | Coral, turquoise, bright orange |
| Fall | Dark | Mustard, olive green, rust |
| Winter | All | Navy, charcoal, deep plum |
5. Final Touches: Accessories and Patterns
- Bandanas: Use stripes or polka dots in colors that echo the main outfit but add a pop of pattern.
- Collars: A leather collar with metal accents can anchor an otherwise bright ensemble.
- Ribbons & Bowties: Incorporate a single accent color from your palette to tie everything together.
Remember, the goal is balance—your dog’s comfort and natural beauty should always come first. With these guidelines, you can confidently experiment with colors while ensuring every DIY creation looks polished and pet‑friendly.
Seasonal Outfit Variations (Summer vs. Winter)
Summer Styles for Your Furry Friend
When the temperatures rise, keep your dog cool and stylish with lightweight fabrics and breathable designs.
- Lightweight Cotton T-Shirts: Ideal for hot days; choose moisture‑wicking cotton blends to help dogs stay dry. Pair with a simple collar or bandana for added flair.
- Aloe Vera Tank Tops: These are not only cool but also soothing for itchy skin. Use a soft, natural fabric and secure the top with elastic waistbands so it stays in place during play.
- Sun‑Blocker Bandanas: Add a protective layer that blocks UV rays. Look for UPF-rated fabrics or add a thin, lightweight hat for extra coverage.
- Waterproof Shorts with Built‑in Cooling: Great for beach days. The inner lining can be a mesh material to enhance airflow while the outer shell repels water.
DIY Tips for Summer Outfits
- Sizing Matters: Measure your dog’s chest, neck, and waist before cutting fabric. Keep a few extra inches for adjustment.
- Ventilation: Sew small, discreet holes or use mesh panels on the sides to allow air circulation without compromising the design.
- Easy On/Off: Use Velcro straps or snap buttons instead of zippers so you can quickly remove the outfit during a sudden heat wave.
- Color & Pattern: Bright, reflective colors not only look fun but also increase visibility in low light conditions.
Example DIY Project: A “Sun‑Shield” tank top made from 100% organic cotton with a removable UV bandana. Simply cut the torso shape, attach elastic waistbands, and add a snap closure for the collar area.
Winter Styles to Keep Your Dog Warm
Cold weather demands thicker fabrics and better insulation. Layering is key, but keep the design simple so your dog can move freely.
- Wool‑Blend Sweaters: Use a blend of merino wool and polyester for warmth while maintaining breathability. Add a front zipper or button closure for easy dressing.
- Cotton Lined Jackets: The cotton lining provides extra softness against the skin, while the outer shell can be water‑repellent to keep dogs dry in snow or rain.
- Thermal Hoodies with Ear Flaps: Protect sensitive ears from frostbite. Ensure the hood is roomy enough for the head but snug around the neck.
- Fleece Leggings: Pair a fleece pant with a sweater to keep the legs insulated, especially for small breeds prone to cold feet.
DIY Tips for Winter Outfits
- Insulation Layers: Use a thin cotton base layer under a thicker fleece or wool top. This double‑layer approach traps heat without bulk.
- Secure Fastenings: Zippers can snag on fur; instead, opt for magnetic Velcro or snap buttons that stay closed even if the dog moves vigorously.
- Thermal Padding: Add a removable padded insert in the chest area for dogs with thin coats. This can be sewn into a small pocket and removed when not needed.
- Waterproofing: Treat outer fabrics with a silicone spray to resist snow melt and sleet, ensuring the dog stays dry inside.
Example DIY Project: A “Cozy Winter Jacket” made from fleece with an inner cotton lining. Sew a front pocket for a thermal insert and attach Velcro straps at the collar so it can be fastened securely without a zipper.
Transitioning Between Seasons
- Layer Gradually: When moving from summer to winter, introduce a light jacket first before adding heavier layers.
- Check for Comfort: Remove any outfit that feels too tight or restricts movement. A well‑fitted garment should allow your dog to walk, sit, and lie down without discomfort.
- Monitor Weather Conditions: Even in winter, some dogs may not need a full jacket if they have thick coats. Use weather forecasts to decide on layering.
DIY Dog Fashion: Make Outfits at Home
For step‑by‑step tutorials, pattern downloads, and material recommendations, visit our DIY Dog Fashion Hub. You’ll find detailed guides for both summer and winter garments, plus seasonal care tips to keep your pet happy all year round.
Maintenance: Washing and Storage of DIY Outfits
Once your furry friend has slipped into their freshly made outfit, the next step is keeping it clean and ready for future adventures. Proper washing and storage not only extend the life of the garment but also ensure that the material remains safe and comfortable for your dog. Below you’ll find a step‑by‑step guide, practical tips, and product recommendations tailored to the fabrics most commonly used in DIY dog fashion.
1. Pre‑Wash Preparation
- Check for Loose Threads: Inspect seams, buttons, zippers, and any decorative elements. Tighten or replace anything that could unravel during washing.
- Separate by Color: Keep light-colored outfits away from dark ones to avoid color bleeding. If you’re unsure, a quick test with a small hidden area can reveal whether the dye is set.
- Remove Heavy Items: Take off any accessories such as collars or harnesses that are not part of the garment itself; they may need special care.
2. Hand Washing vs Machine Washing
The choice depends on the fabric and construction. Below is a quick reference:
| Fabric | Best Method |
|---|---|
| Cotton or Cotton Blend | Machine (gentle cycle) or hand wash |
| Linen | Hand wash to prevent fraying; machine only on delicate cycle |
| Synthetic blends (polyester, nylon) | Machine wash; avoid high heat |
| Wool or Cashmere | Dry clean or hand wash in cool water with a mild detergent |
Hand‑Wash Instructions (for delicate fabrics)
- Fill a basin with lukewarm water and add a small amount of gentle, pH‑balanced detergent.
- Submerge the outfit and gently agitate for 5–10 minutes. Avoid scrubbing hard; let the fibers do the work.
- Rinse thoroughly in cool water until all soap residue is gone.
- Squeeze out excess water—never wring—to prevent distortion.
- Lay flat on a clean towel, roll to remove more moisture, then reshape and air dry away from direct sunlight.
Machine‑Wash Instructions (for sturdy fabrics)
- Place the outfit in a mesh laundry bag to protect it and any zippers or buttons.
- Select a gentle cycle with cold water. Use a mild detergent; avoid bleach or fabric softeners as they can damage elasticity.
- After washing, immediately remove the garment from the machine to prevent creasing.
- Tumble dry on low heat or air‑dry completely before storage.
3. Drying Tips
- Avoid High Heat: Even if the label says “machine dry,” high temperatures can shrink or warp delicate fabrics.
- Flat Air‑Dry: Lay the outfit on a flat, clean surface. For items with embellishments that may shift, use a drying rack with adjustable support.
- Use a Damp Cloth: If you notice wrinkles after air‑drying, lightly mist the garment and smooth it out by hand—no iron required for most dog fabrics.
4. Storage Solutions
Proper storage preserves shape, prevents mildew, and keeps your DIY outfits ready for the next outing.
- Clean Thoroughly: Only store garments that are completely dry to avoid mold.
- Fold Flat or Hang: For lightweight cottons, fold flat on a clean surface. For heavier fabrics or outfits with stiff panels, use a padded hanger (e.g., a wire dog‑friendly hanger) to maintain shape.
- Avoid Plastic Bags: Breathable storage bags made of cotton or muslin allow moisture to escape. If you prefer plastic, add a silica gel pack and change it every few months.
- Use Odor‑Control: Place cedar chips or activated charcoal in the storage area to absorb excess moisture and keep odors at bay.
5. Quick Fixes for Everyday Wear
- Stain Removal: Treat fresh stains with a gentle spot‑cleaner (e.g., diluted dish soap) before washing.
- Tighten Loose Threads: Keep a small sewing kit handy for on‑the‑go repairs. A simple stitch can save the outfit from falling apart.
- Check Fit Regularly: Dogs grow fast! Measure your dog’s neck, chest, and waist periodically to ensure the outfit still fits comfortably.
6. Product Recommendations
While you can use any gentle detergent, here are a few that perform well with pet fabrics:
- All‑Paws Gentle Wash – plant‑based formula, no dyes.
- Bark & Bloom Hypoallergenic Laundry Detergent – fragrance‑free, great for sensitive skin.
- CedarDry Silica Gel Packets – keep outfits dry and odor‑free during storage.
By following these washing and storage guidelines, you’ll keep your DIY dog outfits looking fresh and comfortable for many adventures to come. Happy crafting—and happy cleaning!
Troubleshooting Common Sewing Issues
1. Fabric Pilling on Fleece or Knit Panels
Pilling is a frequent issue when working with soft fabrics like fleece, which are often used for dog hoodies and sweaters.
- Pre‑wash your fabric: Wash the material before cutting to reduce loose fibers that can pill later.
- Use a ballpoint needle: This reduces snagging and keeps the seam line smooth.
- Choose a satin stitch or flat‑lock stitch: These stitches minimize friction along the seam, keeping fur from gathering.
2. Uneven Seams on Tailored Dog Jackets
When constructing fitted pieces like jackets or vests, a slight misalignment can lead to an uneven look.
- Mark a reference line: Use fabric chalk along the center back and front edges. Align all seams with this line.
- Check symmetry during sewing: Pause after each side is sewn, flip the garment, and compare the lines.
- Use a walking foot on heavier fabrics: It keeps both layers moving together, preventing pull‑back that can distort seam placement.
3. Loose or Missing Buttonholes on Collar Pieces
Buttons are a hallmark of classic dog collars and vests but can be tricky to install properly.
- Pre‑pin the buttonhole area: Secure the fabric with small pins before cutting the hole to keep edges straight.
- Use a buttonhole foot or a sewing machine’s built‑in feature: This ensures consistent spacing and depth.
- Add a safety stitch: Sew an extra row of stitches along the buttonhole edge for added strength, especially on thicker materials like canvas.
4. Stretching or Gaping on Elastic Waistbands
Elastic is essential for adjustable dog pants and shorts but can lose shape if not handled correctly.
- Sew a bias‑cut strip: Attach the elastic to a narrow bias strip of fabric; this keeps it from stretching outwards.
- Use a zigzag stitch: It offers flexibility and prevents the elastic from pulling the seam open.
- Check tension on your machine: Too high can cut through, too low will not hold the elastic firmly.
5. Fabric Slippage When Adding Decorative Trim
Adding trims like ribbons or faux fur to dog accessories often results in slippage if not secured properly.
- Stitch the trim with a ladder stitch: This creates multiple anchor points along the edge.
- Apply a small amount of fabric glue on the backside: Especially useful for lightweight trims that may unravel.
- Tuck the trim into a bias‑cut pocket: This provides extra support and hides any loose threads.
Practical Tips for All Projects
- Always test on a scrap piece: Before cutting your final dog garment, run through the entire process on a leftover fabric to spot potential issues.
- Keep your tools sharp and clean: Dull needles or dirty scissors can create uneven cuts and weak seams.
- Label pattern pieces clearly: This reduces confusion during assembly, especially when working with multiple colors or fabrics.
- Store unfinished projects in a dry place: Moisture can cause mold or warping of fabric, leading to further complications.
By anticipating these common pitfalls and applying the solutions above, you’ll produce dog fashion pieces that look professional, fit comfortably, and stand up to everyday wear. Happy sewing!
Conclusion
When it comes to canine couture, the possibilities are as endless as your imagination. By combining simple materials, a few basic tools, and a dash of creativity, you can transform ordinary dog clothing into personalized fashion statements that celebrate your pet’s personality.
Key Takeaways
- Start with the right base: Choose breathable fabrics like cotton or bamboo for everyday wear and heavier blends (e.g., fleece) for colder climates.
- Measure accurately: Use a flexible measuring tape to capture chest, neck, length, and leg circumference. A quick reference chart can help you convert measurements into fabric cuts.
- Simplicity beats complexity: For beginners, focus on straight‑cut vests or simple jackets with minimal seams. Once comfortable, experiment with zippers, Velcro closures, or decorative trims.
- Safety first: Avoid small buttons, loose ribbons, and any sharp edges that could be chewed off. All embellishments should be securely attached.
Practical Project Ideas
- Seasonal Sweater: Cut a simple V‑neck sweater from soft fleece, add a faux fur collar for winter flair, and attach a lightweight hood with elastic ties.
- Summer T-Shirt: Use a cotton tee as the base. Add embroidered monograms or fabric paint designs that match your dog’s energy level—think paw prints for playful pups.
- Formal Gown: For special occasions, sew a satin cape over a fitted bodysuit. Add a detachable bow made from silk ribbon; secure it with a small safety pin on the inside so the dog can’t pull it off.
Materials & Tools Checklist
| Item | Purpose |
|---|---|
| Cotton, Bamboo, or Fleece Fabric | Main garment material |
| Sewing Machine (or hand‑sewing needle) | Construct seams and hems |
| Elastic Bands & Velcro Strips | Adjustable closures for comfort |
| Fabric Glue or Hot Gun | Secure lightweight decorations |
| Safety Pins (inside) | Prevent accidental detachment of accessories |
Final Words
DIY dog fashion isn’t just about looking good—it’s a bonding experience. As you stitch, trim, and tailor, your pup will feel the love poured into every seam. Remember to test fit after each step; a well‑fitted outfit ensures comfort and confidence for both of you.
Ready to start? Grab your tools, pick your favorite pattern, and let your creativity run wild. Your dog’s wardrobe is waiting!
FAQ
1. What materials are best for homemade dog outfits?
The key is to choose fabrics that are breathable, durable, and safe for pets. Here’s a quick rundown:
- Cotton blends – Soft, washable, and ideal for everyday wear.
- Linen – Lightweight, great for hot climates, but can wrinkle easily.
- Fleece – Warm and cozy for winter, but be careful with the thickness; too heavy can restrict movement.
- Bamboo fabric – Naturally antibacterial and moisture‑wicking, perfect for dogs that sweat a lot.
Avoid synthetic fibers like polyester or nylon if your dog has sensitive skin, as they can trap heat and cause irritation.
2. How do I measure my dog for a custom outfit?
Accuracy matters to avoid itchy seams or restrictive fit. Use a flexible measuring tape:
- Neck circumference – Wrap the tape around the widest part of the neck, just behind the ears.
- Chest depth – Measure from the base of the neck to the sternum.
- Belly width – Between the front and rear legs, at the widest point.
- Back length – From the base of the neck down to the base of the tail (or just below it).
Add a 1–2 cm allowance for seam allowances and comfort. Keep a record of each measurement; you’ll need them when cutting fabric.
3. What sewing techniques are dog‑friendly?
- Tear‑away stitches – Use a small, tightly spaced stitch that can be easily undone if your pup needs to adjust the garment.
- Flatlock or French seams – These finish edges smoothly and reduce irritation.
- Sewn-in loops – Instead of button or snap closures, sew a small loop that can be slipped over the dog’s head; this eliminates choking hazards.
4. How do I add accessories without compromising safety?
Keep all embellishments light and securely attached:
- Velcro strips – Great for adjustable cuffs, but ensure they’re not too loose to slip off.
- Pockets – Sew small pockets with reinforced stitching; avoid stuffing them with heavy items that could shift during movement.
- Ribbons or bows – Attach them using a knot rather than glue so they can be easily removed if your dog gets tangled.
5. How do I care for homemade outfits?
Most DIY garments are machine washable, but always check the fabric type first:
- Cotton and linen – Wash on a gentle cycle with mild detergent; tumble dry on low heat.
- Fleece – Hand wash or use a delicate machine cycle, then air dry to prevent shrinking.
- Bamboo – Machine wash cold, no bleach, and line dry for best longevity.
Inspect the outfit after each wash; replace any worn seams or loose threads immediately to keep your pup safe.
6. Can I use my dog’s existing clothing as a template?
Absolutely! If your dog already wears a collar, vest, or jacket, take it apart and re‑use the patterns. This saves time and ensures a perfect fit.
7. Where can I find pattern templates?
- Online resources – Websites like Pet Pattern Co. offer free downloadable PDF patterns for various dog sizes.
- Community forums – Check out DogOwner.com; members often share custom pattern files.
- Local sewing clubs – Many have dog‑friendly sections and can provide hands‑on help.
8. How do I handle dogs that dislike wearing clothes?
Introduce the outfit gradually:
- Start with accessories – Let your dog sniff and explore a collar or band before adding a full garment.
- Use positive reinforcement – Reward treats and praise whenever the dog remains calm while trying on the outfit.
- Keep sessions short – 5–10 minutes at a time, gradually increasing as your pup becomes more comfortable.
Remember: Every dog is unique. If you notice any signs of discomfort—itching, excessive licking, or agitation—remove the outfit immediately and consult your veterinarian.
Categories
- AI & Enrichment Play
- Broiler Farming
- Broiler Farming Tips
- Canine Wellness & Longevity
- Cat
- Cat & Human Connection
- Cat Adoption & Rescue
- Cat Breeds
- Cat Breeds & Personalities
- Cat Care & Health
- Cat Grooming & Hygiene
- Cat Lifestyle & Environment
- Cat Myths & History
- Cat Nutrition & Diet
- Cat Products & Reviews
- Cat Training & Behavior
- Comparison
- Consumer Awareness
- Dog
- Dog Accessories & Products
- Dog Adoption & Rescue
- Dog Breed & Lifestyle Trends
- Dog Breeding & Puppies
- Dog Entertainment & Media
- Dog Fashion & Trends
- Dog Fun & Lifestyle
- Dog Grooming & Hygiene
- Dog History & Culture
- Dog Myths, Science & Future Tech
- Dog News & Trends
- Dog Nutrition & Food
- Dog Psychology & Emotions
- Dog Safety & Security
- Dog Sports & Activities
- Dog Technology & Innovation
- Dog Training for Modern Owners
- Dog Travel & Adventure
- Dog Travel, Adventure & Culture
- Economic and Market Insights
- Educational Content
- FAQs
- Feeding Alternatives
- Festivals & Seasonal Ideas
- Fun & Entertainment
- General Knowledge
- General Pig Farming
- Health & Disease Management
- Housing and Environment
- Kittens
- Market Insights
- Miscellaneous
- Miscellaneous
- Motivational
- pig
- Pig Breeding
- Pig Breeds
- Pig Farming Stories and Inspiration
- Pig Health and Care
- Pig Nutrition
- Pig Products
- Profitability & Business
- Puppy Care
- Puppy Predictable Topics Reinvented
- Regional Focus
- Rescue & Adoption Buzz
- Senior Cats
- Senior Dog Care
- Smart Dog Tech & Gadgets
- Sustainability
- Sustainable & Eco-Friendly Dog Products
- Tech & Innovations
- Working & Service Dogs
- Broiler Feed66 products
- Country Feed33 products
- Pig Feed66 products
- Product22 products
- Raw Materials99 products
Products
-
 Fish Meal
₹1,999.00 – ₹2,999.00Price range: ₹1,999.00 through ₹2,999.00Rated 0 out of 5
Fish Meal
₹1,999.00 – ₹2,999.00Price range: ₹1,999.00 through ₹2,999.00Rated 0 out of 5 -
 FATTENING BROILER FEED
₹2,299.00 – ₹2,349.00Price range: ₹2,299.00 through ₹2,349.00Rated 0 out of 5
FATTENING BROILER FEED
₹2,299.00 – ₹2,349.00Price range: ₹2,299.00 through ₹2,349.00Rated 0 out of 5 -
 LAYER COUNTRY FEED
₹1,549.00 – ₹1,649.00Price range: ₹1,549.00 through ₹1,649.00Rated 0 out of 5
LAYER COUNTRY FEED
₹1,549.00 – ₹1,649.00Price range: ₹1,549.00 through ₹1,649.00Rated 0 out of 5 -
 COUNTER BROILER FEED
₹1,199.00 – ₹1,299.00Price range: ₹1,199.00 through ₹1,299.00Rated 0 out of 5
COUNTER BROILER FEED
₹1,199.00 – ₹1,299.00Price range: ₹1,199.00 through ₹1,299.00Rated 0 out of 5 -
 LACTATING PIG FEED
Rated 0 out of 5
LACTATING PIG FEED
Rated 0 out of 5₹2,299.00Original price was: ₹2,299.00.₹1,740.00Current price is: ₹1,740.00. -
 Maize
Rated 0 out of 5
Maize
Rated 0 out of 5₹1,650.00Original price was: ₹1,650.00.₹1,300.00Current price is: ₹1,300.00. -
 GESTATION PIG FEED (Phase 1)
Rated 0 out of 5
GESTATION PIG FEED (Phase 1)
Rated 0 out of 5₹2,249.00Original price was: ₹2,249.00.₹1,699.00Current price is: ₹1,699.00. -
 Pre Starter Broiler Feed
₹2,399.00 – ₹2,499.00Price range: ₹2,399.00 through ₹2,499.00Rated 0 out of 5
Pre Starter Broiler Feed
₹2,399.00 – ₹2,499.00Price range: ₹2,399.00 through ₹2,499.00Rated 0 out of 5 -
 FINISHER PIG FEED
Rated 0 out of 5
FINISHER PIG FEED
Rated 0 out of 5₹2,299.00Original price was: ₹2,299.00.₹1,749.00Current price is: ₹1,749.00. -
 Broiler Premix
Rated 0 out of 5
Broiler Premix
Rated 0 out of 5₹820.00Original price was: ₹820.00.₹699.00Current price is: ₹699.00.