
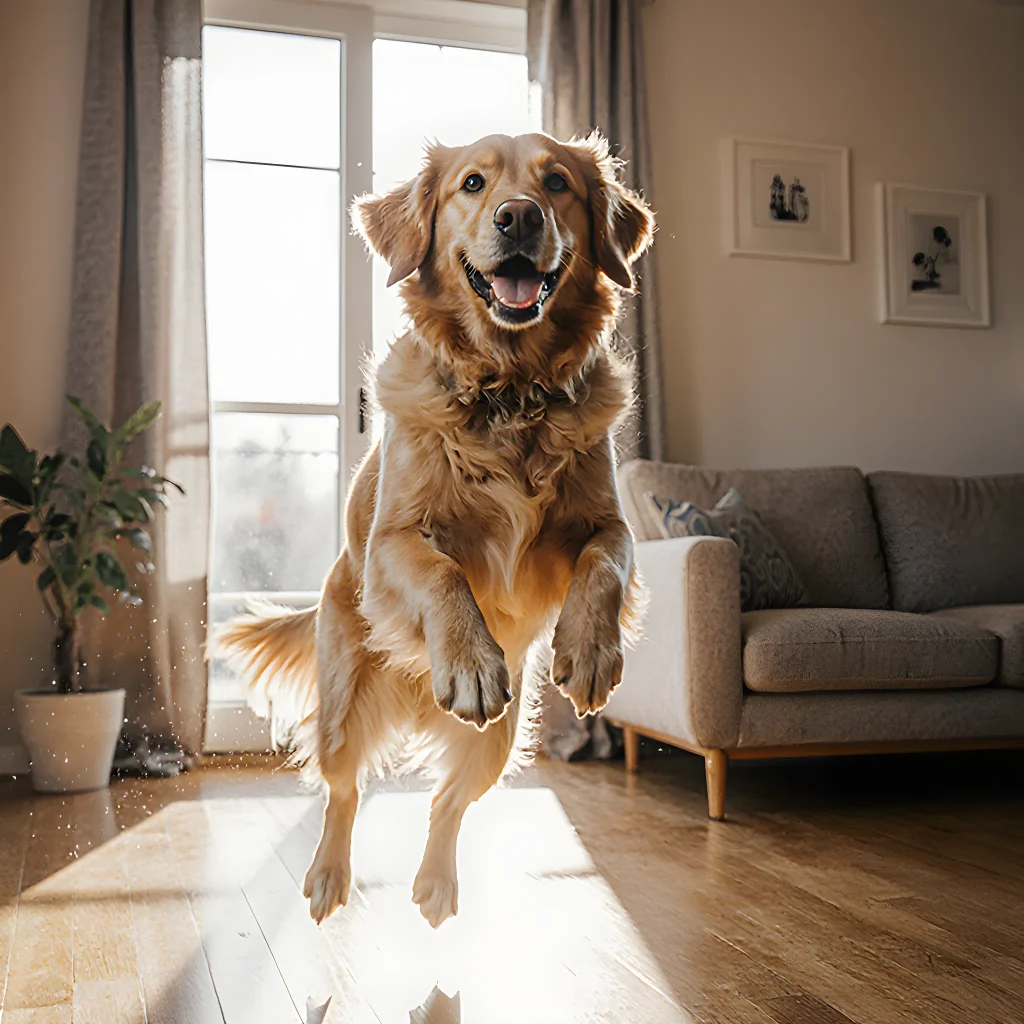
Capture Your Canine Star—Pro Tips for Home Shots
How to Shoot Professional Dog Content at Home
Table of Contents
- Introduction
- Gear: Everything You Need
- Lighting Basics for Dog Photography
- Choosing a Background
- Camera Settings: Aperture, Shutter Speed & ISO
- Positioning the Dog
- Capturing Action Moments
- Working with Commands and Tricks
- Using Accessories & Stabilizers
- Pacing the Session
- Posture and Angles for a Professional Look
- Editing Your Images
- Creating a Storyboard or Mood Board
- Finalizing and Sharing the Photos
- Conclusion
- FAQ
Introduction
Capturing high‑quality dog footage from the comfort of your own home is entirely possible with a few simple techniques and thoughtful preparation. Whether you’re creating content for a pet‑centric brand, a YouTube channel, or just want stunning family portraits, these practical steps will help you elevate your shots from “good” to “pro.”
1. Plan Your Shoot Like a Professional Photographer
- Storyboard the key moments: Write down the scenes you want—e.g., a playful chase, a calm cuddle, or a training trick. Having a clear storyboard keeps the shoot focused.
- Create a shot list: Include camera angles (low‑angle to emphasize size, high‑angle for cuteness), focal lengths (wide for group shots, telephoto for close‑up expressions), and lighting setups.
- Schedule during peak energy times: Most dogs are most active in the early morning or late afternoon. Plan your shoot around these windows to capture natural enthusiasm.
2. Optimize Your Home Environment
- Choose a clutter‑free space: A clean, neutral backdrop reduces distractions and keeps the focus on the dog.
- Control lighting: Natural light is your best friend. Position the dog near a large window with diffused light; use sheer curtains to soften harsh shadows.
- Set up reflective surfaces: A whiteboard or large sheet can reflect light onto the dog’s face, brightening features without additional equipment.
3. Equipment Essentials
| Item | Why It Matters |
|---|---|
| Camera with manual mode (DSLR or mirrorless) | Allows you to control exposure, depth of field, and ISO for crisp shots. |
| Lens options: 24‑70mm f/2.8 (versatile) or a 50mm prime (sharp detail) | Wide enough for group shots, yet tight enough to isolate the dog’s face. |
| Tripod with remote shutter release | Keeps camera steady and lets you avoid lens flare from your hand. |
| Portable LED light panel (optional) | Adds fill light or creates dramatic backlighting when natural light is insufficient. |
4. Directing Your Dog
Professional shots rely on a well‑behaved subject. Use these tactics to keep your dog engaged:
- Use high‑value treats: Small, soft treats that are easy to chew increase focus and reward desired behavior.
- Leverage favorite toys or commands: A squeaky toy can trigger a jump; “sit” or “stay” helps maintain a calm pose.
- Keep sessions short but frequent: Dogs have limited attention spans. 10‑minute bursts with breaks keep them enthusiastic and reduce stress.
5. Capture Motion Creatively
Dogs are dynamic subjects—here’s how to freeze or emphasize motion without losing quality:
- Use a fast shutter speed (1/500s or faster): This stops blur during jumps, sprints, or playful swishes.
- Consider burst mode: Capture 10‑15 frames per second; choose the best moment later.
- Experiment with panning: Keep the camera moving with the dog at a slower speed to create a motion blur background while keeping the subject sharp.
6. Post‑Production Tips
- Color balance and white balance: Adjust to match natural light or use presets like “Soft Pastel” for a dreamy look.
- Crop for composition: Use the rule of thirds; leave space in front of the dog’s head for dynamic framing.
- Sharpen selectively: Enhance the eyes and fur texture while avoiding noise amplification.
7. Practical Example: “Fetching Fun” Sequence
Storyboard: The dog runs, jumps to catch a frisbee, lands with a playful bark.
- Setup: Place the camera on a tripod at ground level (1‑2 ft) facing the backyard. Use a 24mm lens for a wide view.
- Lighting: Shoot during late afternoon when light is golden; use a reflector to bounce light onto the dog’s face.
- Treatment: Cue with “fetch” and toss a bright frisbee. Capture in burst mode at 1/500s.
- Post‑edit: Choose the frame where the dog’s mouth is open, eyes wide; apply a subtle vignette to focus attention on the action.
By treating your home studio with the same rigor as a commercial set—planning, controlling light, using proper gear, directing the subject, and refining in post‑production—you can produce dog content that looks polished, engaging, and truly professional.
Gear: Everything You Need
If you want your pet’s photos and videos to look like they came straight out of a studio, it’s not just about the dog’s personality – it’s also about having the right gear on hand. Below is a curated list of equipment that will help you capture sharp, well‑lit, and engaging footage without breaking the bank.
1. Camera Basics
- DSLR or Mirrorless: A camera with interchangeable lenses (e.g., Canon EOS Rebel T7i, Sony A6400) gives you control over depth of field and low‑light performance.
- Smartphone (if budget tight): Modern phones like the iPhone 15 Pro or Google Pixel 8 have excellent sensors. Pair with a tripod mount for stability.
- Action Camera: GoPro HERO11 or DJI Osmo Action is great for capturing high‑speed shots from a dog’s perspective.
2. Lenses & Filters
- Standard Zoom (24–70mm): Versatile for portraits and candid shots.
- Prime Lens (50mm or 85mm): Produces a flattering shallow depth of field; perfect for headshots.
- Aperture Priority Mode: Lets you control background blur while the camera handles shutter speed.
- Polarizing Filter: Reduces glare on shiny fur and enhances color saturation.
3. Lighting Solutions
- Softbox Kit (2‑piece): Creates diffused, studio‑style light that flatters fur texture.
- Ring Light: Ideal for video; provides even illumination and reduces shadows on the face.
- LED Panels (e.g., Neewer 660 RGB): Adjustable color temperature for natural or creative lighting setups.
- Reflectors (2‑inch white, silver, gold): Bounce light into gaps; useful for filling shadows during outdoor shoots.
4. Accessories for Stability & Control
- Tripod: A sturdy tripod with a fluid head allows smooth panning and tilting.
- Monopod or Shoulder Rig: Handy when you need mobility but still want stability during dynamic shots.
- Remote Shutter Release / Intervalometer: Prevents camera shake on long exposures; great for time‑lapse sequences.
- Microphone (if shooting video): Lavalier or shotgun mic improves audio quality, especially in noisy indoor environments.
5. Audio & Video Enhancements
- Background Music Library: Use royalty‑free tracks to add atmosphere.
- Video Editing Software: Adobe Premiere Pro, Final Cut Pro, or free alternatives like DaVinci Resolve.
- Photo Editing Tools: Lightroom Classic or Snapseed for color grading and retouching.
6. Safety & Comfort Items
- Dog Harness & Collar with ID Tags: Keep your pet secure during long shoots.
- Water Bowl & Treats: Reward system keeps the dog motivated and reduces stress.
- Soft Blanket or Mat: Provides a comfortable spot for static shots and reduces hair shedding on camera surfaces.
7. Practical Tips for Home Set‑Up
- Choose a Quiet Room with Natural Light: Position near a large window; use curtains to soften harsh sunlight.
- Create a “Dog Zone”:** Mark a specific area with a rug or mat where the dog can roam freely during shoots.
- Use a Background that Compliments Fur Color: A neutral wall or textured backdrop prevents visual clutter.
- Plan Your Shots: Script short sequences (e.g., “walk to the left, sit, look at camera”) to keep the dog engaged and reduce wasted time.
- Test Camera Settings: Shoot a few test clips or photos before starting; adjust ISO, aperture, and shutter speed based on lighting conditions.
With these tools and techniques in place, you’ll be able to produce high‑quality dog content right from the comfort of your home. Remember: consistency, patience, and positive reinforcement are just as crucial as any piece of gear.
Lighting Basics for Dog Photography
Good lighting is the foundation of every great photograph—especially when your subject is a four‑legged friend with an ever‑changing expression. Below are practical tips and examples that will help you master light in a home environment, turning casual snaps into professional‑grade images.
1. Understand Light Quality
- Soft light: Diffused by curtains, frosted panels, or even a white sheet. Ideal for portraits because it reduces harsh shadows and highlights the dog's features.
- Hard light: Direct from a bare bulb or sunlight through an open window. Great for creating dramatic textures but can be unforgiving on sensitive skin.
2. Positioning Your Light Source
Think of your dog as the center of a triangle. Place the main light at about 45° to the side, slightly above eye level (about 1–1.5 m). This angle highlights cheekbones and fur texture while keeping shadows subtle.
Example Set‑up:
- Window Light: Place a large white sheet between the window and the dog. The sheet acts as a diffuser, turning harsh sunlight into soft, even illumination.
- Ring Light (if available): Position it directly behind the camera at eye level for consistent fill light that eliminates deep shadows.
3. Using Reflectors and Fill Lights
Reflectors are inexpensive and effective. A silver or white reflector can bounce light back onto the dog's face, filling in shadowed areas without adding extra equipment.
Practical tip: Hold a 13” × 18” white foam board about 30 cm away from your dog’s face. Adjust until you see a gentle glow on the fur, not a glaring highlight.
4. Managing Color Temperature
Indoor bulbs often emit warm (2700–3000K) light. If you want cooler tones or to match natural daylight, use a daylight-balanced LED panel (~5600K). Alternatively, adjust the camera’s white balance in post‑processing.
5. Controlling Exposure with Aperture and Shutter Speed
A wide aperture (f/2.8–f/4) creates a shallow depth of field that isolates your dog from background distractions. Pair it with a shutter speed of at least 1/250 s to freeze movement, especially for energetic breeds.
6. Practical Shooting Scenarios
- Playful Paws: Use natural daylight from a window; position the dog facing the light so that the sun highlights their whiskers and ears. Capture multiple frames to catch spontaneous expressions.
- Cozy Portraits: Set up a soft box or large diffuser near a lamp. Place the dog on a plush rug, ensuring the light falls evenly across their face. Use a slower shutter speed (1/125 s) and a tripod to keep camera shake minimal.
- Action Shots: For running dogs, use two flash units set slightly apart for continuous lighting. Keep one as the main light and the other as fill; sync both with your camera’s flash mode if possible.
7. Quick Troubleshooting Checklist
- No Shadows? Add a reflector or move the light source closer.
- Overexposed fur? Reduce ISO, close the aperture, or add neutral density filters.
- Underexposed ears? Increase fill light intensity or adjust white balance to warmer tones.
By mastering these lighting fundamentals and experimenting with different setups at home, you’ll be able to capture stunning, professional‑looking dog photographs that highlight each pet’s unique personality and beauty.
Choosing a Background
A clean, uncluttered background is the foundation of every great dog photo. It keeps the focus on your four‑legged star and eliminates distractions that can pull viewers’ eyes away from what matters most.
- Neutral Colors: Whites, grays, or soft pastels work well because they contrast subtly with fur tones without competing for attention. A plain white wall or a simple gray backdrop board is often the safest choice.
- Texture Matters: While you want to avoid busy patterns, a subtle texture can add depth. Think of a smooth wood plank, a brushed metal sheet, or even a matte fabric drape. Just make sure the texture isn’t too pronounced.
- Natural Settings: If you’re shooting outdoors, choose a backdrop that complements your dog’s coat color—a green lawn for golden retrievers, sandy beach for terriers, etc. Keep the background cohesive by using a single dominant element (e.g., a field of tall grass).
Practical Tips for Home Set‑ups
- Use What You Have: A plain sheet, a rolled poster board, or even a clean piece of cardboard can serve as an inexpensive backdrop. Hang it on a wall or attach it to a sturdy stand.
- Control Lighting with the Background: Position your background so that natural light falls evenly across both the surface and your dog. Avoid back‑lighting the backdrop, which can create unwanted shadows.
- Keep It Steady: A lightweight backdrop may shift when a dog moves. Secure it with clips or weights at the corners to maintain stability during action shots.
- Mind the Color of Your Dog’s Accessories: If you’re using bandanas, collars, or toys, choose colors that contrast with the background. For example, a red collar against a gray backdrop will pop without clashing.
Examples That Work
- Case Study 1: A golden retriever on a white linen sheet against a softly lit kitchen counter—minimal distractions, clean lines, and the dog’s warm fur stands out beautifully.
- Case Study 2: A terrier in a backyard with a muted green grass backdrop; the dog’s dark coat contrasts sharply with the natural background, creating an engaging composition.
Remember: the goal is to create a harmonious environment where your dog is the star. By selecting the right background—neutral, textured or natural—and applying these practical tips, you’ll elevate every shot from “just a photo” to professional‑grade imagery.
Camera Settings: Aperture, Shutter Speed & ISO
When shooting professional‑looking dog photos at home, mastering your camera’s exposure triangle is essential. Each setting—aperture, shutter speed, and ISO—controls a different aspect of the image. By understanding how they interact, you can capture sharp, well‑exposed shots even in challenging indoor lighting.
1. Aperture (f‑stop)
- What it does: Controls depth of field and amount of light entering the sensor.
- Typical values for dog portraits: f/2.8 – f/5.6
- Practical tip: Use a wide aperture (f/2.8–f/3.5) to blur the background and make your dog pop out. If you’re shooting in a small space or want more of the environment visible, stop down to f/4–f/5.6.
- Example: A golden retriever sitting on a sofa—shoot at f/3.2 to keep its face sharp while softening the couch.
2. Shutter Speed
- What it does: Determines how long the sensor is exposed to light, affecting motion blur.
- Typical values for dog photography: 1/250 s – 1/500 s (for still shots); slower speeds (1/60 s) can be used with a tripod or when you’re shooting in controlled lighting and want to capture subtle movements like tail wagging.
- Practical tip: Always keep the shutter speed faster than your focal length divided by the crop factor. For example, if you’re using a 50 mm lens on an APS‑C sensor (crop factor 1.5), aim for at least 1/75 s.
- Example: A terrier jumping—shoot at 1/400 s to freeze the action and avoid blur.
3. ISO
- What it does: Adjusts sensor sensitivity to light, influencing noise levels.
- Typical values for indoor dog shoots: 200–800 (depending on available light and camera’s low‑light performance).
- Practical tip: Keep ISO as low as possible while still achieving a proper exposure. Use a high‑quality lens with a wide aperture to let more light in, allowing you to stay at ISO 200–400.
- Example: A small terrier in a dim living room—set ISO 800 and pair it with f/2.8 and a shutter speed of 1/250 s for balanced exposure without excessive noise.
Putting It All Together: Exposure Triangle Checklist
- Start with the aperture: Set to f/3.5–f/4 for a soft background.
- Choose shutter speed: Aim for 1/250 s or faster if your dog is moving.
- Adjust ISO: Keep it between 200 and 800; bump up only when necessary to avoid blur.
- Verify exposure: Use the camera’s histogram. A balanced curve with a slight tail on the right indicates proper exposure without clipping highlights.
Troubleshooting Common Issues
- Under‑exposed shots: Increase aperture, raise ISO, or slow shutter speed (if motion blur is acceptable).
- Over‑exposed shots: Decrease aperture, lower ISO, or increase shutter speed.
- Noise in low light: Reduce ISO and compensate with a wider aperture or slower shutter speed.
By mastering these settings, you’ll consistently produce sharp, beautifully lit dog portraits that look as good on the web as they do in your portfolio.
Positioning the Dog
Getting your dog in the right spot is half the battle when you’re aiming for professional‑looking home photography. Think of positioning as the foundation that supports composition, lighting, and storytelling. Below are actionable strategies—complete with visual cues, real‑world examples, and step‑by‑step instructions—to help you place your canine subject exactly where it belongs.
1. Decide on the Narrative First
- Action Shot: If you want to capture a playful moment—like a jump or a chase—place your dog slightly off‑center so the motion leads the eye toward the background.
- Portrait: For a classic headshot, position the dog at eye level with the camera. Use a soft backdrop and let the face take center stage.
- Environmental Portrait: If you’re showcasing your pet in its natural habitat (e.g., on a porch or beside a tree), use the rule of thirds to place key elements—dog, background, and foreground—in balanced positions.
2. Use Reference Points for Consistency
Marking spots on the floor with painter’s tape or small objects helps you replicate the exact same frame during multiple takes.
- Level Lines: Tape a line at the dog’s eye level; this ensures that each shot is aligned and avoids tilting.
- Depth Markers: Place a second tape marker where you want the dog to stand relative to the background—say, 2 feet from a window or 4 feet from a couch. This keeps depth consistent across shots.
3. Leverage Natural Light and Angles
- Side Lighting: Position your dog so that the light source (window, lamp) falls on one side of its face. This creates texture and dimension without harsh shadows.
- Backlighting for Silhouettes: When shooting outdoors during golden hour, place your dog between you and a low sun to get a dramatic silhouette effect.
- Avoid Direct Overhead Light: It can flatten features; instead aim for diffused light from the side or front.
4. Mind the Background and Foreground
A cluttered backdrop distracts from your dog. Keep it simple, but add subtle elements that enhance the story—like a favorite toy in the foreground or a patterned rug behind.
- Neutral Backdrops: A plain wall or a single‑color curtain works well for portraits.
- Textured Backgrounds: A wooden floor or a cozy blanket adds depth but keep colors muted so the dog remains the focal point.
5. Use Props Strategically
Props should complement, not overpower, your subject. Here’s how to position them:
- Leash as a Guide: Hold one end of a leash in front of the camera; let the dog follow it. This keeps the pet within frame and encourages natural movement.
- Toys for Action: Toss a ball or squeaky toy at a slight angle to prompt a mid‑air jump—position yourself behind the action to capture full-body motion.
- Collar & Tag Placement: If you’re shooting a portrait, have your dog look directly into the lens while its collar hangs slightly off‑center to add visual interest.
6. Keep the Dog Comfortable and Engaged
A relaxed pet produces natural expressions. Try these techniques before clicking:
- Use Treats Wisely: Hold a treat at eye level to get the dog’s gaze toward the camera.
- Play a Quick Game: A short tug‑of‑war or fetch can make the dog excited and ready for candid shots.
- Short Sessions: Keep each session under 10 minutes to avoid fatigue—especially with puppies or older dogs.
7. Test Shots & Adjust on the Fly
Take a few quick test photos and review them immediately. Check for:
- Focus Points: Eyes should be sharp; adjust your distance if they’re blurry.
- Lighting Balance: Ensure no part of the face is overexposed or under‑exposed.
- Composition: Verify that the dog occupies the intended spot—move the camera or the dog slightly if needed.
8. Practical Example: “Golden Hour Portrait”
Set up a golden hour session on a porch with a wooden floor and a light blanket in the background.
- Position the dog at eye level, 2 feet from the window where the sun is low.
- Place a small cushion 1 foot behind the dog to create depth.
- Use a soft white reflector on the opposite side to fill shadows.
- Hold a treat in front of the camera; let the dog look at it and capture the moment as they turn toward you.
With these positioning tactics, your home shoots will start looking like they belong in a professional studio—without leaving the comfort of your living room.
Capturing Action Moments
When filming a dog in motion, the goal is to keep the animal sharp and the frame fluid. Below are practical steps, equipment tips, and real‑world examples that will help you shoot professional‑looking action shots right from your living room or backyard.
1. Camera Settings for Action
- Shutter Speed: Use a fast shutter speed (at least 1/500 s) to freeze movement. If your dog is sprinting, consider 1/1000 s or higher.
- Aperture: Choose a moderate aperture (f/4–f/5.6). A wider opening gives a shallow depth of field and isolates the dog, but too wide can blur the background too much; a narrower setting keeps more of the scene in focus.
- ISO: Keep ISO low (100–400) to avoid grain. If lighting is limited, bump ISO up gradually, but stay below 800 for best quality.
- Continuous Autofocus (AF‑C): Enable continuous autofocus so the camera keeps tracking the dog’s movement.
2. Light It Right
Good lighting is crucial for high‑speed shots. Natural light works best, but if you’re indoors:
- Use a softbox or diffuser. Place it at a 45° angle to reduce harsh shadows on the dog’s face.
- Position multiple lights. A back‑light can help separate the dog from the background and add depth.
- Avoid direct flash. It creates red eye and uneven illumination; use bounce cards instead.
3. Compose for Motion
- Rule of Thirds: Place the dog’s eyes or nose on one of the intersecting points to create a dynamic frame.
- Leading Lines: Use pathways, fences, or garden beds to guide the viewer’s eye toward the moving subject.
- Low Angle Shots: Shooting from the dog’s height makes them appear more powerful and adds excitement.
4. Step‑by‑Step Action Routine
- Set up a safe play area: Clear obstacles, add soft mats if needed.
- Choose a focal point: Decide whether you want to capture the whole body or just the face.
- Use a trigger or voice command: This ensures the dog starts moving at the right moment.
- Shoot in bursts: Capture 10–15 frames per burst; this gives you plenty of options to pick the perfect freeze frame.
- Review on‑screen: Use a monitor or laptop connected via HDMI to quickly check focus and exposure.
5. Case Study: “Max the Border Collie”
In this shoot, the photographer used a Canon EOS R6 with an RF 24–70mm f/2.8 lens. They set:
- Shutter speed: 1/800 s
- Aperture: f/4.5
- ISO: 200
- Continuous autofocus + burst mode (20 fps)
The dog was led through a backyard trail while the photographer followed with a low‑angle view, resulting in crisp images of Max mid‑jump over a small fence. The final shots were exported at 300 dpi for print and compressed to JPEG for web use.
6. Editing Tips
- Stabilize: Use Lightroom’s Crop & Straighten to lock the horizon.
- Sharpen selectively: Apply sharpening only on the dog’s fur and eyes to avoid noise in the background.
- Color grading: Enhance natural colors with a subtle Vignette or “Dog‑Friendly” preset that boosts greens and browns.
With the right settings, lighting, and composition, capturing action moments of your dog can be as simple as setting up a few shots and letting them play. Practice regularly, experiment with angles, and soon you’ll have professional‑grade footage ready for social media or a personalized photo book.
Working with Commands and Tricks
When shooting professional‑looking dog photos at home, the best way to get that natural, expressive look is to combine clear commands with engaging tricks. A well‑trained dog will know what you expect, reducing the need for long sessions and making your camera work smoother.
1. Basic Commands Every Dog Should Know
- “Sit” – The foundation of most shots. Use a treat or clicker to reinforce the action, then capture the dog in a relaxed seated pose.
- “Stay” – Ideal for group shots or when you need your dog to hold still while you compose the frame.
- “Come” – Great for dynamic movement photos. Cue the dog, then walk away slowly so the camera can follow.
- “Down” – Works well for portrait angles and close‑up shots of the face.
- “Look at me” / “Watch me” – Directs eye contact straight into the lens, essential for high‑impact portraits.
2. Turning Tricks Into Photo Opportunities
Once your dog masters the basics, start incorporating fun tricks that add personality to your images:
- Jumping over a low obstacle – Set up a simple PVC frame or a broom balanced on books. The moment of takeoff and landing creates dynamic lines.
- Rolling over – Capture the dog mid‑roll; use a wide aperture to blur the background and emphasize motion.
- Playing with a toy – Use a brightly coloured squeaky toy. The dog’s excitement will show in its eyes, giving an authentic expression.
- “Sit pretty” or “Pose like a model” – Train your dog to hold a posed position for a few seconds while you adjust the lighting and composition.
3. Practical Shooting Tips While Using Commands
- Keep the command short and consistent. Use the same word or phrase each time so your dog learns to associate it instantly.
- Use high‑value treats. A small piece of chicken or a favorite snack can keep the dog motivated throughout the shoot.
- Practice in the shooting environment. If you’ll be using a particular backdrop, train your dog there so it feels comfortable during the actual session.
- Take breaks. Dogs get tired quickly. Short intervals between takes prevent frustration and keep the mood positive.
- Use a remote shutter or self‑timer. This lets you focus on directing the dog without stepping away from the camera, ensuring continuity in your shots.
4. Building a Mini “Doggie Portfolio” at Home
Create a simple storyboard before shooting:
- Portrait shot: Dog sitting with eye contact.
- Action shot: Dog mid‑jump over the obstacle.
- Playful shot: Dog chasing or playing with a toy.
- Relaxed shot: Dog lying down, looking content.
With these commands and tricks in your toolkit, you’ll be able to capture professional‑quality dog photos from the comfort of your home. Remember: consistency, patience, and a lot of treats are the keys to success!
Using Accessories & Stabilizers
When shooting professional dog footage at home, the right accessories and stabilizing gear can make a world of difference. Below are practical tools you’ll want to consider, how they improve your shots, and quick tips on using them effectively.
1. Gimbal Stabilizer (e.g., DJI Ronin‑SC)
- Why it matters: A gimbal smooths out body movements—especially useful when following a playful dog that runs in unpredictable directions.
- Setup tip: Keep the camera’s center of gravity balanced. If you’re using a heavier lens, add counterweights on the gimbal’s arm to prevent tilting.
- Practical trick: Practice “walk‑and‑shoot” mode: set the gimbal to follow your feet automatically while keeping focus locked on the dog’s face. This creates a steady, cinematic tracking shot without you having to hold the camera steady.
2. Shoulder Rig (e.g., Manfrotto 024)
- Why it matters: A shoulder rig distributes weight across your upper body, reducing fatigue during long shooting sessions and enabling quicker repositioning.
- Setup tip: Adjust the arm length so the camera sits just above eye level when you’re standing. This gives a natural perspective that looks great on social media feeds.
- Practical trick: Use the rig’s built‑in handle to hold a lightweight tripod or monopod while keeping your hands free for dog interaction—perfect for capturing spontaneous moments.
3. Tripod & Monopod Combo
- Why it matters: For static shots (e.g., product demos, “how to” tutorials), a tripod guarantees pixel‑perfect stability; for dynamic shots, a monopod offers quick mobility.
- Setup tip: Use a fluid head on the tripod to allow smooth pan/tilt movements—great for following a dog’s tail or eye movements.
- Practical trick: Attach a lightweight ball‑head to your monopod. It lets you pivot the camera quickly while still maintaining some stability, ideal for capturing fast‑paced play sessions.
4. Remote Trigger / Wireless Shutter (e.g., Sony RMT‑150)
- Why it matters: Avoids camera shake from pressing the shutter button, especially when you’re holding a leash or interacting with the dog.
- Setup tip: Pair the remote with your camera’s “silent” mode to prevent any audible clicks that might startle your pet.
- Practical trick: Use the remote in burst mode for high‑speed action shots—capture multiple frames per second and later select the sharpest image.
5. Light Modifiers (Reflectors & Diffusers)
- Why it matters: Dogs have sensitive eyes; proper lighting reduces harsh reflections and creates flattering highlights on fur.
- Setup tip: Place a 2‑by‑2 ft silver reflector opposite your main light source to bounce back soft illumination onto the dog’s face.
- Practical trick: Use a diffuser over the LED panel to soften harsh shadows during indoor shoots. A simple white foam board works well and is inexpensive.
6. Lens Filters (UV & Polarizing)
- Why it matters: UV filters protect the lens from dust, while polarizers reduce glare on shiny fur or wet surfaces.
- Setup tip: Mount a 58 mm UV filter on your prime lens before adding any other accessories to keep the front element clean.
- Practical trick: In outdoor shoots, rotate the polarizing filter until you see the fur’s texture pop—this adds depth and reduces reflections from water or shiny toys.
7. Audio Accessories (Shotgun Mic & Lavalier)
- Why it matters: Clear audio is essential for instructional content (“how to train”) and for capturing the dog’s natural sounds.
- Setup tip: Use a shotgun mic on a boom pole to capture the trainer’s voice while keeping the camera focused on the dog. Pair this with a lavalier mic clipped near your mouth to avoid background noise.
- Practical trick: Test audio levels in a quiet room before shooting; use headphones to monitor for wind or handling noises that can bleed into the recording.
8. Portable Power Solutions (Power Bank & Camera Battery Pack)
- Why it matters: Long shooting sessions can drain camera batteries, especially when using LED lights and stabilizers.
- Setup tip: Carry a high‑capacity power bank (20,000 mAh) and connect it to the camera’s USB charging port. Keep spare batteries in a pouch with quick‑access clips.
- Practical trick: Charge all devices overnight and bring a charger for your phone or tablet—use it as a live‑view monitor if your camera supports HDMI output.
9. Post‑Production Stabilization (Software Tools)
- Why it matters: Even with hardware stabilizers, some footage may still wobble slightly—software can fine‑tune the stability.
- Setup tip: Use Adobe Premiere Pro’s Warp Stabilizer or DaVinci Resolve’s Stabilizer. Set “Smoothness” to 60–70% for a subtle but noticeable effect.
- Practical trick: Apply stabilization only to clips that truly need it; over‑stabilization can cause unnatural motion blur, especially in fast dog actions.
10. Safety & Comfort Accessories (Leash Holders & Dog-Friendly Props)
- Why it matters: Keeping the dog comfortable reduces stress and makes for more natural shots.
- Setup tip: Use a short,
Pacing the Session
When you’re shooting professional dog content at home, pacing isn’t just about keeping your pup entertained—it’s about creating a rhythm that keeps both the animal and the photographer focused. A well‑paced session maximizes productivity while minimizing stress for everyone involved.
1. Set a Clear Timeline
- Pre‑shoot prep (15–20 min): Gather gear, set up the shooting area, and do a quick walk‑through with your dog to get them comfortable.
- Main shoot (45–60 min): Allocate specific blocks for each shot type—close‑ups, action shots, lifestyle poses. Keep transitions short; dogs have limited attention spans.
- Breaks (10–15 min every hour): Offer water, a quick walk, or a play session to re‑energize your dog and prevent frustration.
2. Use a Shot List with Time Stamps
Create a spreadsheet that lists:
- Shot description (e.g., “Golden retriever rolling on the grass”)
- Location on set (e.g., “Living room couch, left side”)
- Estimated time to capture
- Camera settings or props needed
During the shoot, glance at the list every 15 minutes to stay on track. This keeps you from getting lost in a loop of re‑shots and ensures each key moment is covered.
3. Keep the Dog’s Energy Balanced
- Start with high‑energy shots: Capture playful moments first while the dog is naturally enthusiastic.
- Transition to calm poses: Once the excitement fades, move into relaxed or “portrait” shots. This mirrors a natural energy arc and keeps the dog from becoming overstimulated.
4. Maintain Visual Consistency
Consistent pacing also means consistent lighting and background setups:
- Lighting checks: Every 20 minutes, adjust diffusers or reflectors to maintain even exposure.
- Background resets: If you’re using a backdrop, flip it or change the color between scenes so that each shot feels fresh but still cohesive.
5. Communicate with Your Dog
A dog’s body language tells you when they’re ready for another pose:
- Eye contact & tail wagging: Positive signals—great for a quick shot.
- Lethargy or ear droop: Time to offer a treat or short walk.
6. Capture B‑Roll and Behind‑the‑Scenes Footage
Use spare time (e.g., while the dog is resting) to shoot behind‑the‑scenes clips—camera adjustments, prop placement, or a quick training trick. These become valuable assets for marketing or social media content.
7. Review and Adjust in Real Time
After each block of shots, review the images on a tablet:
- Check exposure, focus, and composition.
- Identify any gaps—e.g., missing key expressions or angles.
- Adjust your shot list accordingly for the next phase.
Practical Example: A 2‑Hour Home Shoot
| Time Slot | Activity | Notes |
|---|---|---|
| 0–15 min | Setup & Warm‑up Walk | Dog explores the area, treats ready. |
| 15–35 min | Action Shots (Running, Jumping) | Use natural light; keep camera on a tripod for stability. |
| 35–45 min | Break & Play Session | Short walk + treat break. |
| 45–60 min | Portrait Close‑ups (Face, Eyes) | Use a macro lens; keep background simple. |
| 60–75 min | Lifestyle Poses (Living room scene) | Incorporate props like toys or blankets. |
| 75–80 min | Break & Water Refreshment | Dog’s hydration. |
| 80–95 min | B‑Roll (Camera gear, treats) | Useful for social media reels. |
| 95–110 min | Final Shots & Wrap‑up | Quick review; capture any missing expressions. |
By following this pacing strategy, you’ll produce a high‑quality, stress‑free session that yields professional dog content ready for publishing on your WordPress site.
Posture and Angles for a Professional Look
Getting the right posture and angle is essential when shooting dog portraits at home. These two elements help you capture your pup’s personality while maintaining a polished, studio‑style aesthetic.
1. Understanding the “Golden Angle”
- Definition: The golden angle (approximately 137.5°) is an aesthetically pleasing ratio that can be applied to camera placement.
- Application: Position your camera so the dog’s eye line sits roughly at one of the golden ratios on the frame. This gives a balanced, natural look without making the shot feel forced.
2. Shooting from Slightly Below Eye Level
A common mistake is shooting straight on. Instead, aim for a camera angle that’s slightly below your dog’s eye level—about 10–15 degrees downwards. This technique:
- Makes the dog appear larger and more majestic.
- Reduces unflattering angles that can distort facial features.
- Creates depth, especially when combined with a shallow depth of field.
3. The “Head‑Up” Technique for Active Breeds
For energetic breeds like Border Collies or Jack Russell Terriers, capture action shots from a higher perspective (camera at eye level or slightly above). This allows you to:
- Showcase their movement without losing detail.
- Keep the background blurred while keeping the dog in focus.
- Prevent the camera from being obscured by large, moving limbs.
4. Using a Low Angle for Confidence Boost
When you want to emphasize your dog’s confidence or size—think of a Golden Retriever or Great Dane—a low angle works wonders:
- Place the camera on the floor, slightly tilted upward.
- Encourage your pup to look up at the lens (you can hold a treat just above their head).
- This perspective makes the dog appear taller and more imposing.
5. Avoiding Common Posture Pitfalls
- Over‑compressed faces: Keep the distance between your dog’s nose and the camera at least one arm span to avoid a “smushed” look.
- Unnatural body positions: Never force a pose that makes the dog uncomfortable—use treats or toys to guide them into natural stances.
- Shallow depth of field misuse: If you’re using a wide aperture (f/1.8–2.8), ensure the dog’s face remains sharp, especially the eyes.
6. Practical Setup Checklist
- Camera Position: Start at eye level; adjust up or down based on breed size and desired effect.
- Lighting: Use softbox or natural window light to avoid harsh shadows that can distort posture.
- Background: Keep it neutral (plain wall, fabric backdrop) so the focus stays on the dog’s stance.
- Stabilization: Use a tripod or stable surface; a 3‑second timer helps capture crisp shots without camera shake.
7. Example Scenarios
- Cute Poodle Portrait: Camera at eye level, backlit with a window to create a halo effect; dog seated calmly with head slightly tilted.
- Action Shot of a German Shepherd: Low angle from the ground, capturing the dog mid‑stride; use burst mode to catch the perfect moment.
- Portrait of an Old‑Fashioned Bulldog: Slightly below eye level to emphasize the strong jawline and avoid squinting in the frame.
By mastering posture and angles, you’ll elevate your home dog photography from casual snapshots to gallery‑ready portraits. Experiment with these techniques, keep your pup comfortable, and watch your professional look come to life!
Editing Your Images
After you’ve captured the perfect shot of your dog, the real magic happens in post‑production. Editing allows you to bring out the personality of your pet, correct any technical flaws, and make your images stand out on social media or print. Below is a step‑by‑step guide that blends practical advice with creative inspiration.
1. Choose the Right Software
- Adobe Lightroom Classic / Photoshop: Industry standard for photo professionals; offers robust RAW processing, layer-based editing, and a vast plugin ecosystem.
- Capture One Pro: Excellent color fidelity and tethering options, especially useful if you’re shooting with a DSLR or mirrorless camera.
- Affinity Photo: Affordable alternative to Photoshop with a one‑time purchase; great for batch processing.
- GIMP / Darktable: Free open‑source options that cover most basic and intermediate tasks.
2. Start With Basic Corrections
- White Balance & Exposure: Adjust the temperature slider to neutralize any color cast from indoor lighting, then fine‑tune exposure so the dog’s fur isn’t blown out or under‑exposed.
- Contrast & Clarity: Increase contrast slightly (≈+10–15) to give depth, and add clarity (~+5–10) for sharper textures on fur and eyes.
- Noise Reduction: If you shot in high ISO, apply a modest noise reduction setting (<10% is usually enough) to keep the image crisp without losing detail.
3. Enhance the Dog’s Features
- Eyes: Use the Sharpen tool or a high‑frequency filter on a duplicate layer to make the pupils pop. Add a subtle vignette around the eyes with a soft brush for focus.
- Fur Texture: Duplicate the image, apply a High Pass filter set to 10–12px, then blend it using the Overlay or Soft Light mode. This brings out natural fur patterns without making them look artificial.
- Color Pop: Use a selective color adjustment layer to boost reds or yellows in the coat, giving the dog more vibrancy while keeping the background muted.
4. Clean Up Distracting Elements
Home environments often contain clutter that can distract from your subject. Use the Clone Stamp, Healing Brush, or Content‑Aware Fill to remove wires, stray toys, or shadows cast by furniture.
5. Apply Creative Effects (Optional)
- Black & White Conversion: Convert the image to monochrome for a timeless look. Keep a color version as a backup.
- Vignette or Lens Distortion: Add a subtle vignette (≈–10%) to draw attention toward the dog, or correct barrel distortion if you used a wide‑angle lens.
- Texture Overlay: For a vintage vibe, overlay a grain texture and set the layer mode to Overlay with low opacity (~5–10%).
6. Export Settings for Different Platforms
| Platform | Resolution (px) | File Format | Compression |
|---|---|---|---|
| Instagram Feed | 1080 × 1080 (square) or 1080 × 1350 (portrait) | .jpg | JPEG Quality 80–90% |
| Facebook Cover | 820 × 312 | .jpg | JPEG Quality 85% |
| Print (8×10) | 2400 × 3000 (at 300 ppi) | .tiff or .png | No compression (or PNG‑24) |
7. Batch Process for Efficiency
If you have dozens of shots, use Lightroom’s Develop Sync feature to apply the same adjustments across a folder. In Photoshop, create an Action that records your steps and then run it on all images via Image Processor.
8. Save Your Workflows
- Lightroom Presets: Export your settings as a preset file (.lrtemplate) to reuse or share with collaborators.
- Photoshop Actions: Save actions in the Action Panel, then export them for backup.
9. Backup and Archiving
Keep RAW files intact and store backups on an external drive or cloud service (e.g., Google Photos, Dropbox). Tag images with metadata such as “Dog,” “Indoor Shoot,” and “Owner Name” to make future searches painless.
By following these steps—starting from technical corrections, moving through creative enhancements, and finishing with proper export settings—you’ll turn raw dog photos into polished, shareable content that showcases your pet’s personality and the quality of your home shooting setup.
Creating a Storyboard or Mood Board
A well‑planned visual plan is the backbone of any successful dog video shoot. Whether you’re filming a playful montage, an educational tutorial, or a heart‑warming story, a storyboard (for detailed shots) or a mood board (for overall feel) will help you stay organized and keep your creative vision intact.
Why You Need One
- Clarity of Vision: It turns abstract ideas into concrete visuals, ensuring everyone involved understands the final look.
- Time & Cost Savings: By anticipating challenges and planning shots in advance, you reduce wasted takes and avoid costly reshoots.
- Team Coordination: A shared reference point keeps the director, camera operator, dog trainer, and crew aligned.
- Creative Consistency: Keeps lighting, color grading, and storytelling style uniform across scenes.
Storyboard Basics
A storyboard is essentially a comic strip of your shoot. Each panel should include:
- Frame Number – Simple numbering for easy reference.
- Shot Description – What’s happening (e.g., “Dog jumps over the pillow”).
- Camera Angle & Movement – Static, dolly, handheld, tracking shot, etc.
- Duration – Approximate time in seconds.
- Notes for Dog Trainer – Commands or cues needed (e.g., “Sit”, “Stay”).
- Lighting & Props – Where lights are positioned, props to use.
Sample Storyboard Panel
| # | Shot Description          | Camera Angle | Duration | Trainer Cue | Lighting |
|---|---------------------------|--------------|----------|-------------|----------|
| 1 | Dog enters frame, tail wagging | Wide, stationary | 5s | “Come” | Softbox on left |
Mood Board Essentials
A mood board focuses more on the aesthetic: color palette, textures, and overall vibe. Use it to:
- Set Color Tone: Choose a palette (e.g., warm earth tones for a cozy home setting).
- Select Textures: Soft blankets, shiny toys, natural wood surfaces.
- Gather Reference Images: Photos of dogs in similar poses or environments.
- Define Lighting Style: Natural daylight vs. dramatic shadows.
Creating a Digital Mood Board
- Open a design tool (Canva, Adobe Spark, Figma).
- Create a new board and add sections: “Color Palette”, “Textures”, “Reference Shots”, “Lighting”.
- Drop in images from Unsplash or your own shots.
- Add annotations (“Use a 3-point light rig to soften shadows”).
- Export as PDF and share with the crew.
Practical Tips for Dog Content
- Keep it Short: Each storyboard panel should not exceed 10–15 seconds; dogs have short attention spans.
- Use Natural Light: Position the dog near a window for flattering, diffused light.
- Plan for Breaks: Insert “Dog Break” panels to let your canine star recharge.
- Capture B‑Roll: Add extra shots of paws, toys, or background elements to use in cuts.
- Include Safety Notes: Mark any potential hazards (e.g., slippery floors) and plan how to mitigate them.
Workflow Integration
Once your storyboard/mood board is ready, integrate it into your shooting schedule:
- Pre‑Production Meeting: Review with the dog trainer and camera operator.
- Set Checklist: Create a printable version for on‑set reference.
- Post‑Production Alignment: Use storyboard panels to match footage during editing, ensuring continuity.
By investing time in crafting a detailed storyboard or mood board, you’ll turn a chaotic home shoot into a polished, professional dog video that resonates with viewers and showcases your pet’s best moments.
Finalizing and Sharing the Photos
Once you’ve captured a library of shots, it’s time to polish them into share‑worthy images that truly showcase your dog’s personality. This section walks through the post‑production workflow—from basic edits to advanced retouching—and offers tips on how to share your work across social media and other platforms while keeping copyright considerations in mind.
1. Organize Your Raw Files
- Create a Folder Hierarchy: Separate “RAW,” “Edited,” and “Exported” folders for each shoot date.
- Use Metadata: Add keywords (e.g., golden retriever, beach, golden hour) to your files in Lightroom or Capture One so you can quickly filter later.
- Back Up Immediately: Use a 3‑2-1 strategy: three copies of the data, two on different media types, one offsite (cloud).
2. Basic Color Correction & Exposure Adjustments
Start with the “Auto” or “White Balance” presets in Lightroom, then fine‑tune:
- Exposure & Contrast: Slightly increase exposure to bring out highlights without blowing them; boost contrast for depth.
- Saturation & Vibrance: Increase vibrance more than saturation to preserve skin tones while brightening fur colors.
- Clarity & Dehaze: Add clarity (≈+10) for mid‑tone detail; use dehaze sparingly if the background is foggy.
3. Advanced Retouching Techniques
For a truly professional look, consider these advanced steps:
- Spot Removal: Use the Spot Healing Brush to eliminate dust spots or stray fur on the background.
- Frequency Separation (Photoshop): Separate texture from color for flawless skin and fur surfaces.
- Selective Color Adjustments: Target specific colors in the dog’s coat with HSL sliders to avoid oversaturation.
- Lens Correction: Enable profile corrections to fix barrel distortion, especially when using wide‑angle lenses indoors.
4. Export Settings for Different Platforms
Choose the right resolution and format based on where you plan to share:
| Platform | Resolution | Format | Compression |
|---|---|---|---|
| Instagram Feed | 1080×1080 (square) or 1080×1350 (portrait) | .JPG | High quality (≈80‑90%) |
| Instagram Stories | 1080×1920 | .JPG | Medium quality (≈70%) to keep file size small |
| Facebook/LinkedIn | 1200×630 (link preview) | .JPG or .PNG | High quality (≈90%) |
| Print or PDF Portfolio | 300 ppi, 8.5×11″ (or larger) | .TIFF or high‑resolution .JPG | No compression |
5. Adding Watermarks and Branding
Protect your work while promoting your brand:
- Watermark Placement: Bottom‑right corner with a small, semi‑transparent logo works best.
- Text Watermarks: Use a clean sans‑serif font (e.g., Montserrat) and keep the opacity around 30–40% to avoid distracting from the image.
- Batch Apply: In Lightroom, create an export preset that includes your watermark so you can apply it across multiple images quickly.
6. Captioning and SEO for Social Media
A great photo needs a compelling caption to engage viewers:
- Storytelling: Mention the dog’s name, breed, or a fun anecdote (e.g., “Max loves chasing the sunset at our beach getaway!”).
- Hashtags: Combine broad tags (#dogsofinstagram) with niche ones (#GoldenRetrieverLove). Keep it to 10–15 relevant hashtags.
- SEO for Blog Posts: Use descriptive alt text (“golden retriever playing in a field of golden grass”) and include keywords naturally in the post title and meta description.
7. Scheduling and Consistency
Use tools like Later, Buffer, or Hootsuite to schedule posts for optimal engagement times (e.g., 9 am–11 am on weekdays). Maintain a consistent aesthetic by sticking to the same editing style and color palette across your feed.
8. Engaging Your Audience
Beyond posting images, build community:
- Ask Questions: “What’s your dog’s favorite outdoor activity?” invites comments.
- Run Contests: “Share a photo of your pup in the park for a chance to win a free portrait session.”
- Respond Promptly: Reply to comments within 24 hours to foster loyalty.
9. Monitoring Performance
Track key metrics using native analytics or third‑party tools:
- Engagement rate (likes + comments ÷ followers)
- Reach and impressions for each post
- Click‑through rates if you link back to your website or portfolio
10. Legal Considerations
When sharing photos of pets, keep these points in mind:
-
<li
Conclusion
Bringing the studio into your living room doesn’t mean you have to sacrifice quality or creativity. By combining thoughtful preparation, strategic lighting, and a touch of playful direction, you can capture stunning dog portraits that rival any commercial shoot.
1. Set Up Your “Mini Studio”
- Backdrop selection: A plain white or pastel backdrop works best for clean, high‑contrast images. If you’re shooting outdoors, a solid‑color tarp or even a sheet of plywood can serve as an excellent background.
- Lighting: Position two softboxes (or large LED panels) at 45° angles to your dog, slightly above eye level. This creates flattering, diffused light and reduces harsh shadows. For a more natural look, shoot during the golden hour or use a window with sheer curtains as a softbox.
- Reflector use: Place a silver or white reflector opposite the main light source to bounce light back onto your dog’s face, brightening eyes and cheekbones.
2. Keep Your Dog Comfortable
A relaxed dog is a happy subject. Follow these tips:
- Short sessions: Limit each shoot to 10–15 minutes to avoid fatigue.
- Positive reinforcement: Use treats, toys, or favorite toys as rewards for staying still or looking at the camera.
- Familiar environment: Shoot in a room where your dog spends most of its time. Familiar scents and furniture reduce anxiety.
3. Use Angles That Flatter
- Eye level: Capture the dog’s face at eye level for a natural, engaging portrait.
- Low angle: Shoot slightly below the dog to emphasize stature and create a heroic vibe.
- Side profile: For breeds with distinctive facial features (e.g., German Shepherds or Dachshunds), a side view highlights their unique shape.
4. Capture Personality Through Action Shots
Static portraits are great, but dynamic shots bring out your dog’s character. Try these:
- Mid‑air jump: Cue a short hop and capture the moment when fur is lifted.
- Tug‑of‑war: Use a favorite rope toy to elicit playful energy.
- Water splash: On a sunny day, let your dog splash in a shallow basin for a lively “wet” look.
5. Post‑Production Tips
Even the best images benefit from light editing:
- Crop and straighten: Remove distractions by cropping to focus on your dog’s face or silhouette.
- Adjust exposure & contrast: Enhance vibrancy without over‑saturating fur tones.
- Remove background clutter: Use a quick mask or blur effect if the backdrop isn’t perfectly flat.
6. Create a Shot List Beforehand
A pre‑planned list ensures you capture all essential shots without wasting time:
| # | Shot Type | Description |
|---|---|---|
| 1 | Full body | Standing, front view. |
| 2 | Side profile | Half‑body side shot. |
| 3 | Close‑up | Eye level face with focus on eyes. |
| 4 | Action (jump) | Mid‑air capture. |
| 5 | Playful interaction | Dog and owner together. |
7. Final Thoughts
With the right tools, a calm environment, and a clear vision, you can produce professional‑grade dog photos from your own home. Experiment with lighting, angles, and storytelling shots to showcase each canine’s unique personality. Remember: practice makes perfect—so keep shooting, tweaking, and enjoying the process.
FAQ
1. What equipment do I need for a professional-looking dog shoot?
A solid foundation will give you the best results without breaking the bank.
- Camera: A DSLR or mirrorless camera with interchangeable lenses (e.g., Canon EOS 90D, Sony A7 III). If you’re on a tight budget, a high‑resolution smartphone like the iPhone 15 Pro or Google Pixel 8 can still deliver great images.
- Lenses: A standard zoom (24–70mm) for general shots and a prime lens (50mm or 85mm) for flattering portraits. Consider a wide‑angle lens if you want to capture the entire setting.
- Lighting: Natural light is ideal—position your dog near a large window with diffused daylight. For controlled lighting, invest in a basic softbox kit (2–3 lights) or LED panels that allow adjustable color temperature.
- Tripod & Gimbal: A sturdy tripod keeps the camera steady for stills and video. A handheld gimbal stabilizer helps when you’re moving around the dog.
- Accessories: Reflectors, diffusers, a backdrop (solid color or patterned), and a set of treats or toys for positive reinforcement.
2. How do I keep my dog calm and engaged during the shoot?
The key is to make the session feel like playtime, not a task.
- Plan short sessions: Dogs have limited attention spans—keep each block under 15 minutes.
- Use high‑value treats: Small pieces of chicken or cheese work well. Hold them in front of the camera to direct the dog’s gaze.
- Incorporate favorite toys: A squeaky toy or a ball can keep your pup entertained while you set up shots.
- Practice commands: Ensure your dog responds to “sit,” “stay,” and “look at me.” These commands help control the composition.
- Take breaks: If your dog starts whining or chewing, pause for a quick walk or water break.
3. What are some creative shot ideas that look professional?
Experiment with angles and compositions to add visual interest.
- The “Mid‑Air Jump”: Capture the dog mid‑jump against a clear sky or open window. Use a fast shutter speed (1/800–1/1200) and a wide aperture (f/2.8–4).
- Silhouette Shots: Position the dog between the camera and a bright backlight—use a window with blinds or a sunny porch.
- Close‑up “Mouth” Portraits: Focus on the nose, whiskers, and eyes to capture emotion. Use a shallow depth of field (f/1.4–2) for a dreamy background blur.
- Action Sequences: Shoot a short video loop of your dog fetching a toy or running across a hallway. Stabilize the camera with a gimbal and use continuous focus to keep the dog sharp.
- Environmental Storytelling: Include props like a favorite blanket, a bowl of treats, or a small obstacle course to tell a story about your pet’s personality.
4. How do I edit photos and videos for maximum impact?
Post‑production is where you refine the look and make images stand out.
- Photo Editing:
- Use Lightroom or Capture One to adjust exposure, white balance, and contrast. A subtle increase in saturation can bring out coat colors.
- Apply the “Portrait” preset for skin‑tone correction (be careful with fur texture).
- Crop using the 3:2 aspect ratio for Instagram or a square crop for Facebook thumbnails.
- Video Editing:
- In Premiere Pro, DaVinci Resolve, or even iMovie, trim unnecessary footage and add slow‑motion segments for dramatic effect.
- Add background music—use royalty‑free tracks from sites like Artlist or Epidemic Sound. Sync the beat to key moments (e.g., a jump or bark).
- Insert text overlays: “Meet Max – Golden Retriever” or “Dog of the Week.” Keep fonts simple and legible.
5. How can I monetize my dog content?
Turning your passion into profit is possible with multiple channels.
- Prints and Merchandise: Sell high‑resolution prints, canvas wraps, or custom mugs via platforms like Etsy or Shopify.
- Stock Photography: Submit images to stock sites (Shutterstock, Adobe Stock) with relevant tags such as “dog portrait,” “playful pup.”
- Sponsorships and Brand Partnerships: Build a niche following on Instagram or TikTok; reach out to pet‑food brands, grooming products, or accessory makers.
- Pet Photography Workshops: Offer local classes or online tutorials teaching beginners how to capture their dogs.
- Content Licensing: License your footage for use in commercials, social media ads, or pet‑related blogs.
6. What legal and ethical considerations should I keep in mind?
Respecting animal welfare and copyright rules is essential.
- Animal Welfare: Never force a dog
Categories
- AI & Enrichment Play
- Broiler Farming
- Broiler Farming Tips
- Canine Wellness & Longevity
- Cat
- Cat & Human Connection
- Cat Adoption & Rescue
- Cat Breeds
- Cat Breeds & Personalities
- Cat Care & Health
- Cat Grooming & Hygiene
- Cat Lifestyle & Environment
- Cat Myths & History
- Cat Nutrition & Diet
- Cat Products & Reviews
- Cat Training & Behavior
- Comparison
- Consumer Awareness
- Dog
- Dog Accessories & Products
- Dog Adoption & Rescue
- Dog Breed & Lifestyle Trends
- Dog Breeding & Puppies
- Dog Entertainment & Media
- Dog Fashion & Trends
- Dog Fun & Lifestyle
- Dog Grooming & Hygiene
- Dog History & Culture
- Dog Myths, Science & Future Tech
- Dog News & Trends
- Dog Nutrition & Food
- Dog Psychology & Emotions
- Dog Safety & Security
- Dog Sports & Activities
- Dog Technology & Innovation
- Dog Training for Modern Owners
- Dog Travel & Adventure
- Dog Travel, Adventure & Culture
- Economic and Market Insights
- Educational Content
- FAQs
- Feeding Alternatives
- Festivals & Seasonal Ideas
- Fun & Entertainment
- General Knowledge
- General Pig Farming
- Health & Disease Management
- Housing and Environment
- Kittens
- Market Insights
- Miscellaneous
- Miscellaneous
- Motivational
- pig
- Pig Breeding
- Pig Breeds
- Pig Farming Stories and Inspiration
- Pig Health and Care
- Pig Nutrition
- Pig Products
- Profitability & Business
- Puppy Care
- Puppy Predictable Topics Reinvented
- Regional Focus
- Rescue & Adoption Buzz
- Senior Cats
- Senior Dog Care
- Smart Dog Tech & Gadgets
- Sustainability
- Sustainable & Eco-Friendly Dog Products
- Tech & Innovations
- Working & Service Dogs
- Broiler Feed66 products
- Country Feed33 products
- Pig Feed66 products
- Product22 products
- Raw Materials99 products
Products
-
 Fish Meal
₹1,999.00 – ₹2,999.00Price range: ₹1,999.00 through ₹2,999.00Rated 0 out of 5
Fish Meal
₹1,999.00 – ₹2,999.00Price range: ₹1,999.00 through ₹2,999.00Rated 0 out of 5 -
 FATTENING BROILER FEED
₹2,299.00 – ₹2,349.00Price range: ₹2,299.00 through ₹2,349.00Rated 0 out of 5
FATTENING BROILER FEED
₹2,299.00 – ₹2,349.00Price range: ₹2,299.00 through ₹2,349.00Rated 0 out of 5 -
 LAYER COUNTRY FEED
₹1,549.00 – ₹1,649.00Price range: ₹1,549.00 through ₹1,649.00Rated 0 out of 5
LAYER COUNTRY FEED
₹1,549.00 – ₹1,649.00Price range: ₹1,549.00 through ₹1,649.00Rated 0 out of 5 -
 COUNTER BROILER FEED
₹1,199.00 – ₹1,299.00Price range: ₹1,199.00 through ₹1,299.00Rated 0 out of 5
COUNTER BROILER FEED
₹1,199.00 – ₹1,299.00Price range: ₹1,199.00 through ₹1,299.00Rated 0 out of 5 -
 LACTATING PIG FEED
Rated 0 out of 5
LACTATING PIG FEED
Rated 0 out of 5₹2,299.00Original price was: ₹2,299.00.₹1,740.00Current price is: ₹1,740.00. -
 Maize
Rated 0 out of 5
Maize
Rated 0 out of 5₹1,650.00Original price was: ₹1,650.00.₹1,300.00Current price is: ₹1,300.00. -
 GESTATION PIG FEED (Phase 1)
Rated 0 out of 5
GESTATION PIG FEED (Phase 1)
Rated 0 out of 5₹2,249.00Original price was: ₹2,249.00.₹1,699.00Current price is: ₹1,699.00. -
 Pre Starter Broiler Feed
₹2,399.00 – ₹2,499.00Price range: ₹2,399.00 through ₹2,499.00Rated 0 out of 5
Pre Starter Broiler Feed
₹2,399.00 – ₹2,499.00Price range: ₹2,399.00 through ₹2,499.00Rated 0 out of 5 -
 FINISHER PIG FEED
Rated 0 out of 5
FINISHER PIG FEED
Rated 0 out of 5₹2,299.00Original price was: ₹2,299.00.₹1,749.00Current price is: ₹1,749.00. -
 Broiler Premix
Rated 0 out of 5
Broiler Premix
Rated 0 out of 5₹820.00Original price was: ₹820.00.₹699.00Current price is: ₹699.00.
Recently Viewed Products
-
 Rice DDGS (Distillers Dried Grains with Solubles from Rice)
₹1,600.00Original price was: ₹1,600.00.₹1,449.00Current price is: ₹1,449.00.