
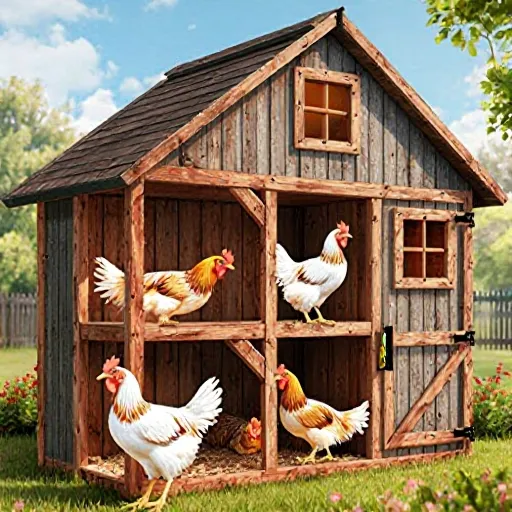
Save on materials, DIY your broiler coop!
Table of Contents
- Selecting the Right Location for Your Broiler Chicken Coop
- Designing the Layout of Your Broiler Chicken Coop
- Choosing Suitable Materials and Supplies
- Constructing the Floor for Optimal Comfort
- Creating Proper Ventilation to Prevent Heat Stress
- Providing Adequate Lighting for Healthy Chickens
- Installing Efficient Feeding and Watering Systems
- Ensuring Easy Access and Handling of Your Broilers
- Adding Perches for Rest and Comfort
- Installing a Robust Shelter from Rain and Wind
- Providing Adequate Space per Chicken to Prevent Crowding
- Implementing Hygienic Practices for Disease Prevention
- Setting Up an Efficient Waste Management System
- Conclusion
- FAQs
Selecting the Right Location for Your Broiler Chicken Coop
Selecting the right location for your broiler chicken coop is crucial for ensuring optimal growth and health of your chickens, as well as for managing costs effectively. The environment where you place your broiler chicken coop can significantly impact both the quality of life for your birds and the overall success of your farming venture. Here are some key factors to consider when choosing the perfect spot:
1. Ventilation and Air Quality
A well-ventilated area is essential to prevent respiratory issues in broilers, which can be caused by poor air quality. Ensure that the location has good airflow, but not direct drafts from wind. Proper ventilation helps in maintaining a stable temperature and humidity level inside the coop.
2. Temperature Control
Broiler chickens are sensitive to extreme temperatures. The ideal temperature range for broilers is between 75°F (24°C) and 90°F (32°C). Choose a location that provides natural shade during hot months and protection from cold winds in winter. Avoid areas prone to frost or heavy snowfall, as these can damage the coop.
3. Space Availability
Broilers grow quickly, so ensure there is enough space for them to move around freely within the coop. This not only promotes healthy growth but also reduces stress levels among the birds. A spacious area allows for better air circulation and prevents overcrowding.
4. Accessibility
Select a location that offers easy access for feeding, watering, cleaning, and harvesting eggs (if applicable). It should be close enough to your daily routines so you can manage the coop efficiently without much trouble.
5. Protection from Predators
Predators pose significant threats to broilers; thus, it’s important to choose a location that offers natural protection or has strong fencing options available. This could mean selecting an area surrounded by hedges, trees, or walls that can deter wild animals like foxes, coyotes, or even neighborhood cats.
6. Nearby Resources
Consider proximity to water sources and feed supplies when choosing the location for your coop. Accessing these resources should be convenient; however, keep in mind that excessive distance may lead to increased labor costs over time.
Practical Tips on Building a Low-Cost Broiler Chicken Coop
Building a low-cost yet functional broiler chicken coop doesn’t require extensive materials or skills. Here are some practical tips based on the earlier mentioned factors:
- Ventilation: Use old windows, fans, and natural openings to create adequate ventilation.
- Temperature Control: Install simple insulation using cardboard boxes or straw bales if necessary. Shade cloth can help during hot weather.
- Space Availability: Design the coop with multiple tiers if space is limited, allowing you to stack birds in different levels to save room.
- Accessibility: Build a ramp or incline for easier access to and from the coop. Keep paths clear of obstacles like sharp rocks or uneven ground.
- Predators Protection: Fence off vulnerable areas with sturdy wire mesh or boards. Consider using motion-sensor lights if you live in an area where wildlife poses a threat.
- Nearby Resources: If water is scarce, consider installing a small rainwater harvesting system near the coop; for feed supplies, set up bins around your property to minimize transport costs.
Selecting and preparing the right location for your broiler chicken coop is an investment in your farm’s future success. By considering all these factors carefully, you can create a healthy environment that promotes rapid growth and profitability without breaking the bank.
Designing the Layout of Your Broiler Chicken Coop
Introduction: Designing a well-thought-out layout for your broiler chicken coop is crucial for ensuring optimal growth and health of your chickens. This design should consider factors like ventilation, space allocation, and ease of maintenance to create an environment that promotes high productivity and sustainability.
Key Considerations in Layout Design
- Ventilation: Proper ventilation is essential for maintaining a healthy environment inside the coop. Fresh air circulation helps prevent respiratory issues, reduces ammonia levels, and maintains temperature stability. To ensure adequate ventilation:
- Install louvers or slats on at least two sides of the coop.
- Air vents should be placed near the ceiling to allow warm air to escape.
- Consider using a fan for forced ventilation, especially during hot weather.
- Space Allocation: The amount of space each chicken requires varies based on its breed and growth stage. For broilers, providing enough room per bird is vital to prevent overcrowding and ensure they can move around freely:
- Breed-specific guidelines suggest a minimum of 0.25 square feet (approximately 23 cm²) per bird.
- Ensure the area allows for comfortable movement, feeding, drinking, and resting space.
- Consider adding additional space for exercise runs outside the coop to prevent leg issues in broilers.
- Feeding and Watering Areas: Proper placement of feeders and waterers ensures that all chickens have easy access, which is especially important in a low-cost setup where resources are limited:
- Install feeders at a height just above the birds' reach to minimize waste.
- Position waterers away from the feeding area to avoid contamination with feed.
- Use multiple smaller feeders and waterers to prevent overcrowding and ensure all chickens have access.
- Litter Management: Proper litter management is critical for hygiene and comfort:
- Choose materials like straw, sawdust, or wood shavings that are affordable and locally available.
- Rake the litter regularly to maintain cleanliness and absorb excess moisture.
- Replace litter when it becomes soiled or wet to prevent ammonia buildup and disease spread.
- Ease of Maintenance: Design should facilitate regular cleaning and maintenance:
- Use wire flooring for easier bedding removal and waste management.
- Install dividers or partitions to separate different areas, making cleaning more manageable.
- Ensure the coop is easily accessible from all sides for thorough cleaning.
Practical Tips and Examples
Example Layout: Consider a simple yet effective layout that you can replicate or modify based on your space constraints:
- Place the entrance at one end of the coop for easy access.
- Create distinct areas within the coop: feeding and drinking area, resting area, and exercise run.
- Install a ventilation system that includes louvers and fans to maintain air quality.
- Add perches near the walls if your broilers are of a breed that enjoys them.
Conclusion
By focusing on these key aspects, you can design a broiler chicken coop layout that supports healthy growth and high productivity. Remember to adapt the design based on your specific conditions and resources available. With careful planning and execution, you'll be able to create an efficient and comfortable environment for your broilers.
Choosing Suitable Materials and Supplies
When building a low-cost broiler chicken coop, selecting the right materials and supplies is crucial for ensuring both durability and cost-effectiveness. The goal is to create an environment that keeps your chickens healthy while minimizing expenses.
Key Considerations:
- Ease of Construction: Opt for materials that are easy to handle and assemble, reducing labor costs and time spent on construction. Pre-cut lumber or recycled wood can be great options.
- Durability: Materials should withstand weather conditions such as rain, wind, and temperature fluctuations. Look for items like treated wood, metal sheets, or plastic materials that are resistant to rotting or rusting.
- Cost-Effectiveness: Choose affordable yet high-quality materials wherever possible. For instance, using old pallets can provide a sturdy foundation for the coop without a significant financial outlay.
Specific Materials and Supplies:
Poultry Wire or Chicken Wire:
This is essential for enclosing your chicken coop. Ensure that it has small enough openings to prevent chickens from escaping but not so small that they cause stress due to overcrowding.
Treated Wood or Recycled Materials:
For the frame and floor, treated wood can be a good choice as it resists moisture and pests. Alternatively, recycled materials like old pallets can be repurposed effectively with minimal cost.
Metal Sheets (Roofing):
Lightweight metal sheets are ideal for the roof as they provide excellent weatherproofing at a low price point. Ensure proper ventilation to prevent heat build-up inside the coop.
PVC Pipes:
These can be used for ventilation, drainage, and even fencing. PVC pipes with holes drilled through them make great ventilation systems that help regulate temperature inside the coop.
Practical Advice:
- Recycling: Utilize recycled materials whenever possible to reduce costs and environmental impact. Old tires, plastic bottles, and even metal scraps can be repurposed creatively.
- Local Suppliers: Shop locally for supplies where available; this reduces transportation costs and supports local businesses.
- DIY Projects: Engage in DIY projects to build parts of the coop yourself, such as nesting boxes or feeders. This not only cuts down on expenses but also adds a personal touch to your project.
Examples:
Nesting Boxes: Use old wooden crates with holes cut out for ventilation and easy cleaning. Line the inside with hay or straw for comfort.
Feeders: Create DIY feeders using plastic containers or PVC pipes. Drill holes at intervals to allow access but prevent wastage.
Ventilation Holes: Place ventilation holes in strategic locations, such as the roof and sides, ensuring good air circulation without letting predators in.
Final Thoughts:
Selecting suitable materials and supplies for your low-cost broiler chicken coop involves careful planning and resourcefulness. By focusing on cost-effectiveness, durability, and practicality, you can create a functional and comfortable environment that supports healthy chickens at minimal expense.
Constructing the Floor for Optimal Comfort
In constructing a low-cost broiler chicken coop, one of the critical aspects to consider is the floor. The quality and design of the flooring can significantly impact the health, comfort, and productivity of your chickens. Here are some essential steps and tips to ensure you build a comfortable and hygienic floor for your broilers.
Materials Needed
For a low-cost construction, you will need:
- Rice hulls or wood shavings (for bedding)
- Gravel or small stones (optional for drainage)
- Wire mesh (to prevent soil from mixing with litter)
- PVC pipes or wooden slats
Step-by-Step Guide to Building the Floor
- Laying the Base: Start by laying a layer of gravel or small stones at the bottom of your coop. This helps in drainage and prevents waterlogging which can lead to health issues for your chickens.
- Adding Wire Mesh: Place wire mesh over the gravel base. This will keep soil from mixing with the bedding material, ensuring better hygiene.
- Incorporating PVC Pipes or Wooden Slat Floors: Use PVC pipes or wooden slats to create a raised floor above the wire mesh. This helps in preventing moisture buildup and allows for good ventilation under the coop floor.
- Adding Bedding Material: Spread a layer of rice hulls or wood shavings over the flooring. These materials are not only comfortable but also absorb excess moisture, which is crucial for maintaining hygiene and reducing ammonia levels in the coop.
Benefits of a Well-Constructed Floor
Building your floor with these materials and methods offers several benefits:
- Better Hygiene: A proper flooring system reduces the risk of disease spread by minimizing contact between the chickens' feet and potential pathogens.
- Improved Ventilation: Proper ventilation is crucial for maintaining a healthy environment. By creating an elevated floor, you allow air to circulate under the coop, reducing humidity levels.
- Comfortable Litter: Using appropriate bedding materials ensures that your chickens have a comfortable and warm spot to rest, which can improve their overall health and egg production.
Tips for Maintenance
To keep your flooring in top shape, follow these maintenance tips:
- Regularly replace or replenish the bedding material to maintain its effectiveness.
- Ensure that the drainage system is functioning properly by checking regularly and cleaning out any blockages.
- Maintain a clean environment by promptly removing any waste or spilled feed from the coop floor.
Conclusion
The flooring of your broiler chicken coop plays a vital role in ensuring the health and comfort of your flock. By following these steps and tips, you can construct a floor that not only meets budget constraints but also provides optimal conditions for your chickens.
Creating Proper Ventilation to Prevent Heat Stress
In a low-cost broiler chicken coop, proper ventilation is crucial for maintaining optimal conditions that prevent heat stress in chickens. Heat stress can significantly impact the health and productivity of your flock, leading to reduced growth rates, increased mortality rates, and lower meat quality. Therefore, ensuring adequate ventilation should be a priority when building or modifying your coop.
Understanding Ventilation Needs
The amount of ventilation required depends on several factors including the size of the coop, the number of chickens, environmental conditions such as temperature and humidity, and the design of the coop. Proper ventilation helps to regulate air quality by removing stale air and replacing it with fresh air, which is essential for maintaining a comfortable environment for your flock.
Designing Effective Ventilation
To create effective ventilation in your low-cost broiler chicken coop, consider the following:
- Placement of Perches: Place perches away from drafts to prevent chickens from chilling. Chickens should have access to a dry area where they can rest without being directly exposed to cold air.
- Use of Fans and Openings: Install fans if possible, which can help circulate air effectively. Ensure there are sufficient openings in the coop for fresh air to enter and hot air to escape. Windows or louvers can be used to provide controlled ventilation.
- Positioning Roosters and Feeders: Keep feeders and waterers away from drafts, as chickens may not consume enough if they are uncomfortable due to cold air. Placing them in a corner where the air flow is less direct can help avoid this issue.
Tips for Building Proper Ventilation
Here are some practical tips to ensure your coop has proper ventilation:
- Use Insulation Wisely: While insulation is important for keeping the coop warm in winter, excessive insulation can trap heat and cause excessive humidity during hot summer months. Balance insulation with adequate ventilation.
- Regular Cleaning: Regular cleaning of the coop ensures that dust and debris do not interfere with the natural flow of air, which could lead to poor ventilation and increased heat stress.
- Monitor Temperature: Use a thermometer to monitor the temperature inside the coop. Aim for an optimal temperature range between 70°F (21°C) and 85°F (29°C), depending on the age of your chickens.
Examples and Case Studies
To illustrate how proper ventilation can be achieved with a low-cost coop, consider these examples:
- Example 1: A coop built using simple materials like plywood and plastic sheeting for the roof. The roof has cut-out windows that allow natural airflow during warmer months while being closed off in colder months.
- Example 2: Another example is a coop where the sides are constructed with wire mesh, allowing for good ventilation without compromising security too much. The coop also includes a small fan to help circulate air inside the coop.
Conclusion
In conclusion, creating proper ventilation in your low-cost broiler chicken coop is essential for preventing heat stress and maintaining optimal conditions for your flock. By considering factors like placement of perches, use of fans and openings, positioning feeders and roosters, using insulation wisely, regularly cleaning the coop, and monitoring temperature, you can ensure that your chickens stay healthy and productive throughout the year.
Providing Adequate Lighting for Healthy Chickens
To ensure that your broiler chickens remain healthy and productive, providing adequate lighting is crucial. Proper lighting not only influences their feeding behavior but also impacts their growth rate and overall well-being. This section will delve into the importance of lighting in a low-cost broiler chicken coop, offering practical advice on how to implement it effectively.
Understanding Lighting Requirements
Broiler chickens need a specific amount of light each day to maintain their health and growth rate. Typically, they require 16 hours of light per day during the brooding period (0-4 weeks), reducing to 8 hours of light per day for older birds. This gradual reduction in light exposure helps to slow down the growth rate of the chickens, which is essential for producing meat without compromising on health.
Using Natural Light
If your chicken coop allows it, maximizing natural light can be a cost-effective solution. Ensure that your coop has large openings or windows that allow sunlight to enter freely during daylight hours. This not only saves on electricity but also mimics the natural environment chickens are accustomed to.
Electric Lighting Solutions
In areas with limited natural light, electric lighting is necessary. LED lights are an excellent choice due to their energy efficiency and longevity. They should be installed at a height of about 2 meters from the floor to ensure that all chickens have access to light.
Lighting Schedules
To manage your chicken's lighting schedule effectively, consider using timers or motion detectors. These devices can automatically turn lights on and off at specific times, ensuring consistency in your lighting regime. Consistent lighting schedules help regulate the chickens' circadian rhythms, which is crucial for their health and productivity.
Practical Advice
- Consistency: Ensure that lights are on at the same time every day to avoid confusing your chickens. This consistency helps in regulating their feeding and resting patterns.
- Light Intensity: Brighter lights can encourage faster growth but may lead to stress, so it's important to find a balance. Too dim lighting can cause delays in development.
- Reduction Phase: Gradually reduce the light intensity and duration as your chickens age to slow down their growth rate and improve meat quality.
Examples
Imagine you have a low-cost broiler chicken coop with limited natural light. By installing LED lights that are turned on at sunset and off at sunrise, you can mimic the natural day-night cycle effectively. Use timers to ensure these lights stay on for 16 hours during the brooding period and gradually reduce this time as your chickens mature.
Conclusion
Providing adequate lighting is a critical aspect of maintaining healthy and productive broiler chickens in a low-cost coop. By understanding the lighting requirements, utilizing natural light where possible, and implementing effective electric lighting solutions with proper schedules, you can enhance your chickens' well-being and improve meat quality.
Installing Efficient Feeding and Watering Systems
To ensure optimal growth and health of your broiler chickens, it is crucial to install efficient feeding and watering systems in your coop. This setup not only enhances productivity but also ensures the well-being of the birds. In this guide, we will explore how you can build a low-cost broiler chicken coop while incorporating these essential systems.
Understanding Feeding Systems
Proper feeding is a key factor in the success of your broiler chickens. A well-designed feeder ensures that birds have easy access to feed, reducing waste and preventing overeating which can lead to health issues such as leg disorders.
- Automatic Feeders: These systems are highly efficient but can be expensive. They automatically dispense feed at set intervals, ensuring consistent intake without manual intervention. However, they require electricity or a reliable power source.
- Spiral Feeders: A less costly alternative is the spiral feeder, which allows birds to peck food from an inclined trough. This setup is effective in preventing overcrowding and reducing feed spillage.
- Pan Feeders: These are simple, low-cost options where feed is dispensed into pans. While they require more manual attention, they can be easily cleaned and refilled. Ensure that the height of the feeder is adjustable to accommodate growing chickens.
Watering Systems
Just as important as feeding is ensuring a constant supply of clean water. Hydration is essential for maintaining energy levels, supporting digestion, and aiding in overall health. Inadequate water intake can lead to reduced growth rates and even death.
- Automatic Waterers: These systems are highly recommended as they provide a continuous supply of clean water. They come with reservoirs that need regular refilling, but once set up, they reduce the time spent on manual tasks like cleaning or changing water.
- Floating Drinkers: Another low-cost option is the floating drinker, which allows birds to sip water as needed from a small trough. These drinkers should be cleaned regularly and checked for leaks.
- Vented Waterers: To prevent contamination, you can use vented waterers that have a filter system. This helps in keeping the water clean by trapping dirt and debris before they enter the drinking area.
Practical Advice for Setting Up Systems
To get the most out of your feeding and watering systems, follow these practical tips:
- Space Requirements: Ensure that feeders and waterers are spaced appropriately to prevent overcrowding. Chickens should have access to feeders and drinkers without having to fight for space.
- Elevation: Raise the feeders and drinkers slightly above ground level using platforms or bricks. This keeps them out of reach of wild animals and helps maintain cleanliness.
- Frequent Checks: Regularly inspect your systems for any malfunctions, blockages, or signs of wear and tear. Prompt repairs can prevent health issues in the flock.
- Cleaning: Clean feeders and drinkers daily to avoid bacterial growth and contamination. Use a simple solution of water and mild detergent and allow them to air dry before use.
Conclusion
The installation of efficient feeding and watering systems is a fundamental aspect of building a successful broiler chicken coop. By choosing the right system based on your budget and needs, you can ensure that your chickens have all they need to thrive. Following these guidelines will help you create a low-cost yet effective setup that supports healthy growth and maximizes productivity.
Ensuring Easy Access and Handling of Your Broilers
When building a low-cost broiler chicken coop, ensuring easy access and handling is crucial for the health and productivity of your flock. Proper design can save you time and effort while also promoting better broiler care practices.
Design Considerations for Easy Access
The layout of your broiler coop should facilitate movement in and out of the structure. Consider these key elements:
- Entrance Door: Ensure that the entrance door is wide enough to allow easy access for you, as well as the broilers themselves. A door width of at least 30 inches (76 cm) can be sufficient for most cases.
- Elevation: Elevate the coop slightly off the ground to prevent water and mud from entering. This also helps in maintaining cleanliness inside the coop.
- Parking Area: Design a small parking area outside the coop where you can rest and observe your broilers without stepping directly into the coop, reducing the risk of contaminating feed or bedding with dirt.
Practical Tips for Handling Your Broilers
To ensure that handling your broilers is easy and stress-free, follow these practical tips:
- Familiarize Yourself: Spend time getting to know the behavior of your broilers. Understanding their movements and preferences can make it easier to handle them.
- Use Gentle Movements: Broilers are sensitive birds, especially during the brooding period. Handle them gently to avoid causing stress or injury.
- Group Handling: If you have multiple broilers, consider handling them in groups rather than individually. This helps minimize stress and makes the process more efficient.
Examples of Low-Cost Solutions
Here are some examples of how to incorporate easy access and handling into a low-cost broiler coop:
- Sloped Floors: Use sloped floors with a gentle incline towards the exit door, making it easier for you to clean and move the broilers.
- Nesting Boxes: Incorporate nesting boxes that are easily accessible. This not only provides a comfortable place for your broilers but also makes it easy for you to check on them.
- Retractable Doors: Consider using retractable doors that can be closed during the day and opened at night, allowing for better temperature control and easier access.
Conclusion
In conclusion, ensuring easy access and handling of your broilers is an essential aspect of building a low-cost broiler chicken coop. By focusing on design elements such as the entrance door, elevation, and parking area, you can create a structure that not only benefits your broilers but also streamlines your daily tasks.
Adding Perches for Rest and Comfort
When building or improving your broiler chicken coop, adding perches for rest and comfort is an essential consideration. Perches not only provide a comfortable place for your chickens to roost at night but also contribute significantly to their overall health and well-being. By offering these vertical resting spaces, you can help reduce stress, promote natural behavior, and enhance the hygiene of your coop.
Benefits of Adding Perches
- Reduces Stress: Chickens naturally prefer to roost off the ground at night. Providing perches can help reduce stress by allowing them a safe, elevated spot to sleep.
- Promotes Natural Behavior: Perching allows chickens to mimic their wild counterparts, which can lead to healthier and more active birds.
- Enhances Hygiene: Keeping the coop clean and dry is crucial for preventing diseases. By providing perches, you help keep the nesting boxes and living areas cleaner, as chickens will spend less time on the ground.
How to Build Perches
Building perches is a straightforward task that can be done with minimal materials. Here’s how you can create simple yet effective perches for your broilers:
- Select the Right Material: Use durable, non-toxic wood such as pine or cedar. Avoid treated wood to keep the coop environment safe for both chickens and humans.
- Measure Correctly: Perches should be about 1-2 inches in diameter (depending on the size of your broilers) and placed at heights that are comfortable for them, typically between 4 and 6 feet above the ground.
- Spacing is Key: Space perches so that each chicken has enough room to roost comfortably. A general rule is to provide 8-12 inches of perch space per bird.
- Secure Perches Properly: Attach the perches securely using nails or screws, and ensure they are level for a comfortable resting experience.
Placement Tips
The placement of perches is equally important as their construction. Here are some practical tips to consider:
- Avoid Wet Areas: Place perches in dry, well-ventilated areas to prevent moisture buildup and potential health issues.
- Group Perches Together: Chickens tend to roost together. Placing multiple perches close together can encourage more natural flock behavior.
- Use Nesting Boxes Wisely: Ensure that nesting boxes are separate from the perches and do not obstruct them, allowing for clear pathways between feeding areas and resting spots.
Examples and Practical Advice
Here are some examples of how you can incorporate perches into your coop:
- DIY Perch Ideas: You can use old branches, wooden dowels, or even PVC pipes cut to size for perches. These can be easily found around the home and require little cost.
- Rotating Perches: Consider rotating perches seasonally. This ensures that perches are not overcrowded during busy times of the year when more chickens may use them.
- Combine with Other Features: You can integrate perches with other coop features like feeders and waterers, creating a functional layout that promotes both comfort and efficiency.
In conclusion, adding perches to your broiler chicken coop is not just about providing a comfortable place for your birds to rest. It’s an investment in their health, happiness, and overall well-being. By following the tips outlined above, you can create an environment that supports natural behaviors and keeps your chickens healthy and content.
Installing a Robust Shelter from Rain and Wind
To create a robust shelter that protects your chickens from rain, wind, and other environmental elements, it is essential to follow the principles of sturdy construction similar to those used in building a low-cost broiler chicken coop. This section will guide you through the process with practical advice, examples, and detailed steps.
Materials Needed
- Strong wooden poles or posts
- Ribbed metal roofing (corrugated tin)
- Wooden boards for flooring and walls
- Nails, screws, and nails
- Plywood for additional support and sealing
- Weatherproofing paint or sealant
Step-by-Step Construction Guide
- Site Selection: Choose a level, well-drained area. Ensure the site is free from standing water and prone to flooding.
- Foundation: Dig shallow holes for your posts where you want them. Place concrete blocks or bricks at the bottom of each hole for stability. Set the wooden posts in place.
- Framing: Use strong, straight wooden poles to frame the sides and front/back of the coop. Ensure that the corners are square by measuring diagonally from one corner to another.
- Ribbed Metal Roofing: Install the corrugated tin or metal roofing over the framed structure. Secure it with screws or nails, ensuring a tight seal to prevent wind and rain penetration.
- Flooring: Lay wooden boards horizontally across the frame inside the coop for flooring. This will help keep your chickens dry during wet weather.
- Windows (Optional): For ventilation, consider installing small windows or slats in the sides of the coop. Ensure these are high enough off the ground to prevent drafts but low enough for good air circulation.
- Weatherproofing: Apply weatherproofing paint or sealant over any exposed wood surfaces to protect them from rot and decay.
Tips and Tricks
- Use Strong Nails: Use galvanized nails that are long enough to penetrate the corrugated metal roof securely. This prevents rusting and loosening over time.
- Secure Connections: For additional security, consider using both screws and nails at key points of attachment between the roofing material and the frame.
- Regular Maintenance: Inspect your coop regularly for any signs of damage or wear. Repairing small issues promptly can save you from major problems later on.
Examples
Here are some examples of low-cost broiler chicken coops that incorporate these principles:
- Simple Frame Structure: This design uses basic wooden posts and a simple corrugated metal roof. It is easy to build and maintain.
- Add Ventilation Slats: For better air circulation, you can add slatted sides or windows at the top of the coop.
- Incorporate Roosting Bars: Install horizontal bars inside the coop for your chickens to roost on. This keeps them off the ground and out of muddy areas.
By following these steps, you can create a durable shelter that will protect your broilers from harsh weather conditions while ensuring they have a safe and comfortable place to live. Remember, proper planning and attention to detail are crucial for building an effective low-cost but robust chicken coop.
Providing Adequate Space per Chicken to Prevent Crowding
Proper space allocation per chicken is crucial for maintaining a healthy, productive flock and ensuring ethical treatment of your broiler chickens. Crowded conditions can lead to stress, disease spread, and poor growth rates. By providing adequate space, you not only promote the well-being of your birds but also enhance their productivity and yield.
Understanding Space Requirements
The amount of space required per chicken depends on factors such as breed, age, and housing type. For broiler chickens specifically, it is recommended to provide at least 0.5 square feet (47 cm²) per bird for the growing period and 1-2 square feet (93-186 cm²) during the finishing phase.
These guidelines are based on industry standards and can vary slightly depending on local regulations and practices. Always refer to the specific breed's requirements, as some may need more or less space based on their size and activity level.
Designing a Low-Cost Broiler Chicken Coop
Building a low-cost broiler chicken coop can be both efficient and practical. Here are some tips to ensure adequate space per bird:
- Use Efficient Layouts: Optimize the design of your coop by ensuring that each chicken has enough room to move around comfortably without feeling confined. A simple rectangular layout with a central feeding area and separate sleeping quarters can be effective.
- Incorporate Perches and Roosting Spaces: Chickens need places to perch and rest. Ensure there are adequate perches for your flock, spaced appropriately so that each chicken has access without overcrowding.
- Use Vertical Space Wisely: If floor space is limited, consider using vertical space by adding shelves or multi-tiered nesting boxes. This can help reduce the amount of floor space needed while still providing adequate living areas.
Practical Examples
Imagine you have a coop that houses 20 broiler chickens. Based on the recommended space, you should provide at least:
- For growing period: Each bird needs 0.5 square feet of floor space. Therefore, for 20 birds, you need a minimum coop size of 10 square feet (9.3 m²).
- For finishing phase: Each bird requires between 1 and 2 square feet of space. For this stage, the recommended coop size would range from 20 to 40 square feet (1.86 to 3.7 m²).
To calculate floor area per bird, simply divide the total floor area by the number of birds:
Area per bird = Total Floor Area / Number of Birds
Conclusion
By providing adequate space for your broiler chickens, you are fostering a healthier environment that reduces stress and improves overall welfare. This not only benefits the birds but also ensures better meat quality and increased profitability in your farming venture.
Implementing Hygienic Practices for Disease Prevention
When building or managing a broiler chicken coop, implementing hygienic practices is crucial for disease prevention and maintaining optimal health. This not only ensures the well-being of your chickens but also contributes to higher productivity and better economic returns.
- Regular Cleaning: Regular cleaning of the coop is essential. It helps in removing waste, food residues, and other potential contaminants. For a low-cost setup, using basic tools like shovels, brooms, and water can be sufficient.
- Dust Bathing: Encourage your chickens to bathe in dust regularly as it helps control parasites such as mites and lice. Provide a shallow box filled with dry, clean soil or wood ash where they can take dust baths.
- Water Quality: Ensuring access to clean water is vital. Change the water frequently and use filters if possible to reduce contamination from bacteria and other pathogens. For low-cost setups, you can install simple waterers that are easy to clean.
Proper nutrition plays a significant role in disease prevention by boosting the immune system of your chickens. Feeding them a balanced diet rich in vitamins, minerals, and essential amino acids is crucial. For low-cost feeders, consider using locally available grains like maize or sorghum mixed with supplements to ensure they receive all necessary nutrients.
- Use of Disinfectants: Periodically disinfect the coop and feeding areas. Use mild disinfectants that are affordable but effective, such as bleach solutions or sodium hypochlorite. Ensure thorough cleaning before applying the disinfectant to avoid residual contamination.
- Sunlight Exposure: Taking advantage of natural sunlight is an excellent low-cost method for disinfection. UV rays from the sun can kill many pathogens if surfaces are exposed long enough.
Maintaining hygiene also involves controlling pests which can spread diseases to your chickens. Regular inspections and interventions such as using natural predators like birds or physical barriers can be effective. For low-cost setups, you can create habitats for beneficial insects that prey on harmful bugs.
Regularly monitor the health of your flock. Early detection of any signs of illness can prevent widespread infections. This involves observing behavior changes like reduced activity or appetite loss and inspecting feathers for parasites. Immediate treatment by a vet is crucial when necessary.
Implementing hygienic practices in your broiler chicken coop is not just about disease prevention; it’s also an investment in the long-term health and productivity of your chickens. By following these guidelines, you can create a healthier environment that supports better growth rates and yields higher profits for your farming business.
Setting Up an Efficient Waste Management System
Setting up an efficient waste management system is crucial for maintaining a healthy and sustainable environment, especially when managing resources such as poultry farm waste. This section draws parallels to the concept of building a low-cost broiler chicken coop, emphasizing practical steps that can be applied across various agricultural settings.
Before diving into specific strategies and tools, it's essential to understand what constitutes waste management. In the context of poultry farming, managing waste involves collecting, processing, and disposing of byproducts like manure, feathers, and bedding material in a manner that minimizes environmental impact.
- Composting: Composting is one of the most effective ways to manage poultry waste. By mixing organic materials with chicken manure, you can create a nutrient-rich compost that improves soil quality when used as fertilizer. This process not only reduces the volume of waste but also turns it into a valuable resource.
- Use of Bedding Material: Choosing appropriate bedding material is key to reducing waste in broiler chicken coops and other poultry settings. Straw, sawdust, or recycled paper are excellent options as they absorb moisture effectively and can be reused multiple times.
- Solid Waste Separation: Implementing a system where solid waste is separated from liquid waste can prevent the clogging of septic systems. This separation allows for better processing and disposal of each component individually, ensuring that resources are used efficiently.
The principles of building a low-cost broiler chicken coop can be extended to waste management. By focusing on sustainability and resourcefulness, you can create an efficient system that minimizes costs while maximizing benefits.
- Cost-Effective Materials: Utilize locally sourced materials such as bamboo or recycled wood for constructing the coop. These options are not only affordable but also environmentally friendly.
- Air Circulation and Hygiene: Ensure proper air circulation to prevent dampness, which can lead to ammonia buildup. Regular cleaning and hygiene practices help in managing waste effectively.
- Water Management: Install a simple water distribution system that minimizes spillage and waste. This reduces the amount of contaminated water that needs to be managed separately from solid waste.
To ensure your waste management system is efficient, consider these practical tips:
- Regularly rotate bedding material in the coop to maintain hygiene and reduce ammonia levels.
- Encourage natural decomposition by allowing manure to sit uncovered for a few days before composting or using it as fertilizer.
- Monitor and adjust water usage to prevent overflows, which can lead to increased waste management challenges.
In conclusion, setting up an efficient waste management system in a broiler chicken coop is not just about reducing costs but also ensuring environmental sustainability. By applying similar principles of resourcefulness and sustainability across different aspects of poultry farming, you can create a more efficient and eco-friendly operation.
Conclusion
Building a low-cost broiler chicken coop is not just about providing shelter for your flock; it's also an opportunity to maximize space, optimize resource usage, and ensure the health and productivity of your birds. By following these practical steps inspired by How to Build a Low-Cost Broiler Chicken Coop, you can create an efficient and cost-effective setup that meets the specific needs of broilers.
Optimizing Space Utilization
Efficient space utilization is crucial for maximizing productivity in broiler chicken coops. By ensuring that each bird has enough room to move around, eat, and drink without overcrowding, you can prevent stress, reduce cannibalism, and enhance growth rates. For instance, the recommended spacing for broilers is typically 0.3 square feet per bird during the growing period. This allows for optimal feed intake and reduces competition for resources.
Cost-Effective Materials
When building a low-cost coop, it's essential to choose materials wisely. Using locally sourced or recycled materials can significantly reduce costs while still providing the necessary protection against weather elements. For example, using old pallets for flooring and walls not only reduces waste but also provides insulation that helps regulate temperature inside the coop. Additionally, corrugated cardboard or plastic sheeting can be used as temporary roofing during construction.
Hygiene and Ventilation
Maintaining hygiene is critical for broilers to prevent disease outbreaks and ensure good health. Proper ventilation ensures that air quality inside the coop remains optimal, which helps reduce respiratory issues common in broiler chickens. To achieve this, consider installing simple venting systems such as plastic pipes cut into sections or using larger vents strategically placed at high points on the structure.
Feeding and Watering Systems
Efficient feeding and watering systems are vital for broiler chickens to ensure they receive adequate nutrition throughout their growth phase. Setting up automatic feeders and waterers can save time and labor while promoting consistent consumption of feed and water. It's important to regularly clean these systems to prevent bacterial contamination, ensuring that your birds stay healthy.
Practical Tips for Success
- Start early: Begin planning your coop construction well in advance of when you plan to introduce broilers.
- Follow guidelines: Adhere strictly to the recommended dimensions and spacing provided by How to Build a Low-Cost Broiler Chicken Coop for best results.
- Maintain hygiene: Regularly clean and disinfect the coop to prevent disease spread among your flock.
- Monitor growth: Keep track of your broilers' weight and health status regularly to ensure they are meeting their potential.
By carefully considering these factors, you can build a low-cost but effective broiler chicken coop that will support the successful raising of healthy and productive broiler chickens. Remember, the key is balance—providing enough space for comfort while keeping costs down.
FAQs
- Q: What materials are needed to build a low-cost broiler chicken coop?
A: Building a low-cost broiler chicken coop requires minimal investment. You can use materials such as wooden pallets, old doors, and wire mesh. Wooden pallets provide sturdy walls, while old doors can be used for the entrance. Wire mesh is essential for ventilation and preventing predators from entering. For example, you can find free wooden pallets at local businesses or through community platforms. Old doors are often discarded but can be reused with some repairs. Wire mesh can be sourced from hardware stores or even recycled from old fences. - Q: How do I ensure proper ventilation in the coop?
A: Proper ventilation is crucial for maintaining a healthy environment for your broiler chickens. You should have at least one square foot of vent space per bird to prevent heat buildup and reduce humidity levels. For instance, you can create vents on the top of the coop or use perforated wire mesh for airflow. Ensuring good air circulation helps keep the coop cool during hot weather and reduces respiratory issues in your chickens. - Q: What size should the coop be?
A: The size of the coop depends on the number of broiler chickens you plan to raise. Generally, allow at least 1 square foot of space per bird for movement and comfort. For example, if you are raising 50 broiler chickens, your coop should be at least 50 square feet in area. It is important to provide ample space so that the birds have enough room to grow without overcrowding. - Q: How do I protect my broiler chickens from predators?
A: Predators such as foxes, raccoons, and even neighborhood cats can pose a threat to your broiler chickens. To protect them, it is essential to build the coop with a strong and secure roof that extends at least 12 inches beyond the walls to prevent predators from accessing the coop from above. Additionally, using wire mesh for the floor and walls ensures that smaller animals cannot enter through gaps. Regularly inspecting the coop for any damage or weak spots can help maintain security. - Q: What should I feed my broiler chickens?
A: Broiler chickens need a balanced diet to ensure they grow quickly and healthily. You should provide them with commercial broiler feed, which is formulated specifically for their nutritional requirements during this growth phase. For instance, you can mix the feed with water to create a slurry that is easy for the birds to consume. It is also important to supply fresh water at all times. - Q: How do I keep my broiler chickens clean?
A: Maintaining cleanliness in the coop is vital for preventing diseases and ensuring healthy broilers. Regularly cleaning the coop by removing waste, bedding materials, and soiled areas helps to reduce ammonia levels and prevents infections. You can use a shovel or rake to remove debris daily, and replace bedding materials every few weeks. Additionally, providing enough space between the birds allows for better airflow and hygiene. - Q: How long do broiler chickens need in the coop?
A: Broiler chickens typically spend about 6 to 8 weeks in the coop before being ready for slaughter. During this time, they will grow rapidly and require proper care to ensure optimal health and welfare. It is important to monitor their growth and adjust feed amounts accordingly as needed. - Q: What are some tips for successful broiler chicken rearing?
A: Successful broiler chicken rearing involves careful planning, proper nutrition, and consistent care. Some key tips include: - Providing a balanced diet with commercial feed. - Ensuring adequate ventilation to maintain air quality. - Maintaining clean and hygienic living conditions. - Offering plenty of space for movement and exercise. - Protecting against predators by building secure fencing around the coop. By following these guidelines, you can help your broiler chickens grow into healthy and productive birds.
Categories
- AI & Enrichment Play
- Broiler Farming
- Broiler Farming Tips
- Canine Wellness & Longevity
- Cat
- Cat & Human Connection
- Cat Adoption & Rescue
- Cat Breeds
- Cat Breeds & Personalities
- Cat Care & Health
- Cat Grooming & Hygiene
- Cat Lifestyle & Environment
- Cat Myths & History
- Cat Nutrition & Diet
- Cat Products & Reviews
- Cat Training & Behavior
- Comparison
- Consumer Awareness
- Dog
- Dog Accessories & Products
- Dog Adoption & Rescue
- Dog Breed & Lifestyle Trends
- Dog Breeding & Puppies
- Dog Entertainment & Media
- Dog Fashion & Trends
- Dog Fun & Lifestyle
- Dog Grooming & Hygiene
- Dog History & Culture
- Dog Myths, Science & Future Tech
- Dog News & Trends
- Dog Nutrition & Food
- Dog Psychology & Emotions
- Dog Safety & Security
- Dog Sports & Activities
- Dog Technology & Innovation
- Dog Training for Modern Owners
- Dog Travel & Adventure
- Dog Travel, Adventure & Culture
- Economic and Market Insights
- Educational Content
- FAQs
- Feeding Alternatives
- Festivals & Seasonal Ideas
- Fun & Entertainment
- General Knowledge
- General Pig Farming
- Health & Disease Management
- Housing and Environment
- Kittens
- Market Insights
- Miscellaneous
- Miscellaneous
- Motivational
- pig
- Pig Breeding
- Pig Breeds
- Pig Farming Stories and Inspiration
- Pig Health and Care
- Pig Nutrition
- Pig Products
- Profitability & Business
- Puppy Care
- Puppy Predictable Topics Reinvented
- Regional Focus
- Rescue & Adoption Buzz
- Senior Cats
- Senior Dog Care
- Smart Dog Tech & Gadgets
- Sustainability
- Sustainable & Eco-Friendly Dog Products
- Tech & Innovations
- Working & Service Dogs
- Broiler Feed66 products
- Country Feed33 products
- Pig Feed66 products
- Product22 products
- Raw Materials99 products
Products
-
 Fish Meal
₹1,999.00 – ₹2,999.00Price range: ₹1,999.00 through ₹2,999.00Rated 0 out of 5
Fish Meal
₹1,999.00 – ₹2,999.00Price range: ₹1,999.00 through ₹2,999.00Rated 0 out of 5 -
 FATTENING BROILER FEED
₹2,299.00 – ₹2,349.00Price range: ₹2,299.00 through ₹2,349.00Rated 0 out of 5
FATTENING BROILER FEED
₹2,299.00 – ₹2,349.00Price range: ₹2,299.00 through ₹2,349.00Rated 0 out of 5 -
 LAYER COUNTRY FEED
₹1,549.00 – ₹1,649.00Price range: ₹1,549.00 through ₹1,649.00Rated 0 out of 5
LAYER COUNTRY FEED
₹1,549.00 – ₹1,649.00Price range: ₹1,549.00 through ₹1,649.00Rated 0 out of 5 -
 COUNTER BROILER FEED
₹1,199.00 – ₹1,299.00Price range: ₹1,199.00 through ₹1,299.00Rated 0 out of 5
COUNTER BROILER FEED
₹1,199.00 – ₹1,299.00Price range: ₹1,199.00 through ₹1,299.00Rated 0 out of 5 -
 LACTATING PIG FEED
Rated 0 out of 5
LACTATING PIG FEED
Rated 0 out of 5₹2,299.00Original price was: ₹2,299.00.₹1,740.00Current price is: ₹1,740.00. -
 Maize
Rated 0 out of 5
Maize
Rated 0 out of 5₹1,650.00Original price was: ₹1,650.00.₹1,300.00Current price is: ₹1,300.00. -
 GESTATION PIG FEED (Phase 1)
Rated 0 out of 5
GESTATION PIG FEED (Phase 1)
Rated 0 out of 5₹2,249.00Original price was: ₹2,249.00.₹1,699.00Current price is: ₹1,699.00. -
 Pre Starter Broiler Feed
₹2,399.00 – ₹2,499.00Price range: ₹2,399.00 through ₹2,499.00Rated 0 out of 5
Pre Starter Broiler Feed
₹2,399.00 – ₹2,499.00Price range: ₹2,399.00 through ₹2,499.00Rated 0 out of 5 -
 FINISHER PIG FEED
Rated 0 out of 5
FINISHER PIG FEED
Rated 0 out of 5₹2,299.00Original price was: ₹2,299.00.₹1,749.00Current price is: ₹1,749.00. -
 Broiler Premix
Rated 0 out of 5
Broiler Premix
Rated 0 out of 5₹820.00Original price was: ₹820.00.₹699.00Current price is: ₹699.00.
Recently Viewed Products
-
 Rice DDGS (Distillers Dried Grains with Solubles from Rice)
₹1,600.00Original price was: ₹1,600.00.₹1,449.00Current price is: ₹1,449.00.