
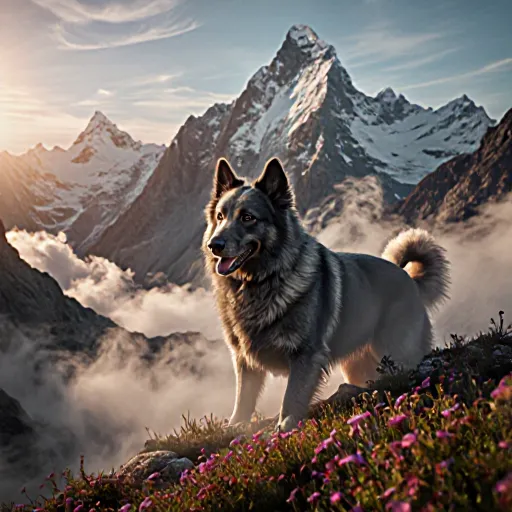
Unleash Adventure – Where Canine Courage Meets Mountain Majesty
“Paws on Peaks: Your Dog’s Survival Symphony”
Table of Contents
- 1. Planning Your Trail
- 2. Choosing the Right Dog Gear
- 3. Proper Hydration for You and Your Dog
- 4. Nutrition and Snacks on the Trail
- 5. First Aid Essentials for Dogs
- 6. Leash, Harness, and Control Tools
- 7. Identification and Safety Tags
- 8. Weather-Appropriate Clothing for Your Dog
- 9. Trail Etiquette and Leave‑No‑Trace Practices
- 10. Managing Dog Waste on the Trail
- 11. Checking for Parasites and Tick Prevention
- 12. Exercise Limits and Rest Breaks
- 13. Training Tips for Long Hikes
- Conclusion
- FAQ
1. Planning Your Trail
Before you and your four‑legged companion hit the trail, a thoughtful plan ensures safety, enjoyment, and compliance with local regulations.
1. Research Local Rules & Regulations
- Leash Laws: Some parks require leashes at all times; others allow off‑leash in designated areas.
- Seasonal Closures: Many trails close during snowpack or heavy rain. Check the park’s website for up‑to‑date notices.
- Permits & Fees: Certain wilderness areas require a permit; bring proof of purchase and read the terms carefully.
2. Trail Difficulty & Distance
| Trail Type | Distance (mi) | Elevation Gain (ft) | Recommended Dog Size/Condition |
|---|---|---|---|
| Easy Loop | 2–4 | 0–200 | All breeds, all ages |
| Moderate Hike | 5–8 | 500–1,000 | Medium to large dogs, good fitness |
| Hard Backcountry | 10+ | 2,000+ | Large, highly active dogs; experienced hikers |
3. Weather & Seasonal Considerations
Plan for temperature extremes, rain, snow, and insect activity.
- Heat: Carry water, use shaded routes, start early.
- Cold: Layer clothing, bring dog‑safe blankets or jackets.
- Insects: Apply pet‑friendly repellents and keep your dog’s ears clean to prevent infestations.
4. Dog Hiking Essentials Checklist
Below is a concise checklist you can print or save on your phone. Tick each item before you leave.
- Identification: Collar with ID tags, microchip confirmation.
- Leash & Harness: 4‑ft leash for control; harness for comfort.
- Water & Bowl: At least one gallon per hour of dog’s weight in water.
- Food & Treats: Enough for the hike plus a few extra treats for motivation.
- First Aid Kit: Bandages, antiseptic wipes, tweezers (for ticks).
- Trail Map & GPS: Paper backup and a charged phone with offline maps.
- Waste Bags: Biodegradable bags for clean‑up.
- Dog‑Safe Sunscreen (if needed): Apply to ears, nose, and paws.
- Emergency Contact Info: Local vet, park ranger office, 911 number.
5. Practical Tips for a Smooth Trip
- Practice Off‑Leash Skills: Train your dog to respond reliably before leaving the comfort of home.
- Use Trail Markers: Follow cairns, blazes, or GPS waypoints; avoid getting lost.
- Respect Wildlife: Keep a safe distance from animals and never feed them.
- Leave No Trace: Pack out everything you bring in—especially food scraps that can attract wildlife.
6. Sample Itinerary for a Day Trip
Assuming an easy loop of 3 miles, here’s a quick schedule:
| Time | Activity |
|---|---|
| 07:00 AM | Breakfast & pack check |
| 08:00 AM | Departure; start hike |
| 09:30 AM | Puddle break; water refill |
| 10:15 AM | Snack & leash walk |
| 11:00 AM | Return to trailhead; pack up |
With careful planning and the right gear, you’ll both enjoy a memorable adventure while staying safe and respectful of nature.
2. Choosing the Right Dog Gear
When you’re preparing for a hiking adventure with your canine companion, selecting the right gear is as crucial as planning the trail itself. A well‑equipped dog not only enjoys the journey but also stays safe and healthy throughout.
Dog Hiking Essentials Checklist
- Backpack or Day Pack: Choose a lightweight, adjustable pack that fits your dog’s size and has padded shoulder straps. For smaller dogs, consider a small dog backpack; for larger breeds, look for packs with reinforced frames.
- Collapsible Water Bowl: A spill‑free bowl keeps your pup hydrated. Look for BPA‑free materials and a built‑in handle for easy carrying.
- Hydration Reservoir or Water Flask: For longer hikes, a hydration pack like the ShelterTech Hydration Pack can store up to 2 L of water and dispense it via a tube.
- First Aid Kit: Include items such as gauze, antiseptic wipes, tweezers, and a small pair of scissors. A dog‑specific bandage is handy for minor scrapes.
- Leash & Harness Combo: A sturdy retractable leash (30–40 ft) paired with a comfortable harness ensures control while allowing freedom to explore.
- Dog‑Safe Sunscreen: If your dog has thin fur or exposed skin, apply a pet‑safe sunscreen before setting out.
- Portable Food & Treats: Pack high‑energy snacks like dehydrated meat sticks and a small bag of kibble for midday breaks.
- Cooling Vest or Bandana (Summer Only): These help regulate body temperature on hot days. Test fit before the hike to ensure it doesn’t restrict movement.
- Dog‑Friendly Trail Map & GPS: Keep a printed trail map and, if possible, a GPS device with your dog’s coordinates saved for emergencies.
Practical Tips for Gear Selection
- Fit First: Always measure your dog’s chest circumference and waist. A properly fitted harness or backpack should not leave more than an inch of space between the strap and skin.
- Weight Distribution: Aim for a pack that weighs no more than 10–15% of your dog’s body weight. For example, a 50 lb dog should carry no more than 5–7.5 lb in gear.
- Test Runs: Before the big hike, take short walks with the gear on to ensure there are no chafing spots or discomfort.
- Consider Climate: In cold weather, add a lightweight jacket or sweater for your dog. In hot climates, prioritize hydration and shade breaks.
- Check Trail Regulations: Some parks require that dogs be leashed at all times or prohibit certain gear (like large backpacks). Verify rules ahead of time to avoid fines.
Example Gear Set‑Up for a 5‑Hour Hike
For a moderate trail lasting around five hours, here’s a sample gear list:
- Backpack: 1.2 L dog pack (e.g., REI Dog Backpack)
- Water: 1 L hydration reservoir + collapsible bowl
- Food: 2 servings of dry kibble + 3 dehydrated treats
- Safety: First aid kit, dog‑safe sunscreen, reflective vest for night hikes
- Comfort: Cooling bandana (if summer) and a lightweight jacket (if cool)
With the right gear, you’ll reduce risk, increase comfort, and ensure that both you and your dog can fully enjoy the great outdoors.
3. Proper Hydration for You and Your Dog
Staying hydrated on a hike is essential not just for human comfort but also for your canine companion’s health. Dogs lose water through panting, drooling, and increased respiration rates when they’re active, especially in warm or humid conditions. Below are practical guidelines, examples, and a quick checklist to keep both of you well‑quenched.
1. Know the Signs of Dehydration
- For Humans: Dry mouth, fatigue, dizziness, dark urine.
- For Dogs: Dry nose (though not always reliable), sunken eyes, lethargy, rapid breathing, sticky gums.
2. Water Requirements by Weight and Activity Level
A general rule: a dog needs about 1 ounce of water per pound of body weight each day, but this can increase up to 50% during strenuous activity.
| Dog Size | Daily Water (oz) | Additional During Hike (oz) |
|---|---|---|
| Small (<20 lb) | 20–30 | 10–15 |
| Medium (20–50 lb) | 30–60 | 15–25 |
| Large (>50 lb) | 60–90 | 25–35 |
3. Practical Hydration Strategies
- Carry Enough Water: Use a lightweight, collapsible water bowl and a hydration pack for the dog. A standard 2‑liter bottle can support up to 10 lb dogs; larger packs are available for bigger breeds.
- Use Dog‑Safe Hydration Packs: Brands like Kurgo, Ruffwear, and PetStroller offer packs that attach to your backpack, with a built‑in bowl and easy‑access valve.
- Schedule Regular Sips: Every 15–20 minutes, encourage your dog to drink. Don’t wait until they’re thirsty—especially in high temperatures.
- Add Electrolytes (Optional): For long treks or hot days, a pinch of salt or a commercial canine electrolyte powder can help maintain sodium balance.
- Cool the Water: Pre‑cool water before your hike. Ice packs in a zippered pouch keep it refreshing for longer periods.
4. When to Stop and Rehydrate
If you or your dog shows any signs of dehydration, find shade, lay down, and sip slowly. In extreme cases (heat stroke, severe lethargy), seek immediate veterinary care.
5. Dog Hiking Essentials Checklist – Hydration Focus
- Water for Human: At least 0.7 L per hour of activity.
- Dog Water Bottle/Hydration Pack: Minimum capacity based on dog size.
- Collapsible Bowl or Built‑in Dish: Easy to set up and clean.
- Ice Packs/Pre‑cooled Water: For hot days.
- Water Treats (Optional): Gel or freeze‑dried treats that double as hydration boosters.
- First Aid Kit with Hydration Tools: Includes a small syringe or droppers for emergency fluid administration if needed.
Remember: the goal is to keep both you and your dog comfortable, safe, and energized. By planning ahead and following these hydration strategies, you’ll enjoy a smoother, more enjoyable hike together.
4. Nutrition and Snacks on the Trail
Keeping both you and your dog energized during a hike is essential for safety, performance, and enjoyment. Below are practical tips, snack ideas, and how to incorporate them into the Dog Hiking Essentials Checklist.
Human Nutrition
- Hydration first: Carry at least 1 L of water per person for every 4 km (2.5 mi). Use a collapsible bottle or hydration bladder to reduce weight.
- Balance macros: A good rule is 40% carbs, 30% protein, 30% fat. Pack energy bars that meet this split or combine oats with nuts and dried fruit.
- Light, non-perishable snacks: Trail mix, chocolate-covered raisins, jerky, or a small bag of rice cakes are great for quick bursts of energy.
- Post-hike refuel: Include a protein shake or a banana to replenish glycogen stores and electrolytes.
Dog Nutrition
Your dog’s diet on the trail should mirror its regular routine but with higher energy density to compensate for increased activity.
- Portable treats: Hard biscuits, freeze-dried chicken, or small pieces of cooked turkey keep your pup motivated and satisfied.
- Hydration packs: If you have a dog-specific water bottle or collapsible bowl, fill it with fresh water every 30–45 min. Consider adding electrolyte tablets for long, hot days.
- Avoid toxic foods: Keep chocolate, grapes, raisins, onions, and xylitol out of reach. Store treats in a sealed bag to prevent accidental ingestion.
- Monitor weight: If you’re hiking for more than 4 hours, add an extra snack or increase portion size to maintain body condition.
Practical Packing Tips
- Use a dedicated dog food pouch: Attach it to your backpack or carry it in a side pack so you can easily access treats without rummaging through gear.
- Pre-measure portions: Weigh out snack servings before the hike. This keeps your dog from overeating and helps you track calories.
- Carry a small first aid kit for dogs: Include a pair of tweezers, gauze, and a small sample of ice packs (in a reusable bag). Treat minor bites or cuts promptly.
- Plan snack breaks: Schedule 10–15 min rest stops every 1.5 km to let your dog drink and eat. This also prevents fatigue and keeps morale high.
Checklist Integration
When you review the Dog Hiking Essentials Checklist, make sure to tick off:
- Water bottle for both you and your dog.
- High-energy snack packs for yourself.
- Treat pouch or bag with at least two servings of dog treats.
- Collapsible bowl or water container for the dog.
- First aid supplies tailored to dogs (tweezers, gauze).
Sample Packing List
| Item | Quantity |
|---|---|
| Your Water Bottle (2 L) | 1 |
| Dog Collapsible Bowl | 1 |
| Human Snacks (Trail Mix, Energy Bars) | 200 g |
| Dog Treats (Hard Biscuits) | 50 g |
| Electrolyte Tablets (Optional) | 2 tablets |
| First Aid Kit for Dogs | 1 set |
By planning nutrition carefully and aligning it with the Dog Hiking Essentials Checklist, you’ll both stay healthy, energized, and ready to tackle any trail ahead.
5. First Aid Essentials for Dogs
When you’re out on a trail with your canine companion, accidents can happen at any time—whether it’s a minor scrape or an unexpected medical emergency. A well‑equipped first aid kit gives you the confidence to handle most situations quickly and safely.
1. Basic Supplies (Checklist)
- Sterile gauze pads – Use for cleaning wounds and applying pressure.
- Cotton swabs & sticks – For gentle cleaning around eyes, ears, or noses.
- Adhesive tape (non‑sticky, dog‑friendly) – Secure gauze without irritating skin.
- Antiseptic wipes / solution (e.g., chlorhexidine) – Disinfect wounds before dressing.
- Disposable gloves – Protect yourself and your dog from blood or fluids.
- Scissors & tweezers – Trim gauze, remove debris, or pull out splinters.
- Instant cold pack (reusable) – Reduce swelling or treat heatstroke symptoms.
- Thermometer (digital or infrared) – Check for fever or hypothermia.
- Hydration tablets & electrolyte solution – Replenish fluids if your dog is dehydrated.
- Prescription medications (if applicable) – Keep a copy of any ongoing meds and dosage instructions.
- Emergency contact sheet – Include vet phone numbers, local emergency services, and your own contact info.
2. Common Trail Emergencies & How to Handle Them
- Minor Cuts & Scrapes
-
- Clean the area with antiseptic wipes.
- Apply a small gauze pad and secure it with tape.
- Monitor for signs of infection (redness, swelling).
- Insect Bites & Stings
-
Use an over‑the‑counter antihistamine spray or a small amount of hydrocortisone cream if your vet approves. If swelling is severe, seek veterinary care immediately.
- Splashing Splinters or Sharp Objects
-
- Use tweezers to grasp the splinter from the tip.
- Pull slowly in the direction it entered.
- Clean and dress the wound afterward.
- Heatstroke or Overheating
-
Move your dog to shade, offer cool water (not ice), and apply a cold pack to the neck and groin. If breathing slows or the dog becomes unresponsive, contact emergency services.
- Hypothermia (Cold Weather Trails)
-
Wrap your dog in a blanket, gently warm with a heating pad set on low, and provide warm fluids if conscious. Seek veterinary help if shivering persists or the dog is lethargic.
- Sudden Collapse or Seizure
-
Keep the dog’s airway clear, place them in a safe position (left lateral), and monitor breathing. Call for emergency help immediately if symptoms last more than a few minutes.
3. Practical Tips for Keeping Your Kit Ready
- Check expiration dates: Replace any expired medications or wipes every six months.
- Store in a waterproof case: Protect contents from moisture and dirt.
- Label items clearly: Use waterproof markers to identify each component.
- Carry extra supplies: Extra gauze, tape, and gloves can be lifesavers on longer hikes.
- Practice drills: Familiarize yourself with how to use the kit before heading out.
By packing a comprehensive first aid kit and knowing how to use it, you’ll turn potential emergencies into manageable situations. Your dog’s safety—and your peace of mind—depends on being prepared.
6. Leash, Harness, and Control Tools
The foundation of a safe hiking adventure for your dog is the right set of control tools. A well‑chosen leash, harness, or combination of both can keep you in command while giving your pup freedom to explore.
Choosing the Right Leash
- Length: For most trails, a 4–6 ft. leash provides enough room for sniffing without letting the dog drift too far behind you. If you plan to venture into more open areas, consider a 7–10 ft. “retrieval” leash.
- Material: Nylon is lightweight and durable; braided polyester offers extra strength and less stretch. For rugged terrain, a heavy‑weight canvas or nylon‑blend leash can withstand scrapes and pulls.
- Weight & Comfort: Look for a padded handle or ergonomic grip to reduce fatigue on long hikes. A weighted leash can help you maintain balance if your dog is strong or energetic.
Harnesses vs. Collars
A harness distributes pressure across the chest and shoulders, reducing strain on a dog's neck and preventing injuries during sudden pulls.
- Front‑Clip Harness: Ideal for dogs that pull; it redirects their momentum toward you.
- Back‑Clip Harness: Keeps the dog close to your side, great for calm, well‑trained companions.
- Dual‑Clip Harness: Offers flexibility—clip at the front when exploring and at the back on steep descents.
Control Tools for Challenging Terrain
- Retractable Leashes: Provide extended reach in open spaces but keep a firm grip. Always check that the mechanism is functioning before each hike.
- Two‑Way Leash Systems: Allow you to switch between front and back clips on the fly, useful when navigating uneven ground or sudden obstacles.
- Portable Hand‑hold Handles: Attach a small handle to the leash for extra leverage during steep climbs or descents.
Practical Tips
- Test your gear in a controlled setting before heading out. Ensure no frays, loose stitching, or broken buckles.
- Carry a spare leash and harness—breaks happen, especially on long days.
- Use a “no‑pull” training aid if your dog tends to tug aggressively. Attach the training device to the front clip of a harness for better control.
- Check the weather forecast; in hot climates, a reflective leash or harness can improve visibility during dusk or dawn hikes.
Checklist Snapshot
Dog Hiking Essentials Checklist – Leash & Harness Section:
| Item | Quantity | Notes |
|---|---|---|
| Nylon or polyester leash (6 ft.) | 1 | Padded handle |
| Front‑clip harness (heavy‑weight) | 1 | Adjustable, no stretch |
| Retractable leash (10 ft.) | 1 | Test mechanism before use |
| Spare leash & harness set | 1 each | Backup for emergencies |
Equipping yourself with the right control tools not only protects your dog but also enhances your hiking experience. Keep these guidelines in mind, and you'll be ready to tackle any trail with confidence.
7. Identification and Safety Tags
When you hit the trail with your four‑legged friend, you’re not just bringing gear—you’re also ensuring that your dog can be identified quickly if they wander off or get lost. A reliable identification system is a cornerstone of responsible hiking.
1. Microchip + ID Tag Combo
- Microchip: Implant the microchip at a vet’s office; it contains your contact info in a unique code that scanners read. Make sure the information is up to date—update it after any name change, address move, or new phone number.
- ID Tag: A durable metal tag with the dog’s name and your phone number. Use a break‑away design so that if the tag gets caught on something, it will snap off instead of injuring your pup.
- Example: “Snoopy – 555‑123‑4567” on a brass tag with a 3‑inch loop for easy attachment to a collar or harness.
2. Reflective and Glow‑In‑The‑Dark Tags
Visibility matters, especially in low light or when hiking at dusk. Look for tags that have reflective strips or phosphorescent paint so they glow after exposure to daylight.
- Best Choice: A 2‑inch stainless steel tag with a matte black finish and bright orange reflective tape sewn around the edges.
- Practical Tip: Attach a second tag on the opposite side of the collar or harness to maximize visibility from all angles.
3. RFID‑Enabled Collar Tags
These tags store your contact info in an RFID chip embedded in the collar itself. They’re handy for quick scanning with a handheld reader, especially useful at pet stores or shelters.
- Example: “Buddy – 555‑987‑6543” on a lightweight nylon collar tag that can be replaced every year to keep the chip active.
4. Emergency Contact Cards
In addition to tags, carry an emergency card with vital details: dog’s name, age, medical conditions (e.g., allergies, medications), and a short description of your contact info. Keep it in a waterproof pouch inside the backpack.
5. Training Your Dog to React to Tags
While tags are passive safety devices, you can reinforce their importance by training:
- “Find my Tag” Game: Hide a small tag on your dog’s collar and ask them to locate it with a cue. This helps them associate the tag with a positive reward.
- Leash Check Routine: Every time you attach or remove a leash, glance at the ID tag—this trains both you and your dog to check for wear and tear.
6. Maintenance Checklist for Tags
- Inspect tags weekly for rust, scratches, or broken loops.
- Replace any damaged tags immediately; a compromised tag can break off while hiking.
- Re‑apply reflective tape annually to maintain high visibility.
- Update microchip and ID tag information within 30 days of moving or changing phone numbers.
By combining microchips, durable ID tags, reflective enhancements, and consistent maintenance, you’ll give your dog the best chance of staying safe—and for you, peace of mind while exploring the great outdoors together.
8. Weather-Appropriate Clothing for Your Dog
Just as you would dress yourself according to the forecast, your dog’s clothing should match the temperature, humidity, and terrain of your hike. Proper gear keeps them comfortable, reduces the risk of hypothermia or overheating, and can even protect against insects and rough surfaces.
1. Cold Weather Gear
- Thermal Harnesses: Look for lightweight, breathable materials (e.g., merino wool blends) that fit snugly without restricting movement. A good harness should have adjustable straps to accommodate different body shapes.
- Dog Jackets & Coats: Waterproof and wind‑proof jackets are essential in snowy or wet conditions. Check for reflective strips if you plan on early morning or late evening hikes.
- Boots: Protect paws from ice, salt, and hot pavement. Choose boots with non‑slip soles and removable liners for easy cleaning.
2. Warm Weather Gear
- Cooling Vests: Made of moisture‑absorbing fabric that chills the dog as sweat evaporates, keeping core temperature stable on hot trails.
- UV Protection Clothing: Some brands offer jackets or shirts with built‑in UV blockers. This is especially useful for breeds with thin coats or exposed skin.
- Lightweight Bandanas: While not a substitute for a vest, a bandana can help keep sweat out of the eyes and provide a small shade on very sunny days.
3. All‑Weather Basics
- Reflective Straps & Vests: For visibility during dawn or dusk hikes, attach reflective tape or use clothing with built‑in reflectors.
- Waterproofing Spray: Treat jackets and harnesses with a water‑repellent spray to extend their life and improve performance in wet conditions.
- Easy‑Fit Fasteners: Velcro or magnetic closures make it quicker to put on/off gear, especially when your dog is excited or nervous.
Practical Tips for Selecting and Using Weather Gear
- Measure Accurately: Use a soft measuring tape around the chest (just behind the front legs) and neck. Compare with the manufacturer’s size chart.
- Fit Test: Put on the gear before the hike; your dog should be able to sit, stand, and lie down comfortably without any pressure marks.
- Check for Comfort Breaks: After a short walk, look for any chafing or irritation. Adjust straps immediately if needed.
- Layer Wisely: In unpredictable weather, layer thin garments under jackets rather than using bulky coats that may restrict movement.
- Dry Properly: After a wet hike, hang gear to dry in a shaded area. Avoid direct sunlight which can degrade fabrics and reduce UV protection.
Dog Hiking Essentials Checklist: Weather‑Appropriate Clothing Section
| Item | Purpose | Season/Condition |
|---|---|---|
| Thermal Harness | Insulation & safety during cold hikes | Cold, snowy, windy |
| Waterproof Jacket | Protection from rain and snow | All seasons with precipitation |
| Cooling Vest | Heat dissipation on hot days | Warm, sunny |
| Reflective Straps/Vest | Visibility in low light | All seasons, dawn/dusk |
| Dog Boots | Paw protection from ice, salt, rough terrain | Cold, rocky trails |
By matching your dog’s clothing to the weather conditions and incorporating these items into your hiking checklist, you’ll ensure a safe, comfortable adventure for both of you.
9. Trail Etiquette and Leave‑No‑Trace Practices
When you hit the trail with your four‑legged companion, it’s not just about staying on path or keeping your dog leashed. It’s also about respecting other hikers, wildlife, and the environment. Below are practical guidelines that tie directly into our Dog Hiking Essentials Checklist, ensuring a safe, enjoyable, and environmentally responsible outing.
1. Know Your Trail Rules
- Leash Requirements: Many parks require dogs to be on a leash no longer than 6 ft in designated areas. Check the Dog Hiking Essentials Checklist for “Trail Signage” before you go.
- No‑dog Zones: Some trails or sections (e.g., wetlands, nesting sites) are off‑limits to dogs. Keep an eye on signs and your checklist’s “Leave‑No‑Trace” section for prohibited areas.
2. Yield Properly
When encountering other hikers or mountain bikers, give them the right of way:
- Walk Uphill; Bike Downhill: If you’re on a narrow trail and see a bike coming downhill, move uphill to let it pass.
- Use your Dog Hiking Essentials Checklist item “Trail Signaling” – a simple hand gesture or short “hello” keeps everyone aware of your presence.
3. Pack Out What You Pack In
The core Leave‑No‑Trace principle: “Leave the trail as you found it.” Use your checklist’s “Waste Management” box to remember:
- Dog Waste: Carry a biodegradable bag or waste scoop. Dispose in a designated bin, or if none are available, bury the waste at least 6 ft from water sources and trails.
- Food & Water Containers: Rinse out bottles and cans to avoid attracting wildlife.
4. Minimize Impact on Flora
Keep your dog off fragile vegetation, especially in alpine or wetland areas. The checklist’s “Trail Surface” reminder will help you identify sensitive spots:
"Avoid stepping on moss, lichen, and young saplings; use existing paths only."
5. Respect Wildlife
- Keep Distance: Maintain at least a 100 ft buffer from wildlife. Dogs can trigger panic or aggression in animals.
- No Feeding: Even if you have treats, feeding wildlife is harmful. Refer to the checklist’s “Food Safety” section for this rule.
6. Use Proper Signaling and Communication
When hiking with a dog in remote areas, it’s helpful to carry:
- A whistle or two‑tone radio for emergencies.
- An updated map that includes trail markers (check “Navigation Tools” on the checklist).
7. Leave No Trace: The Five Principles Applied to Dogs
- Plan and Prepare: Use the Dog Hiking Essentials Checklist before departure.
- Travel and Camp on Durable Surfaces: Stick to established trails and campsites.
- Dispose of Waste Properly: Pack out all trash, human waste, and pet waste.
- Avoid Littering: Do not leave food wrappers or other debris.
- Leave What You Find: Preserve the natural beauty for future hikers.
8. Practical Tips & Examples
- Example 1 – Trail Crossing: If you need to cross a stream, lead your dog through the existing stone bridge or shallow crossing point. Avoid dragging the leash across muddy banks.
- Example 2 – Group Hiking: When hiking in a group of 4–5 people, keep your dog between two hikers and hold the leash tightly to avoid tangling.
- Example 3 – Weather Changes: If sudden rain forces you into a more exposed area, secure your dog’s harness and consider using a lightweight tarp for shelter—never leave it unattended on a trail.
By integrating these etiquette guidelines with the items on your Dog Hiking Essentials Checklist, you’ll help keep trails safe, clean, and welcoming for everyone—and for your dog’s next adventure.
10. Managing Dog Waste on the Trail
One of the most important responsibilities of a responsible dog owner is to keep trails clean and safe for everyone—including other hikers, wildlife, and future generations of pet lovers. The Dog Hiking Essentials Checklist includes “Waste Bags” as a must‑have item; it’s more than just a convenience—it's a stewardship duty.
Why It Matters
- Health & Safety: Dog waste can carry parasites, bacteria, and viruses that pose risks to humans, other dogs, and wildlife. Proper disposal prevents the spread of diseases like roundworm or hookworms.
- Environmental Protection: Nutrients in pet feces can alter soil chemistry, affecting plant growth and water quality downstream.
- Trail Etiquette & Regulations: Many parks and trail systems require on‑trail waste removal. Failure to comply can result in fines or loss of access privileges.
Practical Steps for On‑Trail Waste Management
- Carry Enough Bags: A good rule is one bag per dog, plus a backup. Use the “Waste Bag” from your checklist and store it in an easily accessible pocket or backpack compartment.
- Use the Right Tool: Keep a small, sturdy scoop (often part of a “Dog Hiking Essentials Checklist” kit) to collect waste. If you prefer a more hygienic method, some owners use a lightweight plastic straw with a sealable tip—ideal for quick clean‑ups.
- Seal & Store: After scooping, place the feces in a sealed bag. Many trail users opt for biodegradable bags that decompose within 90 days; however, if you’re hiking in an area with strict regulations, use a non‑biodegradable bag and store it until you reach a designated disposal point.
- Drop It at the Proper Disposal: Look for a marked “Dog Waste” bin or a composting station. If none are available, plan to carry your waste back to the trailhead or nearest parking area where you can dispose of it in a municipal landfill or take it home for proper disposal.
- Follow Leave No Trace Principles: Avoid burying waste (unless local regulations explicitly allow). Burying can create unsanitary conditions and damage vegetation. If you must, dig a 6‑to‑8‑inch deep hole at least 200 ft from water sources or campsites.
Checklist Quick Reference
| # | Item | Purpose |
|---|---|---|
| 1 | Dog Waste Bags (biodegradable or not) | Contain and seal feces for safe transport. |
| 2 | Waste Scoop/Straw | Easily collect waste without direct contact. |
| 3 | Portable Trash Bag (for disposal) | Carry sealed waste to a proper dump site. |
Tips for Busy Hikers
- Pre‑pack your waste kit into a small pouch and keep it in the front pocket of your backpack so you can grab it quickly.
- Use a “doggie doo” marker (a small flag or sticker) to indicate where you’ve disposed of waste—helping others avoid repeated areas.
- If you’re hiking with multiple dogs, designate one dog for waste duties; the others can keep the trail clear while you handle disposal.
Educate Your Pack and the Trail Community
Share best practices with friends and fellow hikers. Consider leaving a note on your dog’s collar or in your group chat reminding everyone of the importance of proper waste removal. When you set an example, others are more likely to follow suit.
Final Thought
Managing dog waste isn’t just about keeping trails clean—it’s about respecting nature and ensuring that future hikers can enjoy the same pristine environment we cherish today. By following these steps and keeping your “Dog Hiking Essentials Checklist” handy, you’ll be a responsible trail steward every time you hit the path.
11. Checking for Parasites and Tick Prevention
Before every hike, give your dog a thorough parasite check. Even if you’ve treated them recently, ticks can attach quickly in damp or wooded trails.
Step‑by‑Step Parasite Check
- Inspect the body: Look at the ears, inside the ears, under the tail, between toes, and around the belly. Ticks often hide in these areas.
- Feel for bumps: Run your fingers along the back and sides; a tick feels like a small grain of sand or a pea.
- Check the hairline: In breeds with dense coats, use a comb to brush out hidden ticks.
- Use a flashlight: Light up dark spots (e.g., under the ears) to spot any tiny parasites.
Common Parasites on Trails
- Ticks – can transmit Lyme disease, Rocky Mountain spotted fever, and ehrlichiosis.
- Mites – especially in humid areas; they cause intense itching.
- Caterpillars & Slugs – some species have irritating spines or mucus that can sting.
Treatment & Prevention Tips
Use a combination of preventive products and behavioral strategies:
| Product Type | Example | How to Use |
|---|---|---|
| Topical Spot‑on | Frontline, Advantage, Seresto (insecticide) | Apply monthly on the back of the neck; ensures full body coverage. |
| Oral Medication | Tic‑Cure, NexGard | Give once a month; effective against ticks and fleas. |
| Deworming | Pyrantel, Praziquantel | Administer quarterly or as directed by vet to kill internal parasites. |
Behavioral Prevention
- Keep your dog on a short leash: Prevents them from wandering into dense brush where ticks thrive.
- Avoid tall grass: If you must cross, do so quickly and check for ticks immediately after.
- Use tick‑repellent sprays: After the hike, spray your dog’s coat (avoid face) with a pet‑safe repellent.
After-Hike Routine
- Remove any ticks using tweezers or a tick removal tool; grasp at the head and pull straight up.
- Wash the area with mild soap to prevent infection.
- Check for redness, swelling, or fever—contact your vet if symptoms appear within 48–72 hours.
Checklist Integration
Add these items to your Dog Hiking Essentials Checklist:
- Tick comb and tweezers
- Pet‑safe tick spray or lotion
- Spot‑on or oral preventive medication (pre‑hike)
- First‑aid kit with antiseptic wipes
By staying vigilant and using a layered approach—products, behavior, and routine checks—you can keep your canine companion safe from parasites while enjoying the great outdoors.
12. Exercise Limits and Rest Breaks
When planning a hike with your canine companion, it’s essential to balance activity with recovery. Even the most energetic dog will need periods of rest, especially on steep or uneven terrain. Below is a practical guide that ties in directly with the items on our Dog Hiking Essentials Checklist.
1. Know Your Dog’s Physical Limits
- Breed & Age: Small breeds and puppies have less endurance than large, mature dogs.
- Health Status: Dogs with joint issues or heart conditions should avoid prolonged elevation changes. Check the “Veterinary Clearance” item on the checklist before heading out.
- Previous Conditioning: Gradually increase mileage in training hikes to build stamina.
2. Establish a Rest Break Routine
- Set a Time Interval: For most dogs, a 5–10 minute break every mile (1.6 km) is sufficient. Adjust based on temperature and terrain.
- Choose a Safe Spot: Look for flat ground with shade; this aligns with the “Shade & Shelter” item.
- Use a Leash Checkpoint: Keep your dog within 10–15 ft to prevent straying. The checklist’s “Leashes & Harnesses” section reminds you to keep them secure.
3. Hydration Strategy During Breaks
Rehydrate at every rest stop:
- Water Bowl: The “Portable Water & Food Containers” item ensures you have a bowl or collapsible cup.
- Water Intake: Offer 1–2 oz (30–60 ml) of water per minute of activity, especially in hot weather.
- Don’t forget the “Hydration Pack” if you’re carrying a larger supply.
4. Monitor Physical Indicators
Watch for signs that your dog needs more rest:
| Indicator | Action |
|---|---|
| Panting excessively | Shorten the next segment or take a longer break. |
| Drooling or sticky tongue | Hydrate and rest immediately. |
| Slowing down or lagging behind | Check for fatigue; consider a walk instead of a run. |
5. Incorporate “Rest Break” into the Checklist
When you create your trail plan, add a dedicated “Rest Break” entry:
Trail Segment | Distance (mi) | Estimated Time | Rest Stop
--------------|---------------|-----------------|-----------
Segment 1     | 2             | 30 mins         | Trailhead Park Bench
Segment 2     | 3             | 45 mins         | Creek Crossing Shade
...
By marking these pauses, you’ll keep your dog’s exercise within safe limits and ensure the entire hike stays enjoyable for both of you.
13. Training Tips for Long Hikes
Preparing your dog for a long hike is just as important as packing the right gear. A well-trained companion will stay safe, focused, and enjoy the adventure as much as you do.
- Start with Short Walks: Gradually increase distance to build stamina. Begin with 10‑15 minute walks and add a few minutes each week.
- Teach Basic Commands: Consistent use of “sit,” “stay,” “heel,” and “come” helps you maintain control in unpredictable trail situations.
- Use Positive Reinforcement: Reward with treats, praise, or a favorite toy after successful compliance. This encourages repeat behavior.
- Practice on Varied Terrain: Include gravel, mud, and slight inclines to acclimate your dog to different surfaces they’ll encounter.
- Introduce Trail Etiquette: Train your dog to stay off other hikers’ backsides, avoid following strangers, and respect wildlife by keeping a safe distance.
- Hydration Training: Get your dog used to drinking from a water bottle or collapsible bowl. Offer water regularly during training hikes.
- Check for Fatigue: Teach yourself how to spot signs of overexertion—heavy panting, drooling, or lagging behind—and know when to turn back.
- Simulate Real‑World Scenarios: Occasionally bring a “stranger” (friend) on the trail so your dog learns to stay calm around new people.
Integrating the Dog Hiking Essentials Checklist
Your training plan should dovetail with the Dog Hiking Essentials Checklist you’ve prepared. Here’s how:
- Gear Familiarization: Let your dog explore items like the harness, leash, and water bottle during training walks to reduce anxiety.
- Emergency Supplies Practice: Periodically practice setting up a first‑aid kit on a trail segment. This ensures you’re comfortable handling injuries or sudden weather changes.
- Trail Map Navigation: Teach your dog to pause at map markers (e.g., trail junctions) while you consult the guide, reinforcing teamwork.
- Leave No Trace Habits: Train your dog to use a designated area for waste and practice packing it up with you. This aligns with the checklist’s “Pack Out Trash” item.
By blending consistent training with a thorough understanding of the essentials, you’ll set both you and your canine companion up for a safe, enjoyable long‑hike experience.
Conclusion
Taking your dog on a hike is an adventure that can strengthen the bond between you and give both of you a chance to explore new trails together. By planning ahead, staying mindful of your pet’s needs, and following the Dog Hiking Essentials Checklist, you’ll ensure a safe, enjoyable experience for everyone involved.
- Preparation matters: Make sure your dog is up-to-date on vaccinations, has a recent health check, and is physically fit for the trail’s difficulty level. A quick walk in the park can gauge stamina before you hit the backcountry.
- Pack smart: Your bag should include water (both yours and a collapsible bowl or water bottle for your dog), a leash that can be clipped to a harness, high‑energy treats, a first‑aid kit tailored for pets, waste bags, and a portable rain jacket in case of sudden showers.
- Mind the terrain: Sticky mud, loose gravel, or rocky paths can cause injuries. Consider bringing sturdy boots for your dog’s paws or a protective paw balm to reduce abrasion.
- Respect wildlife and other hikers: Keep your dog on a short leash in areas where it might disturb wildlife or block trail passage. Use a “dog‑friendly” flag or signage if the park requires it.
- Hydration and nutrition: Dogs can dehydrate faster than humans, especially in hot weather. Bring enough water for at least two hours of hiking and give treats sparingly to avoid weight gain or digestive upset.
Remember that each hike is unique—weather changes, trail conditions, and your dog’s health can all shift the dynamics on the trail. By staying flexible, keeping a close eye on your pet’s behavior, and adhering to the checklist, you’ll be able to enjoy the great outdoors safely and responsibly.
FAQ
- What should I pack for a short trail hike with my dog?
- How much water does my dog need on the trail?
- Do I need a special harness for hiking?
- Can my dog eat regular food while hiking?
- What should I do if my dog gets dehydrated?
Signs include lethargy, dry gums, and sunken eyes. Offer water immediately; if your dog refuses, try a small amount of low‑sodium electrolyte solution or plain beef broth. If symptoms persist, seek veterinary care.
- How do I protect my dog’s paws on hot trails?
- What should I pack for an overnight dog‑friendly backcountry trip?
- Is it safe to let my dog drink from natural water sources?
Only if you’re confident the source is clean. Use a portable filter (e.g., LifeStraw) or boil water for at least 1 minute before feeding. Avoid stagnant pools where parasites may thrive.
- How can I keep my dog safe from ticks and insects?
Apply a vet‑approved tick repellent to the collar area, check your dog’s ears, tail, and underbelly after hikes, and use a fine‑mesh netting if you’re in high‑tick zones. Treat any visible ticks promptly.
- What is the best way to train my dog for hiking?
Start with short walks on varied surfaces, gradually increasing distance. Use positive reinforcement, keep training sessions fun, and always reward calm behavior. Teach a reliable “leave it” command to avoid distractions like wildlife or debris.
A short (1–3 hour) trail requires the basics: water and a collapsible bowl, a lightweight leash or harness, poop bags, a small first‑aid kit (bandages, tweezers), a compact snack (energy bars or homemade treats), and a reflective vest if you’re hiking after sunset. If it’s hot, add a shaded spot like a tree or bring a portable shade tent.
As a rule of thumb, a medium‑sized dog (20–30 kg) should drink about 0.5 % of its body weight per hour in hot weather. For example, a 25 kg dog needs roughly 125 ml (4 oz) every hour. Always carry extra water and a small bowl or hydration pack.
A front‑clip harness distributes pulling forces away from the neck, reducing strain on joints during uneven terrain. Look for breathable mesh panels, adjustable straps, and reflective strips for low light conditions.
Short hikes are fine with kibble or a small portion of dry food. For longer treks (4+ hours), consider high‑calorie treats, rice cakes, or commercial “hiking” snacks that provide sustained energy and electrolytes.
Use a paw balm with beeswax and lanolin to create a protective barrier. After the hike, clean paws with cool water; check for cracks or splinters. For extreme heat, consider neoprene booties designed for dogs.
Beyond the day‑hike essentials: a lightweight dog tent or bivy sack, a high‑energy dry food supply, a small camp stove if you plan to cook, extra layers (fleece jacket), a rain poncho, and a GPS tracker. Always bring enough water for both you and your dog.
Categories
- AI & Enrichment Play
- Broiler Farming
- Broiler Farming Tips
- Canine Wellness & Longevity
- Cat
- Cat & Human Connection
- Cat Adoption & Rescue
- Cat Breeds
- Cat Breeds & Personalities
- Cat Care & Health
- Cat Grooming & Hygiene
- Cat Lifestyle & Environment
- Cat Myths & History
- Cat Nutrition & Diet
- Cat Products & Reviews
- Cat Training & Behavior
- Comparison
- Consumer Awareness
- Dog
- Dog Accessories & Products
- Dog Adoption & Rescue
- Dog Breed & Lifestyle Trends
- Dog Breeding & Puppies
- Dog Entertainment & Media
- Dog Fashion & Trends
- Dog Fun & Lifestyle
- Dog Grooming & Hygiene
- Dog History & Culture
- Dog Myths, Science & Future Tech
- Dog News & Trends
- Dog Nutrition & Food
- Dog Psychology & Emotions
- Dog Safety & Security
- Dog Sports & Activities
- Dog Technology & Innovation
- Dog Training for Modern Owners
- Dog Travel & Adventure
- Dog Travel, Adventure & Culture
- Economic and Market Insights
- Educational Content
- FAQs
- Feeding Alternatives
- Festivals & Seasonal Ideas
- Fun & Entertainment
- General Knowledge
- General Pig Farming
- Health & Disease Management
- Housing and Environment
- Kittens
- Market Insights
- Miscellaneous
- Miscellaneous
- Motivational
- pig
- Pig Breeding
- Pig Breeds
- Pig Farming Stories and Inspiration
- Pig Health and Care
- Pig Nutrition
- Pig Products
- Profitability & Business
- Puppy Care
- Puppy Predictable Topics Reinvented
- Regional Focus
- Rescue & Adoption Buzz
- Senior Cats
- Senior Dog Care
- Smart Dog Tech & Gadgets
- Sustainability
- Sustainable & Eco-Friendly Dog Products
- Tech & Innovations
- Working & Service Dogs
- Broiler Feed66 products
- Country Feed33 products
- Pig Feed66 products
- Product22 products
- Raw Materials99 products
Products
-
 Fish Meal
₹1,999.00 – ₹2,999.00Price range: ₹1,999.00 through ₹2,999.00Rated 0 out of 5
Fish Meal
₹1,999.00 – ₹2,999.00Price range: ₹1,999.00 through ₹2,999.00Rated 0 out of 5 -
 FATTENING BROILER FEED
₹2,299.00 – ₹2,349.00Price range: ₹2,299.00 through ₹2,349.00Rated 0 out of 5
FATTENING BROILER FEED
₹2,299.00 – ₹2,349.00Price range: ₹2,299.00 through ₹2,349.00Rated 0 out of 5 -
 LAYER COUNTRY FEED
₹1,549.00 – ₹1,649.00Price range: ₹1,549.00 through ₹1,649.00Rated 0 out of 5
LAYER COUNTRY FEED
₹1,549.00 – ₹1,649.00Price range: ₹1,549.00 through ₹1,649.00Rated 0 out of 5 -
 COUNTER BROILER FEED
₹1,199.00 – ₹1,299.00Price range: ₹1,199.00 through ₹1,299.00Rated 0 out of 5
COUNTER BROILER FEED
₹1,199.00 – ₹1,299.00Price range: ₹1,199.00 through ₹1,299.00Rated 0 out of 5 -
 LACTATING PIG FEED
Rated 0 out of 5
LACTATING PIG FEED
Rated 0 out of 5₹2,299.00Original price was: ₹2,299.00.₹1,740.00Current price is: ₹1,740.00. -
 Maize
Rated 0 out of 5
Maize
Rated 0 out of 5₹1,650.00Original price was: ₹1,650.00.₹1,300.00Current price is: ₹1,300.00. -
 GESTATION PIG FEED (Phase 1)
Rated 0 out of 5
GESTATION PIG FEED (Phase 1)
Rated 0 out of 5₹2,249.00Original price was: ₹2,249.00.₹1,699.00Current price is: ₹1,699.00. -
 Pre Starter Broiler Feed
₹2,399.00 – ₹2,499.00Price range: ₹2,399.00 through ₹2,499.00Rated 0 out of 5
Pre Starter Broiler Feed
₹2,399.00 – ₹2,499.00Price range: ₹2,399.00 through ₹2,499.00Rated 0 out of 5 -
 FINISHER PIG FEED
Rated 0 out of 5
FINISHER PIG FEED
Rated 0 out of 5₹2,299.00Original price was: ₹2,299.00.₹1,749.00Current price is: ₹1,749.00. -
 Broiler Premix
Rated 0 out of 5
Broiler Premix
Rated 0 out of 5₹820.00Original price was: ₹820.00.₹699.00Current price is: ₹699.00.