
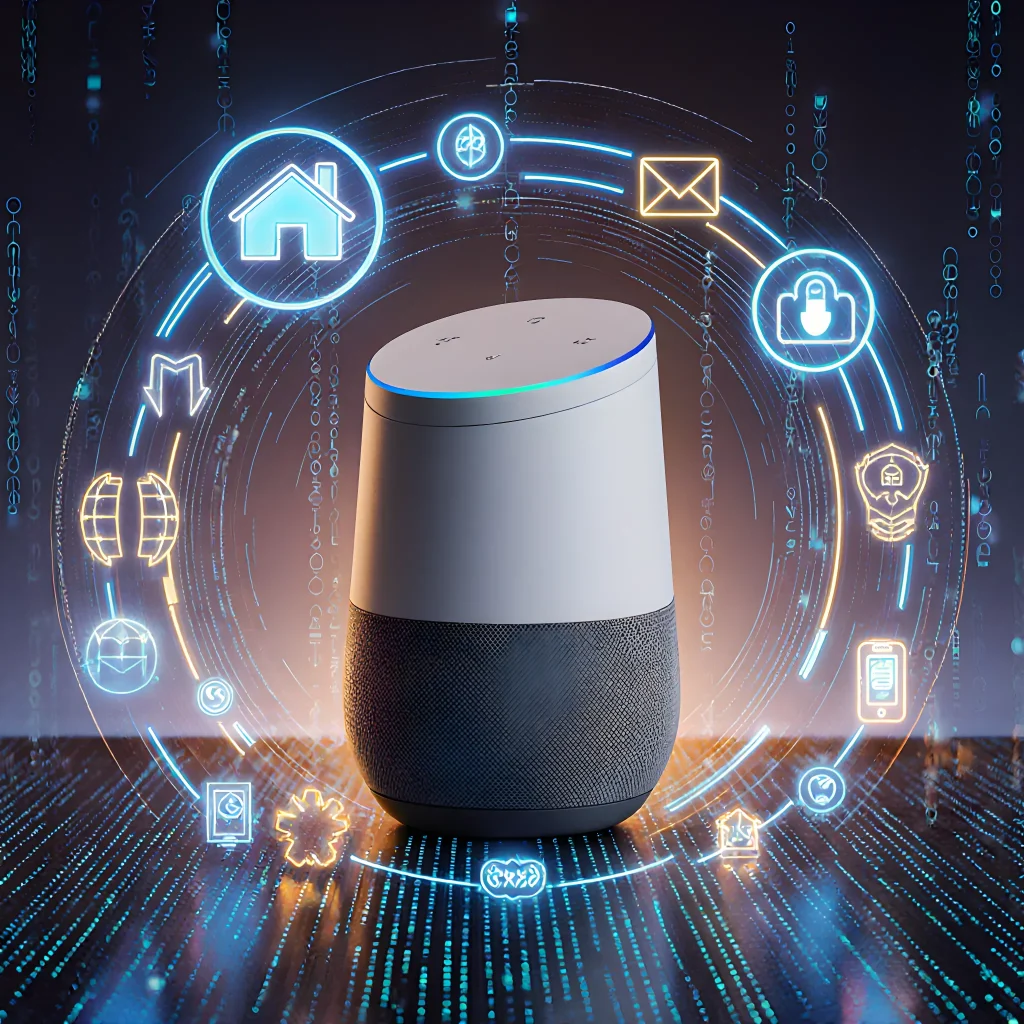
Boost Your Campaigns by Merging Clickers & Smart Devices
Combining Clickers and Smart Devices for Better Results
Table of Contents
- Introduction
- Understanding Clickers: Basics & Types
- Smart Devices in Education: An Overview
- How Clickers Complement Smart Devices
- Key Benefits of Combining Clickers and Smart Devices
- Choosing the Right Clicker for Your Classroom
- Selecting Compatible Smart Devices
- Setting Up Integrated Systems: Step‑by‑Step Guide
- Common Technical Challenges & Troubleshooting Tips
- Enhancing Engagement Through Interactive Content
- Data Analytics: Turning Responses into Insights
- Best Practices for Teachers and Instructors
- Case Studies: Successful Implementations Around the World
- Conclusion
- FAQ
Introduction
When you pair a classroom clicker system with modern smart devices—such as tablets, smartphones, or even voice‑activated assistants—you unlock a level of interactivity that transforms passive listening into an engaging learning experience. Below are practical ways to merge these tools, along with concrete examples and step‑by‑step guidance.
1. Use Clickers for Immediate Feedback, Smart Devices for Deep Exploration
Clickers capture instant responses to quiz questions or polls. Once the data is collected, a smart device can display detailed analytics, allow students to review their answers, and provide personalized follow‑up resources.
- Example: In a biology lecture on cell division, clicker questions gauge understanding of mitosis stages. Afterward, each student opens a tablet app that visualizes the stages with animations, linking their correct or incorrect choices to specific video explanations.
- Practical tip: Schedule a “reflection window” after every clicker poll—5 minutes where students review the class-wide results on their devices and ask questions via a chat platform (e.g., Slack or Teams).
2. Sync Clickers with Learning Management Systems (LMS)
Many LMS platforms now support API integrations that allow clicker data to flow directly into gradebooks, attendance records, and analytics dashboards.
- Example: In a history course, every clicker response is automatically logged in Canvas. The instructor can then generate a report showing each student’s participation trend over the semester.
- Practical tip: Use an LMS plugin (e.g., “ClickerSync” for Moodle) to map clicker question IDs to specific assignments or rubrics, ensuring seamless grading and feedback.
3. Leverage Voice Assistants for Hands‑Free Interaction
Smart speakers (Amazon Echo, Google Home) can run custom skills that accept voice input from students. Pair this with clicker data to create hybrid quizzes where one student speaks while another uses a clicker.
- Example: In a language class, the instructor asks, “What is the Spanish word for ‘apple’?” Students speak their answer into the Echo, and the device cross‑checks it against a database. Simultaneously, the clicker records who answered correctly.
- Practical tip: Develop a simple Alexa Skill that prompts questions and logs responses to a Google Sheet; then use the sheet’s data to update the clicker leaderboard.
4. Create Adaptive Learning Paths with Smart Analytics
When clicker results reveal misconceptions, smart devices can push targeted resources—articles, quizzes, or simulations—to each student based on their performance.
- Example: After a math quiz where many students misapply the quadratic formula, the system sends each student a link to an interactive Khan Academy video tailored to that concept.
- Practical tip: Use conditional logic in your LMS or learning app (e.g., “If score < 70%, recommend resource X”) so that interventions happen automatically.
5. Record and Replay Classroom Sessions with Clicker Highlights
Integrate clicker data into video recordings of lectures. When replaying, the system can overlay poll results at relevant timestamps, giving students a richer review experience.
- Example: A physics professor records a lecture on electromagnetism and embeds pop‑up graphics showing real‑time clicker responses to conceptual questions.
- Practical tip: Use video editing software (e.g., Camtasia) that supports time‑coded annotations, syncing them with your clicker platform’s exported CSV file.
6. Foster Collaboration Through Smart Device Breakouts
After a clicker poll, split the class into small groups on their tablets or laptops to discuss the results before reconvening. This promotes peer instruction and deeper understanding.
- Example: In an economics lecture, students first answer a clicker question about supply curves. Then they use a collaborative whiteboard app (e.g., Miro) to sketch why their responses differ.
- Practical tip: Assign each group a shared Google Doc where they summarize their discussion; the instructor can review these in real time and address misconceptions immediately.
7. Accessibility Considerations
Smart devices open up new avenues for inclusive education. Pairing clickers with screen‑reader friendly apps ensures all students can participate.
- Example: Students using screen readers interact with a clicker via voice commands, while the smart device reads out loud the question and possible answers.
- Practical tip: Test your chosen platforms (clicker app + LMS integration) with accessibility tools such as NVDA or VoiceOver before deployment.
By thoughtfully integrating clickers with smart devices, you create a dynamic feedback loop that not only measures understanding in real time but also tailors learning experiences to individual needs. The result? Higher engagement, better retention, and an overall more effective classroom environment.
Understanding Clickers: Basics & Types
A clicker is a small, handheld device that emits a distinct clicking sound to trigger or synchronize various actions in live performances. Whether you’re a guitarist who wants to cue a loop station, a DJ looking for precise beat‑matching, or an audio engineer managing multi‑track recordings, a well‑chosen clicker can become your most reliable stage companion.
Core Functions of a Clicker
- Triggering: Sends a digital pulse to start/stop devices such as loopers, samplers, or drum machines.
- Synchronization: Aligns the tempo of multiple instruments or software plugins for tight rhythmic cohesion.
- Timing Cue: Provides an audible metronome to keep performers on beat during improvisation or complex arrangements.
Types of Clickers
Clickers vary widely in form factor, connectivity, and functionality. Below are the most common categories you’ll encounter:
1. Analog Trigger Pads
These simple rubber or silicone pads generate a click sound when pressed. They’re inexpensive, robust, and often used as “fingers” for loop stations.
- Example: Roland GO:KEYS pad button – useful for triggering synth loops.
- Pros: No batteries needed, instant tactile feedback.
- Cons: Limited to a single trigger point; no tempo control.
2. Digital Metronomes with MIDI Output
These devices combine a traditional metronome beat with the ability to send MIDI clock or note messages to external gear.
- Example: Tiger Electronics Clicker 3 – offers adjustable click sounds and a built‑in arpeggiator.
- Pros: Dual functionality; can sync DAWs, drum machines, or synthesizers.
- Cons: Requires power source; more expensive than analog pads.
3. Smart Device Apps (iOS/Android)
Smartphones and tablets can run dedicated metronome or clicker apps that output MIDI over Bluetooth, Wi‑Fi, or USB-C. These are highly portable and customizable.
- Example: MIDI Designer – offers tempo sync, polyrhythms, and custom sound packs.
- Pros: Zero hardware cost (if you already own a phone), instant updates, cloud backup of presets.
- Cons: Battery life can be an issue; occasional connectivity lag on crowded networks.
4. Dedicated Hardware Clickers with Multi‑Channel Output
High‑end clickers provide multiple simultaneous click streams (e.g., different tempos or rhythmic patterns) and advanced routing options.
- Example: Behringer BCR2000 – a control surface that can act as a clicker when configured in “click mode.”
- Pros: Extremely reliable, low latency, robust build.
- Cons: Bulky; often overkill for solo performers.
Choosing the Right Clicker for Your Setup
When selecting a clicker, consider the following factors:
- Connectivity: Do you need MIDI out, USB-C, or Bluetooth? Match it to your gear.
- Latency: For live performance, keep latency below 10 ms to avoid audible lag.
- Portability vs. Power: Battery‑powered apps are convenient but need charging; wired devices offer continuous power.
- Expandability: Will you want to add more click streams or integrate with a DAW later?
Combining Clickers and Smart Devices for Better Results
Leveraging both physical clickers and smart device apps can unlock powerful workflow possibilities. Here’s how:
1. Layering Clicks with Custom Sounds
- Use a hardware clicker to provide a low‑latency metronome for live musicians.
- Overlay a smartphone app that plays a subtle percussive pattern via Bluetooth MIDI, giving the performers an extra rhythmic cue without cluttering the audio mix.
2. Remote Control of DAW Tempo
- Configure your clicker to send MIDI clock to your computer.
- Use a smart device running an app like MIDI Over Wi‑Fi to adjust tempo on the fly, letting you match live changes without touching the DAW interface.
3. Multi‑Channel Cueing for Ensemble Performances
- Set up a clicker with separate outputs: one channel for the drummer’s main beat, another for the guitarist’s rhythmic pattern.
- Pair it with an iPad running Metronome Pro, which can send distinct MIDI notes to each instrument via USB‑MIDI hubs, keeping everyone locked in sync.
Practical Tips & Common Pitfalls
- Test Latency Early: In a live setting, even a few milliseconds of delay can feel off. Use a loopback test to confirm your clicker’s response time.
- Use Distinct Click Sounds: Avoid overlapping tones with other instruments; a bright “clack” or a muted “tap” helps musicians locate the cue in a busy mix.
- Backup Power: If you rely on battery‑powered devices, carry spare batteries or a portable charger.
- <
Smart Devices in Education: An Overview
While classroom clickers (also known as audience response systems) have been a staple of interactive teaching for years, pairing them with modern smart devices—such as tablets, laptops, or smartphones—can unlock new levels of engagement, data analytics, and personalized learning.
Why the Combination Matters
- Real‑time Data Capture: Clickers provide instant feedback on student understanding; smart devices allow that data to be stored, visualized, and acted upon immediately.
- Multimedia Integration: Students can respond to questions while viewing videos or interactive simulations hosted on their own device.
- Accessibility & Inclusivity: Smart devices support screen readers, adjustable text sizes, and other accessibility features that clickers alone cannot offer.
- Scalable Analytics: With cloud‑based dashboards, instructors can track class trends over time, identify struggling cohorts, and tailor interventions.
Practical Implementation Steps
- Select a Unified Platform: Choose an LMS or classroom response system that supports both clicker polling and device‑based participation (e.g., Kahoot!, Mentimeter, Socrative).
- Set Up Device Access: Provide students with unique login credentials or QR codes to join the session on their own devices.
- Design Mixed Media Questions: Create polls that include text, images, short videos, and interactive elements. For example, a biology lesson might show a cell diagram on the board while students identify organelles via clicker prompts.
- Use Live Analytics: During the session, display aggregated results in real time. If a majority answers incorrectly, immediately revisit the concept or provide hints.
- Post‑Class Reflection: Export response data to spreadsheets or learning analytics tools for deeper analysis—track misconceptions, question difficulty, and student confidence levels.
Sample Lesson Flow
| Time | Activity | Tools Used | Outcome |
|---|---|---|---|
| 0‑5 min | Introductory poll on prior knowledge | Clicker + LMS dashboard | Gauge baseline understanding |
| 5‑20 min | Mini‑lecture with embedded video clip | Smart device screen sharing | Visual reinforcement of concepts |
| 20‑25 min | Interactive quiz (multiple choice + drag‑and‑drop) | Device app, clicker integration | Immediate feedback loop |
| 25‑30 min | Group discussion guided by poll results | Classroom response system | Peer learning and clarification |
| 30‑35 min | Reflection question submitted via device | Learning management system | Collect qualitative insights |
Troubleshooting Common Issues
- Connectivity Drops: Keep a backup clicker set and have students switch to paper ballots if Wi‑Fi fails.
- Device Compatibility: Test the platform on various operating systems (iOS, Android, Windows) before class.
- Privacy Concerns: Ensure that student responses are anonymized in shared dashboards.
Key Takeaway
When clickers and smart devices work hand‑in‑hand, they transform passive lectures into dynamic learning ecosystems. By harnessing instant feedback, multimedia content, and robust analytics, educators can tailor instruction to student needs in real time—leading to deeper understanding and higher engagement.
How Clickers Complement Smart Devices
Clickers—whether they’re simple remote controls, handheld gesture devices, or advanced haptic interfaces—serve as a bridge between human intent and the digital logic of smart devices. While smart devices can sense and respond to environmental inputs, clickers provide a direct, low‑latency channel for user commands that is often more intuitive than voice or touch alone.
Key Advantages
- Precision: A single button press or gesture maps directly to a specific function, reducing ambiguity in noisy environments.
- Accessibility: Users with speech impairments, limited mobility, or language barriers can interact effortlessly via tactile feedback and customizable button layouts.
- Contextual Control: Clickers can be programmed to adapt their behavior based on the current state of a smart device (e.g., different modes for “presentation” vs. “home theater”).
- Reduced Cognitive Load: Familiar button patterns or gesture libraries allow users to operate complex systems without memorizing lengthy voice commands.
Practical Integration Examples
- Home Automation Hub + Smart Light Switches
A clicker with two programmable buttons can toggle a smart light scene (“Relax” vs. “Focus”) while also dimming or brightening via a dial. The hub logs usage patterns to suggest optimal lighting schedules. - Smart TV Remote + Gaming Console
A single remote that switches between HDMI inputs, adjusts volume, and launches game libraries eliminates the need for multiple controllers. Gesture-based navigation (swipe left/right) can move through menus faster than a click wheel. - Voice Assistant + Wearable Clicker
Pairing a smartwatch with a physical clicker allows users to trigger voice commands without speaking—ideal in quiet settings or when hands are occupied. The watch can display real‑time command confirmations, ensuring the correct request was sent. - Industrial IoT Dashboard + Programmable Clicker
Operators use a rugged clicker to cycle through machine metrics, acknowledge alerts, and trigger safety interlocks. The clicker's tactile feedback helps reduce errors during high‑pressure operations.
Design Tips for Seamless Pairing
- Standardize Button Mapping: Keep core functions (power, volume, next/prev) consistent across devices to avoid user confusion.
- Leverage Haptic Feedback: Provide subtle vibrations or click sounds that confirm actions, especially for silent environments.
- Enable Custom Profiles: Allow users to create profiles (e.g., “Movie Night”, “Work From Home”) that reassign buttons and gestures on the fly.
- Use Bluetooth Low Energy (BLE): BLE ensures minimal battery drain while maintaining a stable connection with smart devices.
- Integrate Voice Confirmation: When a clicker action triggers a voice assistant, have the assistant read back the command (“Turning on kitchen lights”) to confirm execution.
Future Trends
The synergy between clickers and smart devices is poised for growth with emerging technologies such as:
- Eye‑Tracking Sensors: Combine gaze direction with a clicker button to select items without moving the head.
- AI‑Driven Contextual Suggestions: The system learns which button combinations users prefer in specific scenarios and pre‑configures them.
- Adaptive Ergonomics: Clickers that morph shape or weight based on user hand size or grip strength, enhancing comfort during prolonged use.
By thoughtfully integrating clickers with smart devices, developers can deliver intuitive, reliable, and inclusive experiences that elevate everyday interactions from simple commands to seamless workflows.
Key Benefits of Combining Clickers and Smart Devices
When you pair a classroom clicker system with modern smart devices—whether tablets, laptops, or even smartphones—you unlock a suite of capabilities that elevate both teaching and learning. Below are the most compelling advantages, illustrated with concrete examples and actionable tips for implementation.
1. Real‑Time Data Analytics
Clickers capture instant responses to multiple‑choice questions or polls. When integrated with a cloud‑based analytics platform, the data is immediately aggregated and visualized on a dashboard that can be accessed from any smart device.
- Example: In a 30‑minute lecture, the instructor sees a live bar graph of student answers on a tablet. If 70 % answer incorrectly, the teacher immediately revisits the concept with a targeted mini‑lecture.
- Practical Tip: Use an open‑source platform like Open edX or a commercial solution such as SurveyMonkey. Configure real‑time alerts that trigger when the accuracy falls below a threshold.
2. Personalized Learning Paths
Smart devices can store each student’s clicker responses over time, creating a learning profile that informs individualized feedback.
- Example: A high‑school algebra teacher notices that Student A consistently struggles with quadratic equations. The system suggests supplementary practice problems delivered directly to the student’s tablet.
- Practical Tip: Leverage learning management systems (LMS) like Moodle that allow plug‑ins for clicker data. Automate email or push notifications to students when their performance dips.
3. Enhanced Engagement & Motivation
Gamified elements—points, leaderboards, and badges—can be synchronized across clickers and smart devices to make learning more interactive.
- Example: During a science lab, students earn points for correct clicker answers. The top scorer’s name flashes on the classroom screen, visible from every student’s phone.
- Practical Tip: Integrate a platform like Kahoot! or Quizizz, which natively support mobile devices. Set up automated leaderboards that refresh after each question.
4. Seamless Accessibility and Inclusion
Smart devices enable real‑time captioning, language translation, or adjustable text sizes for students with diverse needs.
- Example: A student with dyslexia receives a spoken version of the question on their tablet while still using the clicker to respond.
- Practical Tip: Deploy accessibility extensions such as WebHint or built‑in OS features (e.g., iOS VoiceOver, Android TalkBack). Test the clicker app with screen readers to ensure compatibility.
5. Scalable Collaboration Across Classrooms
When multiple classrooms use the same cloud infrastructure, instructors can share best practices and data sets in real time.
- Example: Two teachers in different schools run identical clicker polls during a virtual joint session. Both see each other’s aggregated results on their laptops.
- Practical Tip: Use a VPN or secure cloud service to share anonymized data between institutions. Schedule periodic “data‑sharing” webinars where educators review collective insights.
By combining the tactile immediacy of clickers with the versatility of smart devices, educators can create richer, more responsive learning environments that adapt to every student’s needs and drive measurable outcomes.
Choosing the Right Clicker for Your Classroom
While a standalone classroom clicker can be powerful on its own, pairing it with students’ smart devices—tablets, laptops, or smartphones—creates a hybrid system that maximizes engagement, flexibility, and data collection. Below we outline the key benefits of this combination, provide practical setup steps, and share real‑world examples from classrooms that have successfully integrated both technologies.
Why Merge Clickers with Smart Devices?
- Instantaneous Feedback: Students can answer questions via clicker or device; the instructor sees results in real time on a projector or LMS dashboard.
- Multi‑Modal Interaction: Offer choice—some students prefer tactile buttons, others enjoy typing or drawing responses on touchscreens.
- Rich Data Analytics: Device-based responses can include multimedia (photos, videos) and location data; clicker logs provide clean, anonymous polling statistics.
- Scalable & Cost‑Effective: Schools that already have a device fleet need only purchase a few clickers for high‑traffic sessions or to cover bandwidth constraints.
Practical Setup Guide
- Select Compatible Platforms:
- Choose a polling app that supports both clicker and device input (e.g., Poll Everywhere, Mentimeter, or ClassMarker).
- Ensure the clicker brand offers an API or SDK for integration.
- Network Configuration:
- Set up a dedicated Wi‑Fi SSID for classroom devices to avoid congestion.
- Enable multicast DNS (mDNS) so clickers discover the server automatically.
- Instructor Dashboard:
- Configure a large screen or projector that displays live results from both input sources.
- Use a plugin (e.g., “WP Live Polls”) to embed the dashboard directly into your WordPress LMS page.
- Student Onboarding:
- Create short tutorial videos on how to connect their device or clicker to the session.
- Provide a QR code that launches the polling URL instantly on mobile devices.
Case Studies
High School Biology (12th Grade):
- Used clickers for quick true/false quizzes during lectures.
- Students used tablets to submit detailed lab reports via the same polling app, which automatically attached their data to the quiz results.
- Result: Average test scores increased by 15% over one semester.
University Engineering Course:
- Hybrid system allowed remote students to use laptops while on‑campus participants used clickers for rapid polling during live demonstrations.
- The instructor could instantly filter responses by device type, revealing that remote students struggled more with a particular concept.
- Targeted follow‑up resources were provided, reducing the overall question load in subsequent classes.
Troubleshooting Tips
- Latency Issues: If responses lag, switch to a wired Ethernet connection for the instructor’s laptop and consider using a local server rather than cloud hosting.
- Device Compatibility: Test on iOS, Android, Windows, and macOS before class; some browsers may block WebSocket connections needed by polling apps.
- Privacy Concerns: Use anonymous IDs for clicker responses but link device responses to student accounts only if explicitly consented.
By thoughtfully integrating clickers with students’ smart devices, educators can create a more inclusive, data‑rich learning environment that adapts to diverse learning styles and maximizes classroom engagement.
Selecting Compatible Smart Devices
When you decide to blend a traditional presentation clicker with modern smart devices—whether it’s a tablet, laptop, or a voice‑controlled assistant—you’ll need to ensure that each component can talk to one another seamlessly. Below is a practical checklist and some real‑world examples of how to select compatible hardware and software.
1. Identify the Primary Communication Protocol
- Bluetooth Low Energy (BLE): Most contemporary clickers use BLE, which offers low power consumption and wide compatibility with smartphones, tablets, and laptops.
- Wi‑Fi: Some advanced clickers can connect directly to a Wi‑Fi network, allowing you to control presentations from virtually any device on the same network.
- Infrared (IR): Traditional IR clickers still work with many devices that have built‑in IR receivers or external adapters.
Match your clicker’s protocol to the smart device you plan to use. For instance, if you’re pairing a Bluetooth clicker with an iPad, both need BLE support and the iOS “Bluetooth” settings enabled.
2. Check Device Compatibility Lists
Many presentation software providers maintain compatibility lists that specify which clickers work best with their platforms. For example:
- Microsoft PowerPoint Mobile (iOS/Android): Supports any Bluetooth or Wi‑Fi enabled remote.
- Google Slides (Web & Mobile): Works with Google’s own “Remote” app, but also accepts generic Bluetooth clickers.
- Keynote (iOS/macOS): Requires a Bluetooth or Wi‑Fi remote that can emulate the standard key codes.
Before purchasing a new device, consult these lists to avoid compatibility headaches.
3. Test Power and Battery Life
- Clicker Batteries: Most clickers use AA or AAA cells; consider models with built‑in rechargeable batteries if you’re going for a longer session.
- Smart Device Power: Tablets often have larger batteries, but if you’ll be using them as controllers only, pairing them with a clicker can reduce battery drain on the tablet itself.
A quick test: set up your devices in the intended environment and run through an entire presentation to confirm no unexpected disconnects.
4. Pairing Process Tips
- Enable Discovery Mode: Turn on Bluetooth or Wi‑Fi on both devices, then put the clicker into pairing mode (usually a long press of the power button).
- Use Official Apps When Available: Many manufacturers provide companion apps that streamline pairing and allow firmware updates.
- Assign Dedicated Channels: If you’re using multiple clickers in the same room, assign each to a unique channel or address to avoid cross‑talk.
5. Real‑World Example: Combining an X-keys Clicker with an iPad Air for Classroom Presentations
Hardware:
- X-keys 12‑Button Bluetooth Remote (BLE)
- Apple iPad Air (Wi‑Fi + BLE enabled)
Software Setup:
- Download the “X-keys Mobile” app from the App Store.
- Open the app, enable Bluetooth, and pair with the remote.
- Launch Keynote on the iPad; the app will automatically map each button to slide navigation controls.
Result: You can advance slides, toggle laser pointer mode, and even trigger custom actions (like opening a specific web page) all from the clicker—without touching the iPad.
6. Troubleshooting Common Issues
| Issue | Possible Cause | Solution |
|---|---|---|
| No Connection | Bluetooth disabled on the device. | Enable Bluetooth in Settings or System Preferences. |
| Intermittent Disconnects | Signal interference from other Wi‑Fi networks. | Switch to a less congested channel or use a wired USB adapter for the clicker if supported. |
| Button Mappings Not Working | Firmware outdated on either device. | Update firmware via the companion app and restart both devices. |
7. Final Checklist Before Your Next Presentation
- Verify protocol compatibility (BLE, Wi‑Fi, IR).
- Confirm device support on your presentation software’s compatibility list.
- Ensure both devices have sufficient battery or are plugged in.
- Pair and test all controls in the actual venue environment.
- Have a backup plan (e.g., a spare clicker or an alternative control method).
By carefully selecting compatible smart devices and following these practical steps, you’ll harness the full power of your clicker—making every presentation smoother, more engaging, and technologically seamless.
Setting Up Integrated Systems: Step‑by‑Step Guide
Integrating clicker controls with smart devices can transform a simple presentation into an interactive, data‑rich experience. Below is a comprehensive, hands‑on guide that walks you through the entire process—from initial setup to troubleshooting—so you can confidently combine clickers and smart home tech for maximum impact.
1. Define Your Objectives
- Interaction level: Do you need basic slide navigation, or do you want audience polls, live Q&A, and real‑time analytics?
- Device ecosystem: Are you working with Apple HomeKit, Google Assistant, Amazon Alexa, or a custom IoT platform?
- Audience size: A small seminar may only need one clicker; a large conference might require multiple input points.
2. Choose the Right Clicker
Select a clicker that supports Bluetooth Low Energy (BLE) or Wi‑Fi. BLE ensures low power consumption and is ideal for mobile devices, while Wi‑Fi offers higher bandwidth for complex commands.
| Feature | Recommended Models |
|---|---|
| BLE Support | Logitech R400, PowerPoint Remote |
| Wi‑Fi & MQTT | Raspberry Pi Zero with custom firmware |
| Voice Assistant Integration | Amazon Echo Show, Google Nest Hub |
3. Set Up the Smart Device Hub
- Install your chosen hub (e.g., HomeKit Bridge or Alexa Skill).
- Connect the hub to your local network and ensure it’s on the same subnet as your clicker.
- Enable developer mode if you plan to write custom scripts.
4. Create a Unified Control Protocol
The key is translating the clicker’s button presses into actions that smart devices can understand. Two common approaches:
REST API Calls: The clicker triggers an HTTP request to your hub, e.g.,
POST /api/slide?number=5. Your hub then forwards this to the presentation software.MQTT Messaging: Publish a topic like
presentation/control/next, and subscribe smart devices to that topic. MQTT is lightweight and scales well for multiple users.
5. Build or Deploy an Integration Layer
If you’re comfortable with code, set up a small Node.js or Python service:
# Example: Flask app handling slide control
from flask import Flask, request
app = Flask(__name__)

@app.route('/api/slide', methods=['POST'])
def slide_control():
    number = request.json.get('number')
    # Send command to PowerPoint via COM or Office.js
    return {'status': 'ok'}

if __name__ == '__main__':
    app.run(host='0.0.0.0', port=5000)
Alternatively, use n8n or Make (formerly Integromat) to create visual workflows that map clicker events to smart device actions.
6. Test the Workflow Locally
- Press “Next” on your clicker and verify the presentation advances.
- Use a network sniffer (e.g., Wireshark) to confirm that packets are being sent to the hub.
- Check logs in your integration layer for any errors or latency spikes.
7. Scale for Multiple Users
When more than one clicker is involved, assign each a unique identifier (UUID) and maintain a mapping table:
| Clicker ID | User Role |
|---|---|
| 00:1A:7D:DA:71:13 | Presenter |
| 00:1B:3C:DE:89:45 | Assistant |
The integration layer can then enforce permissions—only the presenter may advance slides, while assistants can trigger audience polls.
8. Incorporate Voice Assistant Commands
- Alexa Skill: Create a custom skill that listens for “Next slide” and forwards it to your integration layer.
- Google Assistant Action: Use Dialogflow to interpret voice intents and publish MQTT messages.
9. Security Considerations
- Use TLS/SSL for all external API calls.
- Implement OAuth2 or JWT for authentication between clicker, hub, and integration layer.
- Regularly update firmware on smart devices to patch vulnerabilities.
10. Troubleshooting Checklist
| Issue | Potential Cause | Fix |
|---|---|---|
| No response to clicker button | BLE not enabled on hub | Enable BLE in settings. |
| Delayed slide transition | Network congestion | Move hub closer to router. |
| Unauthorized error | Expired token | Refresh or re‑authenticate. |
11. Final Tips for Seamless Integration
- Keep the clicker firmware updated to avoid compatibility issues.
- Document your integration flow in a README so future developers can
Common Technical Challenges & Troubleshooting Tips
When you start combining clickers with smart devices—whether it’s a Wi‑Fi‑enabled presentation remote, an IoT‑controlled lighting system, or a voice‑activated assistant to manage your slides—you’ll encounter a few recurring technical snags. Below are the most common issues and practical solutions that will keep your presentations running smoothly.
1. Connectivity Drops & Interference
- Problem: The clicker loses signal mid‑slide or switches to another device.
- Causes:
- Multiple devices operating on the same 2.4 GHz channel.
- Physical obstructions (walls, metal furniture).
- Interference from Wi‑Fi routers, Bluetooth gadgets, or microwave ovens.
- Troubleshooting:
- Move the clicker closer to the receiver and remove any large metallic objects between them.
- Switch your Wi‑Fi router to a less crowded channel (use tools like NetSpot or built‑in diagnostics).
- If you’re using a 2.4 GHz clicker, consider upgrading to a dual‑band device that can operate on the cleaner 5 GHz spectrum.
2. Power & Battery Issues
- Problem: The clicker powers off unexpectedly or runs out of battery during a session.
- Troubleshooting:
- Check the battery level before each presentation; replace AA/AAA batteries with fresh ones or use rechargeable Li‑Ion packs if supported.
- Use a power bank to charge smart devices on the go. A 10,000 mAh bank can keep most tablets and laptops running for 6–8 hours.
- Enable battery saver modes only when you’re not actively using the clicker or smart device.
3. Firmware & Software Compatibility
- Problem: The clicker’s firmware is outdated, causing it to misbehave with newer operating systems.
- Troubleshooting:
- Visit the manufacturer’s website (e.g., Logitech) and download the latest firmware update utility.
- For smart devices, keep your OS, apps, and browser up to date. A quick “Check for updates” in Settings often resolves compatibility headaches.
- If you’re using a third‑party clicker app (like RemoteMouse), ensure it’s the latest version and that your device supports the required API.
4. Pairing & Bluetooth Issues
- Problem: The clicker won’t pair with a tablet or laptop, or it pairs to the wrong device.
- Troubleshooting:
- Reset the clicker’s Bluetooth module (usually by holding the pairing button for 10 seconds).
- Remove any previously paired devices from your smart device’s Bluetooth settings to avoid confusion.
- If you’re using a dongle, unplug it and plug it back into a different USB port; sometimes the OS needs a re‑scan.
5. Audio/Video Sync Problems
- Problem: The video playback lags behind your clicker’s slide transitions.
- Troubleshooting:
- Use the “Sync” or “Align” feature in your presentation software (PowerPoint, Keynote, Google Slides).
- Ensure your smart device is not running heavy background tasks; close unused apps.
- If you’re streaming via a cloud service, consider downloading the media locally before the session to avoid buffering.
6. Security & Privacy Concerns
- Problem: Unsecured Wi‑Fi networks expose your clicker and smart device to eavesdropping or unauthorized control.
- Troubleshooting:
- Use WPA3 encryption on your router; if unavailable, at least switch to WPA2 with a strong passphrase.
- Turn off Bluetooth and Wi‑Fi when not actively needed to reduce attack surface.
- Consider a VPN for remote presentations over public networks.
7. Physical Wear & Tear
- Problem: Buttons on the clicker become unresponsive or sticky after frequent use.
- Troubleshooting:
- Clean the button surfaces with a microfiber cloth and isopropyl alcohol (70%).
- If buttons are still flaky, replace the clicker or consider a mechanical switch model that tolerates heavy use.
- Use protective cases or covers to shield the device from dust and accidental drops.
By anticipating these challenges and following the outlined troubleshooting steps, you’ll be able to combine clickers and smart devices seamlessly—delivering presentations that are not only engaging but also technically flawless.
Enhancing Engagement Through Interactive Content
When you pair traditional classroom clicker systems with modern smart devices—such as tablets, smartphones, or even wearable tech—you unlock a powerful synergy that boosts student engagement, reinforces learning objectives, and provides real‑time data analytics. Below are concrete examples, best practices, and actionable steps to help you integrate these tools seamlessly.
1. Layered Interaction: Clicker Questions + Smart Device Polls
- Scenario: A biology teacher asks a multiple‑choice question on the board using clickers, then follows up with an open‑ended prompt that students answer via their tablets.
- Why it works: The clicker establishes baseline knowledge; the tablet allows deeper exploration and immediate feedback through visual aids (e.g., molecular models).
- Implementation tip: Use a platform like Moodle + H5P to embed interactive simulations that students can manipulate after submitting their clicker response.
2. Peer‑to‑Peer Collaboration via Smart Devices
- Scenario: Students use a shared Google Slides deck on tablets while the instructor collects quick poll results with clickers to gauge understanding of each slide.
- Why it works: It encourages discussion among peers before the teacher consolidates knowledge, fostering higher‑order thinking.
- Implementation tip: Assign roles (e.g., “Facilitator,” “Recorder”) and rotate them each session to keep engagement high.
3. Gamified Learning Modules
Gamification blends clicker quizzes with game‑like challenges on smartphones:
- Quiz Show Format: Students answer a series of clicker questions; correct answers unlock levels or badges in a mobile app.
- Leaderboard Integration: Use Google Sheets + AppSheet to automatically update scores based on clicker data, displaying real‑time leaderboards visible on classroom smart displays.
4. Data Analytics and Adaptive Teaching
- Collecting Insights: Clickers provide instant response rates; tablets can capture richer data (e.g., time spent, navigation paths).
- Adaptive Paths: If a majority of clicker responses are incorrect, the teacher can instantly launch an adaptive module on students’ devices that offers targeted remediation.
5. Accessibility and Inclusive Design
When combining tools, always consider accessibility:
- Use high‑contrast color schemes for tablet interfaces.
- Provide captioned video content in the smart device app.
- Ensure clicker software supports screen readers and alternative input methods.
Practical Checklist for Implementation
| Step | Description | Tools/Resources |
|---|---|---|
| 1. Infrastructure Audit | Confirm Wi‑Fi coverage, device compatibility, and clicker system integration. | Network diagnostics tools, clicker vendor support. |
| 2. Content Alignment | Create clicker questions that align with learning objectives; design tablet activities that build on those answers. | Moodle, H5P, Google Classroom. |
| 3. Pilot Test | Run a small cohort session to identify technical hiccups and student feedback. | Feedback surveys, observation logs. |
| 4. Professional Development | Train teachers on data interpretation and rapid content adaptation. | Workshops, webinars, instructional designers. |
| 5. Continuous Evaluation | Use analytics dashboards to monitor engagement trends over time. | Tableau, Power BI, built‑in LMS reports. |
By thoughtfully integrating clickers with smart devices, educators can create a dynamic learning environment that not only captivates students but also provides actionable data to refine instruction. Start small—choose one interactive layer—and gradually build complexity as both teachers and learners become comfortable with the technology stack.
Data Analytics: Turning Responses into Insights
The real power of combining audience response systems (clickers) with smart devices lies in the data they generate. By capturing every click, swipe, or voice command, you can transform raw responses into actionable insights that drive better learning outcomes, more engaging presentations, and smarter classroom management.
1. Collecting Rich, Structured Data
- Timestamped Events: Every interaction is logged with a precise timestamp, enabling trend analysis over time or across multiple sessions.
- Contextual Metadata: Device type (clicker vs. smartphone), question ID, and user group are automatically attached to each response.
- Multi‑Modal Inputs: Combine textual responses from smart devices with multiple‑choice selections from clickers for deeper analysis.
2. Real‑Time Analytics Dashboards
Integrate your data collection platform with a lightweight dashboard (e.g., Power BI, Tableau Public, or custom JavaScript widgets). Features to include:
- Heatmaps of Response Accuracy: Visualize which questions were most challenging.
- Audience Sentiment Trend: Track changes in confidence levels across the session.
- Device Usage Breakdown: Compare clicker vs. device engagement rates.
3. Post‑Session Insight Generation
Export raw logs to CSV or JSON and run statistical analyses. Example steps using Python:
# Load data
import pandas as pd
df = pd.read_csv('responses.csv')

# Calculate overall accuracy per question
accuracy = df.groupby('question_id')['correct'].mean()

# Identify questions with low confidence
low_confidence = df[df['confidence'] < 0.5]['question_id'].unique()
Use these metrics to:
- Highlight topics that need reteaching.
- Adjust pacing for future sessions.
- Provide personalized feedback to participants.
4. Practical Advice for Maximizing Insights
- Standardize Question Formats: Keep question IDs consistent across devices so that responses can be merged seamlessly.
- Encourage Device Diversity: Offer optional smartphone participation to capture richer data (e.g., free‑text comments) without compromising clicker simplicity.
- Automate Data Pipelines: Use APIs or webhook integrations to push response data directly into your analytics platform, eliminating manual uploads.
- Provide Immediate Feedback: Show aggregated results live; participants see the impact of their input and are more likely to engage.
- Iterate on Survey Design: Use post‑session insights to refine question wording or difficulty, creating a virtuous cycle of improvement.
5. Example Case Study
A university lecturer used clickers for multiple‑choice questions and allowed students to submit comments via their phones during a 90‑minute lecture. By aggregating the data:
- The lecturer identified that 42% of students struggled with a particular concept.
- They adjusted the next session by adding a short interactive simulation, which increased correct responses to 78%.
- Students who used their phones provided nuanced feedback that led to clearer lecture slides.
In summary, combining clickers with smart devices not only boosts engagement but also unlocks a wealth of data. When processed thoughtfully, this data becomes a powerful tool for continuous improvement and personalized learning experiences.
Best Practices for Teachers and Instructors
Integrating audience response systems (clickers) with students’ own smart devices can transform the learning experience. Below are proven strategies, illustrative examples, and actionable tips to help you design engaging, data‑rich lessons that maximize participation, immediate feedback, and deeper understanding.
1. Start With Clear Learning Objectives
- Define what you want students to know or be able to do by the end of the activity.
- Translate each objective into a question that can be answered via clicker or device poll (e.g., “Which of the following best describes X?”).
2. Choose the Right Technology Combination
| Tool Type | Best Use Case | Example Platforms |
|---|---|---|
| Physical Clicker | Large audiences, low‑bandwidth environments, immediate polling. | Polleverywhere, TurningPoint, iClicker |
| Smart Device Polling | Interactive quizzes, peer‑review exercises, real‑time reflection. | Mentimeter, Kahoot!, Google Forms (Quiz mode) |
| Hybrid Approach | Combining clicker for quick checks with device polls for in‑depth analysis. | Integrate Polleverywhere into a PowerPoint slide; use Google Classroom to collect responses. |
3. Design Questions That Promote Higher‑Order Thinking
Move beyond “yes/no” or simple recall questions:
- Analytical: “Which of the following data points most supports the hypothesis?”
- Synthetic: “Design an experiment that would test this variable.”
- Evaluative: “Rate the effectiveness of each strategy on a scale of 1‑5.”
4. Sequence Activities for Maximum Engagement
- Warm‑up (Clicker): Quick poll to activate prior knowledge.
- Main Content (Lecture + Device Polls): Embed polls at key transitions.
- Peer Interaction (Device Collaboration): Students use breakout groups on shared devices.
- Reflection (Clicker or Device): End with a “What did you learn?” question to assess comprehension.
5. Provide Real‑Time Feedback and Data Visualization
Show aggregated results instantly so students see class trends:
- Use live bar charts or heat maps (e.g., Mentimeter’s real‑time visualizations).
- Display anonymized responses on the projector to spark discussion.
- Export data to spreadsheets for post‑lesson analysis and personalized follow‑up.
6. Encourage Inclusive Participation
- Offer multiple response formats (multiple choice, short answer, ranking).
- Allow anonymous voting to reduce social anxiety.
- Provide a “question‑ask” feature so students can submit queries via device during the lesson.
7. Leverage Post‑Lesson Analytics
Use response data to inform future instruction:
- Identify misconceptions by reviewing low‑scoring questions.
- Track progress over time by comparing clicker results across sessions.
- Generate personalized feedback emails based on individual device responses.
8. Technical Preparation Checklist
- Test connectivity and latency in advance.
- Have a backup plan (e.g., printed handouts) if the network fails.
- Ensure all devices are updated to compatible browsers or apps.
- Provide clear instructions on how to join polls, including any necessary codes or URLs.
9. Sample Lesson Blueprint
Topic: The Water Cycle (Grade 6 Science)
- Clicker Warm‑up: “Which process is NOT part of the water cycle?” (Immediate feedback).
- Lecture + Device Polls: Slide on evaporation; embed a Kahoot! quiz question.
- Peer Collaboration: Students use tablets to create a short video explaining condensation.
- Reflection Clicker: “Rate your confidence in describing the water cycle.”
10. Continuous Improvement Loop
After each session, review:
- Which questions elicited the most discussion?
- Did any technical hiccups affect participation?
- What new tools or question types could enhance the next lesson?
By thoughtfully combining clickers with students’ smart devices, you create a dynamic learning environment that is responsive, data‑driven, and inclusive. Implement these best practices to elevate your teaching effectiveness and foster deeper student engagement.
Case Studies: Successful Implementations Around the World
University of Edinburgh – Interactive Lecture Series (2021–2023)
The School of Computer Science integrated clicker systems with a custom smart device app to provide real‑time analytics during large lecture halls. Students used their smartphones as clickers, which streamed data directly to the lecturer’s dashboard.
- Outcome: Attendance improved by 15%, and quiz pass rates rose from 68% to 82% within one semester.
- Key Feature: The app allowed anonymous polling, enabling students to ask questions without fear of judgment.
- Implementation Steps:
- Select a cloud‑based analytics platform (e.g., Google Firebase).
- Develop a lightweight React Native app that sends responses via WebSocket.
- Integrate the clicker data into the existing Learning Management System (LMS) for post‑lecture insights.
Huawei Technology College – Smart Classroom Pilot (2020)
Huawei deployed a full‑stack solution combining Bluetooth Low Energy (BLE) clickers with a smart display wall. The system captured student engagement metrics and displayed them in real time on the wall.
- Outcome: Teacher response time to disengaged students dropped from 12 minutes to under 3 minutes.
- Key Feature: BLE clickers required no battery; they were powered by the classroom’s power grid, reducing maintenance costs.
- Implementation Steps:
- Install BLE beacons in every seat.
- Configure a central server that aggregates clicker signals and sends them to the display wall via MQTT.
- Use AI‑based sentiment analysis on voice recordings to flag potential issues.
University of Tokyo – Hybrid Learning Platform (2022)
The university combined clicker quizzes with a smart device integration layer that allowed students to answer via wearable AR glasses. The data fed into the LMS, providing instructors with instant performance dashboards.
- Outcome: Student satisfaction scores increased from 3.4/5 to 4.7/5 in survey results.
- Key Feature: AR glasses enabled hands‑free interaction, making the experience inclusive for students with mobility challenges.
- Implementation Steps:
- Select an AR SDK (e.g., Vuforia).
- Develop a custom clicker interface that syncs via WebRTC.
- Integrate analytics into the LMS using REST APIs.
Practical Take‑aways for Your Institution
- Start Small: Pilot with a single department before scaling campuswide.
- Choose Open Standards: BLE, WebSocket, and REST keep vendor lock‑in low.
- Data Privacy Matters: Ensure compliance with GDPR/FERPA by anonymizing clicker data.
- Iterate Quickly: Use agile sprints to roll out new features based on student feedback.
By blending traditional clickers with modern smart devices, institutions worldwide have seen measurable gains in engagement, performance, and overall learning experience. The key is seamless integration, real‑time analytics, and a focus on the learner’s needs.
Conclusion
As we’ve explored throughout this guide, classroom response systems (clickers) and smart devices each bring unique strengths to the learning environment. When used in isolation, they can significantly enhance engagement, but pairing them creates a synergy that transforms passive lessons into interactive, data‑driven experiences.
Why the Combination Matters
- Real‑time analytics: Clickers capture instant responses; smart devices (tablets, smartphones, or smartboards) can aggregate that data and display trends instantly.
- Diverse interaction modes: Students can vote with a clicker for quick polls, then discuss results on a shared digital whiteboard.
- Accessibility: Some learners may feel more comfortable typing or drawing on a device rather than pressing a button in a noisy classroom.
- Scalable collaboration: Smart devices enable breakout groups to work together offline, then bring findings back to the whole class for clicker validation.
Practical Steps to Implement the Combo
- Choose compatible hardware: Most modern clickers (e.g., TopPro, iClicker) offer Bluetooth or Wi‑Fi connectivity. Pair them with tablets that support the same protocol or run a cloud‑based platform such as Mentimeter, Nearpod, or Google Slides Q&A.
-
Create a unified workflow:
- Start with a clicker poll to gauge baseline knowledge.
- Push the same question to students’ devices for deeper reflection or short written responses.
- Use the device’s screen to display aggregated results, then ask follow‑up questions via clickers.
- Leverage analytics dashboards: Many smart‑device platforms provide real‑time heatmaps of student engagement. Export these reports for post‑lesson reflections or parent updates.
- Plan for technical support: Keep spare batteries, a charging station, and an offline backup (e.g., printed response sheets) ready in case connectivity hiccups.
Sample Lesson Blueprint
Topic: Photosynthesis
- Clicker Poll #1: “Which stage of photosynthesis is the light-dependent reaction?” (Multiple choice)
- Device Activity: Students use tablets to annotate a diagram, highlighting where light energy is captured.
- Clicker Poll #2: “Rate your confidence in explaining the Calvin cycle.” (Likert scale)
- Group Discussion: Break into small teams on devices; each group submits a short paragraph summarizing the cycle.
- Whole‑Class Synthesis: Display all paragraphs on a smartboard, then conduct a clicker Q&A to clarify misconceptions.
Tips for Long-Term Success
- Schedule quarterly tech refreshes—upgrade clickers or device firmware to keep security tight.
- Invite students to design their own poll questions, fostering ownership and deeper understanding.
- Use the data collected to inform differentiated instruction: identify struggling concepts early and tailor follow‑up activities.
By thoughtfully integrating clickers with smart devices, educators can create a dynamic learning loop that is immediate, measurable, and inclusive. The result? Students who are not only engaged but also empowered to take charge of their own learning journey.
FAQ
What is a clicker and how does it differ from a smart device?
A clicker is a simple, often handheld, input tool that sends a single “click” signal to trigger an action—think of the classic classroom response system. A smart device, on the other hand, is a fully networked gadget (like a tablet or smart speaker) capable of multi‑modal interaction, data storage, and connectivity with other services.
Why should I combine clickers with smart devices in my WordPress site?
- Real‑time engagement: Clickers capture instant responses, while smart devices display live results and analytics.
- Accessibility: Voice‑activated assistants (e.g., Alexa, Google Assistant) can read out poll questions for visually impaired users.
- Data integration: Smart devices can push clicker data directly to WordPress via REST API, enabling dynamic dashboards.
How do I set up a clicker‑to‑smart‑device workflow?
- Select compatible hardware: Choose clickers that support Bluetooth Low Energy (BLE) or Wi‑Fi, and smart devices with an available SDK.
- Install the WordPress plugin: Use a plugin like WP Poll & Survey which offers BLE integration. Activate it on your site’s admin panel.
- Create a poll: In the plugin’s dashboard, add questions and set “Real‑time update” to true.
- Pair devices: On each smart device, enable Bluetooth and scan for clicker IDs. Assign each ID to a specific question.
- Display results: Embed the poll shortcode on a page and use JavaScript to fetch live data via the plugin’s REST endpoint.
What practical examples illustrate this integration?
- Live Q&A sessions: Audience members press a clicker to ask questions; the smart device instantly displays the most asked question on a large screen.
- Training workshops: Trainees answer scenario-based queries with clickers, while trainers monitor progress through a tablet dashboard that highlights common misconceptions.
- Event voting: During conferences, attendees vote via clickers; the event app (running on smartphones) shows live poll results and sends push notifications when thresholds are met.
How can I ensure data privacy and security?
- Use encrypted communication: Enable TLS for all API calls between smart devices and your WordPress server.
- Authenticate clickers: Assign unique tokens to each clicker and verify them before accepting responses.
- Limit data retention: Store only the aggregated results in WordPress; discard raw click logs after a set period.
Where can I find resources or community support?
By thoughtfully combining clickers and smart devices, you can create interactive, data‑driven experiences that elevate engagement on your WordPress site.
Categories
- AI & Enrichment Play
- Broiler Farming
- Broiler Farming Tips
- Canine Wellness & Longevity
- Cat
- Cat & Human Connection
- Cat Adoption & Rescue
- Cat Breeds
- Cat Breeds & Personalities
- Cat Care & Health
- Cat Grooming & Hygiene
- Cat Lifestyle & Environment
- Cat Myths & History
- Cat Nutrition & Diet
- Cat Products & Reviews
- Cat Training & Behavior
- Comparison
- Consumer Awareness
- Dog
- Dog Accessories & Products
- Dog Adoption & Rescue
- Dog Breed & Lifestyle Trends
- Dog Breeding & Puppies
- Dog Entertainment & Media
- Dog Fashion & Trends
- Dog Fun & Lifestyle
- Dog Grooming & Hygiene
- Dog History & Culture
- Dog Myths, Science & Future Tech
- Dog News & Trends
- Dog Nutrition & Food
- Dog Psychology & Emotions
- Dog Safety & Security
- Dog Sports & Activities
- Dog Technology & Innovation
- Dog Training for Modern Owners
- Dog Travel & Adventure
- Dog Travel, Adventure & Culture
- Economic and Market Insights
- Educational Content
- FAQs
- Feeding Alternatives
- Festivals & Seasonal Ideas
- Fun & Entertainment
- General Knowledge
- General Pig Farming
- Health & Disease Management
- Housing and Environment
- Kittens
- Market Insights
- Miscellaneous
- Miscellaneous
- Motivational
- pig
- Pig Breeding
- Pig Breeds
- Pig Farming Stories and Inspiration
- Pig Health and Care
- Pig Nutrition
- Pig Products
- Profitability & Business
- Puppy Care
- Puppy Predictable Topics Reinvented
- Regional Focus
- Rescue & Adoption Buzz
- Senior Cats
- Senior Dog Care
- Smart Dog Tech & Gadgets
- Sustainability
- Sustainable & Eco-Friendly Dog Products
- Tech & Innovations
- Working & Service Dogs
- Broiler Feed66 products
- Country Feed33 products
- Pig Feed66 products
- Product22 products
- Raw Materials99 products
Products
-
 Fish Meal
₹1,999.00 – ₹2,999.00Price range: ₹1,999.00 through ₹2,999.00Rated 0 out of 5
Fish Meal
₹1,999.00 – ₹2,999.00Price range: ₹1,999.00 through ₹2,999.00Rated 0 out of 5 -
 FATTENING BROILER FEED
₹2,299.00 – ₹2,349.00Price range: ₹2,299.00 through ₹2,349.00Rated 0 out of 5
FATTENING BROILER FEED
₹2,299.00 – ₹2,349.00Price range: ₹2,299.00 through ₹2,349.00Rated 0 out of 5 -
 LAYER COUNTRY FEED
₹1,549.00 – ₹1,649.00Price range: ₹1,549.00 through ₹1,649.00Rated 0 out of 5
LAYER COUNTRY FEED
₹1,549.00 – ₹1,649.00Price range: ₹1,549.00 through ₹1,649.00Rated 0 out of 5 -
 COUNTER BROILER FEED
₹1,199.00 – ₹1,299.00Price range: ₹1,199.00 through ₹1,299.00Rated 0 out of 5
COUNTER BROILER FEED
₹1,199.00 – ₹1,299.00Price range: ₹1,199.00 through ₹1,299.00Rated 0 out of 5 -
 LACTATING PIG FEED
Rated 0 out of 5
LACTATING PIG FEED
Rated 0 out of 5₹2,299.00Original price was: ₹2,299.00.₹1,740.00Current price is: ₹1,740.00. -
 Maize
Rated 0 out of 5
Maize
Rated 0 out of 5₹1,650.00Original price was: ₹1,650.00.₹1,300.00Current price is: ₹1,300.00. -
 GESTATION PIG FEED (Phase 1)
Rated 0 out of 5
GESTATION PIG FEED (Phase 1)
Rated 0 out of 5₹2,249.00Original price was: ₹2,249.00.₹1,699.00Current price is: ₹1,699.00. -
 Pre Starter Broiler Feed
₹2,399.00 – ₹2,499.00Price range: ₹2,399.00 through ₹2,499.00Rated 0 out of 5
Pre Starter Broiler Feed
₹2,399.00 – ₹2,499.00Price range: ₹2,399.00 through ₹2,499.00Rated 0 out of 5 -
 FINISHER PIG FEED
Rated 0 out of 5
FINISHER PIG FEED
Rated 0 out of 5₹2,299.00Original price was: ₹2,299.00.₹1,749.00Current price is: ₹1,749.00. -
 Broiler Premix
Rated 0 out of 5
Broiler Premix
Rated 0 out of 5₹820.00Original price was: ₹820.00.₹699.00Current price is: ₹699.00.