
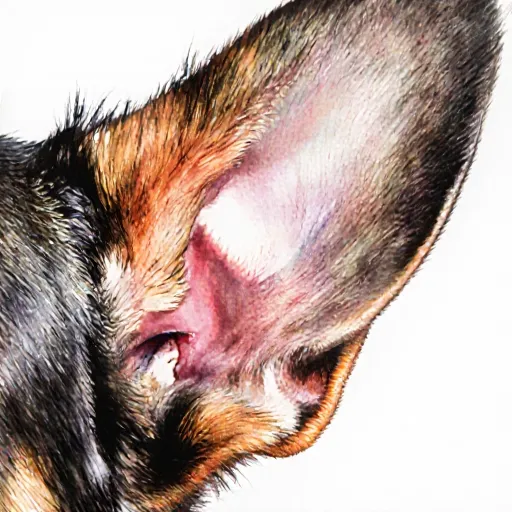
Protect Your Pet’s Hearing: Essential Ear Care Tips
Elevate Your Pet's Quality of Life with Ear Care
Table of Contents
- Introduction to Ear Cleaning for Dogs
- Signs Your Dog Needs Its Ears Cleaned
- Choosing the Right Supplies
- Gathering Necessary Tools
- Washing Your Hands Before Cleaning
- Positioning Your Dog Comfortably
- Inspecting the Ear Canal for Issues
- Dampening Cotton Balls with Ear Cleaner Solution
- Cleaning the Outer Ear Flap
- Carefully Cleaning Inside the Ear Canal
- Drying the Ears Thoroughly
- Monitoring Your Dog's Behavior Post-Cleaning
- Preventing Ear Infections in Dogs
- Conclusion
- FAQs
Introduction to Ear Cleaning for Dogs
Ear cleaning is an essential part of maintaining your dog's overall health. Just like humans, dogs can experience various ear issues such as infections, wax buildup, and irritation. Proper ear hygiene not only promotes a healthy environment within the ears but also helps prevent more serious conditions that could lead to discomfort for your pet.
Before you begin cleaning your dog’s ears, it's important to familiarize yourself with their anatomy. Dog ears are typically divided into three sections: the external ear (the part we can see), the middle ear, and the inner ear. The external ear houses the ear canal, which leads deep within the ear where wax accumulates and bacteria might grow.
Ear cleaning should be done regularly to prevent wax build-up, infections, or irritation that could lead to more serious health issues for your pet. Regular inspection of the ears can also help you catch any signs of infection early on. Signs of an infected ear include redness, odor, discharge, and excessive shaking or scratching at the head.
Using the right tools and products is crucial in effective ear cleaning. You should use a soft cloth or cotton ball dipped in pet-safe ear cleaner rather than Q-tips which can push wax deeper into the ear canal. Always follow up with your veterinarian if you notice persistent issues such as pain, swelling, or discharge after cleaning.
Here are some practical tips for cleaning your dog’s ears:
- Check Your Dog’s Ears Regularly: Look for signs of infection or wax buildup. Regular checks can help catch issues early before they become more serious.
- Use the Right Products: Always use a pet-safe ear cleaner and cotton pads designed for ear cleaning, avoiding human products which can be harsh on your dog's ears.
- Be Gentle: Handle your dog gently during the process to avoid causing them stress or pain. Praise and treats can help make the experience positive.
- Avoid Deep Cleaning: Do not insert cotton swabs or any objects into the ear canal deeper than you can see. This could potentially damage the ear drum.
Remember, while regular cleaning is important, it's always best to consult your veterinarian if you have concerns about your dog’s ears. A professional can provide guidance and help ensure that your cleaning practices are safe for your pet.
Signs Your Dog Needs Its Ears Cleaned
Just like humans, dogs can experience ear infections and other health issues that require proper care. Knowing the signs that your dog's ears need cleaning is crucial for maintaining their overall well-being. Ignoring these signs could lead to more serious health problems down the road. Here are some key indicators that it’s time to clean your dog's ears:
1. Strong Odor
A noticeable and strong odor coming from your dog's ears is a clear sign that they need cleaning. Dogs naturally have a slight smell, but if the scent becomes pungent or foul, it may indicate ear mites, infection, or wax buildup.
2. Excessive Scratching
If your dog is frequently scratching their ears with their paws or shaking their head, it could mean they are uncomfortable due to infected or irritated ears. This behavior can be a sign of an ear infection or allergies that need addressing.
3. Visible Discharge
Visible discharge from the ear canal is another common symptom. If you notice any waxy, brown, yellowish, greenish, or bloody discharge, it's likely time to clean your dog’s ears and possibly seek veterinary attention.
4. Hearing Loss
Sometimes, if the ear canal is severely blocked with wax, hair, or infection, it can lead to hearing loss in dogs. If you notice a change in how responsive your pet is to sounds, it's important to check their ears.
5. Visible Redness and Inflammation
Reddening of the ear canal or visible inflammation around the external ear can be signs of an infection. This could indicate a need for professional cleaning and treatment by your veterinarian.
Ear Cleaning Tips for Dogs: Step-by-Step
- Gather Supplies: Have all necessary supplies ready, including ear cleaner specifically designed for dogs, cotton balls or pads (not q-tips), and a soft cloth.
- Warmth and Relaxation: Make sure your dog is in a comfortable position. You may need to give them treats or engage them in play beforehand to reduce stress during the cleaning process.
- Dilute Ear Cleaner: Follow the instructions on the ear cleaner bottle for proper dilution if necessary.
- Clean Gently but Thoroughly: With your dog facing away, gently pull the ear flap back and pour a small amount of ear cleaner into the canal. Massage the base of the ear to help distribute the solution evenly. Use cotton balls or pads to wipe out any debris without pushing it further in.
- Check for Discharge: After cleaning, check for any discharge that may be coming from the ear and dispose of it carefully.
Remember, regular check-ups with your veterinarian are essential to ensure your dog's ears remain healthy. Early intervention can prevent more severe issues down the line.
Choosing the Right Supplies
When it comes to ear cleaning for your dog, selecting the right supplies is crucial to ensure that you are providing proper care and hygiene. The wrong products or tools can lead to irritation, infection, or even damage the delicate tissues inside the ear canal. Here’s a step-by-step guide on choosing the best supplies for ear cleaning.
1. Ear Cleaning Solution
Selecting the right solution is key to effectively cleaning your dog's ears without causing any harm. Look for solutions that are specifically formulated for pets and contain mild ingredients such as witch hazel, apple cider vinegar, or tea tree oil. Avoid products that contain alcohol or harsh chemicals, as these can irritate the ear canal.
Example: Products like Epi-Otic Ear Cleanser or Vet Solutions Ear Cleaner are popular choices among pet owners and veterinarians alike for their gentle yet effective formula.
2. Cotton Balls or Gauze
Cotton balls or gauze pads can be used to wipe away excess earwax, but it’s important not to insert them too deep into the ear canal. Using a soft, non-abrasive cotton ball is preferable over gauze as it helps avoid accidental damage to the ear canal walls.
Practical Advice: Always use clean and disposable cotton balls or pads to prevent introducing bacteria into your dog's ears during cleaning sessions.
3. Cotton Swabs (Q-Tips)
Cotton swabs are not recommended for deep ear cleaning due to their rigid nature, which can push debris deeper into the ear canal and potentially cause injury. Instead, they should only be used as a last resort if you need to reach areas that the cotton ball or gauze cannot easily access.
Caution: Overusing cotton swabs can lead to issues such as inflammation of the ear canal (otitis externa) and damage to the eardrum. Always consult with a veterinarian before using them for your dog's ears.
4. Warm Water
Warm water is an essential part of the cleaning process, but it should never be used directly on the ear canal without diluting it first or using a properly prepared solution. The warm water helps to soften and loosen any built-up debris so that it can be easily removed with the chosen tools.
5. Gentle Massage
In addition to using cleaning solutions, gently massaging the outer ear flap (pinna) can aid in loosening and expelling wax from the ear canal without causing discomfort or irritation. However, this should be done carefully and only if you have a good understanding of your dog's comfort level during the process.
Tip: A few drops of massage oil like almond or olive oil can also help lubricate the area, making it easier to clean while minimizing any potential discomfort for your pet.
6. Consult Your Veterinarian
If you notice unusual signs such as redness, swelling, discharge, or foul odor coming from your dog's ears, consult your veterinarian immediately before attempting any at-home ear cleaning. Professional assistance may be needed to diagnose underlying issues and recommend appropriate treatment.
By following these steps and choosing the right supplies for ear cleaning, you can help maintain your dog’s overall health and ensure their ears remain clean and healthy.
Gathering Necessary Tools
To effectively clean your dog's ears, it is essential to gather all necessary tools and supplies. Proper preparation ensures that you can address any issues thoroughly while minimizing discomfort for your pet. Here’s a comprehensive list of items you should have on hand:
1. Quality Ear Cleaning Solution
Selecting the right ear cleaning solution is crucial. Look for products formulated specifically for dogs, as human products may contain ingredients that are too harsh or inappropriate for your pet's sensitive skin. Always choose a pH-balanced solution to avoid irritation.
2. Cotton Balls or Gauze
Cotton balls and gauze pads are indispensable tools when cleaning ears, but it’s important not to use Q-tips, as they can push debris deeper into the ear canal. Instead, use a soft cotton ball or gauze pad soaked in the cleaning solution.
3. Eye Dropper or Syringe
An eye dropper or syringe helps dispense the cleaning solution directly into your dog's ear canal without causing discomfort or pushing debris around. Ensure it has a narrow tip to avoid hurting your pet.
4. Warm Water and Towel
Warm water is useful for rinsing out any excess solution after cleaning, while a soft towel can be used to gently dry the outer ear canal once you've finished. Using warm water helps prevent cold drafts and ensures your dog stays comfortable.
5. Patience and Positive Reinforcement
No tool or product will work effectively if your dog is stressed or uncomfortable. Approach the cleaning process with patience, and use positive reinforcement techniques to make it a pleasant experience for both you and your pet. This might include offering treats or playing with your dog afterward.
Practical Advice
- Frequency of Cleaning: Not all dogs need ear cleaning every day; in fact, excessive cleaning can lead to irritation. Typically, once a week is sufficient for most dogs unless advised otherwise by your vet.
- Signs of Ear Infection: Keep an eye out for signs that might indicate an infection, such as redness, swelling, discharge, or odor in the ears. If you notice any unusual symptoms, consult a veterinarian immediately.
- Consult Your Vet: It’s always wise to discuss ear cleaning with your vet during regular check-ups. They can provide personalized advice and recommend specific products based on your dog's breed, age, and health status.
In conclusion, gathering the right tools for ear cleaning is a crucial step in maintaining your dog's overall health. By following these tips and using the appropriate supplies, you'll be able to keep your pet's ears clean and healthy.
Washing Your Hands Before Cleaning
When it comes to cleaning, especially tasks involving your dog's ears, hygiene is paramount. Just as you would wash your hands before preparing food or performing surgery, it's crucial to clean your hands thoroughly before tackling the delicate task of ear cleaning for your furry friend. This ensures that any dirt, bacteria, or debris on your hands does not get transferred into your dog's ears.
Step-by-Step Ear Cleaning Tips for Dogs: Washing Your Hands
- Wet Your Hands: Start by running water over your hands under warm or cool conditions, depending on the time of year and your comfort. Ensure that they are thoroughly wet before applying any soaps or sanitizers.
- Apply Soap: Use a mild soap suitable for human skin to lather up your hands. Avoid using harsh soaps or detergents that could irritate the sensitive skin of your dog's ears.
- Rub Your Hands Together: Scrub your hands thoroughly, making sure to clean between your fingers and under your nails. Take time to remove all dirt and debris from your hands before proceeding.
- Rinse Thoroughly: Turn on the water again and rinse your hands until they are completely free of soap residue. This step is crucial as even a tiny amount of soap left behind could cause irritation for your dog.
- Dry Your Hands: Pat them dry with a clean towel or paper towel. Ensure your hands are completely dry before starting the ear cleaning process to avoid any accidents or discomfort for your pet.
Incorporating these steps into your routine will help maintain both your hygiene and that of your dog's ears, ensuring a comfortable and safe experience during the ear-cleaning session. Remember, just like in other health practices, cleanliness is key to preventing infections and maintaining overall health.
Positioning Your Dog Comfortably
In order to ensure your dog's comfort and hygiene during ear cleaning, proper positioning is crucial. This not only makes the process more comfortable for your pet but also ensures that you can access all areas of their ears effectively. Here’s a detailed guide on how to position your dog correctly:
Step 1: Choose the Right Location
Selecting the right spot in your home or outdoor area is essential for a successful ear cleaning session. Ensure you have enough space to move around without feeling cramped, and that there are no slippery surfaces nearby where your dog could slip while being examined.
Step 2: Gather Necessary Supplies
Before beginning the positioning process, gather all necessary supplies such as ear cleaner, cotton balls or pads, a soft cloth for wiping excess solution, and gloves (optional). Having everything ready will streamline the session and reduce interruptions.
Step 3: Positioning Your Dog
- Lying Down: Have your dog lie down on a soft surface like carpet or a towel. This position allows for easier access to their ears without causing strain.
- Sitting Stiffly: If your dog is more cooperative, you can try getting them to sit stiff-legged. This helps keep the head still during cleaning while preventing any stress on their legs.
- Lifting One Earmuff: For dogs who are particularly skittish about having both ears examined at once, start by lifting one earflap gently but firmly. This can help focus your dog’s attention on just that area initially.
Step 4: Calming Your Dog
Even with the best positioning techniques, some dogs may still feel anxious about having their ears cleaned. To calm them down, consider using treats or praise as positive reinforcement throughout the process. You might also try playing light music or speaking soothingly to reduce nervousness.
Step 5: Gentle Handling
Once your dog is comfortably positioned and relaxed, proceed with handling their ears gently but firmly. Use your thumbs to support the base of each ear while cleaning, ensuring you reach deep into the canal without causing discomfort or pain.
Following these steps ensures that both you and your pet have a positive experience during ear cleaning sessions. Consistency in approach can make future cleanings easier for everyone involved!
Inspecting the Ear Canal for Issues
Inspecting the ear canal is a crucial step in maintaining your dog's overall health. Just as regular cleaning can help prevent issues, inspecting for any signs of trouble early on can save you both from more serious problems down the road.
Why Inspect Your Dog’s Ear Canal?
- Prevent Infections: Regular inspections allow you to catch infections in their early stages, making them easier and less painful to treat. Signs of infection include redness, swelling, or discharge.
- Evaluate Ear Canal Condition: Looking inside the ear canal can help identify blockages, foreign objects, or growths that may need veterinary attention.
- Identify Early Symptoms of Hearing Loss: Changes in your dog’s behavior, such as increased head tilting or sensitivity to sound, could indicate an underlying issue. An inspection might reveal the cause.
Step-by-Step Guide to Inspecting Your Dog's Ear Canal
- Gather Supplies: Before you start, gather a soft flashlight or headlamp, cotton balls or gauze pads, and ear cleaning solution (if needed). Never use Q-tips for this purpose as they can push debris deeper into the canal.
- Create a Calm Environment: Dogs may react unpredictably to having their ears inspected. Start by gently calming them with treats or petting to make the process less stressful.
- Lift the Ear Flap Gently: Using your fingers, carefully lift the ear flap away from the head. Be cautious not to pull too hard as this can hurt your dog.
- Inspect the Canal: Once the ear canal is partially exposed, use the flashlight to illuminate it. Look for any visible signs of problems such as:
- Redness or swelling
- Dark spots (potential infections)
- Excessive waxy build-up
- Foul odor
- Visible foreign objects like grass seeds or dirt
Practical Tips for Ear Cleaning
If your inspection reveals any issues, it may be time to clean the ear canal. Here are some practical tips:
- Dilute the Solution Properly: Always follow the manufacturer's instructions when using any ear cleaning solution.
- Use a Syringe Carefully: If you use a syringe to flush the canal, do so gently and only with clean water or the prescribed solution. Pushing too hard can cause discomfort.
- Rinse Thoroughly: Ensure all debris is flushed out of the ear canal. Use fresh water for rinsing after you’ve applied the cleaning solution.
- Dry the Ears: Once done, gently pat dry with a soft towel to avoid irritation. You can also use a hair dryer on its lowest setting at a safe distance from your dog’s head.
Conclusion
In summary, inspecting and cleaning your dog’s ear canal is an essential part of maintaining their health. It's not just about keeping the ears clean but also ensuring they are functioning properly. By following these steps, you can help prevent serious issues from developing into major problems.
Dampening Cotton Balls with Ear Cleaner Solution
When cleaning your dog's ears, one crucial step is properly dampening cotton balls with an ear cleaner solution. This process is essential for ensuring that the cleaner reaches all parts of the ear canal without being too harsh on the sensitive skin inside. Here’s how to do it effectively:
Step-by-Step Guide
- Select the Right Cleaner: Choose an ear-cleaning solution that is specifically designed for dogs. Human ear drops or solutions may not be suitable as they are formulated differently and can irritate your dog's ears.
- Prepare Your Supplies: Gather cotton balls, a clean pair of tweezers or scissors to cut the cotton balls if needed, and ensure you have a well-lit area where you can work comfortably. It’s also helpful to have a small bowl filled with tepid water handy for rinsing the cotton balls.
- Dampen the Cotton Balls: Squeeze out excess liquid from your ear cleaner solution into the bowl of tepid water before pouring it back into the bottle or container. This step ensures that the cotton balls are not overly wet, which could lead to dripping onto your dog’s fur when you clean their ears.
- Bend and Shape Cotton Balls: If using standard-sized cotton balls, gently bend them with your fingers until they resemble a small cup. This shape helps you to apply the cleaner more effectively without allowing it to run into other parts of the ear or down the canal.
- Apply Gently and Carefully: With your dog in a comfortable position, place one cotton ball inside each ear canal. Ensure that the solution touches all surfaces of the ear canal but avoid pushing deep into the canal to prevent irritation or injury.
- Rinse Thoroughly: After letting the cleaner sit for a minute as per the instructions on your chosen product, gently wipe out any excess liquid from the outside of the ears. Use another cotton ball if necessary and ensure that no solution remains in the ear canal.
Tips and Advice: Regular ear cleaning is important for preventing infections and maintaining your dog’s overall health. However, always remember to use products intended specifically for pets. If you notice any signs of infection such as redness, unusual odor, or excessive discharge from the ears, consult a veterinarian immediately.
Preventing Over-Exposure: Be cautious not to over-dampen the cotton balls; this can lead to excess moisture that may cause skin irritation. Always follow the manufacturer’s instructions carefully when using ear cleaner solutions and never use homemade remedies unless advised by a vet.
Cleaning the Outer Ear Flap
Proper ear cleaning is essential for maintaining your dog's overall health. The outer ear flap, or pinna, plays a crucial role in protecting and directing sound to the inner ear. Cleaning this area can help prevent infections and reduce unpleasant odors.
Step-by-Step Guide
- Prepare Your Supplies: Gather all necessary supplies before you begin, including a cotton ball or soft cloth, a veterinarian-recommended ear cleaner, and possibly a small mirror to help visualize the outer ear flap.
- Calm Your Dog: Gently calm your dog if it becomes agitated. Dogs can become nervous during this process, so it's important to stay patient and reassuring.
- Inspect the Outer Ear Flap: Use a soft cloth or cotton ball moistened with ear cleaner solution to gently wipe away any visible dirt, debris, or wax from the outer ear flap. Be sure to examine both sides of the ear for any signs of infection such as redness, swelling, or discharge.
- Examine Inside the Ear Flap: If you have a small mirror, use it to inspect inside the ear flap if needed. Look for any abnormalities or excessive wax build-up that might require further attention from your veterinarian.
- Clean Gently: Avoid using cotton swabs in the outer ear canal as they can push debris deeper into the ear and potentially cause injury. Instead, use a soft cloth or cotton ball to clean any visible areas without inserting anything inside the ear.
- Dry Thoroughly: After cleaning, make sure to dry the outer ear flap completely with a soft towel. Excess moisture can contribute to the growth of bacteria and yeast.
Note: If you notice any signs of infection or if your dog shows discomfort during the process, it's important to consult your veterinarian for further advice.
Potential Issues and Precautions
- If your dog has a history of ear infections or is prone to them, consider cleaning their ears more frequently (e.g., weekly).
- Avoid using human ear drops as they are not suitable for dogs.
- Be cautious around the ear canal entrance to avoid causing discomfort.
In summary, regular cleaning of the outer ear flap is important for your dog's overall health. By following these steps and being attentive during each session, you can help prevent common issues like infections and maintain a healthier lifestyle for your pet.
Carefully Cleaning Inside the Ear Canal
Proper ear cleaning is essential for maintaining a dog's health and comfort. Just like with dogs, carefully cleaning inside the ear canal in humans requires gentle handling to avoid damage to sensitive tissues.
Tools You'll Need:
- A soft cotton ball or cotton swab
- Ear cleaner solution (pet-safe for humans)
- Warm water
- A towel for drying afterward
Step-by-Step Guide:
- Inspect the Ear Canal: Before cleaning, inspect your ears for any signs of irritation, discharge, or unusual odor. This is important to ensure there are no underlying issues that need attention from a healthcare professional.
- Warm Up the Cleaner Solution: If using a store-bought ear cleaner, warm it slightly before applying it. This can help soften any debris inside the canal and make the cleaning process more comfortable.
- Pour Clean Water Gently into Ear Canal: Use your finger to carefully pour warm water into one ear. The goal is to flush out any built-up dirt, wax, or debris without causing discomfort.
- Clean with Cotton Ball or Swab: After flushing, use a soft cotton ball or swab dipped in the cleaner solution to gently wipe the outer part of the ear canal. Be careful not to push anything further into the ear canal.
- Rinse Again: Pour more warm water into the other ear and allow it to drain out naturally. Repeat this process if necessary until there is no visible debris left in the ear canal.
- Dry Thoroughly: Gently dry your ears with a towel, ensuring that you do not force any moisture deeper inside the ear canal. Patting rather than rubbing can help prevent irritation.
Important Tips:
It's important to be gentle when cleaning the ear canal to avoid causing pain or damage. If you experience discomfort during the process, stop immediately and consult a healthcare professional.
Regular ear cleanings can help prevent infections and other issues related to excessive wax buildup. However, it's always best to seek advice from a medical professional if you notice any changes in your ears or have concerns about proper cleaning techniques.
Drying the Ears Thoroughly
Ensuring that your dog's ears are dried thoroughly is a crucial step in maintaining their overall health. Moisture trapped inside the ear can lead to irritation, discomfort, and potentially harmful infections. Here’s how you can dry your dog’s ears properly:
Step-by-Step Guide
- Inspect the Ear Canals: Before drying, gently inspect both of your dog's ears for any signs of debris or discharge. Use a soft cloth to wipe away any visible dirt.
- Use a Drying Solution (Optional): If your vet recommends it, use an ear-drying solution. These solutions are designed to help prevent infections and keep the ear canal dry by drawing out moisture. Follow the instructions carefully as directed on the bottle.
- Dry with a Soft Towel: Gently pat the outer part of the ear with a soft towel, starting from the top and moving towards the bottom. Be careful not to push any debris deeper into the ear canal.
- Use an Ear Dryer (Optional): If your dog has long or floppy ears, using a low-heat, pet-safe blow dryer can help dry hard-to-reach areas inside the ear. Set it on the lowest heat setting and hold it several inches away from the ear to avoid overheating.
- Clean the Inside (Optional): If your dog has long or hairy ears, you might need to use a cotton ball or a soft-bristled brush to gently clean the inside of the ear. Always be gentle and ensure that you do not push any debris deeper into the ear.
- Observe for Signs of Infection: After drying, observe your dog's ears for any signs of infection such as redness, swelling, or unusual discharge. If you notice anything out of the ordinary, consult your veterinarian immediately.
Additional Tips and Recommendations
- Frequency of Cleaning: Regular cleaning is essential for dogs prone to ear infections or those with floppy ears. However, always check with your vet about the frequency of cleaning as it varies based on each dog’s specific needs.
- Choose the Right Tools: Invest in tools that are specifically designed for ear care in pets such as soft cotton balls, ear wipes, and a veterinarian-approved ear cleaner. Avoid using human products or cotton swabs as they can be too harsh and might push debris deeper into the ear canal.
- Monitor Your Dog’s Behavior: Pay attention to your dog's behavior if you notice any signs of discomfort such as excessive scratching, shaking their head, or tilting it. These could indicate an issue that requires veterinary attention.
Conclusion
Proper ear drying and maintenance play a vital role in preventing infections and ensuring the overall health of your dog's ears. By following these steps and tips, you can help keep your furry friend comfortable and free from potential health issues.Monitoring Your Dog's Behavior Post-Cleaning
To ensure your dog's comfort and well-being after ear cleaning, it is crucial to monitor their behavior closely. Ear cleaning can sometimes be an uncomfortable experience for dogs, so observing how they react afterward helps determine if the process was effective or if there are any signs of discomfort that might require further attention.
Signs Your Dog May Be Discomforted After Cleaning
- Excessive ear scratching or rubbing against objects.
- Head tilting or frequent shaking of the head.
- Loss of balance or unsteady walking.
- A noticeable change in behavior, such as lethargy or irritability.
Practical Steps to Monitor Post-Cleaning Behavior
- Check for Pus or Blood: After cleaning, inspect your dog's ears. If you notice any unusual discharge (pus) or blood, it could indicate an infection that needs medical attention.
- Use a soft cloth to gently wipe the outside of the ear canal if there is visible discharge.
- Consult your veterinarian if the condition persists or worsens.
- Observe for Irritation: Pay attention to any signs that might suggest irritation, such as redness, swelling, or unusual hair growth around the ear area.
- Note Changes in Behavior: Keep track of how your dog behaves. If they seem unusually sensitive or uncomfortable, it could be a sign that they are not feeling well post-cleaning.
Examples and Tips
If you notice your dog is scratching their ear more than usual after cleaning, this might indicate that the cleaning was too thorough or that there may be an underlying issue like an infection. In such cases, it's best to consult a veterinarian for a proper diagnosis.
Alternatively, if your dog seems unusually quiet and lethargic post-cleaning, they could be experiencing pain or discomfort. In these situations, it is advisable to contact your vet immediately to rule out any serious issues.
Preventing Ear Infections in Dogs
Preventing ear infections in dogs is crucial for maintaining their overall health and comfort. While regular ear cleaning can help prevent infection, it's equally important to understand the underlying causes and implement preventive measures beyond just cleaning.
Ears are prone to infections due to their warm, moist environment which makes them an ideal breeding ground for bacteria and yeast. Common symptoms of ear infections in dogs include excessive scratching, head shaking, redness or inflammation, and a foul odor.
1. Regular Ear Inspections
Just as with humans, regular inspection of your dog's ears can help catch issues early. Look for signs like redness, swelling, or discharge that might indicate an infection.
2. Proper Diet and Nutrition
A balanced diet rich in antioxidants can support the immune system and help prevent infections. Foods containing omega-3 fatty acids are particularly beneficial as they have anti-inflammatory properties which can reduce ear irritation.
3. Maintaining Hygiene
Keep your dog's living environment clean to minimize exposure to irritants that could lead to ear issues. This includes regular cleaning of bedding and toys, especially if your pet spends time outdoors.
1. Choose the Right Equipment
Select a suitable ear cleaner approved by veterinarians, cotton pads, and ear cleaning solution that is gentle on your dog's sensitive skin.
2. Warmth and Comfort
Ensure your dog feels comfortable during the process. You might want to give them some treats or play a favorite game after cleaning their ears as positive reinforcement.
3. Proper Technique
- Use clean cotton balls or pads, not Q-tips, which can push debris further into the ear canal.
- Pour a small amount of ear cleaner onto your hand or into the ear canal and gently massage it to help loosen any dirt or wax.
- Use a soft cloth or another clean cotton pad to wipe out excess fluid from the outer part of the ear. Avoid inserting anything deeper than this area.
While proper ear cleaning is important, over-cleaning can sometimes lead to irritation and drying of the ear canal which might increase the likelihood of infections. Always consult with a vet before starting any new regimen involving your pet's health.
Preventing ear infections in dogs requires a combination of preventive measures, regular inspections, and proper cleaning techniques. By following these tips, you can help ensure your furry friend remains healthy and comfortable.
Conclusion
Ear cleaning is a crucial aspect of maintaining your dog's overall health, and proper techniques can prevent minor issues from becoming major problems. Here are some detailed steps and practical advice to ensure you clean your dog's ears effectively:
Step-by-Step Ear Cleaning Tips for Dogs
- Inspect Your Dog's Ears Regularly: Before cleaning, it's important to visually inspect your dog's ears. Look for any signs of redness, swelling, or unusual discharge that may indicate an underlying issue.
- Gather Supplies: Have all necessary supplies ready before starting the process. This includes a veterinarian-recommended ear cleaner, cotton balls or gauze pads (not Q-tips), and possibly a soft-bristled brush for longer ears.
- Warm Up the Cleaner: Warm water can make the cleaning solution more effective in loosening dirt and debris. You can add a few drops of warm water to the ear cleaner before use.
- Clean Gently but Thoroughly: Using your fingers, gently massage the base of the ear canal with the cotton ball or pad. This helps break down any buildup without causing discomfort. Be careful not to insert anything too deeply into the ear canal.
- Rinse Well: After cleaning, rinse out any remaining solution from the ear canal using a soft-bristled brush for longer ears or your fingers with warm water. This ensures no residue remains that could irritate your dog's ears.
- Dry Thoroughly: Use a towel to gently pat dry around and inside the outer ear flap. Make sure not to use excessive force, as this can cause discomfort or damage.
In addition to these steps, it's important to remember that consistency is key when cleaning your dog's ears. Establish a routine and stick to it, especially if you've identified any ear health concerns. Regular cleaning not only prevents infections but also strengthens the bond between you and your pet.
If you notice persistent issues with your dog's ears, such as excessive shaking or unusual odors, consult a veterinarian immediately. Professional advice can provide targeted solutions for specific conditions that may require medicated treatments or other interventions.
FAQs
Proper ear cleaning is essential for maintaining your dog's overall health. Regular ear care can prevent infections, reduce odor, and ensure your pet is comfortable. Here are detailed steps to follow when cleaning your dog's ears:
1. Gather Your Supplies
- Ear cleaner specifically formulated for dogs (human products can be harmful)
- A cotton ball or soft cloth
- A Q-tip, but use it sparingly to avoid irritation
- Paper towels or clean cloths for cleanup
2. Inspect the Ears Regularly
Before cleaning, check your dog's ears for any signs of infection or discomfort. Look for redness, unusual discharge, or foul odor. If you notice anything out of the ordinary, consult a vet before proceeding with ear care.
3. Warm Up the Ear Cleaner
Warm the ear cleaner slightly by holding the bottle in your hand. This can help reduce the shock to your dog's ears and make the process more comfortable for them. Never use hot water or heat as it could be dangerous.
4. Place Your Dog Comfortably
Lift your dog onto your lap or have them sit in a secure spot where they can't run away. If your dog is anxious, you may need to wrap them gently but securely in a blanket before proceeding.
5. Clean the Outer Ear Canal
- Moisten a cotton ball or cloth with ear cleaner and gently wipe the outer part of the ear canal. Avoid inserting anything into the deeper parts of the canal.
- If there is visible debris, you can use a Q-tip to gently remove it, but only if it’s not too deep in the ear canal.
6. Use Gentle Pressure
Apply gentle pressure while wiping, especially around the creases of the ears. Be careful not to push too hard as this can cause discomfort or injury.
7. Monitor Your Dog's Behavior
During and after cleaning, observe your dog for any signs of pain or distress. If they seem uncomfortable or if you notice worsening issues, stop the procedure and consult a veterinarian immediately.
8. Reward Your Dog
After completing the ear cleaning, give your dog a treat and plenty of praise to make the experience positive and enjoyable for them. This will help in making future ear cleanings less stressful.
Additional Tips
- Avoid using cotton swabs as they can push debris deeper into the ear canal.
- If your dog has long, floppy ears, consider keeping them dry after baths to prevent moisture buildup that can lead to infections.
- Consult with a vet if you have any concerns or questions about your dog's ear health.
By following these steps and tips, you can ensure that your dog's ears remain healthy and comfortable. Regular care is key to preventing more serious issues down the line.
Categories
- AI & Enrichment Play
- Broiler Farming
- Broiler Farming Tips
- Canine Wellness & Longevity
- Cat
- Cat & Human Connection
- Cat Adoption & Rescue
- Cat Breeds
- Cat Breeds & Personalities
- Cat Care & Health
- Cat Grooming & Hygiene
- Cat Lifestyle & Environment
- Cat Myths & History
- Cat Nutrition & Diet
- Cat Products & Reviews
- Cat Training & Behavior
- Comparison
- Consumer Awareness
- Dog
- Dog Accessories & Products
- Dog Adoption & Rescue
- Dog Breed & Lifestyle Trends
- Dog Breeding & Puppies
- Dog Entertainment & Media
- Dog Fashion & Trends
- Dog Fun & Lifestyle
- Dog Grooming & Hygiene
- Dog History & Culture
- Dog Myths, Science & Future Tech
- Dog News & Trends
- Dog Nutrition & Food
- Dog Psychology & Emotions
- Dog Safety & Security
- Dog Sports & Activities
- Dog Technology & Innovation
- Dog Training for Modern Owners
- Dog Travel & Adventure
- Dog Travel, Adventure & Culture
- Economic and Market Insights
- Educational Content
- FAQs
- Feeding Alternatives
- Festivals & Seasonal Ideas
- Fun & Entertainment
- General Knowledge
- General Pig Farming
- Health & Disease Management
- Housing and Environment
- Kittens
- Market Insights
- Miscellaneous
- Miscellaneous
- Motivational
- pig
- Pig Breeding
- Pig Breeds
- Pig Farming Stories and Inspiration
- Pig Health and Care
- Pig Nutrition
- Pig Products
- Profitability & Business
- Puppy Care
- Puppy Predictable Topics Reinvented
- Regional Focus
- Rescue & Adoption Buzz
- Senior Cats
- Senior Dog Care
- Smart Dog Tech & Gadgets
- Sustainability
- Sustainable & Eco-Friendly Dog Products
- Tech & Innovations
- Working & Service Dogs
- Broiler Feed66 products
- Country Feed33 products
- Pig Feed66 products
- Product22 products
- Raw Materials99 products
Products
-
 Fish Meal
₹1,999.00 – ₹2,999.00Price range: ₹1,999.00 through ₹2,999.00Rated 0 out of 5
Fish Meal
₹1,999.00 – ₹2,999.00Price range: ₹1,999.00 through ₹2,999.00Rated 0 out of 5 -
 FATTENING BROILER FEED
₹2,299.00 – ₹2,349.00Price range: ₹2,299.00 through ₹2,349.00Rated 0 out of 5
FATTENING BROILER FEED
₹2,299.00 – ₹2,349.00Price range: ₹2,299.00 through ₹2,349.00Rated 0 out of 5 -
 LAYER COUNTRY FEED
₹1,549.00 – ₹1,649.00Price range: ₹1,549.00 through ₹1,649.00Rated 0 out of 5
LAYER COUNTRY FEED
₹1,549.00 – ₹1,649.00Price range: ₹1,549.00 through ₹1,649.00Rated 0 out of 5 -
 COUNTER BROILER FEED
₹1,199.00 – ₹1,299.00Price range: ₹1,199.00 through ₹1,299.00Rated 0 out of 5
COUNTER BROILER FEED
₹1,199.00 – ₹1,299.00Price range: ₹1,199.00 through ₹1,299.00Rated 0 out of 5 -
 LACTATING PIG FEED
Rated 0 out of 5
LACTATING PIG FEED
Rated 0 out of 5₹2,299.00Original price was: ₹2,299.00.₹1,740.00Current price is: ₹1,740.00. -
 Maize
Rated 0 out of 5
Maize
Rated 0 out of 5₹1,650.00Original price was: ₹1,650.00.₹1,300.00Current price is: ₹1,300.00. -
 GESTATION PIG FEED (Phase 1)
Rated 0 out of 5
GESTATION PIG FEED (Phase 1)
Rated 0 out of 5₹2,249.00Original price was: ₹2,249.00.₹1,699.00Current price is: ₹1,699.00. -
 Pre Starter Broiler Feed
₹2,399.00 – ₹2,499.00Price range: ₹2,399.00 through ₹2,499.00Rated 0 out of 5
Pre Starter Broiler Feed
₹2,399.00 – ₹2,499.00Price range: ₹2,399.00 through ₹2,499.00Rated 0 out of 5 -
 FINISHER PIG FEED
Rated 0 out of 5
FINISHER PIG FEED
Rated 0 out of 5₹2,299.00Original price was: ₹2,299.00.₹1,749.00Current price is: ₹1,749.00. -
 Broiler Premix
Rated 0 out of 5
Broiler Premix
Rated 0 out of 5₹820.00Original price was: ₹820.00.₹699.00Current price is: ₹699.00.