
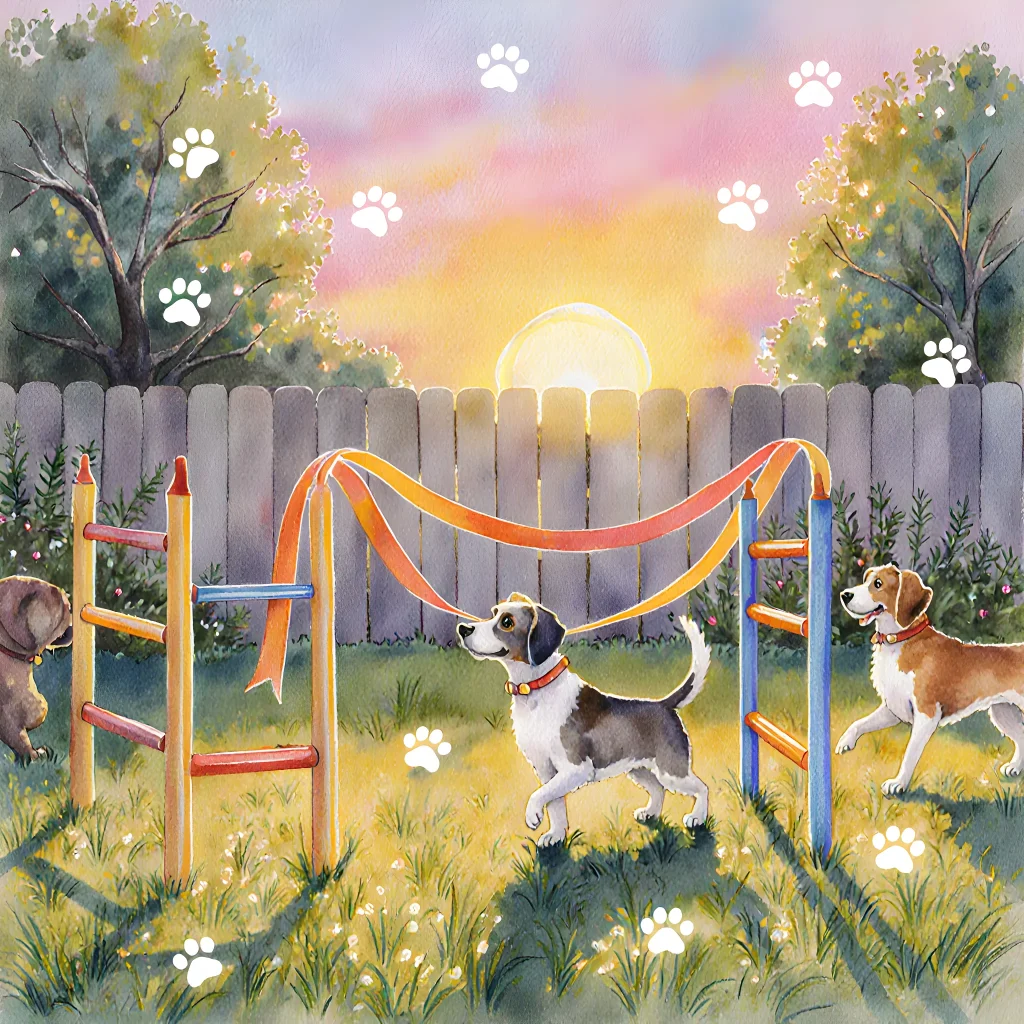
Turn Your Yard into a Magical Pet Playground
Enchanting Enrichment: DIY Pet Course Magic
Table of Contents
- Introduction
- Benefits of Agility Training for Dogs
- Choosing the Right Space in Your Home
- Essential Equipment and Supplies
- Designing Your Course Layout
- Building Tunnels and Bridges
- Setting Up Jumps of Appropriate Height
- Creating Turning Arcs and Weave Poles
- Adding Enrichment Elements (Treats, Toys, Scent)
- Training Your Dog Step by Step
- Using Positive Reinforcement Techniques
- Safety and Maintenance Tips
- Modifying the Course as Your Dog Grows
- Conclusion
- FAQ
Introduction
A home agility course is more than just a series of obstacles; it’s an engaging, mentally stimulating environment that promotes physical fitness, confidence, and bonding between you and your dog. By integrating enrichment elements—such as scent trails, interactive toys, and problem‑solving stations—you can transform a simple workout into a dynamic learning experience.
Why Combine Agility with Enrichment?
- Cognitive Growth: Dogs learn to associate movements with rewards. Adding enrichment tasks forces them to use memory, decision‑making, and sensory discrimination.
- Behavioral Balance: Physical exertion paired with mental challenges reduces anxiety, boredom, and destructive behaviors.
- Strengthened Human‑Dog Bond: Collaborative problem solving fosters trust and communication.
Step‑by‑Step Setup Guide
-
Choose a Safe Space
Pick an area with enough room (minimum 20 ft × 15 ft) and minimal hazards. A backyard, driveway, or even a large garage can work. -
Select Obstacles
Common beginner obstacles include:- Jump rails (1–3 inches high)
- Tunnels (PVC pipe or lightweight fabric)
- Weave poles (spaced 18–24 inches apart)
- Pause tables (stable, dog‑size platforms)
-
Incorporate Enrichment Stations
Place these strategically between obstacles to give your dog a mental break:- Scent Trail: Drag a treat or favorite toy along a line of scent (e.g., a dab of peanut butter) and let the dog follow it.
- Toy Puzzle: Hide small treats inside a Kong or puzzle feeder; reward after completing the obstacle.
- Problem‑Solving Gate: Use a simple gate that requires pulling a lever or nudging a button to open—this adds an extra layer of skill before the next jump.
-
Set a Clear Course Layout
Mark the path with cones or tape. Keep turns gentle (45‑degree) for beginners and gradually increase difficulty by tightening weave spacing or raising jumps. -
Train in Short Sessions
Start with 5–10 minute sessions, focusing on one obstacle at a time. Use positive reinforcement: treats, praise, and a favorite toy. Gradually string obstacles together as confidence builds. -
Safety First
Inspect all equipment daily for wear or loose parts. Ensure the surface is non‑slippery (e.g., grass, rubber mat). Never force a jump; adjust height to your dog’s size and ability. -
Record Progress
Keep a training log: date, obstacle mastered, enrichment success rate. Video clips help you spot form issues and celebrate milestones.
Practical Tips for Success
- Use High‑Value Treats: For first-time obstacles, use small pieces of bacon or cheese; switch to regular treats once the skill is mastered.
- Rotate Enrichment: Keep novelty high by swapping scent trails, puzzle toys, and interactive games every few weeks.
- Involve Family Members: Teach each person how to cue and reward consistently; this reinforces training signals.
- Keep Sessions Fun: End with a favorite game (fetch or tug) so the dog associates agility with positive playtime.
Common Pitfalls & How to Avoid Them
| Pitfall | Solution |
|---|---|
| Dog becomes frustrated and stops trying. | Shorten the obstacle, lower the height, or use a higher‑value reward. |
| Overexertion leading to injury. | Monitor heart rate; give plenty of water breaks and limit sessions to 10–15 minutes for high‑energy breeds. |
| Inconsistent cues causing confusion. | Use the same verbal cue (“Jump!”) and hand signal every time. |
By thoughtfully combining agility with enrichment, you create a holistic training environment that challenges both body and mind. Start simple, stay consistent, and watch your dog thrive—both physically and mentally—in their very own backyard playground.
Benefits of Agility Training for Dogs
Agility training is more than just a fun activity; it’s a holistic approach that enhances a dog’s physical health, mental stimulation, and emotional well‑being. Below are the key benefits you’ll notice when you incorporate agility into your routine.
1. Physical Conditioning & Injury Prevention
- Strength & Endurance: The varied obstacles—tunnels, weave poles, jumps—require dogs to use different muscle groups, building overall strength and cardiovascular fitness.
- Joint Flexibility: Repeated jumping and pivoting increases joint mobility, reducing the risk of arthritis later in life.
- Weight Management: Consistent training burns calories, helping to maintain a healthy body condition score.
2. Mental Stimulation & Cognitive Development
- Problem‑Solving Skills: Navigating a new obstacle layout forces dogs to process spatial cues and make quick decisions.
- Memory Enhancement: Remembering the sequence of obstacles reinforces working memory.
- Focus & Attention Span: Agility demands sustained concentration, which can translate into better obedience during everyday tasks.
3. Strengthened Human‑Dog Bond
- Positive Reinforcement: Training sessions are naturally reward‑based, reinforcing trust and cooperation.
- Shared Goal Setting: Working together to conquer a new obstacle creates a sense of teamwork and shared accomplishment.
- Stress Relief for Both Parties: Physical activity releases endorphins in dogs; the same applies to owners, fostering mutual relaxation.
4. Enrichment & Behavioral Health
- Reduces Boredom‑Induced Behaviors: Engaging activities like agility keep a dog mentally occupied, cutting down on chewing or digging.
- Channeling Excess Energy: Dogs with high energy levels find an outlet for playfulness in structured courses.
- Improved Confidence: Successfully completing obstacles boosts self‑esteem and reduces anxiety.
5. Versatility Across Breeds & Ages
From small terriers to large retrievers, agility can be scaled to fit any dog’s size or skill level. Older dogs can practice low‑impact courses that focus on balance and coordination rather than speed.
A well‑designed home course doesn’t require a large backyard or expensive gear. With creativity, you can create an enriching environment that keeps your dog challenged and happy.
1. Space Planning & Safety First
- Clear Pathways: Remove obstacles such as loose rugs or toys that could cause tripping.
- Soft Landing Areas: Use foam mats, grass patches, or a thick carpet for jumps to minimize injury risk.
- Consistent Lighting: Natural daylight is ideal; supplement with LED lights if training at night.
2. Essential Obstacles & DIY Alternatives
| Obstacle | DIY Idea | Enrichment Twist |
|---|---|---|
| Tunnel | Use a large cardboard box or a collapsible play tunnel. | Place scented treats at the end to encourage sniffing and curiosity. |
| Weave Poles | Set up 4–6 PVC pipes spaced evenly on a flat surface. | Attach a floating toy between two poles for your dog to chase while weaving. |
| Jump | Use broomsticks balanced on stacks of books or low‑profile hula hoops. | Place a target mat under the jump; reward when the dog lands precisely on it. |
| Pause Table | Sturdy wooden crate or low table with a comfortable cushion. | Offer a chew toy that can only be retrieved after the pause period. |
3. Course Sequencing & Progression
- Start Simple: Begin with two obstacles, such as a tunnel followed by a low jump.
- Add Variety: Introduce weave poles or pause tables once the dog masters basics.
- Increase Complexity: Rotate obstacle order daily to keep the course mentally stimulating.
4. Enrichment Techniques to Keep It Fresh
- Scent Trails: Lay a trail of safe, dog‑friendly scented items (e.g., dried herbs) leading to a hidden reward.
- Interactive Toys: Incorporate treat‑dispensing balls that the dog must roll through a tunnel before receiving food.
- Time Challenges: Use a stopwatch or smartphone app to time runs, rewarding faster completion with extra praise.
5. Training Tips & Consistency
- Positive Reinforcement: Reward immediately after the desired action—chews, treats, or enthusiastic verbal praise.
- Short Sessions: Keep training to 10–15 minutes per session; dogs have limited attention spans.
- Observe Body Language: Watch for signs of fatigue or frustration and pause if necessary.
- Record Progress: Take photos or videos each week to track improvement and adjust the course layout.
6. Safety Checklist Before Each Session
- Inspect all obstacles for sharp edges or loose parts.
- Ensure the floor is dry and free of debris.
- Verify that
Choosing the Right Space in Your Home
A well‑planned agility course starts with selecting an ideal location. The space you choose should accommodate a variety of obstacles, allow for safe movement, and be free from distractions that could hinder training. Below are key considerations and practical tips to help you pick the perfect spot.
1. Size Matters
- Length: Aim for at least 30–40 feet (9–12 meters) of clear running space if you plan a full circuit. For smaller homes, consider a “mini‑course” that can be reconfigured.
- Width: A minimum of 10–12 feet (3–4 meters) gives dogs enough room to maneuver around obstacles without feeling cramped.
- Height: If you’re installing jumps or tunnels, ensure the ceiling is at least 8 feet (2.4 meters) high to prevent collisions with overhead fixtures.
2. Flooring and Surface
- Soft but firm: Carpets can be slippery; consider rubber mats or interlocking foam tiles that provide traction while cushioning impact.
- Non‑slippery coatings: A light application of non‑skid spray on hardwood or tile surfaces improves grip, especially during wet conditions.
- Easy cleanup: Dogs shed and sometimes spill treats. Choose a surface that’s easy to sweep or wipe down after sessions.
3. Safety First
- No sharp corners: Use rounded edges on tables, shelving, or wall fixtures near the training area.
- Secure obstacles: Anchor jumps and weave poles with adjustable straps to prevent tipping during high‑speed runs.
- Clear boundaries: Mark the perimeter with tape or low posts so dogs don’t accidentally run into hazardous zones (stairs, windows).
4. Lighting and Visibility
- Natural light: Position the course near a window to benefit from daylight, which reduces eye strain for both dog and handler.
- Supplemental lighting: For evening training or low‑light conditions, install adjustable LED strip lights that provide even illumination without glare.
5. Noise Considerations
- Soundproofing: If your home is in a noisy neighborhood or you live on an upper floor, consider adding acoustic panels to dampen echoes and reduce distractions.
- Quiet zones: Choose rooms with minimal foot traffic—like a basement or dedicated hobby room—to keep the focus on training.
6. Flexibility for Enrichment
- Multi‑use areas: A space that can double as a playroom, exercise zone, or even a small dog park allows you to rotate activities without moving equipment.
- Storage solutions: Built‑in shelving or a closet nearby keeps agility gear organized and out of the way when not in use.
7. Example Layouts
Below are two sample floor plans illustrating how to maximize limited space while maintaining a comprehensive course:
- Linear Course (30 ft x 10 ft): A straight line of obstacles—start with a tunnel, followed by three jumps spaced 5 ft apart, then weave poles and finish with a pause table.
- Square Circuit (20 ft x 20 ft): Place the start/finish on one side. Use a half‑pipe or tire swing in the center, a jump on each corner, and weave poles along two sides for a looped run.
8. Practical Tips for Implementation
- Measure twice: Use a tape measure to confirm dimensions before purchasing or building obstacles.
- Test with your dog: Run a short trial session in the chosen space to spot any unforeseen hazards.
- Adjust as needed: If certain areas feel cramped, reposition obstacles or add extra mats for cushioning.
- Involve your pup: Let your dog explore the area before training begins; familiarizing them with the space reduces anxiety during sessions.
By carefully selecting a location that balances size, safety, and flexibility, you’ll create an engaging environment where both you and your dog can thrive. Remember: the right space is the foundation of effective agility training and enrichment—so choose wisely and watch your pup’s confidence soar!
Essential Equipment and Supplies
Building a functional and engaging home agility course that also offers mental enrichment requires a thoughtful selection of equipment and supplies. Below is a comprehensive list broken down by category, along with practical tips on sourcing, setup, and maintenance.
- Agility Obstacles:
- Pole Vaults: Lightweight PVC or aluminum poles (1‑2 ft tall) are ideal for beginners. For advanced dogs, use sturdier steel poles that can handle higher vaulting forces.
- Jumps: Adjustable jump sets (e.g., 1‑3 ft) made of durable metal or reinforced plastic. Consider a “no‑bend” design to prevent accidental damage when the dog lands.
- Tunnels: Inflatable or collapsible fabric tunnels are easy to store and can be set up in minutes. Look for ones with a sturdy frame that won’t collapse under pressure.
- Weave Poles: Spaced 2‑3 ft apart; metal or heavy-duty plastic poles ensure stability. A collapsible design saves space when not in use.
- Balance Beam: A flat wooden board (4‑6 in wide) secured on a stable base. Ensure it’s level to avoid tripping hazards.
- Enrichment Tools:
- Puzzle Feeders: Slow feeders or treat-dispensing balls encourage problem‑solving while the dog completes a course segment.
- Snuffle Mats: Hide small treats in the fabric for scent work between obstacles.
- Interactive Toys: Soft plush toys that squeak or emit scents can be placed at “reward stations.”
- Safety and Comfort:
- Soft Landing Mats: EVA foam or rubber mats under jumps to cushion falls.
- First‑Aid Kit: Bandages, antiseptic wipes, tweezers for splinter removal, and a copy of your dog’s medical history.
- Water & Treat Station: A small trough or water bowl at the start/finish line keeps hydration handy. Use low‑sugar treats to keep the dog's energy up.
- Installation and Maintenance Supplies:
- Hardware: Allen wrenches, adjustable bolts, and sturdy brackets for securing obstacles on uneven ground.
- Ground Protection: Rubber mats or interlocking tiles to protect your lawn from wear and tear.
- Cleaning Tools: Soft brushes, mild detergent, and a hose or bucket for quick wipe‑downs after sessions.
- Optional Enhancements:
- LED Lights: Low‑power LED strips to illuminate the course during dusk or nighttime training.
- CCTV Camera: A small, waterproof camera to record runs for analysis and coaching.
- Sound System: Bluetooth speaker to play calming music or motivational cues during training.
When selecting equipment, prioritize durability, safety, and versatility. Start with a basic set of obstacles and enrichment tools, then expand as your dog’s skill level grows. Always supervise the first few sessions to ensure proper use and adjust obstacle heights or spacing based on your dog's comfort and confidence.
Designing Your Course Layout
A well‑structured layout is the backbone of an engaging home agility course. It ensures that each element—start line, obstacles, enrichment stations, and finish area—works together to promote safety, variety, and fun. Below you’ll find a step‑by‑step guide to planning your layout, plus practical examples and tips for tailoring the design to your space and your dog’s abilities.
1. Start with a Clear Path
- Define the entry point: Mark a clear start line using tape or a low‑profile flag.
- Set a straight or gently curving path: This allows the dog to focus on the obstacles rather than navigating an overly complex route.
- Consider traffic flow: Ensure that people and pets can move safely around the course without crossing lines or getting in each other’s way.
2. Arrange Obstacles in Logical Sequences
Group obstacles by type and difficulty to create a natural progression. A typical sequence might look like this:
- Warm‑up: Simple jumps or tunnels to get the dog moving.
- Skill building: Weave poles, balance beams, and short hurdles.
- Challenge phase: Longer jumps, double obstacles, or a “doggie obstacle combo” (e.g., jump + tunnel in quick succession).
- Cool‑down/Enrichment: A final station that rewards completion—like a puzzle feeder or a scent enrichment box.
3. Incorporate Enrichment Stations Strategically
Enrichment stations keep training sessions interesting and mentally stimulating. Place them where they naturally fit into the flow:
- Between obstacle groups: A scent trail or treat puzzle can serve as a short break.
- Near the finish line: Rewarding enrichment such as a chew toy or a favorite game provides positive reinforcement for finishing the course.
4. Use Space Wisely
Whether you’re working with a backyard, basement, or a large living room, consider these spatial tips:
- Measure first: Create a scaled floor plan using graph paper or a digital tool like Google SketchUp.
- Keep obstacles at least 3–5 feet apart: This gives dogs enough room to maneuver and reduces collision risk.
- Use vertical space: Tunnels, hanging hoops, or elevated platforms can add variety without taking up floor area.
5. Safety First: Check for Hazards
Before you start training:
- Inspect all equipment: Look for loose screws, splinters, or frayed cords.
- Secure surfaces: Use non‑slip mats under obstacle bases and around high‑traffic areas.
- Test the route: Walk through the course yourself to ensure there are no sharp corners or hidden obstacles that could trip your dog.
6. Example Layouts
Example A: Compact Backyard Course (≈10 ft × 20 ft)
- Start line: Near the back gate.
- Obstacles: 2 low hurdles → 3 weave poles → a tunnel → a short balance beam → 1 high jump.
- Enrichment: A treat puzzle placed after the balance beam.
- Finish line: Front yard with a small reward box.
Example B: Indoor Living Room Course (≈15 ft × 10 ft)
- Start line: Near the front door.
- Obstacles: A low jump over a chair → a set of two slalom poles on the floor → a tunnel made from a cardboard box.
- Enrichment: A scent trail leading to a hidden treat in a pillowcase.
- Finish line: Back to the front door with a favorite toy waiting.
7. Practical Tips for Adjusting Difficulty
- Adjust obstacle height: Raise or lower jumps based on your dog’s size and confidence.
- Add or remove obstacles: For beginners, start with fewer obstacles; for advanced dogs, add double jumps or a “dog‑friendly” maze.
- Use visual cues: Color‑coded markers help the dog learn where each obstacle begins and ends.
8. Document Your Layout
Keep a written or digital record of your course layout so you can:
- Track progress: Note which obstacles the dog struggles with.
- Plan future upgrades: Add new challenges or enrichment stations as the dog improves.
- Share with trainers or family members: Ensures consistency in training sessions.
By thoughtfully arranging your course, you’ll create a safe, engaging environment that nurtures both physical fitness and mental stimulation for your dog. Happy designing!
Building Tunnels and Bridges
A well‑designed tunnel or bridge is one of the most exciting elements a dog can navigate. It not only tests speed and agility but also encourages mental stimulation as dogs learn to judge distances, adjust their stride, and trust their handler’s cues. Below we break down the key components—materials, design, safety, and enrichment tricks—to help you build tunnels and bridges that are safe, fun, and adaptable for any skill level.
1. Choosing the Right Materials
- Tunnels: PVC pipe tubes (8–12 ft long) or collapsible fabric tunnels. PVC offers durability and easy cleaning; fabric tunnels are lightweight and portable.
- Bridges: 4‑to‑6‑inch thick wooden planks, sturdy PVC boards, or even a repurposed IKEA BRÄNT step platform. Ensure the surface is non‑slip (add sandpaper strips or rubber matting).
- Support: Metal brackets for PVC, adjustable wooden supports for planks, or a DIY frame using 4×4 posts and sturdy rope or webbing.
2. Design Considerations
- Length & Width: Tunnels should be at least 10 ft long to give dogs a good run, with a width of 24–36 inches for medium‑sized breeds. Bridges should span 4–6 ft across gaps you want the dog to cross.
- Height & Angle: For beginners, keep bridge height under 12 inches and angle no steeper than 30°. Advanced courses can increase height to 18–24 inches and angle to 45°.
- Orientation: Place tunnels parallel to the running path to avoid sudden turns. Bridges should be positioned after a short straight run so dogs have momentum.
3. Safety First
- Stable Base: Anchor PVC tunnels with weighted bases or sandbags. For bridges, use 4×4 posts buried at least 18 inches into the ground.
- Check for Wear: Inspect all joints and supports every week; replace any loose screws or frayed webbing immediately.
- Soft Landing: Place a thick, cushioned mat (e.g., foam or rubber) under the bridge’s landing area to reduce impact injuries.
4. Step‑by‑Step Construction Guide
- Tunnel Assembly:
- Measure and cut PVC pipe to desired length; attach collapsible lids or fabric covers at both ends.
- Secure each end with a 2‑inch rubber band or zip tie to prevent slippage.
- Place weighted base (e.g., sandbag) on the front end to keep it stationary.
- Bridge Construction:
- Cut wooden planks or PVC boards to span 4–6 ft; sand edges for safety.
- Attach non‑slip surface using adhesive rubber strips or spray adhesive.
- Erect support posts on either side, ensuring they are level. Secure the bridge with metal brackets and a tensioned rope for extra stability.
5. Enrichment Techniques
Turn your tunnel or bridge into an enrichment station by adding interactive elements:
- Tunnel: Sprinkle a thin layer of safe, dog‑friendly scent (e.g., lavender oil diluted in water) inside to pique curiosity.
- Bridge: Place a treat pouch or hidden puzzle box on the landing area; reward successful crossing with praise and a small reward.
6. Integrating into Your Course
Create a flow: start with an easy jump, then a tunnel, followed by a short run to a low bridge. As confidence builds, increase the number of obstacles or add a second tunnel in sequence.
7. Troubleshooting Common Issues
- Dog hesitates at the tunnel: Use a leash to guide them in, then gradually let go as they become comfortable.
- Bridge wobble: Tighten all screws, add extra support posts, or use a heavier base.
8. Maintenance Checklist
- Weekly: Check for loose screws, frayed webbing, and clean surfaces.
- Monthly: Inspect structural integrity of supports; replace any worn components.
- Seasonally: Re‑apply non‑slip coating to bridges if surface shows wear.
By following these guidelines, you’ll create a safe, engaging tunnel and bridge setup that encourages both physical activity and mental stimulation—key ingredients for an effective home agility course with enrichment.
Setting Up Jumps of Appropriate Height
When designing a home agility course that incorporates enrichment, the height of each jump is crucial for safety, engagement, and progressive training. Below are detailed guidelines, practical examples, and actionable tips to help you set up jumps that suit your dog's size, experience level, and overall fitness.
1. Understand Your Dog’s Physical Profile
- Breed & Body Type: Small breeds like Chihuahuas or Jack Russell Terriers should start with jumps no higher than 6–8 inches, while larger breeds such as Labradors or German Shepherds can handle 12–16 inches.
- Age & Development Stage: Puppies and senior dogs need lower, softer jumps (4–6 inches) to avoid joint strain. Adult dogs in peak condition can gradually increase height.
- Health Considerations: Dogs with arthritis, hip dysplasia, or previous injuries should stay below 8 inches unless cleared by a vet.
2. Choose the Right Jump Type
| Jump Style | Description | Ideal Height Range (inches) | Best For |
|---|---|---|---|
| Rope Jump | Thin rope or nylon line; minimal resistance. | 4–12 | Puppies, agility beginners. |
| T-Frame | Wooden frame with adjustable height. | 6–20 | Intermediate to advanced dogs. |
| Track Jump | Parallel rails; requires speed and precision. | 8–18 | Experienced agility teams. |
3. Step‑by‑Step Height Adjustment Procedure
- Measure & Mark: Use a tape measure to mark the desired height on a wall or post. Double‑check with a laser level for accuracy.
- Secure the Frame: Attach the jump using sturdy screws or bolts. If using a T‑frame, ensure the base is anchored into the ground or a heavy-duty floor anchor plate.
- Test Stability: Gently tap the frame and listen for any creaks or wobble. Tighten all fasteners before use.
- Gradual Increase: Start at the lowest height you’ve determined, observe your dog’s performance, then increase by 1–2 inches after each successful run.
4. Incorporating Enrichment into Jump Training
- Reward Placement: Hide a treat or favorite toy just beyond the jump’s landing zone to encourage the dog to clear it for a reward.
- Scent Trails: Lay down a scent trail of essential oils (e.g., lavender, chamomile) leading up to the jump. This adds an olfactory enrichment layer and keeps the dog focused.
- Use interactive toys such as a motion‑activated ball that bounces after each jump, providing visual stimulation.
5. Safety Checklist Before Each Session
| # | Check Point |
|---|---|
| 1 | Ensure the jump is level and secure. |
| 2 | Confirm landing area has soft, non‑slippery surface (e.g., rubber mat). |
| 3 | Verify your dog’s harness or collar is snug but not restrictive. |
| 4 | Have a first aid kit nearby in case of accidental knocks. |
6. Sample Jump Progression Plan (8‑Week Timeline)
- Weeks 1–2: 4 inches, rope jump; focus on confidence.
- Weeks 3–4: 6 inches, T‑frame; introduce basic scent trail.
- Weeks 5–6: 8 inches, track jump; add interactive toy reward.
- Weeks 7–8: 10 inches, combine all jump types in a mini‑course; monitor for fatigue.
By carefully selecting jump heights that match your dog’s capabilities and integrating enrichment elements, you’ll create an engaging, safe, and effective home agility course. Remember to always adapt the plan based on your dog’s progress and consult a veterinarian if any signs of discomfort arise.
Creating Turning Arcs and Weave Poles
Turning arcs (also known as “turn‑arounds” or “U‑shaped turns”) and weave poles are the backbone of any effective home agility course. They teach your dog to change direction quickly, maintain balance, and build confidence in navigating tight spaces—all while having a blast.
Why Turning Arcs Matter
- Body Awareness: Arcs force dogs to use their core muscles and hips to shift weight smoothly.
- Speed Control: They help regulate speed—dogs learn to slow down before turning, which is vital for safety.
- Problem‑Solving: Each arc presents a new angle; dogs must figure out the best path each time.
How to Build an Effective Turning Arc
- Choose the Right Frame: Use sturdy PVC pipe (½” or ¾”) bent into a 90° or 180° angle. A common DIY design is two 6‑foot lengths connected by a 12‑inch elbow.
- Add a Surface: Lay down a non‑slip mat, rubber carpet, or even a thick tarp over the arc to give dogs traction.
- Secure It: Anchor the base with sandbags or heavy objects. If you’re using a temporary setup, place the PVC on top of a stable surface like a plywood board and secure it with zip ties.
- Adjust Height: For small breeds, lower the arc to about 12–15 inches; for larger dogs, keep it at 18–24 inches. You can slide the mat up or down to change the clearance.
Weave Poles: The Classic Obstacle
Weave poles are simple yet powerful tools that improve agility, focus, and coordination. They also provide a great way to practice “in‑place” turns before moving on to full turns.
Building Your Own Weave Poles
- Materials: Use PVC pipes (½” or ¾”) cut into 2–3 foot lengths. Alternatively, repurpose sturdy garden stakes.
- Spacing: The standard spacing is about 1.5–2 times the dog’s height at the withers. For a 20‑inch tall dog, start with 30–40 inches apart.
- Number of Poles: A typical weave set has 6–10 poles. The more you add, the greater the challenge.
Setting Up in Your Backyard
- Mark the Line: Use a garden hose or string to outline a straight line that will be the path between the first and last pole.
- Insert Poles: Push each PVC pole into the ground at the marked positions. If you’re in a sandy area, use a shovel to create a small hole for stability.
- Add Anchors: Tie a light rope or nylon line around each pole’s top and secure it to a stake or tree to keep poles upright during training.
Practical Training Tips
- Start Slow: Let your dog walk through the arc or weave at their own pace before adding speed. Use treats and praise to reinforce proper form.
- Use a Clicker or Marker Word: A clicker or word like “yes” signals correct movement, helping the dog understand what you want.
- Incorporate Commands: Pair each obstacle with a verbal cue (“turn,” “weave”) so your dog learns to associate the command with the action.
- Progressive Difficulty: Once your dog is comfortable, reduce the spacing between weave poles or lower the arc’s height to increase challenge.
Safety First
Always inspect obstacles before each session. Check for loose joints, sharp edges, and ensure mats are not frayed. If you notice any wear, replace or repair immediately to avoid injuries.
Putting It All Together
When you combine turning arcs with weave poles in a single circuit—followed by jumps, tunnels, and a pause box—you create a dynamic course that trains all the core skills of agility: speed, balance, focus, and confidence.
Remember: Consistency beats intensity. Regular short sessions (10–15 minutes) with clear goals lead to better progress than long, rushed workouts.
Adding Enrichment Elements (Treats, Toys, Scent)
A home agility course is a fantastic way to build confidence and coordination in your dog, but it can also be turned into an engaging enrichment experience. By sprinkling treats, toys, and scent throughout the obstacle layout, you’ll keep your pup mentally stimulated while reinforcing good behavior.
1. Treat Placement Strategies
- Reward at the Finish Line: Place a small bag of high-value treats (e.g., hot‑dog slices or freeze‑dried liver) just beyond the final hurdle. This gives your dog a clear goal and encourages them to finish each run.
- Hidden Treats Under Obstacles: Bury a treat under a low pole or behind a tunnel. When your dog clears the obstacle, they’ll discover a reward—great for problem‑solving motivation.
- Treat Ladder: Set up a “treat ladder” by placing treats at increasing heights on a vertical hurdle. This encourages your dog to use their jumping skills while rewarding precision.
2. Toy Integration
- Chew‑Proof Toys as Obstacles: Use sturdy chew toys (e.g., KONG or Nylabone) as the base for a low jump or weave poles. Your dog can chew during the run, combining physical and oral stimulation.
- Interactive Tug Rope: Hang a tug rope from a high pole and let your dog pull it after completing a tunnel. This adds an extra burst of activity and reinforces the “stop and play” cue.
- Retrieval Zones: Place a ball or Frisbee at a designated spot (e.g., beside a balance beam). Once the dog successfully navigates the beam, they can retrieve the toy—encouraging focus and reward pairing.
3. Scent Enrichment
Dogs have an incredible sense of smell; incorporating scent can transform a simple agility run into a detective mission.
- Trail Markers: Sprinkle a thin line of your dog’s favorite food or a scented oil (e.g., peppermint) along the course. The dog follows the scent to reach the next obstacle.
- Scented Hurdles: Dab a small amount of unscented, dog‑safe essential oil on each hurdle. As the dog jumps over, they’ll associate the scent with success.
- Hidden Scent Cues: Hide scented items (like a sock or towel) under a tunnel or within a box at the end of a weave. The discovery reinforces exploration and curiosity.
4. Practical Setup Tips
- Safety First: Ensure all treats, toys, and scent items are non‑hazardous and easy to clean up. Avoid small parts that could be swallowed.
- Start Simple: Begin with one enrichment element per obstacle; add more once your dog masters the basic course.
- Consistent Cues: Use the same verbal cue for each enriched activity (e.g., “Find it!”). This helps your dog understand what’s expected.
- Observe and Adjust: Watch how your dog reacts. If they seem overwhelmed, reduce treat quantity or remove scent cues temporarily.
- Use Positive Reinforcement: Praise immediately after the dog finds a treat or toy. This builds positive associations with both agility and enrichment.
By thoughtfully combining treats, toys, and scent into your home agility course, you’ll create a dynamic training environment that keeps your dog excited, focused, and eager to learn.
Training Your Dog Step by Step
1. Build Trust and Consistency
Before you even touch the first agility obstacle, your dog must feel safe in your presence. Use short, upbeat training sessions (5–10 minutes) that end on a positive note. Reward with treats, praise or a quick play session.
- Command “Sit” and “Stay”: These basics keep the dog focused while you set up the course.
- Positive Reinforcement: Replace negative corrections with clicker training or verbal markers (“Good!”).
- Consistent Timing: Use a timer or phone alarm to keep sessions consistent across days.
2. Teach One Obstacle at a Time
Start with an easy jump, then progress to tunnels and weave poles. Always keep the dog’s confidence high.
- Tunnel: Place it on the ground. Let the dog sniff and explore before encouraging them to walk through. Use a treat or favorite toy as a lure.
- Low Jump (1–2 feet): Set up a low bar. Have the dog approach from behind, then reward for stepping over. Gradually raise height by 1–2 inches each week.
- Weave Poles: Lay poles in a straight line spaced evenly. Use a long stick or ribbon to guide the dog through; once they’re comfortable, remove the visual aid.
3. Combine Agility with Mental Stimulation
Enrichment keeps a dog engaged beyond physical exercise. Sprinkle scent trails, hide treats under obstacles, or incorporate short puzzle toys between runs.
- Scent Trail: Drag a small cloth scented with vanilla or peppermint along the path to create an intriguing trail.
- Hidden Treats: Place a treat behind a tunnel or under a low jump. The dog learns to investigate and reward themselves.
- Puzzle Toys: After each obstacle, let the dog “earn” a puzzle toy by completing a short run. This reinforces effort and gives mental downtime.
4. Sample Weekly Schedule
| Day | Focus | Duration |
|---|---|---|
| Mon | Tunnel + Treat Hunt | 10 min |
| Tue | Low Jump (increase height) | 8 min |
| Wed | Weave Poles + Scent Trail | 12 min |
| Thu | Full Course, 3 rounds | 15 min |
| Fri | Puzzle Toy Reward + Review | 10 min |
5. Keep It Safe and Fun
- Check Obstacles: Ensure no sharp edges or loose parts.
- Hydration Breaks: Offer water after each run, especially on hot days.
- Observe Body Language: If your dog shows signs of fatigue (panting heavily, yawning excessively), pause the session.
6. Reward and Document Progress
Take photos or videos each week to track improvement. Create a small “Dog Agility Diary” where you note dates, obstacle heights, and any behavioral changes.
- Milestone Celebration: When the dog completes the full course without hesitation, host a mini-party with treats, favorite toys, and extra playtime.
- Share Success: Post progress updates on your blog or social media to inspire other pet owners.
Ready to Start?
Gather the right equipment, set up a safe space in your yard or a nearby park, and begin with these step‑by‑step guidelines. Remember: patience, consistency, and plenty of praise are the keys to turning any dog into an agility champion.
Using Positive Reinforcement Techniques
Positive reinforcement is the cornerstone of successful dog training, especially when you’re building an agility course at home. By rewarding desired behaviors—whether it’s a precise jump, a smooth weave or simply maintaining focus—you reinforce those actions and encourage your pup to repeat them. Below are practical ways to incorporate this strategy into your enrichment‑focused agility setup.
1. Choose the Right Rewards
- Treats: Use small, high‑value treats (e.g., chicken bits or commercial bite-sized rewards). Keep a stash handy so you can reward immediately after each correct movement.
- Praise & Affection: Verbal cues (“Good job!”) and gentle petting are powerful for dogs that thrive on social interaction.
- Toys: For toy‑motivated dogs, a quick tug or fetch break after completing a section can be highly motivating.
2. Timing Is Everything
Reward as soon as the dog successfully completes an element—within one to two seconds—to create a clear association between the action and the reward. A delayed response can confuse the pup and weaken the learning process.
3. Build a Structured Training Routine
- Warm‑Up: Start with a short walk or gentle jog around the course to increase heart rate and loosen muscles.
- Introduce One Element at a Time: Focus on a single obstacle (e.g., the first jump). Use treats to lure the dog over, then reward immediately. Repeat until confident.
- Progressive Complexity: Once the dog masters one element, add another (e.g., weave poles). Keep the session short—5–10 minutes—to maintain engagement.
- Cool‑Down & Play: End with a relaxed walk or playtime to reinforce positive feelings about training.
4. Use Clicker Training for Precision
A clicker can serve as an unmistakable “marker” that signals the exact moment of correct behavior. Pair each click with a treat, and your dog will quickly learn what earns the reward.
5. Keep Sessions Fun & Varied
- Change the Order: Rotate obstacle sequences to keep mental stimulation high.
- Incorporate “Enrichment” Breaks: Between obstacles, give a puzzle toy or treat-dispensing ball. This blends training with natural problem‑solving.
6. Address Mistakes Gently
If the dog hesitates or misses an obstacle, do not punish. Instead, reset calmly, offer a new cue, and reward any attempt to rejoin the sequence. Over time, the pup will understand that persistence pays off.
7. Monitor Your Dog’s Energy & Health
Adjust intensity based on your dog’s age, breed, and fitness level. Younger dogs may handle more rapid repetitions, while older or heavier breeds might benefit from longer rests between sets.
8. Document Progress
Keep a training log: note dates, obstacles tackled, reward types used, and any notable improvements or setbacks. This record helps refine your approach and track long‑term development.
9. Celebrate Milestones
When your dog completes the full course for the first time—or hits a new speed goal—celebrate with a larger treat or a favorite toy. These celebrations reinforce the sense of achievement and maintain enthusiasm.
10. Consistency Across Family Members
If multiple people are involved, ensure everyone uses the same cues, reward types, and timing. Uniformity prevents confusion and accelerates learning.
By integrating these positive reinforcement strategies into your home agility course, you’ll create a safe, enjoyable, and highly effective enrichment environment that encourages confidence, focus, and lifelong love for training.
Safety and Maintenance Tips
Creating a home agility course is exciting, but safety should always be your top priority. Below are detailed guidelines to keep both kids and pets safe while ensuring the equipment remains in good condition for long‑term use.
- Inspect All Components Regularly:
- Check for loose screws, frayed cables, or worn rubber on poles and jumps.
- Look for cracks in wooden beams or warped surfaces that could cause tripping hazards.
- Test electrical outlets (if any) with a voltage tester to avoid shock risks.
- Use Non‑Slip Surfaces:
- Place rubber mats or carpet tiles under jumps and tunnels to reduce slip chances for both pets and children.
- Apply anti‑slip spray on wooden poles that are often wet from outdoor use.
- Secure the Course:
- Anchor heavy structures (e.g., high jumps, balance beams) to a stable base or wall using brackets and bolts.
- Use weighted bases for portable obstacles that might tip over during vigorous activity.
- Keep all cables and cords bundled with zip ties to prevent tripping.
- Maintain Proper Clearance:
- Ensure a minimum of 2 feet (60 cm) clearance around each obstacle to avoid collisions.
- Mark boundaries with colored tape or low posts so users know where the course ends.
- Keep the Course Clean:
- Wipe down surfaces after use to remove dirt, pet hair, and sweat that can degrade materials over time.
- Use a mild soap solution for rubber components; avoid harsh chemicals that could cause brittleness.
- Seasonal Adjustments:
- In winter, add sand or gravel to the base of jumps to increase traction on icy surfaces.
- During hot months, provide shade over the course and keep mats in a cool, ventilated area to prevent overheating.
- Teach Safe Usage:
- Demonstrate proper technique for each obstacle before allowing independent use.
- Encourage gradual progression—start with low jumps and simple tunnels before moving to more complex sequences.
- Always supervise children or unfamiliar pets until they master the course safely.
- Emergency Preparedness:
- Keep a first‑aid kit nearby and know basic pet CPR in case of falls or injuries.
- Label the course with clear signage indicating “Pet Safe” or “Child Safe” to inform visitors.
- Routine Maintenance Schedule:
- Weekly: Visual inspection, surface cleaning, and tape replacement if needed.
- Monthly: Tighten all fasteners, test stability of heavy obstacles, and replace worn mats or cushions.
- Seasonally: Inspect for water damage, reapply sealants on wooden parts, and reorganize storage of spare parts.
By following these safety checks and maintenance practices, you’ll create a reliable, fun environment that encourages healthy activity for both pets and kids while minimizing risks. Remember: a well‑maintained agility course is not just about fun—it’s also about fostering confidence, trust, and positive physical interaction.
Modifying the Course as Your Dog Grows
Just like a puppy’s energy levels and coordination change over time, so does their ability to navigate an agility course. To keep training safe, fun, and effective, you’ll need to adapt your home set‑up as your dog matures.
1. Start with the Basics and Build Up
- Puppies (0–6 months): Use low barriers (e.g., a lightweight tunnel or a simple weave pole made of PVC). Keep jumps at floor level or no jump at all. Focus on confidence, basic commands, and positive reinforcement.
- Year‑old dogs: Raise the height of obstacles gradually—add 1–2 inches each week if your dog shows comfort. Introduce short “mini‑tunnels” that are only a foot long to help them get used to enclosed spaces.
- Adult dogs (1–3 years): Begin adding the full set of obstacles: standard jumps, A‑frame, seesaw, and double‑tunnel. Keep the layout simple with clear pathways to avoid confusion.
- Senior dogs: Reduce height or length of obstacles, add more rest points, and consider softer materials (e.g., foam jumps) to minimize joint stress.
2. Adjust the Course Layout for Size & Speed
As a dog grows taller or faster, you’ll need to tweak distances between obstacles:
- Shorter dogs or slower runners: Decrease spacing so they can maintain momentum.
- Larger dogs or high‑energy breeds: Increase spacing to give them room to breathe and avoid collisions.
3. Use Modular Equipment for Flexibility
Invest in gear that can be reconfigured—tunnels with removable walls, collapsible jumps, or adjustable A‑frames. This allows you to:
- Shorten the course during a rainy day when traction is low.
- Expand it for advanced training once your dog masters the basics.
4. Incorporate Enrichment Elements Throughout Growth Stages
Enrichment keeps motivation high and prevents boredom:
- Puppies: Hide treats in the tunnel or at the base of a low jump to encourage exploration.
- Year‑old dogs: Add scent trails between obstacles—spray a faint essential oil (e.g., lavender) along a path.
- Adults: Use interactive toys as rewards after completing sections of the course.
- Seniors: Offer soft, chewable treats that also serve as mental stimulation while resting on the mat.
5. Monitor and Record Progress
Create a simple log (paper or digital) to track:
- Date of each session.
- Obstacle height/spacing used.
- Time taken, number of mistakes, and any signs of fatigue or discomfort.
This data helps you identify when it’s time to adjust the course—either by increasing difficulty or providing more recovery.
6. Safety First: Check Equipment Regularly
- Inspect jumps for cracks or loose joints after each use.
- Replace worn‑out mats or padding every 6–12 months.
- Avoid placing obstacles on slick surfaces; add rubber mats underneath if necessary.
7. Sample Progression Plan (Month‑by‑Month)
| Month | Obstacle Height/Setup | Enrichment Focus |
|---|---|---|
| 0–2 | Floor jumps, single tunnel (12 inches long) | Treats in tunnels |
| 3–4 | 1‑inch jumps, weave poles (6 inches apart) | Scent trail to next obstacle |
| 5–6 | 2‑inch jumps, short A‑frame | Interactive toy at end of course |
| 7–9 | 3‑inch jumps, double tunnel (12 inches long) | Reward with chewable treat on mat |
| 10–12 | 4‑inch jumps, seesaw added | Scent trail + puzzle feeder after course |
By following these guidelines and staying attuned to your dog’s physical and mental cues, you’ll create a dynamic, engaging agility environment that grows with them—turning every training session into a fun, rewarding adventure.
Conclusion
Creating an agility course at home is more than just laying down hurdles; it’s an opportunity to weave fun, mental stimulation, and physical exercise into your dog’s daily routine. Below you’ll find step‑by‑step guidance, practical examples, and tips for turning a simple backyard or living space into a dynamic enrichment hub.
1. Choose Your Space Wisely
- Open Yard: A fenced yard with at least 20 ft by 30 ft of flat ground is ideal for full obstacle sets (tunnels, weave poles, jumps).
- Indoor Option: Use a long hallway or a clear room. Low‑height obstacles (e.g., cushion tunnels, low jumps) keep safety in mind while still providing challenge.
2. Start with Basic Foundations
- Tunnel: Rent a collapsible agility tunnel or use a large cardboard box covered with a blanket. Encourage your dog by running alongside and rewarding when they enter.
- Weave Poles: Place 4–6 poles (PVC pipes, broomsticks) spaced evenly. Teach the “weave” cue by guiding the dog through the first few poles manually before letting them navigate on their own.
- Jump: Begin with a low jump—use a broomstick across two sturdy boxes or a PVC pipe set at 12–18 inches, depending on your dog’s height. Gradually raise the bar as confidence grows.
3. Layer in Enrichment Tasks
Incorporate scent work, puzzle feeders, and target training to keep mental engagement high:
- Scent Trail: Lay a scent trail from the start line to the finish using a treat or favorite toy. Once the dog follows the trail, reward them at the end.
- Puzzle Feeder Station: Place a food‑dispensing ball between two jumps so that the dog must solve the puzzle before proceeding.
- Targeting: Use a small target stick or a colored mat and train your dog to touch it with their nose at each obstacle. This improves precision and focus.
4. Build Progressive Routines
Create short circuits that gradually increase in complexity:
- Warm‑Up Circuit (5 minutes): Run through the tunnel, weave poles, and a low jump.
- Main Course (10–15 minutes): Add a target station after each obstacle. Include a scent trail that leads from one obstacle to the next.
- Cool‑Down (3 minutes): End with a gentle walk around the yard or indoor space, rewarding calm behavior.
5. Safety & Consistency Tips
- Check Obstacles: Inspect all equipment daily for damage—loose screws, splinters, or worn surfaces.
- Positive Reinforcement: Use high‑value treats, enthusiastic praise, and gentle encouragement. Avoid punitive cues that may create fear.
- Progress at Your Dog’s Pace: If a jump is too high, lower it or replace it with a “step up” until confidence builds.
6. Sample Daily Routine
Morning (10 min)
- Tunnel run
- Low jump
- Target touch

Midday (5 min)
- Scent trail to puzzle feeder

Evening (15 min)
- Full circuit: tunnel → weave poles → jump → target station → finish line
- Cool‑down walk
7. Resources & Further Reading
- The Kennel Club – Agility Basics
- AKC – Starting Agility Training
- Local dog agility clubs often offer free or low‑cost equipment rentals and coaching sessions.
By thoughtfully integrating physical obstacles with enrichment activities, you’ll provide a holistic training environment that keeps your canine companion mentally sharp, physically fit, and joyfully engaged—all from the comfort of home.
FAQ
What kind of space do I need to set up an agility course at home?
A good starting point is a clear, open area that’s at least 20 feet by 30 feet. If you’re using a garage or basement, make sure the floor is flat and free of debris. For smaller homes, consider rotating stations so your dog can use a single space for multiple exercises.
- Outdoor yard: Ideal if you have at least 200 square feet of unobstructed grass or turf.
- Indoor living room: Use a hallway or spare room; keep furniture out of the way and use non-slip rugs.
- Garage: Can be repurposed into a short obstacle course; add padding to protect floors.
What equipment do I need for a beginner agility set?
Start with these basic, affordable items:
- Pole Vaults (PVC or wooden poles): 4–6 feet tall. Use 2–3 per session.
- Weave Poles: 4–8 PVC tubes, 1 foot apart, set up in a straight line.
- Tunnel: A collapsible or pre‑assembled tunnel, about 6 feet long.
- Jumps (Hurdles): Adjustable wooden frames or foam blocks.
- Balance Beam: A sturdy plank (4–5 ft) on a low platform.
Optional: Soft mats for cushioning, reflective tape for visibility at dusk, and a small treat pouch for rewards.
How can I keep my dog safe during training?
- Start slow: Introduce one obstacle at a time and use a clear, verbal cue.
- Use positive reinforcement: Treats, praise, or play to reward correct attempts.
- Check for wear: Inspect poles, tunnels, and jumps every week; replace frayed parts immediately.
- Keep the floor dry: Use anti‑slip mats in wet conditions to prevent slips.
- Hydration breaks: Offer water after each run, especially on hot days.
What’s a realistic training schedule for a beginner dog?
A balanced routine looks like this:
| Day | Session Length | Focus |
|---|---|---|
| Mon & Thu | 10–15 min | Poles + Treats |
| Tue & Fri | 10–12 min | Tunnel + Weave Poles |
| Wed | 5–7 min | Balance Beam + Review |
| Sat/Sun | Rest or Light Walks |
How can I add enrichment beyond basic obstacles?
Incorporate sensory and problem‑solving tasks:
- Scent trails: Lay a trail of treats or scented objects around the course.
- Interactive toys: Use puzzle feeders between obstacles for mental stimulation.
- Water play: If you have a kiddie pool, add a short swim before or after the course.
- Music or background noise: Play calm music to help your dog stay relaxed.
How can I keep costs low while setting up a course?
Consider these budget‑friendly hacks:
- DIY poles: Use sturdy PVC pipes cut to length.
- Recycled materials: Convert an old cardboard box into a tunnel or use broom handles for weave poles.
- Second‑hand gear: Check local classifieds, pet forums, and community groups for gently used agility equipment.
- Multi‑use items: Use a simple ladder as a balance beam by placing it on the floor.
Do I need any permits or insurance to run an agility course at home?
Generally, no. However:
- Neighborhood rules: Check HOA guidelines for equipment placement.
- Insurance: If you plan public events or training classes, consider liability coverage.
How do I keep my dog motivated over time?
Rotate the order of obstacles, vary reward types (treats vs. toys), and introduce new tricks or commands during sessions to maintain novelty.
Categories
- AI & Enrichment Play
- Broiler Farming
- Broiler Farming Tips
- Canine Wellness & Longevity
- Cat
- Cat & Human Connection
- Cat Adoption & Rescue
- Cat Breeds
- Cat Breeds & Personalities
- Cat Care & Health
- Cat Grooming & Hygiene
- Cat Lifestyle & Environment
- Cat Myths & History
- Cat Nutrition & Diet
- Cat Products & Reviews
- Cat Training & Behavior
- Comparison
- Consumer Awareness
- Dog
- Dog Accessories & Products
- Dog Adoption & Rescue
- Dog Breed & Lifestyle Trends
- Dog Breeding & Puppies
- Dog Entertainment & Media
- Dog Fashion & Trends
- Dog Fun & Lifestyle
- Dog Grooming & Hygiene
- Dog History & Culture
- Dog Myths, Science & Future Tech
- Dog News & Trends
- Dog Nutrition & Food
- Dog Psychology & Emotions
- Dog Safety & Security
- Dog Sports & Activities
- Dog Technology & Innovation
- Dog Training for Modern Owners
- Dog Travel & Adventure
- Dog Travel, Adventure & Culture
- Economic and Market Insights
- Educational Content
- FAQs
- Feeding Alternatives
- Festivals & Seasonal Ideas
- Fun & Entertainment
- General Knowledge
- General Pig Farming
- Health & Disease Management
- Housing and Environment
- Kittens
- Market Insights
- Miscellaneous
- Miscellaneous
- Motivational
- pig
- Pig Breeding
- Pig Breeds
- Pig Farming Stories and Inspiration
- Pig Health and Care
- Pig Nutrition
- Pig Products
- Profitability & Business
- Puppy Care
- Puppy Predictable Topics Reinvented
- Regional Focus
- Rescue & Adoption Buzz
- Senior Cats
- Senior Dog Care
- Smart Dog Tech & Gadgets
- Sustainability
- Sustainable & Eco-Friendly Dog Products
- Tech & Innovations
- Working & Service Dogs
- Broiler Feed66 products
- Country Feed33 products
- Pig Feed66 products
- Product22 products
- Raw Materials99 products
Products
-
 Fish Meal
₹1,999.00 – ₹2,999.00Price range: ₹1,999.00 through ₹2,999.00Rated 0 out of 5
Fish Meal
₹1,999.00 – ₹2,999.00Price range: ₹1,999.00 through ₹2,999.00Rated 0 out of 5 -
 FATTENING BROILER FEED
₹2,299.00 – ₹2,349.00Price range: ₹2,299.00 through ₹2,349.00Rated 0 out of 5
FATTENING BROILER FEED
₹2,299.00 – ₹2,349.00Price range: ₹2,299.00 through ₹2,349.00Rated 0 out of 5 -
 LAYER COUNTRY FEED
₹1,549.00 – ₹1,649.00Price range: ₹1,549.00 through ₹1,649.00Rated 0 out of 5
LAYER COUNTRY FEED
₹1,549.00 – ₹1,649.00Price range: ₹1,549.00 through ₹1,649.00Rated 0 out of 5 -
 COUNTER BROILER FEED
₹1,199.00 – ₹1,299.00Price range: ₹1,199.00 through ₹1,299.00Rated 0 out of 5
COUNTER BROILER FEED
₹1,199.00 – ₹1,299.00Price range: ₹1,199.00 through ₹1,299.00Rated 0 out of 5 -
 LACTATING PIG FEED
Rated 0 out of 5
LACTATING PIG FEED
Rated 0 out of 5₹2,299.00Original price was: ₹2,299.00.₹1,740.00Current price is: ₹1,740.00. -
 Maize
Rated 0 out of 5
Maize
Rated 0 out of 5₹1,650.00Original price was: ₹1,650.00.₹1,300.00Current price is: ₹1,300.00. -
 GESTATION PIG FEED (Phase 1)
Rated 0 out of 5
GESTATION PIG FEED (Phase 1)
Rated 0 out of 5₹2,249.00Original price was: ₹2,249.00.₹1,699.00Current price is: ₹1,699.00. -
 Pre Starter Broiler Feed
₹2,399.00 – ₹2,499.00Price range: ₹2,399.00 through ₹2,499.00Rated 0 out of 5
Pre Starter Broiler Feed
₹2,399.00 – ₹2,499.00Price range: ₹2,399.00 through ₹2,499.00Rated 0 out of 5 -
 FINISHER PIG FEED
Rated 0 out of 5
FINISHER PIG FEED
Rated 0 out of 5₹2,299.00Original price was: ₹2,299.00.₹1,749.00Current price is: ₹1,749.00. -
 Broiler Premix
Rated 0 out of 5
Broiler Premix
Rated 0 out of 5₹820.00Original price was: ₹820.00.₹699.00Current price is: ₹699.00.