
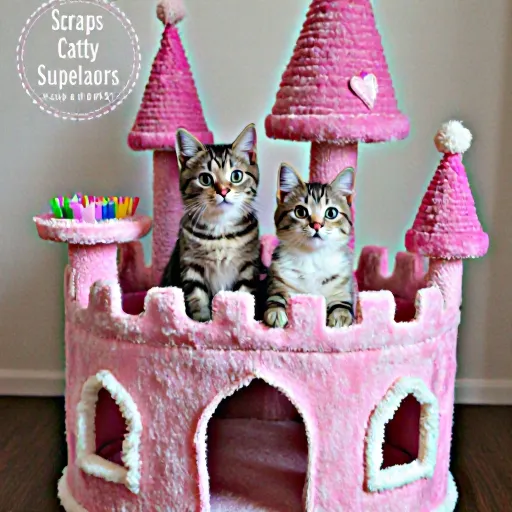
Upgrade your cat's space without breaking the bank!
From Scraps to Splendor: Budget-Friendly Cat Tree Magic
Table of Contents
- Selecting the Right Location for Your Cat Tree
- Choosing Sustainable and Affordable Materials
- Measure Your Space Properly Before Starting
- Assembling a DIY Cat Tree Frame from Cardboard Boxes
- Upcycling Old Furniture into a Unique Cat Tree
- Creating a Vertical Garden for Your Cat's Entertainment
- Adding Ladders and Stairs to Your DIY Cat Tree
- Incorporating Scratching Posts into the Design
- Building Platforms of Different Sizes for Your Cats
- Adding Perches and Hiding Spots for Privacy
- DIY Cat Tree with Built-in Storage Solutions
- Incorporating Toys and Tunnels for Interactive Fun
- Maintaining Your DIY Cat Tree for Longevity
- Conclusion
- FAQ
Selecting the Right Location for Your Cat Tree
Selecting the right location for your cat tree is just as important as building it, especially if you're looking to create a cat tree on a budget. The perfect spot should be quiet yet stimulating enough to keep your feline friend entertained and content. Here are some key factors to consider when choosing the ideal location:
1. Privacy
Cats love privacy, so finding a corner that offers them a sense of security is crucial. Higher floors or less frequented areas can provide your cat with a safe space to relax and observe their surroundings without feeling threatened by loud noises or excessive activity.
2. Sunlight
Cats are drawn to sunlight, which helps them sleep soundly and enjoy the natural warmth that boosts their mood. If possible, choose a spot where your cat tree can receive some direct sunlight during parts of the day. This not only enhances the comfort level for your pet but also ensures they have a cozy area to sunbathe.
3. Accessibility
Your cat's mobility should be considered when selecting a location. Ensure that the spot is easy for your cat to reach, especially if you're building a vertical tree with multiple levels. Cats can be quite agile, but they still need assistance climbing up and down, so placing the tree near a door or window may make it easier for them.
4. Away from Potential Hazards
It's important to keep your cat tree away from areas where there might be potential hazards such as electrical wires, windows with open blinds, or spaces that could lead to falls. By placing the tree in a safer area of your home, you're providing a more secure environment for your pet.
5. Visibility
Cats love to watch the world go by, and they often enjoy perches with good views. If possible, choose a location that offers them a vantage point where they can observe people walking by or other pets in the household. This provides stimulation and keeps your cat mentally engaged.
6. Quiet Spaces
Cats also need quiet spaces to retreat when they want some solitude. If you're building a budget-friendly cat tree, consider incorporating features that help create noise-cancelling environments or places where the tree can be quieter compared to other areas of your home.
Practical Advice
- Use Window Sills: If you have a small cat tree, window sills are great spots. Just make sure they're wide enough for the tree to fit and provide adequate support.
- Consider Multi-Level Trees: Higher locations can be great if you choose a multi-level design as your cat will feel more secure up high and it might also discourage them from climbing dangerous areas of your home.
- Incorporate Climbing Accessories: Add ropes, sisal posts, or other climbing elements to encourage your cat's natural instincts. These can be placed strategically in quiet corners that are away from the hustle-bustle of daily life.
- Mix with Furniture: If space is limited, consider designing a cat tree that blends into existing furniture. This could mean using fabric or wood that matches your home decor to create an unobtrusive but functional addition to your living space.
Selecting the right location for your cat tree requires careful consideration of your pet's needs and preferences, as well as practical aspects of your home. By thoughtfully placing your budget-friendly cat tree in a suitable spot, you'll create an inviting environment that will keep your cat happy and healthy.
Choosing Sustainable and Affordable Materials
When embarking on building your own cat tree, it's crucial to consider both the sustainability of materials used and their cost-effectiveness. This approach ensures that you're not only creating a fun and safe space for your feline friend but also contributing positively to the environment.
Selecting Eco-Friendly Materials
Building eco-friendly cat trees involves using sustainable, non-toxic materials that are both good for your pet and beneficial for the planet. Here are some examples:
- Bamboo: Bamboo is a rapidly renewable resource known for its strength and durability, making it an excellent choice for cat tree posts. It’s also naturally resistant to mold and mildew.
- Plywood: Look for plywood made with formaldehyde-free adhesives. This ensures that no harmful chemicals are released into the air, making it safe for both your cat and family members.
- Oak: Oak is another durable wood that offers excellent resistance against wear and tear, making it suitable for both indoor and outdoor use. It's a more expensive option but provides a natural, warm aesthetic to your home.
- Recycled Wood: Reclaimed or recycled wood not only saves resources by reusing existing materials but also gives each piece a unique character and history. It’s eco-friendly and often budget-friendly due to its second-hand status.
Example: You can purchase pre-cut bamboo poles or even buy whole bamboo pieces from your local hardware store, which you can then cut into the desired lengths yourself.
Practical advice: Plywood can be easily cut to size using a handsaw or power saw. Ensure you sand down rough edges before assembly to prevent any splinters from irritating your cat’s paws.
Example: You can find oak boards at most lumber yards or online retailers specializing in sustainable materials.
Practical advice: When using reclaimed wood, make sure it's properly cleaned and sealed with a non-toxic finish to prevent any harmful substances from affecting your cat or the environment.
Purchasing Second-Hand Materials
Sourcing second-hand materials can significantly reduce costs while still providing high-quality results. Here’s how you can do it:
- Freecycle Networks: Freecycle is a network of free item exchanges in local communities around the world. You might find old furniture or wood that can be repurposed into a cat tree.
- Building Material Stores: Some stores sell surplus materials from construction projects at reduced prices. This not only cuts down on waste but also provides unique and often high-quality pieces for your project.
- Craigslist or Facebook Marketplace: These platforms can be treasure troves of second-hand items, including wood, metal, and other materials that could work perfectly for your cat tree. Always ensure the material is safe and suitable before using it.
Eco-Friendly Finishes
To finish off your sustainable cat tree project, choose paints or finishes that are non-toxic and environmentally friendly:
- Water-Based Paints: Opt for water-based paints which dry quickly without releasing volatile organic compounds (VOCs) into the air.
- Spray Sealer: Use a spray sealer that dries fast and provides a protective layer to keep the wood in good condition. Look for sealers made from natural oils or water-based formulas.
In conclusion, choosing sustainable and affordable materials is not only beneficial for your wallet but also for the environment. By selecting eco-friendly options like bamboo, plywood, oak, recycled wood, and using non-toxic finishes, you can create a beautiful and safe cat tree that your feline friend will love.
Measure Your Space Properly Before Starting
When embarking on the project of building a cat tree, one critical step that often gets overlooked is properly measuring your space. This seemingly small task can significantly impact the final outcome and ensure that your project fits seamlessly into your home environment.
Why Measure Your Space Properly?
Accurate measurements are crucial for several reasons:
- Avoid Wasted Materials: Incorrect measurements can lead to over-purchasing materials, which not only increases the cost but also adds unnecessary waste.
- Fits in Your Space: A cat tree that is too large or too small for your living area could look out of place or take up valuable space unnecessarily.
- Promotes Functionality: Ensuring the tree fits well in its designated spot can enhance its functionality, allowing your cat to climb and explore effectively without any hindrance.
Tools You Will Need
To measure your space properly, you will need a few basic tools:
- Measuring Tape: A flexible measuring tape is essential for getting precise measurements. It allows you to measure around curves and angles accurately.
- Ruler or Straight Edge: For straight lines, such as the length of a wall or space between furniture, a ruler can be very helpful.
- Notebook and Pen: To jot down all your measurements for easy reference during planning and construction.
Step-by-Step Measurement Guide
- Identify the Spot: Choose where you want to place the cat tree. This could be a corner, by a window, or any other spot that works well in your home.
- Measure Dimensions: Measure the width and depth of the space using your measuring tape. If it's an irregular shape, take multiple measurements at different points and average them out to get an accurate measurement.
- Height Considerations: Measure from the ground to the ceiling or the desired placement height for the cat tree. This will help you determine if a taller tree would fit comfortably.
- Note Obstructions: Take note of any obstacles in the space, such as doorways, furniture, or electrical outlets that could affect where the tree can be placed or how it is constructed.
Practical Examples
Let's consider a specific example: you're building a cat tree for a small apartment. The corner of your living room has an area of approximately 2 feet by 4 feet, with a ceiling height of about 10 feet. You want to ensure that the cat tree fits well without obstructing any pathways or furniture.
- Measure the space: Your measurements are width = 2 feet; depth = 4 feet.
- Determine the size of the cat tree: Based on these dimensions, you might choose a smaller tree that is around 2.5 to 3 feet tall and 18 inches wide at its base.
Tips for Budget-Friendly Building
By properly measuring your space before starting the project, you can also save money:
- Avoid Overspending on Materials: Knowing the exact size of the tree you need helps in buying only necessary materials. For example, if your measurements are precise, you won't buy extra wood or other supplies.
- Optimize Space Usage: Building a cat tree that fits perfectly within available space means you're making efficient use of your home’s layout, which can be particularly beneficial in smaller apartments.
- Ease Construction Process: Proper measurement ensures easier assembly and fewer mistakes during the building process. This reduces the need for additional materials or labor costs.
In conclusion, taking the time to measure your space properly before starting your cat tree project is a crucial step that can save you money and ensure the final product fits seamlessly into your home environment. Following these guidelines will help you build a budget-friendly yet stylish cat tree that meets all your needs.
Assembling a DIY Cat Tree Frame from Cardboard Boxes
The joy of owning a cat is in providing them with an environment that meets their physical and mental needs. A sturdy, yet budget-friendly cat tree can be the perfect addition to your home. In this guide, we'll walk you through how to build a cat tree frame using cardboard boxes, following the principles outlined in How to Build a Cat Tree on a Budget. This project is not only cost-effective but also eco-friendly and can be easily customized according to your space and preferences.
Materials Needed:
- Cardboard boxes of varying sizes (ensure they are sturdy)
- Packing tape or strong adhesive
- Wooden dowels or PVC pipes for vertical supports
- A hammer and nails, or a drill with screws
- Cut pieces of wood for additional support
Step-by-Step Instructions:
- Select Your Cardboard Boxes: Choose sturdy boxes that will hold the weight of your cat and any additional items you plan to add. Larger boxes can serve as bases or platforms, while smaller ones can be used for vertical supports.
- Cut Out Holes: Depending on your design, cut out holes in the sides of the boxes to allow your cat to climb up and down. Ensure these are large enough for your cat but not so big that they could fall through.
- Assemble Vertical Supports: Use wooden dowels or PVC pipes to create vertical supports for each platform. These will provide stability and ensure the cat tree frame stands upright securely.
- Bond Boxes Together: Securely tape or glue the boxes together using packing tape or a strong adhesive. This will give your cat tree structure and durability. Make sure all connections are tight to prevent any wobbling when cats climb up.
- Add Platforms: Place smaller cardboard boxes on top of larger ones to create platforms where your cat can rest, play, or nap. Use additional tape or adhesive to ensure the platforms remain steady.
- Attach Supports: Use nails, screws, or even strong glue to attach the wooden dowels or PVC pipes to the cardboard boxes, creating a sturdy frame for your cat tree.
Tips and Tricks:
- Customize for Your Cat: Observe how your cat uses their current scratching posts or furniture. Tailor the height of platforms, the number of vertical supports, and any additional features like hanging toys to suit your cat's preferences.
- Maintain Stability: Always ensure that the base is wide enough to support the entire structure. A wider base will help prevent tipping over.
- Enhance Appeal: Once the frame is assembled, you can cover it with fabric or place plants on top for a more aesthetically pleasing finish while keeping your cat safe and entertained.
Conclusion:
Building a DIY cat tree from cardboard boxes not only saves money but also promotes sustainability. By following these steps, you can create a sturdy and customized cat tree frame that will keep your furry friend happy and healthy for many years to come. Remember, the key is to make it fun, safe, and appealing for both you and your cat!
Upcycling Old Furniture into a Unique Cat Tree
Transforming old furniture into a functional and stylish cat tree is not only an eco-friendly choice but also a cost-effective way to spruce up your home decor. This approach aligns perfectly with the principles of sustainability, allowing you to repurpose items that might otherwise end up in a landfill. By following these steps, you can create a unique cat tree that will keep your feline friend entertained and happy while adding charm to your living space.
Materials Needed
- An old piece of furniture (e.g., an armchair, coffee table, or dresser).
- Wooden planks or scrap wood for additional support and design elements.
- Nails, screws, and a hammer.
- Sandpaper.
- Varnish or paint (optional, but recommended if you want to add a new color scheme).
Step-by-Step Guide
- Assess the Furniture: Choose an old piece of furniture that has sturdy legs and a flat surface. Ensure it is structurally sound as this will form the base of your cat tree.
- Clean and Sand: Thoroughly clean the chosen furniture using soap and water. Once dry, sand any rough edges or splinters to ensure the cat’s safety.
- Add Legs (Optional): If the base of your furniture lacks legs, you can add wooden planks to create a platform for the cats’ play area. Secure these with nails or screws.
- Paint or Varnish: To give your project a fresh look, apply paint or varnish. You can choose colors that complement your home decor or even go for a more playful pattern to please your cat’s taste!
Design Ideas and Practical Tips
- Create Multi-Level Platforms: By adding additional platforms of different heights, you can create an interactive space where your cat can climb, jump, and explore. This will keep them physically active and engaged.
- Incorporate Toys and Ladders: Attach small ladders or ropes to various parts of the tree for added interest. Cats love to have places where they can perch and observe their surroundings.
- Pick the Right Location: Place your homemade cat tree in a high-traffic area but also away from windows to minimize the risk of them jumping out if startled by something outside.
Cost-Benefit Analysis
This upcycling project is budget-friendly, as you are essentially using existing materials. By reusing old furniture, you save money and contribute positively to environmental conservation efforts. Additionally, this approach can be tailored based on your specific needs or preferences, making it a highly personal touch for both the cat and the home.
Conclusion
Building a unique cat tree from upcycled furniture is an excellent way to combine creativity with practicality. Not only does it provide entertainment for your pet, but it also adds character to your living space. With a little bit of effort and imagination, you can turn something old into something new that everyone will love.
Creating a Vertical Garden for Your Cat's Entertainment
Imagine creating an environment that not only entertains your furry friend but also adds beauty to your space. A vertical garden specifically designed for cats can be both visually appealing and stimulating. This creative idea builds on the concept of how to build a cat tree on a budget, offering additional features that will keep your cat entertained and happy.
Why a Vertical Garden?
A vertical garden for cats can provide multiple levels of interest and exploration. Cats are naturally drawn to vertical spaces as they mimic climbing trees in the wild. By creating a vertical garden, you are providing them with the same kind of stimulation that would be found outdoors.
Materials Needed
- Pallets or sturdy wooden boards (budget-friendly)
- Cats' favorite scratching posts and materials like sisal or cardboard
- Plants safe for cats, such as cat grass or herbs in pots
- Fabric or mesh to support the structure if needed
- Bamboo poles or rods (optional)
Step-by-Step Guide
- Select a Space: Choose an area in your home that gets plenty of sunlight, especially if you plan to grow plants. This will ensure both the cat and the plants thrive.
- Assemble Your Base: If using pallets or wooden boards, arrange them vertically against a wall or stand on sturdy legs. Secure them with screws or nails for stability.
- Add Scratching Surfaces: Attach scratching posts to the vertical structure using brackets or adhesive tape. Ensure these are easily accessible to your cat and at their height level.
- Incorporate Plants: Place small pots with safe plants along the vertical structure. Cat grass, herbs like basil, and spider plants are popular choices for cats that like to sniff and paw at foliage without risk of toxicity.
- Add Climbing Elements (Optional): If you have bamboo poles or rods, they can be attached horizontally between levels for your cat to climb. This adds another dimension to their exploration area.
Tips and Tricks
- Rotation: Rotate the vertical garden periodically so that all sides receive an equal amount of sunlight, promoting healthy plant growth.
- Observe Your Cat's Interests: Cats may show a preference for certain types of plants or scratching posts. Adjust the layout based on your cat’s behavior to maximize engagement.
- Maintenance: Regularly clean and replace any damaged plant pots or scratching materials. Keep an eye out for any signs that your cat is not using the garden and make adjustments accordingly.
Benefits of a Vertical Garden
A vertical garden offers several benefits beyond just entertainment:
- Space Optimization: It makes use of vertical space, which is especially beneficial in smaller apartments or homes.
- Eco-Friendly: Growing your own cat grass can reduce the need for store-bought treats and provide a sustainable food source.
- Cat Wellness: The combination of climbing, scratching, and interaction with plants promotes physical activity and mental stimulation, reducing boredom and stress in cats.
Conclusion
Creating a vertical garden for your cat is not only an enjoyable DIY project but also a thoughtful gift to the feline member of your family. By following these steps, you can create a stimulating and beautiful environment that keeps your cat active and entertained while adding charm to your living space.
Adding Ladders and Stairs to Your DIY Cat Tree
When building a cat tree, adding ladders and stairs can enhance both the functionality and appeal of your project. This not only provides an extra level of fun and exercise for your furry friend but also adds a stylish touch to your home decor. In this section, we'll explore how you can incorporate these elements into your DIY cat tree on a budget.
Materials Needed
- Wood: Choose sturdy wood such as pine or fir for the main structure of the ladder and stairs. You might also need plywood for constructing platforms and steps.
- Nails, Screws, and Hardware: These are essential for assembling the various components together securely.
- Paint or Stain (Optional): If you want to match your tree with your home decor, consider painting or staining the wood. Choose non-toxic paints suitable for indoor use.
- Soft Fabric: Consider adding a soft fabric covering for the steps or platforms to make them more comfortable and appealing to your cat.
Step-by-Step Guide
- Create the Base Platform: Start by building a sturdy base platform using plywood. This will serve as the starting point for both the stairs and ladder. Ensure it is wide enough to accommodate your cat comfortably.
- BUILD THE LADDER OR STAIRS:
- If you're making a ladder, cut pieces of wood that are slightly longer than the height difference between each platform. Attach them diagonally at an angle that is comfortable for your cat to climb.
- For stairs, use flat pieces of wood and arrange them in steps leading up to the next platform. Ensure that the risers (the vertical part) are not too steep or wide for your cat's paws.
- Add Platforms: On each level where you want a resting spot, add additional platforms of plywood. These should be securely attached to the main frame using nails or screws.
- Attach Ladder/Steps: Once all platforms are in place, attach your ladder or stairs to the base platform and the next higher platform. Make sure they are well-secured; safety is crucial for your cat's climbing experience.
Design Tips
To make your DIY cat tree more appealing and functional:
- Consider the Size of Your Cat: Make sure the steps or ladder are not too steep for your cat. A gentle incline is best.
- Add Hiding Spots: You can incorporate small hiding spots on each level to give your cat a place to hide and relax.
- Incorporate Toys: Attach some toy platforms or hanging toys for added fun. This keeps your cat entertained as it climbs up the tree.
Cost-Effective Ideas
To build a cat tree on a budget, consider these ideas:
- Repurpose Materials: Use materials that you already have at home. Old crates or wooden beams can be repurposed into ladders and steps.
- Sell Unused Wood: If you have extra wood pieces, consider selling them to save on costs.
- Use Natural Elements: Incorporate natural elements like bamboo poles for climbing or branches from trees as scratching posts. These are not only eco-friendly but also add a rustic charm to the tree.
Final Thoughts
Add ladders and stairs to your DIY cat tree by following these steps, and you'll create an engaging, safe, and stylish environment for your pet. Remember that safety is paramount; ensure all pieces are securely attached, and the angles of the ladder or stairs are suitable for your cat's comfort.
Incorporating Scratching Posts into the Design
Incorporating scratching posts into your design can significantly enhance both the aesthetics and functionality of your home, especially if you're building a cat tree on a budget. Scratching is an essential behavior for cats, helping them mark their territory, sharpen their claws, and stretch their muscles. By thoughtfully integrating scratching posts into your cat tree design, you ensure that your feline friend has an attractive and practical place to fulfill these natural instincts.
Designing with Scratching Posts in Mind
The key is to make the scratching post a part of the overall design rather than an afterthought. This means choosing materials, colors, and textures that complement your existing decor while also being appealing to your cat's aesthetic preferences.
Selecting Materials
When building a cat tree on a budget, it’s crucial to choose durable yet affordable materials. Pine or cedar are popular choices for scratching posts due to their natural oils that help deter nail sharpening. However, if you're on a tight budget, consider using reclaimed wood from old furniture or pallets. These not only save money but also add unique character to your cat tree.
Color and Texture
Cats are highly sensitive to color and texture. Opt for materials that provide various surfaces for different scratching preferences. Some cats prefer rough textures, while others might enjoy softer ones like plush fabrics. A combination of woven rope and smooth wood can cater to both preferences.
Placement
The placement of your cat tree is just as important as the design itself. Ensure that it's in a central location where your cat will naturally go, such as near their food bowl or favorite window. This way, you're not only creating an attractive addition to your home but also encouraging your cat to use the scratching post frequently.
Encouraging Use
To encourage your cat to use the scratch post more often, consider adding a treat or toy near it. This can turn the scratching post into a fun spot for play and treats, making it even more inviting for your furry friend.
DIY Scratching Post Ideas
- Pine Logs: Use simple pine logs to create an attractive scratching post. You can sand the rough edges for safety and paint or stain them to match your decor.
- Rope and Wooden Planks: Attach rope to wooden planks to create a DIY scratching post. This design not only looks good but also offers different textures for your cat to enjoy.
- Pallet Scratching Posts: Reclaimed pallets can be transformed into beautiful and budget-friendly scratching posts. Sand down the rough edges, paint or stain them, and add some rope or fabric for extra texture.
Tips for Budget-Friendly Cat Tree Design
- Repurpose Old Furniture: Salvage old furniture pieces that can be repurposed into cat tree components. This reduces costs and gives you a unique, personalized project.
- DIY Fabric Upholstery: Instead of buying expensive upholstery fabrics, use cheap, durable materials like canvas or fleece. These are easy to cut and sew yourself.
- Recycle Materials: Utilize recycled cardboard boxes for scratching pads. They can be easily decorated with non-toxic paints or markers to match your interior design.
Incorporating scratching posts into the design of a budget cat tree is not only cost-effective but also enriches both your home and your cat's environment. By carefully considering materials, placement, and practicality, you can create a functional yet stylish addition to your living space that both you and your cat will love.
Building Platforms of Different Sizes for Your Cats
Building platforms of different sizes for your cats is not just about creating spaces where they can relax and stretch; it's also about enhancing their mental stimulation, physical activity, and overall well-being. By providing various platforms at different heights, you cater to the natural behaviors that wildcats would engage in, such as hunting, climbing, and exploring.
Before you start building, it's crucial to understand your cat's specific needs. Some cats are more playful and energetic than others, so the size and complexity of the platforms should reflect their activity levels. For instance, a larger platform may be ideal for a more active cat, while a smaller one might suffice for a more laid-back kitty.
- Bamboo or wooden planks (for strength and durability)
- Carefully chosen non-slip surface materials to prevent your cat from slipping off the platform
- Nails or screws for attaching the platforms securely
- Paint or wood sealant if you want to customize the appearance of the platforms
- Measure and Mark: Measure your cat's height and decide on various platform heights. Cats typically prefer heights ranging from 1 meter to 2 meters off the ground.
- Select the Size: Choose appropriate sizes for each platform. Smaller platforms (about 30-45 cm) can serve as resting spots, while larger ones (60-90 cm or more) are perfect for lounging and playing.
- Assemble the Platforms: Securely fasten the wooden planks to create solid bases. Ensure that each platform is stable enough to support your cat's weight. You can add additional supports if needed.
- Add Non-Slip Surfaces: Apply non-slip materials such as rubber mats or anti-slip paint on all surfaces to prevent accidents and slips.
- Connect the Platforms: If you want multi-level cat furniture, connect the platforms using sturdy steps or bridges. Ensure that they are wide enough for your cat to comfortably walk across without feeling unsafe.
To ensure a well-rounded environment, consider building multiple types of platforms:
- High Platform: Perfect for your cat to survey the surroundings and enjoy sunshine.
- Middle Platform: Ideal as a quiet spot for naps and playtime.
- Low Platform: Useful for easy access and casual lounging near where you spend most of your time.
If budget is a concern, here are some practical advice to keep costs down while enhancing functionality:
- Repurpose Old Furniture: Instead of buying new materials, look around your home for old wooden crates or furniture pieces that can be repurposed into cat platforms.
- DIY Decorations: Use paint and brushes to give the platforms a unique look without spending extra money on fancy decorations.
- Choose Multi-Purpose Platforms: Opt for versatile designs where your cat can use one platform in multiple ways, reducing the need for buying additional pieces.
Here are answers to some common questions about building platforms for cats:
- How often should I clean my cat's platform?
- Clean the platform weekly or as needed, especially if your cat uses it frequently. Use mild soap and water.
- Do I need to add any special features?
- You can add vertical scratching posts or hanging toys to keep your cat entertained while they relax on their platforms.
- How do I know if my platform is too high for my cat?
- If you notice that your cat struggles to access the platform, consider lowering it slightly. Always ensure safety and comfort when positioning platforms.
Adding Perches and Hiding Spots for Privacy
Incorporating perches and hiding spots into your cat tree is not only about aesthetics but also about creating a secure and comfortable space where your feline friend can relax, hide, or simply observe the world from a safe vantage point. This section will guide you through how to add these essential elements to your budget-friendly cat tree project.
Why Perches and Hiding Spots?
Cats are naturally territorial animals that enjoy having areas where they can feel secure. By adding perches at different levels of the cat tree, you're giving your cat multiple places to climb and rest in various spots. Similarly, hiding spots provide a sense of security and comfort, especially if your home is noisy or busy.
- Perches: Provide your cat with elevated spaces where they can watch over the household without feeling threatened.
- Hiding Spots: Offer them a quiet place to retreat when they need some alone time.
DIY Tips for Adding Perches and Hiding Spots
Building perches and hiding spots into your cat tree can be done with minimal cost and effort. Here are some practical tips:
Perches:
- Select the Right Size: Make sure the perch is not too large for your cat to easily sit on it comfortably.
- Secure Attachments: Use strong, non-slip materials like carpet or sisal to attach the perches. This will prevent slipping and provide comfort for your kitty.
- Vary the Heights: Include several levels of perches at different heights to suit various personalities and energy levels in your household.
Hiding Spots:
- Create a Comfortable Environment: Use soft fabrics or cushions inside the hiding spot. You can also add scented pine cones or catnip to make it more appealing.
- Make It Accessible: Ensure that any hiding spots are easy for your cat to reach and exit, as they may choose to hide in them during stressful situations.
- Encourage Exploration: Place the hiding spot in a quiet corner of your home where it's less likely to be disturbed. This will encourage your cat to use it more often.
Examples and Case Studies
Here are some real-world examples that demonstrate how adding perches and hiding spots can enhance your cat tree:
- Example 1: A budget-friendly cat tree was built using old wooden pallets. Perches were created by attaching small pieces of carpet to the pallets at different heights, providing various levels for the cat to rest and observe its surroundings.
- Example 2: A family with a shy cat had their cat tree designed with multiple hiding spots using fabric-covered cardboard boxes. These were placed in quiet areas around the house, encouraging the cat to use them when needed.
Finding Inspiration
For further ideas on how to incorporate perches and hiding spots into your budget-friendly cat tree project, you can visit online forums or YouTube tutorials dedicated to DIY pet projects. Websites like Home Depot also offer inspiration for upcycling materials into cat trees.
Conclusion
Including perches and hiding spots in your budget-friendly cat tree project is a great way to create a safe, comfortable space that will keep your cat happy and healthy. By following these tips and utilizing the resources available online, you can build a cat tree that meets both your financial constraints and your pet's needs.
DIY Cat Tree with Built-in Storage Solutions
Building a DIY cat tree with built-in storage solutions can be an excellent way to enhance your home decor while providing your feline friend with a fun and functional space. By incorporating storage into your cat tree, you are not only creating a cozy retreat for your pet but also making efficient use of your living space. This project is budget-friendly and easy to execute, offering both aesthetic appeal and practicality.
- Plywood or MDF boards (for the base)
- Particle board (for additional support)
- Wooden beams or dowels (for the frame)
- Hardware and screws
- Carpenter's saw or circular saw
- Sander for smooth edges
- Paint or wood stain (optional, for finishing touch)
- Fabric (optional, for covering the tree)
When designing your cat tree with built-in storage, consider the following:
- Size and Shape: Ensure that the size of the cat tree is appropriate for the number of cats you have. A simple L-shape or multi-level design can provide multiple resting spots.
- Storage Space: Decide where you want to place the storage compartments. They could be at the base, sides, or even on the top levels of the tree.
- Purpose: Think about what kind of items you might store in the cat tree. It could be toys, treats, or even your favorite reading material!
- Measure and Cut: Measure out all necessary pieces of wood based on your design plans. Use a saw to cut the plywood, particle board, and wooden beams or dowels into the required sizes.
- Assemble the Frame: Begin by assembling the main structure using screws and hardware. Make sure it is sturdy enough to hold up the weight of your cat and any stored items.
- Create Storage Compartments: For storage compartments, you can use shallow drawers or simply cut out spaces in the sides or base of the tree. Secure them with hinges or brackets.
- Add Upholstery (Optional): If desired, cover your cat tree with fabric to give it a personalized touch. Ensure that the material is safe for cats and easy to clean.
- Finish: Sand down any rough edges, then paint or stain the tree if you want to change its appearance. Allow it to dry thoroughly before placing it in your home.
- Start with a Plan: Before cutting any wood, sketch out your design and measure twice to ensure accuracy. This will save you time and materials.
- Use Quality Materials: Invest in good quality plywood or MDF boards for durability. Cheap materials can lead to a less stable structure over time.
- Test Stability: Once the tree is assembled, gently shake it to check its stability. Make any necessary adjustments before adding storage compartments and finishing touches.
- Encourage Cat Use: Place some of your cat's favorite toys or treats on the tree to encourage them to use their new space.
Building a DIY cat tree with built-in storage solutions is both a fun and rewarding project. By following these steps, you can create a functional and stylish addition to your home that will be enjoyed by both you and your pet for years to come.
Incorporating Toys and Tunnels for Interactive Fun
Building a cat tree can be both fun and rewarding for your feline companion, but it doesn't have to break the bank. By incorporating toys and tunnels into your cat tree design, you not only enhance its structural appeal but also provide endless entertainment options that keep your cat physically active and mentally stimulated.
Enhancing Your Cat Tree with Toys and Tunnels
When building a budget-friendly cat tree, consider adding toys and tunnels to the design. These additions can make your cat’s playtime more engaging and rewarding, ensuring that your pet stays healthy both physically and mentally.
Incorporating Toys into Your Cat Tree
- Stuffed Toys: Stuffed toys are a favorite among cats. Attach them to the branches of your cat tree so they can bat at, pounce on, and play with them. This not only keeps your cat entertained but also strengthens the bond between you and your pet.
- Feather Wands: Feather wands are great for playing interactive games where you move the toy around to get your cat’s attention. You can dangle these from branches or hide them in different parts of the tree, encouraging exploration.
- Bird Feathers: Real bird feathers can be attached to the tree with safety pins, providing an intriguing visual and auditory stimulation for your cat. However, ensure that you choose only synthetic options if you're using real feathers to avoid any health hazards.
Incorporating Tunnels into Your Cat Tree
Tunnels are fantastic for extending the fun and play experience of your cat tree. They allow your cat to explore and have a sense of adventure, which is crucial for their psychological well-being.
- Cardboard Tunnels: Cardboard tunnels can be easily made at home using old cardboard boxes. Cut the top off the box to create a tunnel shape, then use duct tape or hot glue to reinforce it. Attach this tunnel to your cat tree for some added fun.
- Pvc Pipe Tunnels: PVC pipe tunnels are durable and can be painted in various colors to match your home decor. They're also easy to clean, making them a hygienic option for your pet’s play area.
Practical Tips for Designing Your Cat Tree
To ensure that the cat tree you build is both functional and appealing, follow these practical tips:
- Ease of Use: Make sure that your cat can easily climb up and down the tree. Cats are agile but still need a sturdy structure to help them navigate the tree without any difficulty.
- Variety of Levels: Include multiple levels with different heights so that your cat can explore various areas of the tree, which is important for their physical exercise and mental stimulation.
- Hiding Spots: Cats love to have places where they can hide. Incorporate small nooks and crannies into your design to give them this space.
Conclusion
Incorporating toys and tunnels into a budget-friendly cat tree is a smart decision that provides numerous benefits for your feline friend. Not only does it enhance the structural appeal of the tree, but it also ensures that your pet has plenty of interactive fun, keeping them healthy and happy.
Maintaining Your DIY Cat Tree for Longevity
Conclusion
Building a cat tree on a budget doesn't have to mean compromising on quality or design. With some creativity and resourcefulness, you can create an elegant and functional space for your feline friend without breaking the bank. Here are several steps, tips, and examples that can guide you through the process.
- Gather Materials: The first step is to gather all necessary materials. You don't need expensive supplies; simple items like cardboard boxes, old furniture, or wooden planks can serve as a base. For example, an old dresser drawer can be repurposed into a scratching post by attaching sisal rope to it.
- Design and Planning: Sketch out your design on paper before starting the project. This helps you visualize the final product and ensures all pieces fit together properly. Consider the size of your cat and how they will use different parts of the tree. A good rule of thumb is to ensure there's enough space for them to climb and perch comfortably.
- Building the Base: Start with a sturdy base, which can be made from various materials depending on what you have available. For instance, an old piece of furniture or a large cardboard box can work well as a foundation. Ensure it is stable enough to support the entire structure and that it won't tip over.
- Adding Ladders and Platforms: Once your base is in place, add ladders and platforms. Sisal rope is perfect for climbing and provides an ideal scratching surface. You can also use fabric or carpeting to provide cozy spots where your cat can rest. For example, old curtains cut into squares can be attached to the tree as resting pads.
- Decorate and Finalize: Once your structure is built, add some decorative elements like feathers, bells, or even a small toy. This not only makes the tree more appealing but also keeps it interesting for your cat. Decorations should be safe and non-toxic to prevent any potential health risks.
- Use What You Have: One of the best ways to save money is by using items you already own. Old furniture, discarded pieces, and even household supplies can be repurposed into a cat tree. This approach not only cuts costs but also gives new life to items that might otherwise go unused.
- DIY Scratching Posts: Instead of buying commercial scratching posts, which can be pricey, make your own using materials like cardboard or old carpeting. These can be easily replaced when they start to wear out, making them a cost-effective solution.
- Recycle and Reuse: Look for materials that are already available in your home or community. For example, you could collect branches from the garden or ask friends and family if they have any old furniture pieces that could be used. This practice encourages sustainability while also reducing waste.
Here are a few examples of cat trees made on a budget:
- Cardboard Box Tree: Cut different-sized boxes to form the structure. Use duct tape or glue to secure them together and add sisal rope for climbing. This type of tree is easy to build and can be disassembled if you need to move it.
- Vintage Furniture Tree: Refurbish an old dresser or chest by adding platforms, ladders, and scratching posts. The rustic charm adds a unique touch to your home while providing entertainment for your cat.
- Built-In Bookshelf: If you have a built-in bookshelf that goes unused, transform it into a cat tree. Attach sisal rope to the shelves and add perches and platforms as needed. This adds a functional and stylish element to your home decor.
In conclusion, building a cat tree on a budget is both rewarding and cost-effective. By following these steps, tips, and examples, you can create a beautiful and practical space for your cat without spending a fortune. Remember, the key is to be creative and resourceful while keeping safety in mind.
FAQ
Building your own cat tree can be an exciting project that not only saves money but also allows you to customize the design and space according to your cat's preferences. Here are some frequently asked questions along with detailed answers to help guide you through the process.
Q: What materials do I need to build a simple cat tree on a budget?
A: You can start by gathering basic materials that you might already have at home. Here’s what you'll typically need:
- Plywood or chipboard
- Wood glue
- Nails or screws
- Paint or stain (optional)
- Catnip
Q: How do I choose the right size for my cat tree?
A: The perfect size depends on your space and the number of cats you have. Here are some tips:
- If you only have one cat, a small tree (around 2-3 feet tall) might suffice.
- For two or more cats, aim for a larger structure that provides multiple levels and climbing areas.
- Measure your available space before starting to ensure the tree fits comfortably in your home.
Q: What type of design should I choose?
A: Consider your cat's preferences and behavior. Cats love vertical spaces, so a tree with multiple levels is ideal. Here are some popular designs:
- Triangle Design: This design provides stability and can be built using simple materials. Ensure the triangle base is wide enough to support your cat's weight.
- Tower Design: Perfect for smaller spaces, this design offers multiple levels with minimal footprint.
- L-shaped or U-shaped Design: These designs offer more climbing options and are suitable for larger areas.
Q: How do I add cat-friendly features?
A: Incorporating elements that cats find appealing can make your tree a favorite spot. Here are some ideas:
- Catnip: Sprinkle dried catnip on the climbing surfaces to entice your cat.
- Soft Padding: Add soft, plush padding for resting areas where cats can feel cozy.
- Hanging Toys: Attach small toys or scratch pads that hang down for your cat to play with.
Q: What are some budget-friendly ideas?
A: Saving money doesn’t mean sacrificing quality. Here are some cost-effective tips:
- Recycle Materials: Use old furniture or materials you already have at home.
- DIY Scratching Posts: Instead of buying commercial scratching posts, make your own using cardboard or wood scraps.
- Purchase Secondhand: Look for affordable secondhand materials on platforms like Craigslist or Facebook Marketplace.
Q: How do I ensure the tree is safe and sturdy?
A: Safety should be a top priority. Here are some safety checks:
- Stability: Ensure the base of your tree is wide enough to prevent tipping.
- Mitered Edges: Use mitered edges for corners and sharp surfaces to avoid any cuts or injuries.
- Anti-Slip Feet: Attach anti-slip feet to the bottom of each leg to keep your tree stable.
Q: How do I start building?
A: Here’s a step-by-step guide to get you started:
- Measure and Plan: Before cutting any materials, measure your space and plan the layout.
- Cut Plywood: Cut plywood into the desired shapes for each level of the tree.
- Screw or Nail Together: Assemble the pieces using screws or nails. Start with the base and build upwards.
- Paint or Stain (Optional): If you want to match your home decor, paint or stain the wood.
- Add Features: Add cat-friendly features like padding, catnip, and hanging toys.
Building a cat tree on a budget is not only rewarding but also provides endless entertainment for your furry friend. With careful planning and creative thinking, you can create a safe and stimulating environment that your cats will love!
Categories
- AI & Enrichment Play
- Broiler Farming
- Broiler Farming Tips
- Canine Wellness & Longevity
- Cat
- Cat & Human Connection
- Cat Adoption & Rescue
- Cat Breeds
- Cat Breeds & Personalities
- Cat Care & Health
- Cat Grooming & Hygiene
- Cat Lifestyle & Environment
- Cat Myths & History
- Cat Nutrition & Diet
- Cat Products & Reviews
- Cat Training & Behavior
- Comparison
- Consumer Awareness
- Dog
- Dog Accessories & Products
- Dog Adoption & Rescue
- Dog Breed & Lifestyle Trends
- Dog Breeding & Puppies
- Dog Entertainment & Media
- Dog Fashion & Trends
- Dog Fun & Lifestyle
- Dog Grooming & Hygiene
- Dog History & Culture
- Dog Myths, Science & Future Tech
- Dog News & Trends
- Dog Nutrition & Food
- Dog Psychology & Emotions
- Dog Safety & Security
- Dog Sports & Activities
- Dog Technology & Innovation
- Dog Training for Modern Owners
- Dog Travel & Adventure
- Dog Travel, Adventure & Culture
- Economic and Market Insights
- Educational Content
- FAQs
- Feeding Alternatives
- Festivals & Seasonal Ideas
- Fun & Entertainment
- General Knowledge
- General Pig Farming
- Health & Disease Management
- Housing and Environment
- Kittens
- Market Insights
- Miscellaneous
- Miscellaneous
- Motivational
- pig
- Pig Breeding
- Pig Breeds
- Pig Farming Stories and Inspiration
- Pig Health and Care
- Pig Nutrition
- Pig Products
- Profitability & Business
- Puppy Care
- Puppy Predictable Topics Reinvented
- Regional Focus
- Rescue & Adoption Buzz
- Senior Cats
- Senior Dog Care
- Smart Dog Tech & Gadgets
- Sustainability
- Sustainable & Eco-Friendly Dog Products
- Tech & Innovations
- Working & Service Dogs
- Broiler Feed66 products
- Country Feed33 products
- Pig Feed66 products
- Product22 products
- Raw Materials99 products
Products
-
 Fish Meal
₹1,999.00 – ₹2,999.00Price range: ₹1,999.00 through ₹2,999.00Rated 0 out of 5
Fish Meal
₹1,999.00 – ₹2,999.00Price range: ₹1,999.00 through ₹2,999.00Rated 0 out of 5 -
 FATTENING BROILER FEED
₹2,299.00 – ₹2,349.00Price range: ₹2,299.00 through ₹2,349.00Rated 0 out of 5
FATTENING BROILER FEED
₹2,299.00 – ₹2,349.00Price range: ₹2,299.00 through ₹2,349.00Rated 0 out of 5 -
 LAYER COUNTRY FEED
₹1,549.00 – ₹1,649.00Price range: ₹1,549.00 through ₹1,649.00Rated 0 out of 5
LAYER COUNTRY FEED
₹1,549.00 – ₹1,649.00Price range: ₹1,549.00 through ₹1,649.00Rated 0 out of 5 -
 COUNTER BROILER FEED
₹1,199.00 – ₹1,299.00Price range: ₹1,199.00 through ₹1,299.00Rated 0 out of 5
COUNTER BROILER FEED
₹1,199.00 – ₹1,299.00Price range: ₹1,199.00 through ₹1,299.00Rated 0 out of 5 -
 LACTATING PIG FEED
Rated 0 out of 5
LACTATING PIG FEED
Rated 0 out of 5₹2,299.00Original price was: ₹2,299.00.₹1,740.00Current price is: ₹1,740.00. -
 Maize
Rated 0 out of 5
Maize
Rated 0 out of 5₹1,650.00Original price was: ₹1,650.00.₹1,300.00Current price is: ₹1,300.00. -
 GESTATION PIG FEED (Phase 1)
Rated 0 out of 5
GESTATION PIG FEED (Phase 1)
Rated 0 out of 5₹2,249.00Original price was: ₹2,249.00.₹1,699.00Current price is: ₹1,699.00. -
 Pre Starter Broiler Feed
₹2,399.00 – ₹2,499.00Price range: ₹2,399.00 through ₹2,499.00Rated 0 out of 5
Pre Starter Broiler Feed
₹2,399.00 – ₹2,499.00Price range: ₹2,399.00 through ₹2,499.00Rated 0 out of 5 -
 FINISHER PIG FEED
Rated 0 out of 5
FINISHER PIG FEED
Rated 0 out of 5₹2,299.00Original price was: ₹2,299.00.₹1,749.00Current price is: ₹1,749.00. -
 Broiler Premix
Rated 0 out of 5
Broiler Premix
Rated 0 out of 5₹820.00Original price was: ₹820.00.₹699.00Current price is: ₹699.00.