
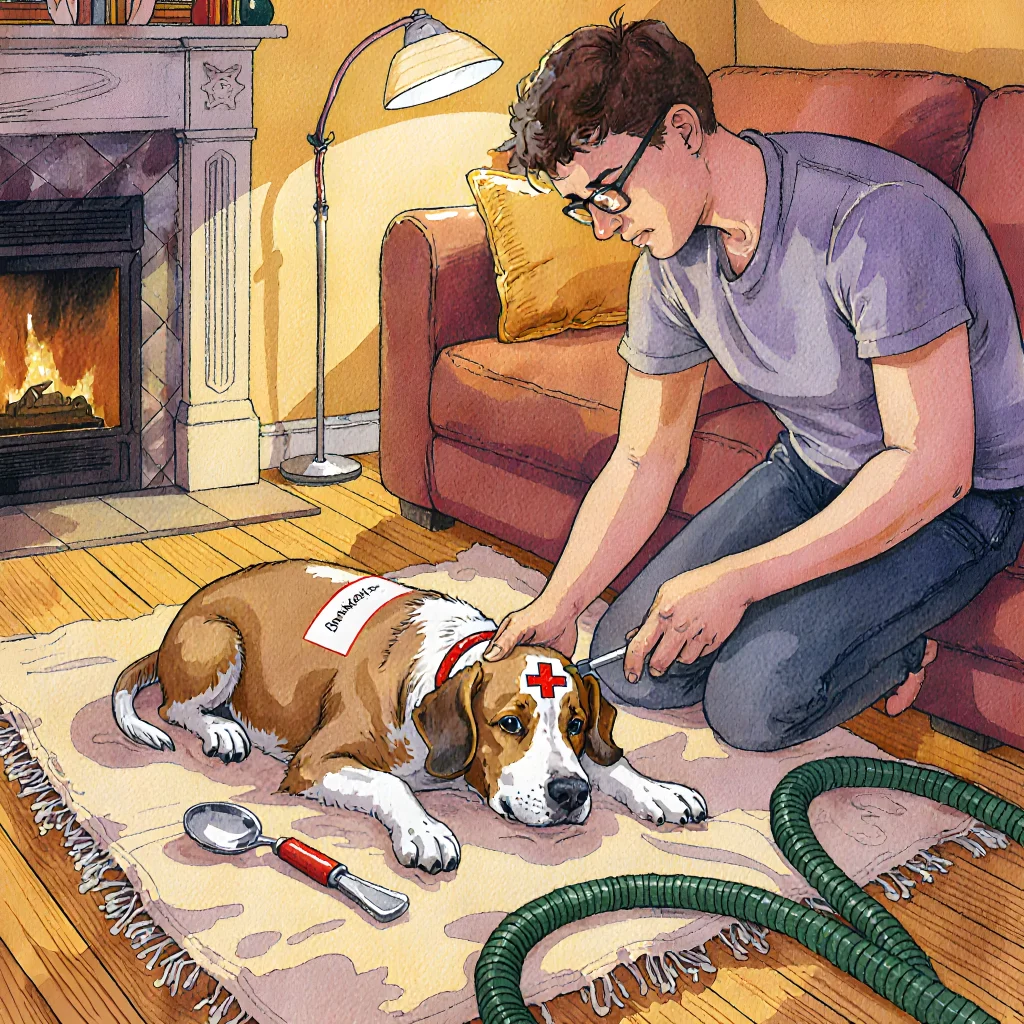
Quick Rescue: Surprising Tools for Your Pet’s Health
Fur‑Friend First Aid: Unexpected Tools for Quick Recovery
Table of Contents
- Introduction
- Basic First Aid Supplies Every Kit Should Have
- Bandages, Gauze and Tape for Dogs
- Antiseptic Solutions and Wound Cleaners
- Pain Relief Options for Canine First Aid
- Emergency Medications (e.g., EpiPen, Antivenom)
- Tools for Restraint and Safe Handling
- Temperature Control: Ice Packs and Cooling Mats
- Eye Care Supplies (e.g., Eye Wash, Contact Lens Solution)
- Ear Cleaning and Decontamination Products
- Dental First Aid Items (toothbrush, toothpaste, dental wipes)
- Emergency Contact List and Vet Information
- First Aid Instructions Sheet and How-To Guides
- Conclusion
- FAQ
Introduction
Having a well-stocked first‑aid kit on hand can mean the difference between a minor injury that heals quickly and a serious emergency that could cost your pet dearly. Below is a comprehensive guide to the items every dog owner should keep in their home, car, or travel bag, along with practical tips for how to use them.
1. Basic Supplies
- Sterile gauze pads (2–4” x 2–4”): Use these to cover cuts, scrapes, or lacerations. Choose non‑adhesive gauze for delicate skin.
- Adhesive tape (3–5” rolls of medical or pet‑specific tape): Secure gauze in place without causing irritation.
- Scissors (small, rounded tip): Ideal for trimming gauze or removing splinters. Keep a separate pair from the ones used for household tasks to avoid cross‑contamination.
- Pet‑safe tweezers: For extracting fleas, ticks, or small foreign objects.
- Disposable gloves (latex or nitrile): Protect both you and your dog from bloodborne pathogens. Store a pair per hand for quick access.
2. Medications & Remedies
- Antiseptic wipes (pet‑safe, e.g., chlorhexidine or povidone‑iodine): Clean wounds before applying gauze. Avoid alcohol‑based products that can burn raw skin.
- Pet‑specific pain relievers: Keep a small bottle of an approved canine NSAID (e.g., carprofen) if prescribed by your vet. Never give human pain medication.
- Anti‑nausea gel or tablets: Useful for motion sickness during travel. Confirm dosage with your veterinarian first.
3. Emergency Tools
- Digital thermometer (oral/rectal): Helps detect fevers quickly. A digital probe is more accurate than a mercury thermometer.
- Heart rate monitor or stethoscope: For checking pulse and breath sounds during an emergency.
- Emergency contact list (vet, 24‑hour animal hospital): Store both printed and digital copies.
- Flashlight & extra batteries: Essential for low‑visibility situations or nighttime emergencies.
4. Special Items for Common Situations
- Treatment for choking: A small, soft rubber tube (like a suction catheter) can help dislodge obstructions.
- Water‑soluble oral rehydration solution: Helps prevent dehydration after vomiting or diarrhea.
- First‑aid manual or quick‑reference card: A laminated guide with step‑by‑step instructions for common injuries.
5. Storage & Maintenance Tips
- Keep the kit in a waterproof, insulated pouch that fits easily in your car trunk or backpack.
- Check expiration dates on medications and antiseptics every six months; replace as needed.
- Replace gloves and gauze after each use to avoid contamination.
- Periodically review the contents with a veterinarian to ensure all items remain appropriate for your dog’s size, breed, and health conditions.
Practical Example: Treating a Minor Bite
Step 1: Put on disposable gloves.
Step 2: Rinse the wound with lukewarm water for at least 30 seconds.
Step 3: Apply an antiseptic wipe and pat dry gently.
Step 4: Place a sterile gauze pad over the bite, secure it with adhesive tape.
Step 5: Monitor for swelling or discharge; contact your vet if symptoms worsen.
By equipping yourself with these essential items and knowing how to use them, you’ll be prepared to handle most minor emergencies quickly and safely—giving your dog the best chance at a swift recovery.
Basic First Aid Supplies Every Kit Should Have
If you’re a dog owner, your first aid kit is an essential part of responsible pet ownership. A well-stocked kit can be the difference between a minor injury that resolves quickly and a situation that requires emergency veterinary care. Below are the core supplies every dog‑owner’s kit should contain, along with practical tips for selecting and using each item.
1. Sterile Gauze Pads (10 × 10 cm)
- Purpose: Control bleeding, cover wounds, or apply dressings.
- How to use: Gently press the pad onto a cut or abrasion. Replace with a fresh pad every few hours or when it becomes saturated.
- Tip: Keep at least 10 pads in your kit; store them in an airtight container to preserve sterility.
2. Adhesive Tape (medical grade, 1 cm wide)
- Purpose: Secure gauze, bandages, or splints.
- How to use: Wrap the tape around the gauze or dressing, ensuring it does not wrap too tightly over a joint.
- Tip: Choose a hypoallergenic option if your dog has sensitive skin.
3. Antiseptic Wipes (povidone‑iodine or chlorhexidine)
- Purpose: Clean wounds, remove debris, and reduce infection risk.
- How to use: Swab the wound area gently in a circular motion. Allow the wipe to dry before applying gauze.
- Tip: Store wipes in a sealed bag; replace them after 3–5 uses to maintain effectiveness.
4. Sterile Bandage Roll (15 × 10 cm)
- Purpose: Wrap larger wounds, provide compression for sprains, or create a splint base.
- How to use: Apply the roll over gauze and secure with adhesive tape. Use a figure‑of‑eight pattern for maximum support.
- Tip: Keep at least 5 rolls in your kit; store them in a cool, dry place.
5. Scissors (rounded tip)
- Purpose: Cut gauze, tape, or clothing that may be blocking an injury.
- How to use: Use a gentle, controlled motion to avoid cutting the dog’s skin.
- Tip: Choose scissors with a safety guard on the blade to prevent accidental cuts while handling your pet.
6. Tweezers (fine‑pointed)
- Purpose: Remove splinters, ticks, or foreign objects from fur and skin.
- How to use: Grasp the object firmly, pull in the direction it entered, and wipe away any debris.
- Tip: Use tweezers with a smooth, non‑abrasive tip to avoid irritating the dog’s skin.
7. Elastic Bandage (5 cm wide)
- Purpose: Provide compression for sprains or support for injured limbs.
- How to use: Wrap around the limb in a spiral pattern, starting at the distal end and working proximally. Do not wrap tighter than the dog’s normal joint movement allows.
- Tip: Keep 3–4 rolls; store them in a separate pouch within your kit to avoid contamination with other items.
8. Disposable Gloves (latex or nitrile, size medium)
- Purpose: Protect you and your dog from bloodborne pathogens during wound care.
- How to use: Wear a glove before handling any injury; discard after each use.
- Tip: Have at least 5 pairs in the kit. Consider nitrile gloves if you or your dog has latex allergies.
9. Emergency Contact Sheet
- Purpose: Quick reference for emergency veterinary clinics, poison control, and your own contact information.
- How to use: Keep the sheet on hand or attach it to the outside of the kit’s pouch.
- Tip: Update the list annually and store a backup in your smartphone or email.
10. First Aid Manual (dog‑specific)
- Purpose: Step‑by‑step instructions for common canine emergencies, such as choking, heatstroke, or bleeding.
- How to use: Refer to the manual before acting on an emergency. The guide should include diagrams and checklists.
- Tip: Keep a digital copy on your phone for easy access when you’re away from home.
Practical Storage Tips
- Use a waterproof pouch: Protect contents from moisture and accidental spills.
- Label everything: Color‑code or write the name of each item on its container to avoid confusion during high‑stress situations.
- Check expiration dates: Replace antiseptic wipes, gloves, and any medications that expire annually.
Having a well‑organized first aid kit tailored for dogs ensures you’re prepared to handle most minor emergencies quickly and safely. Keep it easily accessible—whether in your car, backpack, or home—so you can act with confidence when your furry friend needs help.
Bandages, Gauze and Tape for Dogs
When it comes to caring for a wounded pet, having the right type of bandage material can make all the difference. Unlike human first‑aid kits, dog supplies must accommodate a larger range of sizes, varying skin sensitivities, and an active lifestyle that may require quick removal or adjustment.
Choosing the Right Bandage Material
- Non‑adhesive gauze: Ideal for covering open wounds. It keeps debris out while allowing the skin to breathe, reducing infection risk.
- Self‑adhesive bandages (e.g., Vet Wrap): These are great for minor cuts or lacerations where a secure seal is needed without glue. They come in various widths to suit small paws or larger limbs.
- Elastic stretch bandage: Useful for sprains, strains, or post‑surgery support. The elasticity helps maintain gentle compression and encourages circulation.
- Waterproof bandages: For dogs that love water activities or are prone to licking wounds. These keep moisture out but still allow airflow.
Practical Steps for Bandaging a Dog
- Clean the wound: Gently rinse with lukewarm water and mild antiseptic. Pat dry with a clean gauze pad.
- Apply a non‑adhesive dressing: Place a layer of sterile gauze over the area to absorb any fluid and protect from dirt.
- Wrap or tape: If using an elastic bandage, start at the farthest point from the wound (e.g., ankle for a leg injury) and wrap toward the wound. Secure with medical tape or a second layer of gauze if necessary.
- Check circulation: Ensure the bandage isn’t too tight by checking for color changes, swelling, or numbness beyond the wound.
- Secure with veterinary adhesive tape: For long‑term support, apply a strip of Vet Tape over the elastic bandage to keep it in place.
Troubleshooting Common Issues
| Issue | Solution |
|---|---|
| Bandage slips off quickly | Use a higher‑quality adhesive tape or add an extra layer of gauze. |
| Dog keeps licking the wound | Consider a protective cone (Elizabethan collar) or a waterproof bandage. |
| Skin irritation at tape edges | Switch to hypoallergenic tape and apply a thin layer of petroleum jelly before taping. |
When to Seek Professional Help
If the wound is deep, bleeding heavily, or if you notice signs of infection (redness, swelling, foul odor), contact your veterinarian immediately. For large or complex injuries—such as fractures or severe lacerations—a professional assessment ensures proper alignment and healing.
Recommended Products for Your First Aid Kit
- Vet Wrap (self‑adhesive): Available in 4‑inch, 6‑inch, and 8‑inch widths. Keeps wounds clean and secure.
- Non‑Adhesive Gauze Pads: Sterile, pre‑cut to fit small paws or larger limbs.
- Elastic Bandage (Vet Tape): 5‑inch wide, with a built‑in adhesive strip for extra security.
- Waterproof Bandage Sheets: Ideal for dogs that enjoy swimming or are prone to licking.
By understanding the types of bandages and their proper application, you can provide effective first aid that promotes quick recovery while minimizing discomfort for your canine companion.
Antiseptic Solutions and Wound Cleaners
If your dog ever suffers a cut, scrape, or puncture wound, having the right antiseptic solution on hand can make the difference between a quick recovery and a serious infection. Below is a detailed guide to selecting, using, and storing effective wound cleaners that fit neatly into any first‑aid kit for dog owners.
1. Types of Antiseptics Suitable for Dogs
- Povidone‑Iodine (Betadine®): A broad‑spectrum antiseptic that works against bacteria, viruses, and fungi. Use a diluted solution (usually 10% in water) to avoid skin irritation.
- Chlorhexidine Gluconate: Effective against gram‑positive and gram‑negative bacteria. Ideal for superficial wounds; use the 0.05–0.1% concentration recommended by veterinarians.
- Aldehyde Solutions (e.g., Polyhexamethylene Biguanide): These have low toxicity to dogs but are less commonly available in pet stores.
- Hydrogen Peroxide: Good for cleaning the wound initially, but it can damage healthy tissue if left on too long. Use only once or twice during the first wash.
2. Practical Steps for Cleaning a Dog’s Wound
- Restrain gently: Keep your dog calm and still to avoid further injury. A helper can hold the animal or use a towel wrap.
- Rinse with cool water: Remove dirt and debris using a gentle stream of lukewarm tap water or a sterile saline solution.
- Apply antiseptic: Using a clean gauze pad, dab the wound with your chosen antiseptic. Avoid pouring directly onto the wound; this can cause discomfort.
- Repeat if necessary: For deep cuts, rinse and reapply until no visible blood or debris remains.
- Cover lightly: Use a non‑adherent dressing or clean gauze to protect the area. Change dressings daily or as needed.
3. Choosing the Right Antiseptic for Your Kit
When stocking your first aid kit, consider the following:
- Veterinary recommendation: Ask your vet which antiseptics they endorse for home use.
- Allergy potential: Some dogs may react to iodine or chlorhexidine. Keep a small patch test area on a less sensitive part of the body if you’re unsure.
- Packaging: Look for 5‑ml or 10‑ml squeeze bottles that are easy to open and dispense. Clear labeling helps avoid confusion during an emergency.
- Shelf life: Most antiseptic solutions have a 12‑month expiration. Replace them annually to maintain efficacy.
4. Storage Tips
Keep your antiseptic solutions in a cool, dry place—ideally inside the pet’s first aid kit. Avoid direct sunlight and extreme temperatures that can degrade active ingredients. Label each bottle with its contents and expiration date for quick reference.
5. When to Seek Professional Care
- The wound is deep, gaping, or larger than a few centimeters.
- There are signs of infection: redness spreading beyond the wound, pus, foul odor, or swelling.
- Your dog shows pain that doesn't improve after cleaning and dressing changes.
In such cases, promptly contact your veterinarian or an emergency animal clinic. While a clean wound can often be managed at home, early professional intervention reduces the risk of complications like abscess formation or systemic infection.
Pain Relief Options for Canine First Aid
When your dog experiences an injury or sudden discomfort, the goal of first‑aid pain relief is to reduce suffering while you wait for professional help. Below are proven, safe options that can be used at home—provided you follow the guidelines in your First Aid Kit Essentials for Dog Owners checklist.
1. Over‑the‑Counter NSAIDs (Never Use Human Medications Unapproved by a Vet)
- Aspirin: Can be given in small, veterinary‑recommended doses (usually 10–15 mg/kg every 8–12 hours). Do NOT give if your dog is pregnant, has liver disease, or is on blood thinners.
- Non‑steroidal anti‑inflammatory drugs (NSAIDs) approved for dogs: Examples include carprofen (Rimadyl), meloxicam (Metacam), and deracoxib (Deramaxx). These should be administered strictly according to the vet’s prescription.
Always keep a log of dosage, time, and reaction. If you notice vomiting, diarrhea, or lethargy, contact your veterinarian immediately.
2. Veterinarian‑Prescribed Medications
- Opioids (e.g., tramadol, buprenorphine): Used for moderate to severe pain; dosage and frequency are strictly controlled.
- Local anesthetics (lidocaine, bupivacaine): Applied by a vet in the field or at home under veterinary guidance when dealing with joint or nerve injuries.
Never self‑prescribe; always follow your vet’s instructions and never combine opioids with other sedatives unless advised.
3. Complementary Pain Management
- Cold/Heat Packs: Use a cold compress (ice wrapped in a towel) for the first 24–48 hours after an acute injury to reduce swelling. Switch to a warm compress afterward to increase circulation and relieve stiffness.
- Massage & Gentle Stretching: Light, rhythmic massage around the affected area can improve blood flow. Avoid deep pressure on bruised or fractured tissue.
- Omega‑3 Supplements (Fish Oil): Known for anti‑inflammatory properties; add 1–2 ml per 10 kg of body weight daily as a long‑term strategy to reduce chronic joint pain.
4. Watch for Red Flags
If your dog shows any of the following, call your vet right away:
- Persistent crying or whimpering after pain medication.
- Difficulty breathing or rapid heart rate.
- Vomiting, diarrhea, or loss of appetite.
- Swelling that does not improve or worsens after 48 hours.
5. Keep Your Pain Relief Supplies in the First Aid Kit
Your kit should include:
- A properly labeled bottle of veterinarian‑prescribed pain medication.
- An emergency dosage chart (e.g., mg/kg, dosing intervals).
- Ice packs or a reusable gel pack for immediate cold therapy.
- Adhesive bandages and gauze to cover any wound before applying medication.
Review the First Aid Kit Essentials checklist periodically to ensure you have fresh supplies, especially if your dog has chronic conditions that require regular pain management.
Emergency Medications (e.g., EpiPen, Antivenom)
While most pet owners focus on the physical components of a first‑aid kit—bandages, gauze, and tweezers—it’s equally important to consider emergency medications that can save your dog’s life in critical situations. Below is a practical guide for selecting, storing, and using key medications safely.
1. Epinephrine Auto‑Injectors (EpiPen)
- Purpose: Treat severe allergic reactions (anaphylaxis) that can cause breathing difficulty, swelling, and shock.
- When to Use: If your dog shows signs of anaphylaxis—rapid heart rate, drooling, hives, or sudden collapse—administer the injector immediately.
- How It Works: The auto‑injector delivers a single dose of epinephrine directly into the muscle (usually the thigh).
- Practical Tips:**
- Keep the injector in an easily accessible spot—inside your first aid kit or on a keychain.
- Check expiration dates every six months and replace as needed.
- After use, keep the dog under veterinary care; epinephrine is only a bridge to professional treatment.
2. Antivenom (Snake Venom Immunoglobulin)
- Purpose: Neutralize venom from snake bites, reducing systemic toxicity and local tissue damage.
- When to Use: Only administer if you have a confirmed or highly suspected snake bite. Misusing antivenom can cause adverse reactions.
- How It Works:**
- The immunoglobulin binds to venom components, preventing them from interacting with body tissues.
- Typically administered intravenously by a veterinarian.
- Practical Tips:**
- Antivenom is usually only available at veterinary hospitals; consider carrying a “snake bite” emergency kit with a tourniquet, clean cloth, and instructions for rapid transport.
- If you suspect a snake bite, keep the limb immobilized and get to a vet immediately—do not attempt to apply antivenom yourself unless trained.
3. Antihistamines (e.g., Diphenhydramine)
For mild allergic reactions or itching, over‑the‑counter antihistamines can provide relief. Always use the dosage recommended by a vet—dogs are sensitive to human medication dosages.
4. Pain Relievers (Vet‑Approved NSAIDs)
Medications such as carprofen or meloxicam may be included in your kit for post‑injury pain control, but only under veterinary guidance due to potential side effects.
Storage and Safety Guidelines
- Temperature: Keep medications in a cool, dry place—ideally inside the first aid kit where it’s protected from extreme heat.
- Labeling: Clearly mark each medication with the dog’s name, dosage, and expiration date.
- Security: Store medications out of reach of children and other pets to prevent accidental ingestion.
When in Doubt—Call a Vet
Even with the best prepared kit, emergencies can be unpredictable. If you’re unsure about administering any medication or if symptoms persist after treatment, contact your veterinarian immediately.
Remember: Medication is only one component of emergency care—proper first aid technique and swift veterinary assistance are essential for your dog’s recovery.
Tools for Restraint and Safe Handling
When a dog is injured or needs to be moved for medical care, having the right tools can make the difference between a calm recovery and an escalating situation. Below are essential items you should keep in your first‑aid kit, along with practical tips on how to use them safely.
1. Dog‑Sized Restraint Harness
- Why it matters: A properly fitted harness distributes pressure evenly across the chest and shoulders, reducing the risk of injury when you need to restrain a frightened or aggressive dog.
- Choosing the right size: Measure your dog's chest width (between the shoulder blades) and length (from the base of the neck to the base of the tail). Most manufacturers provide a sizing chart; always err on the side of slightly larger for a snug fit.
- How to use it: Slide the harness over the dog’s head, secure the straps behind the ears and around the chest, then fasten the buckles. Practice putting it on with a calm dog so you can do it quickly during an emergency.
2. Soft‑Tipped Tongs or Grabbers
- Purpose: These tools allow you to gently hold a dog's limbs or body without applying direct pressure that could worsen a fracture or cause pain.
- Material: Look for stainless steel with rubberized tips; they’re durable yet gentle on the skin.
- Use case example: If your dog has a suspected broken leg, use tongs to lift and support the limb while you apply a splint or call for veterinary help.
3. Adjustable Slings (e.g., Pet Lifting Sling)
- When to use: Ideal for dogs that are too weak, severely injured, or have spinal issues. A sling distributes the dog's weight across the shoulders and hips.
- Installation steps:
- Place the sling under the dog’s belly, ensuring it doesn’t pinch any organs.
- Secure the loops around each shoulder.
- Attach the support arms to a stable surface or use a hand‑held lift for short distances.
4. Soft‑Edge Folding Crate or Transport Box
- Why it’s useful: A crate with padded sides can restrain a dog during transport to the vet, preventing sudden movements that could worsen an injury.
- Key features:
- Padded interior for comfort and protection.
- Secure latch system that’s easy to open in emergencies.
- Ventilation holes to keep the dog cool.
5. Portable Bed or Blankets with Reinforced Edges
- Application: Use these for temporary support if you need to keep a dog lying still on the ground (e.g., after an injury).
- Tip: Place a non‑slip mat underneath to prevent the dog from sliding.
6. Handheld Vacuum or Air Compressor for Splinting
- Use case: When creating a custom splint with foam or wood, a small air compressor can help set the material in place quickly and securely.
- Safety note: Ensure the dog’s skin is protected with gauze before applying pressure from the compressor.
7. Clear Instructions Card
- Print a laminated card that lists step‑by‑step instructions for restraining and handling an injured dog. Keep it in your kit so you can refer to it during high‑stress moments.
Practical advice:
- Practice sessions: Once a month, rehearse putting on the harness, using tongs, and setting up a sling with a calm dog. Muscle memory will save time during an emergency.
- Check for wear: Inspect all tools for cracks, fraying straps, or broken buckles before each use. Replace any damaged items immediately.
- Keep it accessible: Store the kit in a waterproof container under your garage or in a dedicated cabinet so you can grab it without hesitation.
By equipping yourself with these restraint and handling tools, you’ll be better prepared to keep your dog safe and comfortable while you seek professional care.
Temperature Control: Ice Packs and Cooling Mats
Keeping your dog cool during hot weather, after a strenuous activity, or when they have an injury is crucial for their health. Ice packs and cooling mats are inexpensive yet highly effective tools that should be part of every first‑aid kit for dog owners.
Why Temperature Control Matters
- Prevents Heat Stroke: Dogs can overheat quickly because they primarily cool themselves through panting. A sudden rise in body temperature can lead to organ failure.
- Reduces Swelling: For injuries like sprains or fractures, lowering the local temperature helps limit inflammation and pain.
- Soothes Burns: If a dog has been exposed to hot surfaces or chemicals, ice packs can help mitigate tissue damage.
Choosing the Right Ice Pack
Reusable Gel Packs: These are flexible and retain cold for hours. They can be pre‑frozen in a freezer or placed in a bag of ice.
Disposable Ice Wraps: Ideal for one‑time use, especially when traveling. They come in various sizes to fit different body parts.
Using Cooling Mats Effectively
- Pre‑cool the Mat: Place the mat in a cooler or refrigerator for at least 30 minutes before use.
- Wrap the Dog: Secure the mat around the dog’s neck, back, or paws with an adjustable strap. Ensure it does not obstruct breathing or circulation.
- Check Temperature Regularly: Every 10–15 minutes, feel for any frostbite risk—if the skin turns pale or feels numb, remove the mat and allow the dog to warm up slowly.
Practical Tips for Dog Owners
- Carry a Mini Kit: Keep a small bag with a reusable ice pack, a cooling towel, and a pair of gloves in your car or hiking pack.
- Use Ice Packs on Injuries: Apply for the first 24–48 hours after an injury. Place the pack over the affected area wrapped in a thin cloth to avoid direct skin contact.
- Hydration is Key: While using cooling methods, always provide fresh water and monitor for signs of dehydration.
- Know When to Seek Help: If your dog shows symptoms like excessive drooling, vomiting, or a rapid heart rate after cooling, consult a veterinarian immediately.
Example Scenario: Hiking with Your Dog
Imagine you’re on a hot trail and your dog begins to pant heavily. You pull out the reusable gel pack from its pouch, wrap it in a towel, and place it over their chest. While they cool down, you offer water and rest them in the shade. If they still seem overheated after 20 minutes, switch to a cooling mat that’s been chilled overnight, secure it around their neck, and monitor closely.
Conclusion
Ice packs and cooling mats are simple, versatile tools that can dramatically improve your dog’s safety during heat stress or injury. By integrating them into your first‑aid kit and following the guidelines above, you’ll be better prepared to keep your canine companion comfortable and healthy in any situation.
Eye Care Supplies (e.g., Eye Wash, Contact Lens Solution)
When it comes to keeping your furry friend safe and healthy, having the right eye care supplies in your first‑aid kit is essential. Dogs can get their eyes irritated or injured by a variety of everyday hazards—pollen, dust, splashes from food preparation, or accidental scratches from toys. Below are the key items you should keep on hand, along with practical tips for using them effectively.
1. Eye Wash (Sterile Saline Solution)
- What it is: A clear, odorless saline solution that mimics the eye’s natural tears. It helps flush out debris and soothe irritation without causing further damage.
- When to use: If you notice redness, swelling, or discharge, or if your dog has ingested something that might have gotten into the eye.
- How to apply:
- Hold the dog gently but firmly. A second person can help restrain them.
- Open the eye by pulling the upper eyelid upward and the lower eyelid downward.
- Hold the bottle or a clean syringe above the eye, angle it slightly toward the nose, and let a few drops run into the corner of the eye. The fluid will flow across the surface to flush out irritants.
- Repeat until you see clear drainage from the eye.
- Practical tip: Store the solution in a small, portable bottle that fits easily into your dog’s first‑aid kit. Label it clearly to avoid confusion with other liquids.
2. Contact Lens Solution (Non‑Preservative)
- What it is: A gentle cleaning solution designed for contact lenses, but its mild, non-preservative formula can also be used to rinse a dog’s eye if saline isn’t available.
- When to use: As an alternative when sterile saline is out of stock. It contains buffering agents that help maintain pH balance and reduce irritation.
- How to apply: Follow the same steps as for eye wash, but limit usage to a few drops at a time to avoid drying the eye.
- Practical tip: Keep an eye on the expiration date. Even mild solutions can become contaminated over time.
3. Sterile Gauze Pads & Cotton Swabs
- Use these to gently dab away any visible debris or discharge after rinsing.
- Avoid rubbing the eye directly; instead, press lightly on the skin around the eye to absorb fluid.
4. Protective Eye Shield (Optional)
- If your dog has a known sensitivity or has previously suffered an eye injury, consider a lightweight protective shield that can be fitted over the eye after cleaning.
- This helps prevent accidental scratches from toys or bedding.
5. Quick Reference Guide (Printed or Digital)
- Create a one‑page cheat sheet with step‑by‑step instructions for eye care, including emergency contact numbers and when to seek veterinary help.
- Keep it laminated and tucked into the first‑aid kit for easy access during stressful moments.
When to Seek Veterinary Care
Even with the best home care, some eye conditions require professional attention:
- Persistent redness or swelling that lasts more than 24 hours.
- Vision loss, cloudiness of the cornea, or a visible foreign object embedded in the eye.
- Excessive tearing or discharge that does not improve after rinsing.
By stocking these essential eye care supplies and knowing how to use them, you’ll be better prepared to protect your dog’s vision and comfort during everyday mishaps. Keep your first‑aid kit organized, regularly check for expired items, and update it as needed—your pup will thank you with healthier eyes and a happier life.
Ear Cleaning and Decontamination Products
Keeping your dog’s ears clean is a vital part of routine grooming that can prevent infections, wax buildup, and discomfort. A well‑equipped first aid kit for dog owners should include the following ear care items, along with clear instructions on how to use them safely.
Essential Products
- Earsclean® Ear Cleaner (or equivalent): A pH‑balanced solution that gently loosens wax and debris. Look for a product labeled “no rinse” if you prefer to avoid water, or a “rinse” version if your vet recommends thorough cleaning.
- Ear Cotton Swabs: Soft, disposable swabs designed for pet use. Avoid cotton balls or Q‑tips because they can push debris deeper into the ear canal.
- Earswipe® Ear Cleaning Pads: Pre‑moistened pads that simplify cleaning—just wipe from the outer ear towards the eardrum. Ideal for quick touch‑ups during travel.
- Pet Ear Antibiotic Ointment (e.g., Vetericyn, Debrox): Use only if a veterinarian has prescribed it. These ointments help treat infections and reduce inflammation.
- Gloves (latex or nitrile): Protect your hands from irritation and keep the cleaning area hygienic.
Step‑by‑Step Cleaning Guide
- Prepare the Area: Lay a towel on a flat surface. Hold your dog gently, speaking calmly to reduce stress.
- Apply Cleaner: Shake the bottle and apply 2–3 drops of ear cleaner into each ear canal. Massage the base of the ear for 30 seconds; you’ll hear a gentle “splash” sound as the solution works.
- Wipe Away Debris: Using a fresh cotton swab or pad, wipe outward from the opening of the ear canal to the outer ear. Do not insert the swab deep into the canal; only clean what’s visible.
- Repeat if Necessary: If wax is still present after one pass, repeat steps 2–3 up to three times per ear. Stop if your dog shows signs of pain or discomfort.
- Dry the Ear: Pat the outer ear gently with a clean towel. Avoid using a hair dryer; high heat can irritate sensitive skin.
When to Seek Veterinary Care
- Persistent redness, swelling, or foul odor after cleaning.
- Visible discharge that looks like pus or blood.
- Signs of pain when touching the ear (whining, head shaking).
- Repeated ear infections despite regular cleaning.
Practical Tips for Dog Owners
1. Schedule Routine Checks: Incorporate ear cleaning into your monthly grooming routine or whenever you notice wax buildup.
2. Keep Products Accessible: Store the ear cleaning kit in a designated spot within your first aid kit so it’s easy to grab during travel or emergencies.
3. Use Vet‑Recommended Products: Some breeds (e.g., Basset Hounds, German Shepherds) have more prone ears; always follow your vet’s guidance on specific products for your dog’s needs.
4. Teach Your Dog to Stay Still: Reward with treats after each cleaning session to build a positive association and make future visits easier.
Sample Kit Checklist
- Earsclean® Ear Cleaner – 30 ml bottle (no rinse)
- Ear Cotton Swabs – pack of 50
- Earswipe® Ear Cleaning Pads – pack of 20
- Vetericyn Pet Ear Ointment – 10 ml tube
- Latex/Nitrile Gloves – pack of 10 pairs
- Towel or cleaning mat
By including these ear cleaning and decontamination products in your first aid kit, you’ll be better prepared to keep your dog’s ears healthy, reduce the risk of infections, and ensure a happier, healthier companion.
Dental First Aid Items (toothbrush, toothpaste, dental wipes)
Keeping your dog’s teeth clean is a crucial part of overall health care and can prevent many painful conditions such as periodontal disease or dental abscesses. A well‑equipped first aid kit for dog owners should include the following essential items:
- Dog‑Safe Toothbrush:
- Choose a brush with soft bristles and a small head that fits comfortably in your dog's mouth.
- Some owners prefer a finger brush or a silicone pad if the dog is reluctant to take a traditional toothbrush.
- Example: Pet MD Ultra Soft Dog Toothbrush, available at most pet stores and online retailers.
- Dog‑Safe Toothpaste:
- Avoid human toothpaste because it contains fluoride and xylitol, both toxic to dogs if swallowed.
- Select a paste formulated specifically for pets. Look for ingredients like chlorhexidine or zinc oxide that help reduce plaque.
- Popular brands: Virbac C.E.T. Enzymatic Dog Toothpaste, Petrodex Dental Gel.
- Dental Wipes or Pads:
- Useful for quick clean‑ups, especially after a meal or if your dog has difficulty with brushing.
- Wipes should be pet‑safe, free from alcohol and fragrances that might irritate the gums.
- Example: Vets Best Dog Dental Wipes, which contain chlorhexidine for antibacterial action.
Practical Tips for Using These Items
- Start Early: Introduce dental care when your dog is a puppy, as it becomes easier to get them accustomed to the routine.
- Positive Reinforcement: Use treats and praise during brushing sessions. Consider using a “brush‑treat” toy that dispenses small rewards while you clean.
- Frequency Matters: Brush at least 2–3 times per week; daily brushing is ideal but may not be feasible for all owners.
- Observe Your Dog’s Response: If your dog shows signs of discomfort or aggression, stop and try a different brush size or a dental wipe first.
- Regular Vet Check‑Ups: Bring your dog to the vet for professional cleanings every 6–12 months. Your at‑home kit complements but does not replace professional care.
Why These Items Should Be in Every Dog Owner’s First Aid Kit
A dental first aid kit is more than just a set of tools; it’s an investment in your dog’s long‑term health. Dental disease can lead to systemic infections, heart issues, and even shortened lifespan if left untreated. By having the right toothbrush, toothpaste, and wipes on hand, you’re prepared to address minor problems immediately—such as a sudden gum irritation or an accidental ingestion of food that could cause a blockage—before they become emergencies.
Remember: consistency is key. The more regularly you practice good dental hygiene with your dog, the less stressful it will be for both of you in the long run.
Emergency Contact List and Vet Information
Keep this list handy in your first‑aid kit or on your phone so you can act quickly if your dog gets injured.
- Local 24/7 Veterinary Hospital:
Happy Tails Emergency Vet – 555‑123‑4567 (no appointment needed). Website - Animal Poison Control Hotline:
American Society for the Prevention of Cruelty to Animals (ASPCA) Poison Control Center – 1‑800‑222‑4357. Call within the first hour if you suspect poisoning. - Local Animal Shelter (for lost pets):
Riverdale Pet Rescue – 555‑987‑6543. Email: [email protected] - Your Primary Veterinarian:
Dr. Emily Hart, DVM – 555‑456‑7890 (office hours: Mon–Fri 9 AM–5 PM). Phone: 555‑456‑7801 (on‑call after hours). - Local Poison Control for Humans (if you need help with your own health while caring for a sick dog):
NHS 111 – 111 (UK) or online chat.
How to Use the List Quickly in an Emergency
- Stay Calm: Panic can slow decision‑making. Take a deep breath and assess the situation.
- Call First: If you suspect poisoning, contact the ASPCA Poison Control Hotline immediately before moving your dog.
- Contact Your Vet or Emergency Hospital: If the injury is severe (bleeding, broken bone, seizures), call the local 24/7 vet first. Provide clear details: dog’s name, age, breed, symptoms, and any observed injuries.
- Keep Contact Numbers Visible: Store a printed copy in your first‑aid kit and add them to your phone's “Emergency” contact group.
Tip: Update the list annually or after any changes (new vet, new phone number). Keep a backup on a waterproof card in case your phone battery dies.
The first thing you’ll need is the address and operating hours of the nearest emergency veterinary clinic. Here’s what to bring and expect:
- Identification: Bring your dog’s microchip number, license, or a recent photo with name tags.
- Medical History: Have a quick summary of vaccinations, known allergies, current medications, and any chronic conditions.
- Symptoms & Timeline: Write down when symptoms started, what you’ve tried (e.g., water, small food amounts), and any changes in behavior.
Typical Emergency Visit Flow
- Triage: The vet’s assistant will assess the severity and may ask for vital signs or basic observations.
- Initial Treatment: For minor injuries, they might clean wounds and apply bandages. Severe cases could involve IV fluids, pain medication, or imaging (X‑ray).
- Owner Communication: The vet will explain the diagnosis, treatment options, costs, and follow‑up care.
Practical Advice for a Smooth Visit
- Use a carrier or a sturdy crate; avoid loose leashes that could tug during transport.
- Keep your dog calm: speak softly, offer familiar treats (if safe), and cover the carrier with a blanket to reduce stress.
- Ask about “walk‑in” policies if you’re not sure whether an appointment is needed; many emergency clinics accept walk‑ins but may have wait times.
Aftercare & Follow‑Up
Once discharged, follow the vet’s instructions carefully:
- Administer medications exactly as prescribed.
- Monitor for changes in behavior or new symptoms.
- Schedule a follow‑up visit if advised, especially for fractures or infections.
Remember: A well‑prepared first aid kit and an up‑to‑date emergency contact list are your best allies. Knowing what to expect at the vet can reduce anxiety and help you focus on caring for your dog.
First Aid Instructions Sheet and How-To Guides
Having a well‑organized first aid sheet on hand can make the difference between a quick recovery and a serious complication. Below is a step‑by‑step guide that dog owners can print, keep in their car or home, and refer to during an emergency.
1. Assemble Your First Aid Kit
- Bandages: 2–4 gauze pads (10 mm × 10 mm), 5–8 elastic bandage strips, and a small adhesive tape roll.
- Sterile Gloves: One pair of disposable nitrile gloves for each dog in the household.
- Scissors & Tweezers: A pair of scissors (for cutting tape or gauze) and a small tweezer set (to remove splinters).
- Antiseptic Solution: 10 ml bottle of chlorhexidine or povidone‑iodine.
- Analgesic & Antipyretic: A dog‑specific medication such as carprofen (if prescribed) and a human acetaminophen/ibuprofen (never give to dogs).
- Stitches Kit: Simple suture kit if you’re trained, otherwise a veterinary emergency kit with suturing supplies.
- CPR Mask & Resuscitation Aid: A dog CPR mask or a small oxygen tube and bag‑mask system.
- Heat/Cold Packs: Reusable gel packs that can be frozen or warmed.
- Emergency Contact List: Phone numbers for your vet, local animal hospital, poison control, and 24‑hour pet helpline.
2. Quick Response to Common Emergencies
a) Cuts & Lacerations
- Stop the bleeding: Apply firm pressure with a clean gauze pad for at least 5 minutes.
- Clean the wound: Rinse gently with sterile saline or tap water. Avoid using alcohol as it can damage tissue.
- Apply antiseptic: Dab a small amount of chlorhexidine onto the wound.
- Dress the wound: Place a gauze pad over the area and secure with an elastic bandage strip. Do not wrap too tightly; you should still be able to see slight redness at the skin’s surface.
b) Licking/Choking
If your dog is choking, follow the ABC method (Airway, Breathing, Circulation) and perform Heimlich if necessary. Keep calm—dogs can sense stress.
c) Poisoning
- Identify the toxin: Look at packaging or observe symptoms.
- Call 911 or local emergency services immediately.
- Do not induce vomiting unless instructed by a professional.
- Bring the product container and your dog’s ID tags with you.
d) Heatstroke
- Move your dog to shade or an air‑conditioned area immediately.
- Offer cool (not cold) water in small sips.
- Place a damp, cool towel on the neck and groin; avoid ice packs directly on skin.
- Monitor for vomiting, rapid breathing, or seizures. Seek veterinary care if symptoms persist beyond 15 minutes.
e) Fractures
- Stabilize the limb: Use a splint (a firm board or rolled newspaper) and secure with gauze or elastic bandage. Avoid wrapping over the fracture site.
- Transport carefully: Keep the dog lying on its side, supporting the injured leg with pillows or blankets.
- Take your dog to the nearest veterinary clinic as soon as possible.
3. Practical Tips for Everyday Use
- Keep the kit in a waterproof bag: Attach it to your dog’s collar or keep it in the trunk of your car.
- Label everything clearly: Use waterproof markers and color‑coded tags for quick identification.
- Check expiry dates weekly: Replace expired medications, antiseptics, and sterile supplies.
- Practice CPR with your dog: Once a month, run through the steps to build muscle memory.
- Train your family members: Show them how to use each item—especially the splinting technique for fractures.
4. Additional Resources
5. Quick-Check Printout (Use this as a one‑page reference)
[ ] Gauze pads
[ ] Elastic bandage strips
[ ] Sterile gloves
[ ] Scissors & tweez
Conclusion
A well-stocked first‑aid kit is the single most reliable tool a dog owner can have at their fingertips when an emergency strikes. By investing time in building and regularly maintaining a comprehensive kit, you transform yourself from a passive observer into an active responder capable of stabilizing your pup until professional help arrives.
Key Takeaways
- Preparation is Preventive Care: A pre‑emptive kit reduces stress and improves outcomes for both you and your dog.
- Tailored to Your Dog’s Needs: Size, breed, health conditions, and typical activities dictate the specific items you should include.
- Regular Checks Keep It Ready: Inspect supplies every six months, replace expired medications, and restock used items.
- Know How to Use Them: Familiarize yourself with each item’s purpose through training or practice sessions.
Practical Steps for Maintaining Your Kit
- Create a Checklist: Write down every essential item and store it next to the kit. This ensures you never forget an important component during a rush.
- Set Reminders: Use calendar alerts or mobile apps to prompt quarterly reviews of your kit’s contents and condition.
- Label Everything: Clear, visible labels on tubes, gauze packs, and medication bottles help you locate items quickly under stress.
- Include a Quick‑Reference Guide: A laminated sheet with basic first‑aid instructions can be lifesaving when time is limited.
Beyond the Kit: Building Confidence
The ultimate value of a first‑aid kit lies not just in its physical contents but in the confidence it instills. Attend local dog‑first‑aid workshops, practice simulated scenarios with your pet, and stay updated on veterinary protocols. By combining preparedness with knowledge, you’ll be ready to handle anything from minor cuts to life‑threatening emergencies.
Remember: a well‑maintained first‑aid kit is an extension of the love and responsibility you already feel for your dog. Keep it accessible, keep it updated, and most importantly—keep practicing how to use it. Your furry friend’s safety—and peace of mind—depend on it.
FAQ
What should I include in a basic first aid kit for my dog?
A well‑equipped dog first aid kit is your lifeline when an emergency strikes. Below is a list of essential items you’ll want to keep on hand:
- Bandages and gauze pads – Sterile, non‑adhesive gauze for clean wounds, plus elastic bandage strips (like Micropore) to wrap injuries.
- A pair of disposable gloves – Protects you from bloodborne pathogens and keeps the wound area sterile.
- Antiseptic wipes or solution – Chlorhexidine or povidone‑iodine wipes help clean cuts before dressing them.
- Tweezers & forceps – For removing splinters, burrs, or any foreign bodies from the skin or paws.
- Scissors (dog‑friendly) – Small, rounded‑edge scissors to cut gauze or clothing without harming your pet.
- Pet‑safe pain relievers – Only those specifically labeled for dogs (e.g., carprofen). Never give human NSAIDs like ibuprofen or acetaminophen.
- Hydrogen peroxide (3%) and a small bowl – Useful to induce vomiting in mild poisoning cases, but only after consulting a vet.
- Instant cold packs & heat pads – For swelling or muscle pain. Keep the pack wrapped to avoid frostbite.
- A digital thermometer – To monitor your dog’s temperature during illness.
- An emergency phone list – Local veterinary clinic, 24‑hour animal hospital, and poison control hotline.
Keep the kit in a waterproof container and store it in an easily accessible spot—such as your car trunk or bedroom closet.
How often should I check or restock my dog’s first aid kit?
A good rule of thumb is to review the contents every six months. Look for:
- Expired medications or antiseptic solutions.
- Damaged bandages, gauze, or gloves that have lost their integrity.
- Used items that need replacing (e.g., a single-use gauze pad).
If you’re traveling frequently or have a large dog that’s prone to injuries, consider increasing the review frequency to every three months.
What should I do if my dog is bleeding heavily?
- Remain calm – Your composure will help your pet stay still.
- Apply direct pressure with a clean gauze pad. If the wound is on a limb, elevate the leg slightly to reduce blood flow.
- If bleeding persists after 5–10 minutes of firm pressure, use an elastic bandage to wrap around the injury site—ensure it’s snug but not too tight.
- Once bleeding slows, clean the wound with antiseptic wipes and cover it with a sterile dressing.
- Seek veterinary care immediately; severe bleeding can lead to shock even if the source is seemingly controlled.
How do I handle a suspected snakebite or other toxic bite?
Time is critical. Follow these steps:
- Keep the dog as still and calm as possible to slow toxin spread.
- Do NOT apply ice, tourniquets, or cutting the wound; these can worsen tissue damage.
- Use a clean cloth to gently blot any visible venom from the bite area—do not rub.
- Call your veterinarian or an emergency animal clinic right away for instructions and to arrange transport.
What are some quick ways to treat minor cuts or scrapes?
- Clean the wound with mild soap and lukewarm water, then rinse thoroughly.
- Apply a thin layer of pet‑safe antiseptic solution (e.g., chlorhexidine).
- Cover with a sterile gauze pad secured by an elastic bandage or a self‑adhesive wrap.
- Check daily for signs of infection: increased redness, swelling, pus, or foul odor. If any occur, contact your vet.
Can I use human first aid supplies for my dog?
Only if they are explicitly labeled safe for pets. Human medications often contain ingredients that can be toxic to dogs (e.g., acetaminophen). For wound care, non‑adhesive gauze and elastic bandage strips work fine, but avoid human adhesive bandages on large animals—they may not hold well or could cause skin irritation.
What should I do if my dog ingests a toxic substance?
- Identify the substance and note the amount consumed, time of ingestion, and any symptoms.
- Call your veterinarian or the local animal poison control hotline immediately. Provide all details; they’ll give you specific instructions.
- If advised, induce vomiting with a 3% hydrogen peroxide solution—only once, and only after confirming it’s safe for that particular toxin.
- Do NOT give any food or water unless directed by the vet, as this can interfere with treatment.
Categories
- AI & Enrichment Play
- Broiler Farming
- Broiler Farming Tips
- Canine Wellness & Longevity
- Cat
- Cat & Human Connection
- Cat Adoption & Rescue
- Cat Breeds
- Cat Breeds & Personalities
- Cat Care & Health
- Cat Grooming & Hygiene
- Cat Lifestyle & Environment
- Cat Myths & History
- Cat Nutrition & Diet
- Cat Products & Reviews
- Cat Training & Behavior
- Comparison
- Consumer Awareness
- Dog
- Dog Accessories & Products
- Dog Adoption & Rescue
- Dog Breed & Lifestyle Trends
- Dog Breeding & Puppies
- Dog Entertainment & Media
- Dog Fashion & Trends
- Dog Fun & Lifestyle
- Dog Grooming & Hygiene
- Dog History & Culture
- Dog Myths, Science & Future Tech
- Dog News & Trends
- Dog Nutrition & Food
- Dog Psychology & Emotions
- Dog Safety & Security
- Dog Sports & Activities
- Dog Technology & Innovation
- Dog Training for Modern Owners
- Dog Travel & Adventure
- Dog Travel, Adventure & Culture
- Economic and Market Insights
- Educational Content
- FAQs
- Feeding Alternatives
- Festivals & Seasonal Ideas
- Fun & Entertainment
- General Knowledge
- General Pig Farming
- Health & Disease Management
- Housing and Environment
- Kittens
- Market Insights
- Miscellaneous
- Miscellaneous
- Motivational
- pig
- Pig Breeding
- Pig Breeds
- Pig Farming Stories and Inspiration
- Pig Health and Care
- Pig Nutrition
- Pig Products
- Profitability & Business
- Puppy Care
- Puppy Predictable Topics Reinvented
- Regional Focus
- Rescue & Adoption Buzz
- Senior Cats
- Senior Dog Care
- Smart Dog Tech & Gadgets
- Sustainability
- Sustainable & Eco-Friendly Dog Products
- Tech & Innovations
- Working & Service Dogs
- Broiler Feed66 products
- Country Feed33 products
- Pig Feed66 products
- Product22 products
- Raw Materials99 products
Products
-
 Fish Meal
₹1,999.00 – ₹2,999.00Price range: ₹1,999.00 through ₹2,999.00Rated 0 out of 5
Fish Meal
₹1,999.00 – ₹2,999.00Price range: ₹1,999.00 through ₹2,999.00Rated 0 out of 5 -
 FATTENING BROILER FEED
₹2,299.00 – ₹2,349.00Price range: ₹2,299.00 through ₹2,349.00Rated 0 out of 5
FATTENING BROILER FEED
₹2,299.00 – ₹2,349.00Price range: ₹2,299.00 through ₹2,349.00Rated 0 out of 5 -
 LAYER COUNTRY FEED
₹1,549.00 – ₹1,649.00Price range: ₹1,549.00 through ₹1,649.00Rated 0 out of 5
LAYER COUNTRY FEED
₹1,549.00 – ₹1,649.00Price range: ₹1,549.00 through ₹1,649.00Rated 0 out of 5 -
 COUNTER BROILER FEED
₹1,199.00 – ₹1,299.00Price range: ₹1,199.00 through ₹1,299.00Rated 0 out of 5
COUNTER BROILER FEED
₹1,199.00 – ₹1,299.00Price range: ₹1,199.00 through ₹1,299.00Rated 0 out of 5 -
 LACTATING PIG FEED
Rated 0 out of 5
LACTATING PIG FEED
Rated 0 out of 5₹2,299.00Original price was: ₹2,299.00.₹1,740.00Current price is: ₹1,740.00. -
 Maize
Rated 0 out of 5
Maize
Rated 0 out of 5₹1,650.00Original price was: ₹1,650.00.₹1,300.00Current price is: ₹1,300.00. -
 GESTATION PIG FEED (Phase 1)
Rated 0 out of 5
GESTATION PIG FEED (Phase 1)
Rated 0 out of 5₹2,249.00Original price was: ₹2,249.00.₹1,699.00Current price is: ₹1,699.00. -
 Pre Starter Broiler Feed
₹2,399.00 – ₹2,499.00Price range: ₹2,399.00 through ₹2,499.00Rated 0 out of 5
Pre Starter Broiler Feed
₹2,399.00 – ₹2,499.00Price range: ₹2,399.00 through ₹2,499.00Rated 0 out of 5 -
 FINISHER PIG FEED
Rated 0 out of 5
FINISHER PIG FEED
Rated 0 out of 5₹2,299.00Original price was: ₹2,299.00.₹1,749.00Current price is: ₹1,749.00. -
 Broiler Premix
Rated 0 out of 5
Broiler Premix
Rated 0 out of 5₹820.00Original price was: ₹820.00.₹699.00Current price is: ₹699.00.