
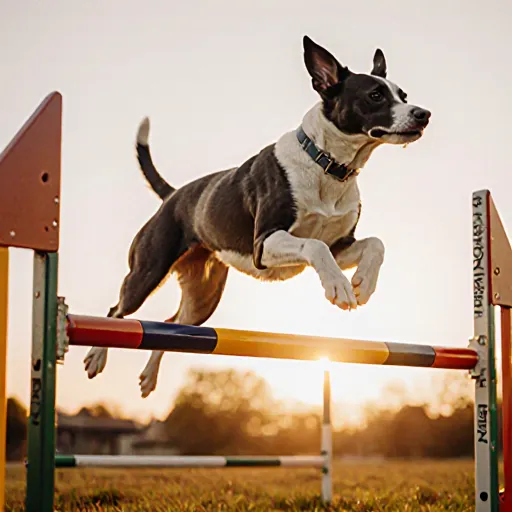
Jump, weave, repeat—train your pup for agility success!
How to Train Your Dog for Agility Courses
Table of Contents
- Introduction
- Understanding Dog Agility Basics
- Choosing the Right Equipment
- Preparing Your Dog Physically
- Mental Conditioning for Agility
- Basic Obedience Training Refresher
- Introducing the Jump Series
- Training the Tunnels and Weave Poles
- Mastering the A-Frame and Dog Walks
- Combining Obstacles into a Course Flow
- Safety Checks and Injury Prevention
- Positive Reinforcement Techniques
- Progressing to Advanced Courses
- Conclusion
- FAQ
Introduction
How to Train Your Dog for Agility Courses
Training a dog for agility is not just about teaching them to jump and weave—it's a comprehensive process that blends physical conditioning, mental stimulation, and strong human‑dog communication. Below you’ll find step‑by‑step guidance, real‑world examples, and actionable tips that will help you turn your pup into an enthusiastic competitor.
- Obey “Come” and “Stay”: The first obstacle is a solid recall. Use high‑value treats (e.g., chicken bits) and practice in increasingly distracting environments.
- Establish the “Leave It” Cue: This command will keep your dog focused on you when they encounter obstacles that might tempt them to sniff or bite.
- Confidence Through Positive Reinforcement: Every time your dog performs a task, reward immediately. This builds trust and eagerness to learn more.
Agriculturally speaking, an agility course demands both endurance and explosive power. A balanced routine includes:
- Warm‑up Jog or Walk (5–10 minutes): Get the blood flowing before you start training.
- Sprint Drills: Short bursts of speed, e.g., “Run to the tree and back.” Helps develop fast-twitch muscle fibers.
- Stretching & Mobility Work: Gentle leg swings, hip circles, and shoulder rolls prevent injuries during jumps.
Start with simple obstacles and gradually increase difficulty. Here’s a typical progression:
- Tunnel (Open Tunnel): Place a wide, open tunnel on the floor. Encourage your dog to walk through by offering treats at both ends.
- Weave Poles: Set up 4–6 poles spaced 2 feet apart. Use a lure or a favorite toy to guide them through in a zig‑zag pattern.
- Jumps (Low Height): Begin with a 12-inch jump. Teach “Take it” by showing the bar and rewarding when they clear it.
- A-Frame: Start with one side at ground level, then raise both sides gradually as confidence grows.
Consistency is key. Pair verbal cues with hand signals so your dog can rely on multiple sensory inputs:
| Cue | Hand Signal | Description |
|---|---|---|
| Jump | Raise one arm straight up | Indicates the dog should leap over the obstacle. |
| Weave | Swipe hand from left to right | Guides the dog through poles. |
| Tunnel | Point forward with index finger | Signals “go through.” |
- Over‑Reinforcing: Rewarding every small step can slow progress. Use a “reward schedule” that escalates with correct performance.
- Ignoring Body Language: Dogs may show signs of fatigue or discomfort (e.g., paw lifts, whimper). Stop training if you notice these cues.
- Skipping Warm‑ups: Always begin with light exercise; skipping this can lead to muscle strains.
- 5 min – Warm‑up walk + basic recall drills.
- 8 min – Tunnel run: 10 passes, treat reward each time.
- 7 min – Weave poles: 3 sets of 4 laps, encouraging smooth transitions.
- 5 min – Jump practice: 6 low jumps with “take it” cue.
- 2 min – Cool‑down stretch + praise.
Create a simple log sheet:
- Date
- Obstacle(s) Covered
- Time to Complete (if applicable)
- Notes on Behavior or Challenges
For deeper dives, check out:
- AKC Agility Training Guide
- DogTrainingZone – Agility Tips
- Local agility clubs often offer beginner classes; a hands‑on experience is invaluable.
With patience, consistency, and the right approach, your dog can transform from a curious companion into an agile competitor ready to tackle any obstacle course. Happy training!
Understanding Dog Agility Basics
Dog agility is more than a fun pastime—it's a structured sport that challenges both the mind and body of your canine companion. By grasping the fundamentals before jumping into full‑scale training, you’ll create a solid foundation for success on the course.
1. What Is Agility?
- A sport, not a game: Agility is a competitive discipline governed by rules set by organizations such as the American Kennel Club (AKC) and United States Dog Agility Association (USDAG).
- The course: Typically 20–30 obstacles arranged in a single path—tunnels, jumps, weave poles, seesaws, A‑frames, dog walkways, etc.
- Two main divisions: “Speed” and “Precision.” Speed focuses on completing the course as quickly as possible; Precision demands flawless execution with no penalties.
2. Core Principles Every Trainer Should Know
- Communication: Dogs rely on clear, consistent cues—“forward,” “up,” “back,” “stop.” Use a combination of verbal commands and hand signals.
- Positive Reinforcement: Treats, praise, and play are the best rewards. Avoid punishment; it erodes trust and slows progress.
- Confidence Building: Start with low obstacles to build confidence before moving to higher jumps or more complex patterns.
3. Step‑by‑Step Starter Routine
Below is a beginner routine that you can run at home or in a backyard park. Each session lasts about 20–30 minutes, focusing on one obstacle type per day.
- Day 1 – Tunnel:
- Place a low tunnel (6–8 inches high) on the ground.
- Encourage your dog to walk through by leading with a treat and saying “through.”
- Once they’re comfortable, add a slight incline and increase speed gradually.
- Day 2 – Jumps:
- Start with a low jump (12–15 inches). Keep the bar at a height that allows your dog to step over, not hop.
- Use a target treat on the other side and say “jump.” Reward immediately after landing.
- Gradually raise the bars by 2–3 inches each week.
- Day 3 – Weave Poles:
- Set up six poles spaced 18–24 inches apart.
- Lead your dog through with a lure, rewarding each successful pass.
- Introduce the “weave” cue once they’re consistent.
4. Practical Tips for Everyday Training
| Tip | Description |
|---|---|
| Use a Long Line | Allows freedom while maintaining control—ideal for practicing jumps or weaves without full risk. |
| Keep Sessions Short | A 10‑minute burst of high‑energy work is better than a tired, distracted dog. |
| Practice in Different Environments | Vary lighting, noise levels, and surfaces to build adaptability. |
| Record Progress | Video your dog’s runs; it helps spot mistakes you might miss live. |
5. Common Mistakes to Avoid
- Over‑training: Dogs need rest days just like humans. Overuse can lead to injury.
- Skipping the Warm‑Up: A simple walk or light jog before obstacles prevents strains.
- Using Negative Cues: “No” or “Stop” should be reserved for safety, not routine corrections.
6. Next Steps
Once your dog can confidently navigate each obstacle individually, start chaining them into short courses. Gradually increase the number of obstacles and reduce the time between cues to simulate real competition conditions.
Remember: consistency, patience, and positive reinforcement are the keys that turn a curious pup into an agility champion.
Choosing the Right Equipment
When training your dog for agility courses, the right equipment can make a huge difference in both performance and safety. Below is a practical guide to help you select high‑quality gear that suits your dog's size, skill level, and personality.
1. Obstacle Kits vs. Individual Pieces
- Obstacle kits: Ideal for beginners or those who want a ready‑to‑assemble set. Kits usually include poles, tunnels, and weave poles in a compact package.
- Individual pieces: Offer flexibility to customize your course layout. If you have space constraints or plan to upgrade certain obstacles over time, buying parts separately can be more cost‑effective.
2. Material Matters
Durability and safety are paramount. Consider the following materials:
| Obstacle Type | Recommended Material | Why? |
|---|---|---|
| Tunnel | Heavy‑duty PVC or polypropylene | Resistant to weather and impact, easy to clean. |
| Weave poles | Aluminum or steel tubes with rubber caps | Stability at high speeds; caps prevent snags. |
| Jumps | Cedar or treated pine, reinforced with metal frames | Natural feel for dogs and robust support. |
3. Size & Height Adjustments
Proper sizing ensures that the obstacle is challenging but not discouraging. Use these guidelines:
- Tunnels: Minimum width 24 inches for medium dogs; larger breeds need 30–36 inches.
- Weave poles: Spacing of 12–18 inches, with pole diameter 1.5–2 inches.
- Jumps: Height set to 50% of your dog’s shoulder height for beginners; increase by 2–3 inches as they progress.
4. Safety Features
Safety should be the top priority when selecting equipment.
- Rounded edges: All obstacles must have rounded or cushioned ends to reduce injury risk.
- Non‑slip surfaces: Poles and tunnels should have a textured finish; use rubber mats around jump bases.
- Sturdy anchoring: For permanent installations, secure frames into the ground or walls with concrete anchors.
5. Portable vs. Permanent Installations
If you’re working in a backyard, portable kits are convenient. For club members or serious training, investing in permanent structures can provide consistency and reduce wear on the equipment.
6. Maintenance Tips
- Regular inspections: Check for loose screws, cracks, or splinters after each session.
- Cleaning routine: Wipe down surfaces with mild detergent to prevent mold and bacteria buildup.
- Storage: Store portable pieces in a dry place; use protective covers during winter months.
7. Budgeting for Quality
A common misconception is that cheaper gear lasts longer. In reality, low‑quality materials often fail faster and can be more expensive over time due to replacements and safety risks. Allocate at least 15–20% of your total training budget to high‑grade equipment.
Example Setup for a Beginner Course
- Tunnel: 30” wide, 12 ft long, PVC frame with rubber caps.
- Weave poles: 6 poles spaced 14” apart; each pole is 2” diameter aluminum with a 3” rubber cap.
- Jumps: Two jumps set at 18” height, wooden frame reinforced with steel rods.
- Landing mats: 4’ x 4’ rubber pads under each obstacle to cushion falls.
By investing time in selecting the right equipment, you’ll create a safe, engaging environment that encourages your dog’s confidence and skill development on agility courses.
Preparing Your Dog Physically
Before your pup can sprint through tunnels or vault over jumps, it needs a solid foundation of strength, flexibility, and endurance. A well‑prepared body reduces injury risk and boosts confidence on the course.
1. Start with a Baseline Assessment
- Veterinary Check‑Up: Ensure your dog is healthy, up to date on vaccinations, and free of joint or heart issues that could hinder performance.
- Weight & Body Condition Score (BCS): A BMI calculator for dogs can help you gauge whether your pup needs weight loss, maintenance, or a slight gain before heavy training.
- Mobility Test: Observe walking, running, and jumping. Look for limping, stiffness, or hesitation—these are red flags that need addressing first.
2. Build Endurance Gradually
Agility courses demand bursts of speed followed by brief recoveries. Mimic this pattern with low‑intensity interval training:
- Sprint Intervals: 10–15 seconds of fast running, then 1–2 minutes of slow jog or walk. Repeat 4–6 times.
- Long Walks: Add a daily 30‑minute brisk walk to develop aerobic capacity without overloading joints.
- Track progress with a simple log—time, distance, and how your dog feels afterward.
3. Strengthen Key Muscle Groups
Strong hindquarters, core, and shoulder girdle are the backbone of agility performance:
- Hill Sprints: Find a gentle incline; have your dog run up and walk down. This works glutes and hamstrings.
- Step‑Up Drills: Use a low platform (6–8 inches). Have the dog step onto it, then off—repeat 10 times per leg.
- Core Work: Simple “sit to stand” repetitions, or using a weighted vest for short bursts (start with 5% of body weight).
4. Improve Flexibility & Joint Mobility
A pliable body can navigate turns and jumps more smoothly.
- Dynamic Warm‑Ups: Leg swings, high knees, and hip circles before every session.
- Static Stretching: After exercise, hold gentle stretches for the hamstrings, quadriceps, and shoulders—hold each for 15–20 seconds.
- Consider a short daily “stretch‑and‑roll” routine with a foam roller or massage stick if your dog tolerates it.
5. Introduce Agility‑Specific Movements Early
Even before formal courses, expose your dog to simple obstacle-like actions:
- Tunnel Run: Open a plastic tunnel and encourage the dog to run through by using treats or toys.
- Low Jumps: Set up a low hurdle (4–6 inches) and reward successful clearance.
- Weave Poles: Place two poles 3–4 feet apart; have the dog weave between them while retrieving a toy.
6. Monitor Recovery & Nutrition
- Hydration: Provide fresh water before, during, and after sessions.
- Protein Intake: Aim for high‑quality protein (chicken, turkey, fish) to support muscle repair—consult your vet for exact grams per pound of body weight.
- Rest Days: Schedule at least one full rest day per week. Use light play or short walks instead of intense training.
7. Safety First: Gradual Progression
Jump from low to high, slow to fast—always allow your dog time to adapt. Overloading too quickly can cause strains, sprains, or stress fractures.
- Rule of Thumb: Increase obstacle height by no more than 2 inches per week and sprint distance by no more than 10%.
- Keep a training log to track changes in performance, energy levels, and any signs of discomfort.
By systematically building endurance, strength, flexibility, and introducing agility movements early on, you set the stage for a successful transition into full‑blown agility training. Remember—consistency, patience, and regular veterinary checkups are your best allies in preparing a healthy, happy, and high‑performing dog.
Mental Conditioning for Agility
While physical conditioning is essential, an agile dog also needs a sharp mind. Mental conditioning helps your dog stay focused, make quick decisions, and maintain confidence during high‑speed courses.
1. Build a Strong Foundation with Basic Obedience
- Short, frequent sessions: Keep training to 5–10 minute blocks so the dog remains engaged.
- Use clear cues: “Sit,” “Stay,” and “Come” should be associated with a reward every time.
- Practice in distractions: Gradually introduce background noise or other dogs while reinforcing commands.
2. Teach Decision‑Making Skills
Agility obstacles require quick choices—turn left, jump high, weave between poles. To train this:
- Obstacle “mock” sessions: Place a single obstacle and let the dog approach it. Reward correct decisions.
- Choice drills: Set up two identical obstacles with different instructions (“jump” vs. “crawl”) and reward the chosen action.
- Time pressure: Use a gentle countdown or a timer to encourage faster decision making without compromising safety.
3. Use Positive Reinforcement Techniques
- Treats & praise: Keep the reward high‑value and unpredictable.
- Clicker training: A click marks the exact moment of correct behavior, helping the dog understand what’s expected.
- Remember: consistency is key. If a cue suddenly stops being rewarded, the dog will become confused.
4. Practice “Mindfulness” Exercises
Calming techniques help dogs stay focused during fast‑paced courses:
- “Look at me” drill: Hold a treat in front of you and command your dog to focus on your face for a few seconds before moving on.
- Deep breathing with the dog: Sit calmly, breathe slowly, and let the dog mirror your calmness. This reduces anxiety during competitions.
5. Incorporate Cognitive Games into Daily Routine
- Hide‑and‑seek treats: Bury small snacks under cups or in a puzzle toy to engage problem‑solving skills.
- Obstacle navigation without rewards: Run through the course once, then remove treats and let the dog rely on memory and confidence.
- “Find the object” game: Place a favorite toy in a room with obstacles; the dog must navigate to find it.
6. Build Confidence Through Progressive Exposure
Gradually increase obstacle difficulty and course length while maintaining success rates. Celebrate small wins to keep motivation high.
Practical Example: A 30‑Minute Mental Conditioning Session
- 5 min – Warm‑up: basic obedience in a quiet space.
- 10 min – Decision drills: two obstacles side by side with different commands.
- 5 min – Mindfulness exercise: “look at me” drill while moving through a short obstacle set.
- 5 min – Puzzle game: hide treats in a puzzle toy and let the dog solve it.
- 5 min – Cool‑down: walk with a gentle reward, reinforcing calm behavior.
By combining these mental conditioning techniques with physical agility training, your dog will develop sharper focus, faster decision making, and greater confidence—key ingredients for success on the agility course.
Basic Obedience Training Refresher
Before your dog can excel in an agility course, it must master a solid foundation of basic obedience. A well‑trained dog is more responsive to cues, safer on the course, and less likely to become distracted by obstacles or other dogs. Below is a step‑by‑step refresher that will help you reinforce essential commands and prepare your pup for the next level of training.
1. Sit & Stay – The Core of Control
- Why it matters: A reliable sit keeps your dog in a stable, focused position while you set up or reset obstacles.
- Training tip: Use a treat placed just above the dog's nose and slowly move it back over the head. As the dog follows, say “Sit” and reward immediately. For stay, extend your palm outward as if stopping a car; give the command “Stay,” count a few seconds, then release with “Free!”
- Practice drill: Line up 10 obstacles (e.g., cones or small jumps). Have your dog sit at each one. Once it sits correctly, call “Go!” and walk past the obstacle. Repeat until the dog stays in place while you move around.
2. Come When Called – A Lifesaver on Course
A strong recall is essential for safety. Dogs should return to you within a few steps, even when distracted by an obstacle or another dog.
- Step 1: Start in a quiet area. Say “Come” loudly and enthusiastically while using a long leash.
- Step 2: When the dog comes, reward with high‑value treats and praise.
- Step 3: Gradually increase distance and add distractions (e.g., another dog walking nearby). Keep rewards consistent.
3. Heel – Keeping Your Dog Close
The heel command ensures your dog stays by your side, making it easier to navigate turns and jumps.
- Method: Hold a treat in the hand that is on the same side as the dog's leash. Walk forward; when the dog stays beside you, say “Heel” and reward.
- Common mistake: Some dogs think heel means to move faster. Use a calm voice and steady pace until they understand it’s about proximity, not speed.
4. Loose Leash Walking – A Must‑Have Skill
A dog that pulls disrupts course timing and can become unsafe around jumps or tunnels.
- Start: Use a short leash in a quiet area.
- Signal: When the dog pulls, stop walking. Wait until the leash slackens, then continue.
- Reward: Praise and treat when the dog walks beside you without pulling.
5. Drop It & Leave It – Managing Distractions
Agility courses often involve objects that can tempt a dog to pick up or chase them.
- Drop It: Hold a treat in both hands and say “Drop it.” If the dog releases an object, reward immediately.
- Leave It: Show the dog a tempting item (e.g., a chew toy). Say “Leave it,” turn away, then reward for ignoring it. Practice until the dog consistently obeys without hesitation.
6. Turning & Pivoting – Prepping for Tight Corners
Agility courses require quick turns and pivots. Teaching your dog to turn smoothly on cue will improve speed and accuracy.
- Spin: Use a treat to lure the dog in a circle, saying “Spin.” Reward after a full rotation.
- Pivots: Place two cones side by side. Have the dog walk straight to one cone, then say “Pivot” and guide it to the other cone. Repeat until the pivot feels natural.
Practical Advice for Course‑Ready Dogs
- Consistency is key: Train in short, frequent sessions (10–15 minutes) rather than long, exhausting ones.
- Positive reinforcement: Use high‑value treats and enthusiastic praise. Avoid punishment; it can create fear around the obstacle or the trainer.
- Progressive difficulty: Start with simple commands in a distraction-free environment. Gradually add obstacles, noise, and other dogs as your dog masters each level.
- Health check: Ensure your dog is fit for agility by consulting a vet, especially if the dog has joint issues or previous injuries.
- Equipment matters: Use a comfortable harness or collar that allows freedom of movement but prevents pulling. A lightweight, adjustable leash is ideal for practicing loose-leash walking.
Once your dog reliably follows these basic obedience commands, you can confidently transition to specific agility drills such as jumps, tunnels, and weave poles. Remember: a well‑trained dog not only performs better but also enjoys the process of learning new skills.
Introducing the Jump Series
The Jump Series is a structured, progressive training program designed to help your dog master the fundamentals of jumping—an essential skill for any agility course. By breaking down the process into clear, manageable steps, you’ll build confidence in both you and your pup while reducing the risk of injury.
Why Focus on Jumping First?
- Foundation for Agility: Jumping is one of the core elements of agility. Mastery here translates to smoother transitions into other obstacles like tunnels, weave poles, and seesaws.
- Confidence Builder: Early success with jumps boosts a dog’s self-esteem, encouraging them to tackle more complex challenges later.
- Risk Reduction: Proper technique from the start minimizes stress on joints and ligaments, protecting your dog from common injuries such as patellar luxation or hip dysplasia.
Step‑by‑Step Jump Training Plan
- Introduce the Bar: Start with a low, non‑threatening bar (≈12–15 inches). Place it on the ground and let your dog sniff and investigate. Use a high‑value treat or favorite toy to lure them over.
Tip: Keep the bar stationary at first so your pup can focus on the movement rather than the obstacle.
- Encourage Over the Bar: As confidence grows, raise the bar by 2–3 inches each session. Use a command like “Jump!” or “Over!” paired with a hand signal.
Example: Place your dog at the start line, say “Jump!”, then reward immediately after they clear the bar.
- Use a Launch Pad: Once comfortable, introduce a small launch pad (a rubber mat or towel). This helps dogs learn to push off from a firm surface.
Practical Advice: Place the pad on a slightly sloped angle for added excitement, but ensure it’s still safe.
- Incorporate Distance: Gradually increase the distance between the start line and the bar. This trains the dog to maintain focus over longer approaches.
Scenario: Start with a 3‑foot gap, then move to 5 feet, keeping the jump height constant.
- Add Variations: Once your dog can handle standard jumps, introduce variations such as:
- Hurdles that lean forward or backward.
- Multiple bars in a row (mini‑triple jump).
- Jumps with a slight incline or decline.
- Practice Consistency: Aim for 5–10 short sessions per week. Keep each session under 20 minutes to avoid fatigue and maintain enthusiasm.
Remember: Positive reinforcement is key—celebrate every successful jump with praise, treats, or a quick play break.
Common Mistakes & How to Avoid Them
| Mistake | Consequence | Solution |
|---|---|---|
| Jumping from too high a bar early on | Increased risk of joint strain or injury. | Start low and increase height gradually—no more than 2–3 inches per week. |
| Using negative punishment (e.g., pulling the leash) | Can create fear, reducing willingness to jump. | Always use positive reinforcement; if hesitation occurs, reset and try again calmly. |
| Inconsistent cues | Confusion about what the dog should do. | Keep verbal commands and hand signals consistent across all training sessions. |
Practical Equipment Checklist
- Adjustable Jump Bars: Preferably with rubber or foam tips to reduce impact.
- Launch Pad or Rubber Mat: For safe take‑off surface.
- High‑Value Treats or Toys: To keep motivation high.
- Leash & Collar/Harness: For safety during early stages.
- Agility Training Marker (e.g., cone or flag): To delineate start and finish lines.
Next Steps in Agility Training
Once your dog consistently clears jumps, it’s time to integrate other obstacles:
- Tunnel: Introduce a tunnel after the jump; reward for running through.
- Weave Poles: Teach directional cues before the dog navigates the poles.
- Seesaw & A-Frame: Build core strength and balance with these structures.
Remember, patience is paramount. Every dog progresses at their own pace—celebrate small victories, keep training sessions fun, and you’ll soon see your pup leap confidently across the entire agility course.
Training the Tunnels and Weave Poles
While the classic jumps and A‑frames often steal the spotlight, tunnels and weave poles are essential for developing a dog’s agility, focus, confidence, and body control. They also add variety to your course, keeping both dog and handler engaged. Below is a step‑by‑step guide on how to train these obstacles safely and effectively.
1. Introducing the Tunnel
- Start with an Open Space: Place the tunnel in a quiet area free of distractions. Let your dog sniff it, explore it at their own pace, and reward them for approaching.
- Use Positive Reinforcement: Offer treats or a favorite toy on the other side to create positive associations. Gradually increase the distance between you and the treat.
- Encourage Entry with a Cue: Once your dog is comfortable, use a verbal cue like “through” or a hand gesture while giving them a short burst of praise after they pass through.
- Build Confidence: If the dog hesitates, step back and let them re‑approach. Avoid forcing them; patience builds trust.
2. Progressing to Weave Poles
- Set Up a Simple Course: Place 4–6 poles (about 1–2 feet apart) in a straight line. Use low, stable poles or sturdy PVC tubes.
- Introduce the Pattern: Walk alongside your dog and guide them through the first few poles using a treat. Keep the walk short to avoid fatigue.
- Use a Consistent Cue: Say “weave” or use a hand signal as you pass each pole. This cue becomes the mental trigger for the pattern.
- Gradually Increase Difficulty: Add more poles, narrow the spacing, or introduce a slight bend in the line to challenge coordination.
3. Combining Tunnels and Weave Poles in a Course
- Order Matters: Start with a simple tunnel or low jump, then weave poles, followed by higher jumps. This progression builds momentum while keeping the dog engaged.
- Use Timing: Keep each obstacle short (2–4 seconds) to maintain the dog’s focus and prevent fatigue.
- Incorporate Rewards Between Obstacles: A quick treat or a brief play session between tunnel and weave poles helps reset the dog's energy levels.
4. Common Challenges & How to Overcome Them
| Challenge | Solution |
|---|---|
| Dog hesitates at the tunnel entrance | Use a low tunnel or partially open the end. Encourage with treats on the other side. |
| Dog knocks over weave poles | Increase pole height slightly, or use more stable poles. Re‑teach the correct path. |
| Loss of focus after a few obstacles | Add short bursts of play or quick “sit”/“stay” commands to reset attention. |
5. Safety Tips
- Check Equipment: Ensure tunnels are free of holes and poles are firmly anchored.
- Monitor Fatigue: Dogs can tire quickly; take breaks after every 10–15 minutes of training.
- Use a Soft Landing: For tunnels, line the floor with a mat or grass to cushion falls.
6. Sample Training Schedule (4 Weeks)
- Week 1: Tunnel introduction + short weave poles (4 poles).
- Week 2: Increase tunnel length; add 2 more weave poles.
- Week 3: Combine tunnel and weaves in a sequence; practice timing.
- Week 4: Full course run with tunnels, weaves, and jumps; reward completion.
Remember, consistency is key. Keep sessions short (10–15 minutes) and end on a positive note. Over time, your dog will not only master these obstacles but also develop the confidence to tackle any agility challenge that comes their way.
Mastering the A-Frame and Dog Walks
The A‑frame is one of the most iconic obstacles in agility training. It tests a dog’s courage, coordination, and trust in their handler. When combined with well‑structured dog walks—short, focused runs that build confidence—the A‑frame becomes an accessible yet challenging element for both beginner and experienced dogs.
1. Understanding the Anatomy of an A‑Frame
- Height: Standard competition A‑frames are 18–20 inches high, but adjustable versions can range from 12 to 24 inches for different skill levels.
- Angle: The classic angle is 60°, which provides a gentle slope. For advanced dogs, you can steepen it to 70° or more.
- Surface: Smooth wooden or PVC boards work best; avoid rough or slippery materials that could injure paws.
2. Step‑by‑Step Training Sequence
- Introduce the Frame: Place a low A‑frame (12 inches) at the end of a short walk. Let your dog sniff and investigate without pressure.
- Encourage Approach: Use treats or a favorite toy to lure the dog toward the frame’s base, rewarding calm behavior.
- First Pass: Once the dog is comfortable, guide them onto the first rung. Keep the walk short (10–15 seconds) and reward immediately after they cross.
- Increase Height Gradually: After 3–5 successful passes at 12 inches, raise the frame to 14–16 inches. Repeat the process until you reach competition height.
- Add Speed and Rhythm: Incorporate a brief walk (20–30 seconds) before the A‑frame to teach pacing. Use a consistent “Go” cue and keep your tone upbeat.
3. Integrating Dog Walks for Confidence Building
A dog walk is essentially a short, controlled run that helps the animal stay focused and calm before tackling obstacles. Here’s how to structure them:
- Length: Start with 10–15 seconds, increasing by 5‑second increments as confidence grows.
- Location: Use a quiet hallway or an empty parking lot. Keep distractions minimal during the initial stages.
- Signal: Use a hand signal (e.g., “Walk”) and a verbal cue (“Go”). Consistency is key for mental association.
- Reward System: Immediately reward at the end of each walk with treats or praise. This reinforces the positive feeling associated with movement.
4. Common Pitfalls and How to Avoid Them
| Pitfall | Solution |
|---|---|
| Dog hesitates at the base of the frame. | Use a low, non‑slippery surface and offer a high‑value treat to entice them forward. |
| Dog rushes and loses balance. | Train with short walks first to establish pacing; use a slow “Walk” cue. |
| Handler gets frustrated, causing tension. | Mental reset: pause for 10–15 seconds if progress stalls, then resume calmly. |
5. Sample Practice Routine (30‑Minute Session)
- Warm‑up: 5 minutes of loose leash walking around the yard.
- Dog Walks: 4 rounds—10, 15, 20, and 25 seconds—rewarding each finish.
- A‑Frame Intro: Place a low frame; perform 3 passes with treats.
- Progression: Raise the frame by 2 inches and repeat until height is 18–20 inches.
Cool Down: Gentle back‑to‑home walk, praise, and a final treat.
6. Resources for Further Learning
- Hundertag Agility Training Guide
- YouTube Tutorial: A‑Frame Basics
- Local agility clubs often host “Intro to Agility” classes—great for hands‑on experience.
By systematically combining dog walks with progressive A‑frame training, you create a solid foundation that boosts your dog’s confidence and skill. Remember: patience, consistency, and positive reinforcement are the true keys to mastering this classic agility obstacle.
Combining Obstacles into a Course Flow
Once you’ve mastered the individual obstacles—tunnels, weave poles, and jumps—it’s time to turn them into a coherent, high‑energy course that challenges both mind and body. The key is to design a flow that feels natural to the dog while keeping your training sessions engaging and safe.
1. Map Out Your Course Layout
- Start with a Clear Goal: Decide whether you’re aiming for speed, precision, or endurance. This will dictate obstacle placement.
- Use a “Z” Pattern: Most agility courses follow a zig‑zag path that keeps the dog turning and looking back. Place obstacles in a sequence that encourages this pattern: jump → weave poles → tunnel → post jump.
- Measure Distances: Keep consistent spacing (e.g., 2–3 meters between obstacles) to maintain rhythm. Adjust distances based on your dog’s size and confidence level.
2. Transition Techniques
Transitions are the moments where a dog changes direction or speed. Smooth transitions reduce the risk of injury and improve performance.
- Use a “Signal Stop”: Teach your dog to pause briefly after each obstacle before moving on. A simple hand cue (“Stop”) works well, especially when you’re still building confidence.
- Incorporate a “Turn Cue”: When the dog needs to change direction (e.g., from a jump to weave poles), give a distinct verbal or hand signal. Consistency helps the dog anticipate what’s next.
- Practice “Back‑and‑Forth”: Run through a short section twice—once forward, once backward—to help your dog master transitions in both directions.
3. Build in Rest Points
Even the most energetic dogs need brief rests. Integrate small “pause” areas where the dog can sit or stand before the next obstacle.
- Use a Small Platform: A low, cushioned platform works as a rest spot and also teaches balance.
- Mark with a Marker Cone: Place a cone at the end of each segment; the dog can look to it before proceeding.
4. Test and Refine
No course is perfect on day one. Observe your dog’s reactions, note hesitation points, and adjust accordingly.
- Record a Video: Review the footage to spot awkward turns or missed cues.
- Ask for Feedback: If you train with a partner or instructor, ask them what they see.
- Iterate Quickly: Make small changes (e.g., moving one obstacle 0.5 m) and re‑test until the flow feels natural.
5. Sample Course Flow for a Beginner Dog
Below is a simple layout that balances excitement with safety, ideal for dogs new to agility:
Start → Jump (2 m) → Weave Poles (4 m) → Tunnel (5 m) → Post Jump (3 m) → Finish
- Each obstacle is spaced to give the dog a chance to recover.
- The tunnel is placed after weave poles, so the dog has time to turn and look back before entering.
- Finish line is directly ahead of the last jump to encourage straight‑line speed.
6. Advanced Flow Ideas
Once your dog can handle a basic flow, try these variations:
- “Switchback” Pattern: Alternate the direction of weave poles to increase agility.
- “Obstacle Combo”:** Combine two obstacles in one move (e.g., jump into a tunnel).
- Time Trials: Use a stopwatch to create competitive motivation and track progress.
Remember, the goal is to keep training fun while challenging your dog’s coordination, confidence, and obedience. By carefully designing obstacle placement and transitions, you’ll transform individual skills into a polished, high‑performance agility routine.
Safety Checks and Injury Prevention
Before you even think about setting up an agility course for your dog, take a few minutes to do a thorough safety check. This ensures that both the environment and the equipment are suitable for your dog's size, age, and skill level.
- Inspect the Course:
- Check all poles, tunnels, and jumps for loose screws or broken parts.
- Look for uneven surfaces that could cause a slip. If you find any, sand down or cover them with rubber mats.
- Ensure that the ground is firm but not hard; a slight give helps absorb impact during landings.
- Check Your Dog’s Health:
- Before training, have your vet confirm that your dog is fit for high‑impact activities.
- Watch for signs of joint pain or stiffness—especially in breeds prone to hip dysplasia (e.g., German Shepherds, Labrador Retrievers).
- If your dog has a history of injury, start with low jumps and short tunnels, gradually increasing difficulty.
- Use Proper Equipment:
- Make sure the jumps are adjustable to match your dog's height. A jump that is too high can cause injuries.
- Choose tunnels with smooth edges and no sharp corners.
- Consider a lightweight, flexible weave fence so that if your dog bumps into it, it won’t snap back hard.
- Create a Clear Training Area:
- Mark boundaries with cones or flags to keep the course away from traffic and obstacles.
- Keep a first‑aid kit handy—especially items for sprains, cuts, and heatstroke.
- Maintain good lighting if you train during dawn or dusk; reflective tape on poles helps visibility.
- Practice Good Warm‑Up and Cool‑Down:
- A 10–15 minute walk followed by light stretching (e.g., gentle leg swings) helps loosen muscles.
- After the session, do a slow jog or walk to gradually lower heart rate.
- Offer water immediately after training; dehydration can lead to muscle cramps.
- Monitor Your Dog’s Performance:
- If your dog shows hesitation, limping, or signs of fatigue, pause the session and reassess.
- Use a training log to track improvements and any incidents. This helps identify patterns that may require adjustments.
- Never force a jump or obstacle if your dog seems uncomfortable; progress should be incremental.
- Teach Recovery Techniques:
- Encourage your dog to take deep breaths after landing—this can help reduce muscle tension.
- If you notice swelling, apply a cool compress for 10–15 minutes. Follow up with a warm compress later in the day to promote circulation.
- Use a gentle massage on the quadriceps and hamstrings to relieve tightness.
Pro Tip: Schedule an annual check‑up that includes joint health imaging if your dog frequently participates in agility. Early detection of arthritis or other issues can significantly reduce injury risk.
Positive Reinforcement Techniques
Positive reinforcement is the cornerstone of effective agility training. By rewarding desirable behaviors, you create a strong association between the action and the reward, which encourages your dog to repeat it. Below are detailed strategies, real‑world examples, and practical tips for implementing positive reinforcement throughout an agility course.
1. Use High‑Value Treats
- Why they work: Dogs respond more strongly to treats that taste exceptional or have a strong aroma compared to everyday kibble.
- Examples: Small pieces of cheese, hot dogs, or commercially available “praise” treats designed for training.
- Practical tip: Keep a stash of these treats in a small container on the course so you can reward immediately after each successful pass.
2. Incorporate Verbal Praise and Hand Signals
- Why it matters: Dogs interpret tone as part of communication; a high‑pitched, enthusiastic voice signals approval.
- Examples: “Good job!” or “Yes!” after completing a jump, followed by a gentle pat on the chest.
- Practical tip: Pair each verbal cue with a distinct hand gesture (e.g., an open palm for “go”) to reinforce learning even when you’re far from the dog.
3. Implement Clicker Training as a Marker
- Why it’s effective: A clicker provides a precise, consistent sound that indicates the exact moment of correct behavior.
- Examples: Click and treat when the dog clears the first hurdle; click again when they navigate the weave poles correctly.
- Practical tip: Calibrate your clicker by clicking once per second during a practice session so your dog learns to anticipate the reward immediately after the click.
4. Use Time‑Limited Rewards for Complex Tasks
- Why it helps: Timing rewards right after the action keeps the association strong and reduces confusion about what was rewarded.
- Examples: Give a treat within 1–2 seconds of the dog completing a tunnel run, or immediately after they land on the landing pad.
- Practical tip: Keep a stopwatch handy during training to ensure consistency in timing across different obstacles.
5. Employ “Treat‑Drop” Training for Speed Drills
- Why it’s useful: Encourages the dog to finish an obstacle quickly and then drop the treat, allowing you to reward without interrupting flow.
- Examples: Hand a small treat at the start of a run; once they complete the course, ask them to “drop” it into your palm.
- Practical tip: Use a “drop” cue (e.g., “drop it”) consistently so the dog learns that dropping is part of the reward process.
6. Gradual Increase in Course Difficulty with Continuous Rewards
- Why consistency matters: Dogs learn best when rewards are predictable, even as obstacles become more challenging.
- Examples: Start with a single jump; reward each successful pass. Add the next jump only after the dog masters the first.
- Practical tip: Use a “break” cue (e.g., “pause”) to pause for a treat before proceeding to the next obstacle, reinforcing that progress equals reward.
7. Celebrate Small Wins with High‑Energy Praise
- Why it builds confidence: Even minor successes should be celebrated loudly and visibly, boosting motivation.
- Examples: If the dog hesitates at a pole but eventually moves through, give a big “yes!” and a treat.
- Practical tip: Keep an eye on body language; if the dog shows signs of frustration, pause training for a short break before continuing.
8. Use “Reward‑Pause” to Control Pace
- Why it’s effective: By rewarding and then pausing briefly, you help the dog internalize the correct speed without rushing.
- Examples: After a successful jump, reward, pause for 2–3 seconds, then start the next segment.
- Practical tip: Maintain consistent pause times across sessions so the dog learns that “pause” is part of the routine.
9. Combine Treats with Play as Dual Rewards
- Why it’s engaging: Many dogs love interactive play; using a toy after a course can reinforce learning while keeping training fun.
- Examples: After finishing the entire obstacle set, toss a ball or tug rope for a short game.
- Practical tip: Ensure that the play reward is brief (30–60 seconds) so it doesn’t become a distraction from subsequent training sessions.
10. Record and Review Your Sessions
- Why monitoring helps: Video allows you to see if rewards are timed correctly and if the dog is responding positively.
- Examples: Use a smartphone to capture a full run; watch it later to check for missed treats or delayed praise.
- Practical tip: Keep a training log with timestamps of each reward so you can fine‑tune your timing over time.
By consistently applying these positive reinforcement techniques, you’ll create a supportive learning environment that encourages your dog to master agility courses with confidence and enthusiasm. Remember: the key is immediacy, consistency, and genuine excitement for every successful step along the way.
Progressing to Advanced Courses
Once your dog has mastered the fundamentals of agility—such as the tunnel, seesaw, and weaver poles—it's time to introduce more challenging obstacles that require precise timing, strength, and mental focus. The goal is not only to increase speed but also to enhance coordination and confidence.
1. Advanced Weave Pairs
- What’s Different? Two sets of weavers placed close together force the dog to navigate a tighter, faster pattern.
- Training Tip: Start with a single pair at a slower pace. Once the dog is comfortable, add the second set and use a higher‑value treat to maintain excitement.
- Common Mistake: Over‑relying on treats; gradually replace them with praise or a favorite toy so the dog stays motivated even when treats are scarce.
2. Jump-Through Wall
This obstacle combines a jump and a tunnel: the dog must leap over an arch while passing through a small opening in front of it.
- Step‑by‑step:
- Place a low wall (12–18 inches) with a gap at eye level.
- Encourage the dog to jump over the wall first, then guide it through the opening using a long line or a lure.
- Gradually lower the height of the wall while keeping the opening size constant.
- Safety Note: Ensure the landing area is soft (e.g., rubber mats) to reduce impact injury.
3. The “T” Turn
A classic test of agility: a dog must run forward, stop at a T‑shaped marker, pivot 180°, and sprint back in the opposite direction.
"The T turn is a pure expression of the dog's confidence. If they hesitate, it's often a sign that their base has not been fully established." – Dr. Emily Harper, Canine Trainer
- Start by rewarding short turns with high‑value treats.
- Use a cue word like “Turn” and pair it with a hand signal.
- Once the dog consistently completes the turn, increase speed gradually.
4. The “Half‑Pipe” or “Bunny Hop”
A half‑pipe requires the dog to jump onto a curved surface and hop back down, testing balance and core strength.
- Begin with a low, wide platform that’s easy to step on.
- Reward each successful landing before moving to the next height.
- Incorporate “bounce” cues: ask the dog to hop up and down on a smaller surface to build confidence in vertical movement.
5. The “Ladder” or “Rope” Crawl
This obstacle challenges upper‑body strength and coordination as the dog climbs over a horizontal bar or rope.
- Use a sturdy, low bar (6–12 inches) that can support the dog's weight.
- Encourage the dog to place one paw on each side of the bar before stepping onto the other side.
- Gradually raise the bar as the dog demonstrates confidence and strength.
Practical Advice for Advanced Training Sessions
- Keep Sessions Short: Advanced courses demand focus; limit training to 15–20 minutes per day with plenty of breaks.
- Use High‑Value Rewards: Switch between treats, praise, and a favorite toy to keep motivation high.
- Incorporate Mental Stimulation: Add simple problem‑solving tasks (e.g., “Which gate?”) between obstacles to tire the mind as well as the body.
- Progress Gradually: Don’t jump to a full course; build each obstacle separately before linking them together.
- Record and Review: Video your dog’s runs to identify hesitation points or missteps for targeted correction.
Sample Advanced Course Layout
Start → Tunnel → Weave Pair → T‑Turn → Jump‑Through Wall → Half‑Pipe → Ladder → Finish
Use this layout as a template and adjust obstacle order based on your dog’s strengths.
Common Challenges & How to Overcome Them
| Challenge | Solution |
|---|---|
| Dog hesitates at the first obstacle after a break. | Start with a short, easy run to re‑establish rhythm before tackling the advanced piece. |
| Lack of confidence in high jumps. | Use a step ladder or box to gradually increase height; reward each successful jump. |
| Dog gets bored between obstacles. | Add quick scent‑based tasks (e.g., “Find the treat”) to keep engagement high. |
With patience, consistency, and a clear progression plan, your dog can transition from beginner to advanced agility with confidence and joy. Remember: the goal is to create an enjoyable challenge that strengthens both mind and body.
Conclusion
Training your dog for agility is a rewarding journey that strengthens the bond between you and your canine companion while boosting their confidence, coordination, and fitness. Below is a step‑by‑step roadmap you can follow from beginner to advanced levels.
1. Start with Basic Obedience
- Commands: Ensure your dog reliably responds to “sit,” “stay,” “come,” and “heel.” Use high‑value treats or a favorite toy as incentives.
- Leash Work: Practice walking on a loose leash in various environments (park, street, quiet hallway) so the dog learns to focus while moving.
2. Introduce Simple Obstacles
- Tunnel: Place a lightweight tunnel and encourage your dog to walk through it by rewarding with treats on the other side.
- Weave Poles: Set up two poles 30–40 cm apart. Guide your dog through them slowly, rewarding each successful pass.
- Jump: Start with a low bar (15–20 cm). Let the dog approach it on its own; once they clear it, give praise and a treat. Gradually raise the height by 5 cm increments.
3. Build Confidence with Routines
Dogs thrive on consistency. Create a short “warm‑up” routine that includes:
- A brief walk to loosen muscles.
- 5–10 minutes of obstacle practice.
- Cool‑down stretching (e.g., gentle neck rolls, paw taps).
4. Introduce a Full Course
Arrange obstacles in a simple sequence: tunnel → weave poles → jump → pause box → finish. Use a clicker or verbal cue (“Go!”) at each transition. Keep sessions short (10–15 min) to avoid fatigue.
5. Gradual Complexity and Speed
- Increase Speed: Once the dog can navigate the course calmly, ask them to run a bit faster while maintaining control.
- Add Variations: Introduce new obstacles (see‑through boxes, A-frame) and shuffle the order to keep training engaging.
6. Mental Stimulation
Agility is as much mental as physical. Use puzzle toys or scent work between obstacle runs to give the dog a brief cognitive break.
7. Safety First
- Inspect all equipment for wear and tear before each session.
- Keep a water bowl handy; hydrate after warm‑ups and after training.
- Watch for signs of fatigue or discomfort—stop if the dog shows excessive panting, lagging, or reluctance to move.
8. Consistency & Patience
Progress may be slow at first. Celebrate small victories (e.g., a single successful jump) and keep training sessions upbeat. A positive mindset will reflect in your dog’s enthusiasm.
9. Join a Community
- Local agility clubs often host beginner classes and offer mentorship.
- Online forums (e.g., Agility.org) provide tips, obstacle designs, and video demonstrations.
10. Keep Learning
As your dog masters the basics, explore advanced techniques such as:
- Speed Drills: Use a stopwatch to time runs and set incremental goals.
- Obstacle Sequencing: Train the dog to remember complex sequences with minimal verbal cues.
- Competitive Routines: Practice timed runs to prepare for local or national competitions.
By following these steps, you’ll create a structured, fun, and safe training environment that helps your dog excel in agility courses while fostering mutual trust and joy. Happy training!
FAQ
1. What is dog agility training?
Dog agility is a competitive sport where dogs navigate an obstacle course consisting of jumps, tunnels, weave poles, and seesaws in the fastest time while staying on cue. The goal is to build speed, endurance, coordination, and a strong bond between handler and dog.
2. Which breeds excel at agility?
- Border Collie: Incredible intelligence and athleticism.
- Australian Shepherd: Strong work ethic and agility.
- Labrador Retriever: Good size, speed, and willingness to please.
- Jack Russell Terrier: Small but explosive; great for beginners.
However, any breed can succeed with consistent training and the right motivation.
3. How do I start basic agility training?
- Build a Foundation: Ensure your dog is physically fit, has a solid obedience base (sit, stay, come), and enjoys running.
- Create a Safe Training Space: A fenced yard or an agility-friendly indoor area with soft flooring.
- Introduce Obstacles One at a Time: Start with simple jumps (Jump Training) and tunnels (Tunnel Training). Use treats and praise to encourage exploration.
- Use Clear Hand Signals: Pair verbal cues (e.g., “Go!”) with hand gestures for each obstacle. Consistency is key.
- Progress Gradually: Increase height, speed, and complexity only when the dog masters the previous level.
4. How should I train jumps?
Start with a low jump (about 6–8 inches). Place a treat on the other side and let your dog naturally hop over it. Once comfortable, add a verbal cue (“Jump!”) and hand signal (a raised palm). Gradually raise the bar in 2-inch increments every few sessions.
- Safety Tip: Use soft foam or rubber barriers to cushion falls.
- Common Mistake: Forcing a jump; always let the dog choose to leap.
5. What’s the best way to introduce tunnels?
Place the tunnel on its side and walk your dog through while offering treats. Use a cue like “Tunnel!” and reward immediately after they exit. Slowly raise the tunnel's height and add a slight incline or decline.
6. How do I train weave poles?
- Set Up: Place six to eight poles about 18–20 inches apart.
- Cueing: Use a hand signal that mimics weaving, like moving your arm from side to side.
- Progression: Start with two poles, then add more as the dog gains confidence.
7. Tips for handling a nervous or hesitant dog?
- Positive Reinforcement: Reward every small step, no matter how minor.
- Break Tasks into Mini-Steps: Use a “step” system—treat after each obstacle rather than the entire run.
- Keep Sessions Short: 10–15 minutes keeps excitement high without fatigue.
8. How can I use treats effectively?
Use high-value treats (e.g., small pieces of chicken or cheese) for first-time attempts and switch to lower-value rewards (treats, praise, play) as the dog becomes confident. Treats should be used sparingly during runs to avoid over-reliance.
9. When should I consider a professional trainer?
If you’re stuck on specific obstacles, dealing with behavioral issues, or want competitive-level coaching, a certified agility instructor can provide tailored drills and feedback.
10. How do I prepare for an actual competition?
- Practice Full Courses: Run through all obstacles in sequence.
- Simulate Pressure: Have a friend act as an audience or use a timer to create urgency.
- Physical Conditioning: Incorporate interval training, endurance runs, and agility drills.
- Gear Check: Ensure your harness, leash, and obstacle accessories are in top shape.
Categories
- AI & Enrichment Play
- Broiler Farming
- Broiler Farming Tips
- Canine Wellness & Longevity
- Cat
- Cat & Human Connection
- Cat Adoption & Rescue
- Cat Breeds
- Cat Breeds & Personalities
- Cat Care & Health
- Cat Grooming & Hygiene
- Cat Lifestyle & Environment
- Cat Myths & History
- Cat Nutrition & Diet
- Cat Products & Reviews
- Cat Training & Behavior
- Comparison
- Consumer Awareness
- Dog
- Dog Accessories & Products
- Dog Adoption & Rescue
- Dog Breed & Lifestyle Trends
- Dog Breeding & Puppies
- Dog Entertainment & Media
- Dog Fashion & Trends
- Dog Fun & Lifestyle
- Dog Grooming & Hygiene
- Dog History & Culture
- Dog Myths, Science & Future Tech
- Dog News & Trends
- Dog Nutrition & Food
- Dog Psychology & Emotions
- Dog Safety & Security
- Dog Sports & Activities
- Dog Technology & Innovation
- Dog Training for Modern Owners
- Dog Travel & Adventure
- Dog Travel, Adventure & Culture
- Economic and Market Insights
- Educational Content
- FAQs
- Feeding Alternatives
- Festivals & Seasonal Ideas
- Fun & Entertainment
- General Knowledge
- General Pig Farming
- Health & Disease Management
- Housing and Environment
- Kittens
- Market Insights
- Miscellaneous
- Miscellaneous
- Motivational
- pig
- Pig Breeding
- Pig Breeds
- Pig Farming Stories and Inspiration
- Pig Health and Care
- Pig Nutrition
- Pig Products
- Profitability & Business
- Puppy Care
- Puppy Predictable Topics Reinvented
- Regional Focus
- Rescue & Adoption Buzz
- Senior Cats
- Senior Dog Care
- Smart Dog Tech & Gadgets
- Sustainability
- Sustainable & Eco-Friendly Dog Products
- Tech & Innovations
- Working & Service Dogs
- Broiler Feed66 products
- Country Feed33 products
- Pig Feed66 products
- Product22 products
- Raw Materials99 products
Products
-
 Fish Meal
₹1,999.00 – ₹2,999.00Price range: ₹1,999.00 through ₹2,999.00Rated 0 out of 5
Fish Meal
₹1,999.00 – ₹2,999.00Price range: ₹1,999.00 through ₹2,999.00Rated 0 out of 5 -
 FATTENING BROILER FEED
₹2,299.00 – ₹2,349.00Price range: ₹2,299.00 through ₹2,349.00Rated 0 out of 5
FATTENING BROILER FEED
₹2,299.00 – ₹2,349.00Price range: ₹2,299.00 through ₹2,349.00Rated 0 out of 5 -
 LAYER COUNTRY FEED
₹1,549.00 – ₹1,649.00Price range: ₹1,549.00 through ₹1,649.00Rated 0 out of 5
LAYER COUNTRY FEED
₹1,549.00 – ₹1,649.00Price range: ₹1,549.00 through ₹1,649.00Rated 0 out of 5 -
 COUNTER BROILER FEED
₹1,199.00 – ₹1,299.00Price range: ₹1,199.00 through ₹1,299.00Rated 0 out of 5
COUNTER BROILER FEED
₹1,199.00 – ₹1,299.00Price range: ₹1,199.00 through ₹1,299.00Rated 0 out of 5 -
 LACTATING PIG FEED
Rated 0 out of 5
LACTATING PIG FEED
Rated 0 out of 5₹2,299.00Original price was: ₹2,299.00.₹1,740.00Current price is: ₹1,740.00. -
 Maize
Rated 0 out of 5
Maize
Rated 0 out of 5₹1,650.00Original price was: ₹1,650.00.₹1,300.00Current price is: ₹1,300.00. -
 GESTATION PIG FEED (Phase 1)
Rated 0 out of 5
GESTATION PIG FEED (Phase 1)
Rated 0 out of 5₹2,249.00Original price was: ₹2,249.00.₹1,699.00Current price is: ₹1,699.00. -
 Pre Starter Broiler Feed
₹2,399.00 – ₹2,499.00Price range: ₹2,399.00 through ₹2,499.00Rated 0 out of 5
Pre Starter Broiler Feed
₹2,399.00 – ₹2,499.00Price range: ₹2,399.00 through ₹2,499.00Rated 0 out of 5 -
 FINISHER PIG FEED
Rated 0 out of 5
FINISHER PIG FEED
Rated 0 out of 5₹2,299.00Original price was: ₹2,299.00.₹1,749.00Current price is: ₹1,749.00. -
 Broiler Premix
Rated 0 out of 5
Broiler Premix
Rated 0 out of 5₹820.00Original price was: ₹820.00.₹699.00Current price is: ₹699.00.