
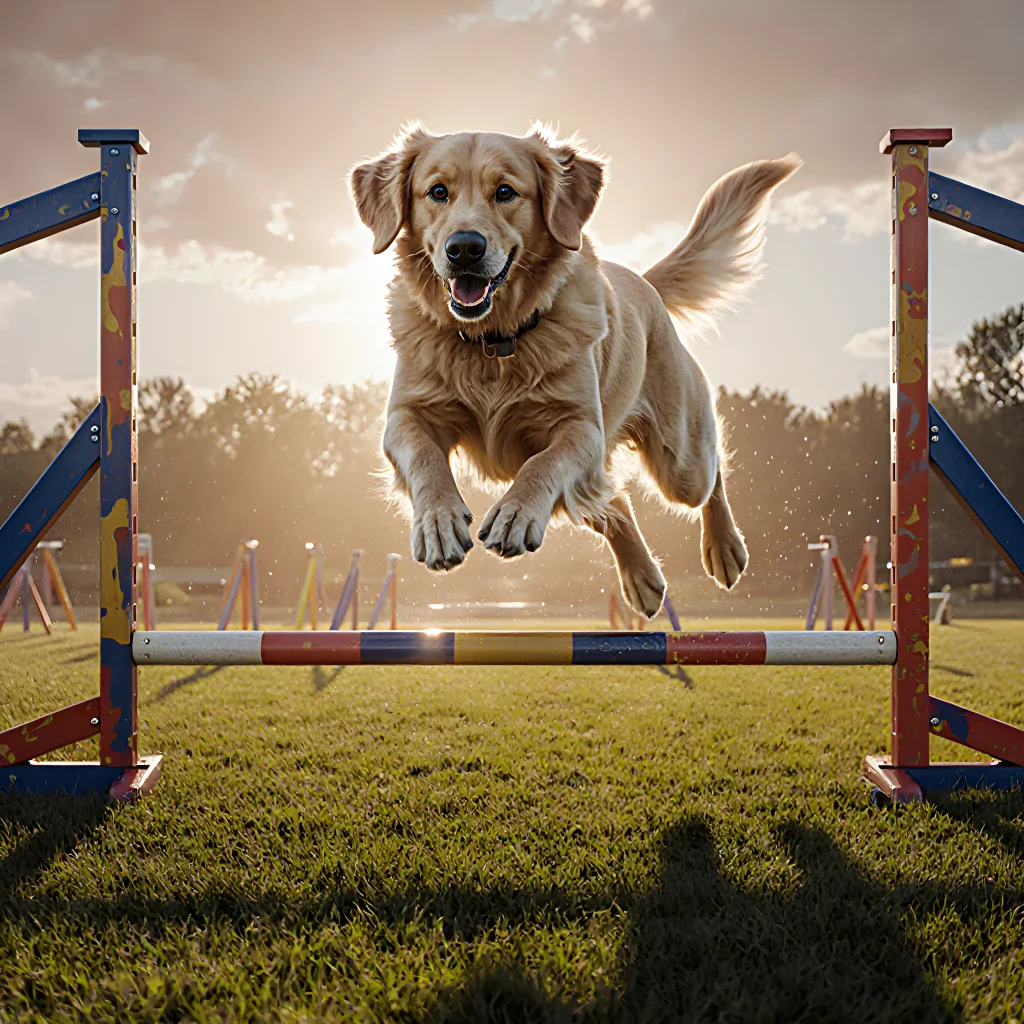
Unleash Your Dog’s Speed and Precision
Paws in Motion: Flyball Mastery Starts Now
Table of Contents
- Introduction to Flyball
- History of the Sport
- Essential Equipment
- Basic Rules and Scoring
- Team Structure and Roles
- Designing a Flyball Track
- Training Phases Overview
- Sprint Training Techniques
- Box Jump Skill Development
- Start‑Stop and Relay Drills
- Mental Focus and Confidence Building
- Nutrition & Hydration for Competitors
- Injury Prevention & Recovery
- Conclusion
- Frequently Asked Questions
Introduction to Flyball
Flyball is a fast‑paced, team sport that combines speed, agility, and teamwork. Two teams of four dogs each race down a runway, jump over hurdles, trigger a spring‑loaded box that releases a tennis ball, chase the ball, retrieve it, and bring it back to their handler. The first dog to return with the ball wins the point for its team. Matches are typically played best‑of‑five or best‑of‑seven.
Why Flyball Is a Win‑Win for Dogs
- Physical Conditioning: The sprint, jump, and retrieve sequence builds cardiovascular fitness, leg strength, and core stability.
- Mental Stimulation: The need to focus on the box, track the ball, and coordinate with teammates keeps dogs mentally sharp.
- Social Interaction: Dogs learn to work in a team, respect handlers, and navigate around other dogs—skills that translate to everyday life.
Basic Equipment Checklist
- Hurdles (2–4 feet high, typically 12–14 inches wide)
- Spring‑loaded ball box (commercially available or homemade with a weighted lid)
- Tennis balls (use fresh ones to avoid choking hazards)
- Runway markers (cones or flags to delineate the track)
- Hander leashes (short, 4–6 feet for control during training)
Step‑by‑Step Training Guide
1. Hurdle Familiarization:
- Start with low hurdles (8–10 inches) and reward the dog for stepping over.
- Gradually increase height while maintaining a consistent pace.
2. Box Activation Drills:
- Place the box on the ground; let the dog sniff and investigate.
- Encourage pawing or nudging with a treat to trigger the lid.
- Once the ball drops, reward the dog immediately for retrieving it.
3. Full‑Run Practice:
- Lay out a short runway (20–30 feet).
- Lead the dog over hurdles, onto the box, and back to you in one continuous motion.
- Use a marker to signal the start; reward with a high‑value treat or play.
4. Team Coordination:
- Practice with two dogs: have them alternate turns, ensuring smooth transitions.
- Use distinct verbal cues (“Go!”, “Stop!”) to avoid confusion.
Common Pitfalls and How to Avoid Them
| Pitfall | Solution |
|---|---|
| Dog hesitates at the box. | Use a treat or clicker to reinforce successful activation; gradually increase distance. |
| Overexertion leading to injury. | Monitor heart rate, provide rest days, and keep training sessions under 20 minutes. |
| Inconsistent start signals. | Standardize the command (“Flyball!”) and pair it with a hand signal for all handlers. |
Practical Tips for First‑Time Participants
- Attend a local club meeting to observe a live match before competing.
- Bring a well‑balanced diet and plenty of water—hydration is key during high‑energy events.
- Schedule a vet checkup to ensure your dog’s joint health is up to par for the jumps.
Final Thought: Flyball isn’t just about speed; it’s an opportunity for dogs and owners to build trust, sharpen skills, and have fun together. With consistent training, proper equipment, and a supportive team, you’ll see your dog thrive on the runway—and in life.
History of the Sport
The origins of flyball can be traced back to the early 1970s in Southern California, where a group of dog enthusiasts sought a new way to combine agility and speed for terriers and other small breeds. The first official event took place at a local kennel club in 1973, and by the mid‑1980s the sport had spread across the United States, eventually gaining international recognition through the International Flyball Association (IFA) founded in 1992.
Key Milestones
- 1973: First informal flyball race held at a Southern California kennel club.
- 1985: Formation of the National Flyball Association (NFA) in the U.S., standardizing rules and equipment.
- 1992: IFA established; global governing body created to promote international competitions.
- 2000s: Introduction of the “flyball ladder” system, allowing teams to progress through tiers based on performance.
- 2015: Flyball included as a demonstration sport at the World Dog Games in Vienna.
The essence of flyball is simple: two teams of four dogs race down a 50‑meter track, each dog triggers a spring‑loaded box that releases a tennis ball. The dog must catch the ball, jump over a hurdle, and return to its handler before the next teammate can begin.
Track Layout
- Starting Gate: Dogs line up in order; the first dog is released by the handler at the signal.
- Box Sequence: Five boxes are spaced 10 meters apart. Each box contains a tennis ball that is only released when the dog triggers the spring mechanism.
- Hurdles: After each ball, dogs must clear a 30 cm hurdle before proceeding.
- Finish Line: The last dog crosses the finish line; the team’s total time is recorded.
Common Penalties
- Jumping the Box: If a dog leaps over the box without triggering it, 5 seconds are added.
- No Ball Retrieval: Failure to catch the ball results in a 10‑second penalty.
- Hurdle Off‑Course: Straying off the designated path incurs a 3‑second penalty.
Flyball is more than just a sport; it’s a comprehensive training tool that delivers physical, mental, and social benefits.
- Physical Fitness
- Encourages cardiovascular endurance, muscular strength, and coordination. Regular sessions can help prevent obesity and joint issues.
- Mental Stimulation
- The requirement to focus on boxes, hurdles, and ball retrieval sharpens problem‑solving skills and reinforces impulse control.
- Socialization
- Dogs interact with other dogs and handlers during warm‑ups and cool‑downs, reducing fear and aggression in new environments.
- Owner–Dog Bonding
- The shared goal of winning a race fosters teamwork, communication, and trust.
Below is a step‑by‑step guide to preparing your dog for flyball competition.
- Foundation: Obedience & Recall
- Teach “stay” and “come” commands with high rewards.
- Practice recall in varied environments (park, backyard, crowded area).
- Agility Basics
- Set up a mini obstacle course: tunnels, weave poles, and low jumps.
- Use positive reinforcement; keep sessions short (10–15 min).
- Box Trigger Drills
- Place a box in the yard; reward the dog for stepping on it and triggering the spring.
- Gradually increase distance between boxes to simulate race conditions.
- Ball Retrieval Practice
- Use a tennis ball with a scent; encourage “fetch” by tossing it lightly.
- Reward immediately upon catching the ball, reinforcing the desired behavior.
- Hurdle Training
- Start with low hurdles (15 cm) and increase gradually to race height (30 cm).
- Use a treat or toy as a lure over the hurdle.
- Simulated Races
- Run full‑length practice races with teammates to build stamina and timing.
- Record time and note any penalties or hesitation points for review.
- Handler Coordination
- Practice hand signals: “go,” “stop,” “wait.”
- Develop a pre‑race routine to calm nerves and set expectations.
Common Pitfalls & How to Avoid Them
- Over‑exertion: Monitor heart rate; allow rest days to prevent injury.
- Inconsistent Rewarding: Use the same treat or toy consistently to avoid confusion.
- Neglecting Safety: Inspect boxes and hurdles for wear before each session.
- Register with your local flyball association; most clubs offer beginner classes. <li
Essential Equipment
Whether you’re a seasoned competitor or just starting out, having the right gear can make all the difference in your team’s performance and safety. Below is a comprehensive list of must‑have equipment, along with practical tips on how to use each item effectively.
1. Flyball Pitcher (Track)
- Standard Size: 16‑foot length, 12‑inch width (per FCI/USFlyball rules).
- Materials: Lightweight aluminum or composite rails for portability; rubber or vinyl top to reduce impact.
- Setup Tips:
- Mark the start and finish lines with bright tape or cones.
- Place the pitching box at a 45‑degree angle to encourage natural running trajectories.
- Check for uneven ground; level the track with a spirit level before each session.
2. Adjustable Jump Bars
The bars are typically set at 15 inches for adult dogs, but many teams use a range of heights (12–18 inches) to accommodate different breeds and training stages.
- Construction: Stainless steel or aluminum with quick‑release pins.
- Safety Check: Ensure the bar’s pivot point is secure; test by applying a 10‑lb load before each run.
- Training Tip: Start training at the lowest height and gradually increase as confidence improves.
3. Pitching Box (Launch Platform)
A stable, non‑slip surface is crucial for consistent ball launches.
- Design: A raised platform with a rubber or silicone floor.
- Weight Capacity: At least 200 lbs to support multiple handlers.
- Portability: Foldable legs and lightweight frame for easy transport between venues.
4. Durable, High‑Speed Balls
The ball’s design directly affects jump height and flight distance.
- Material: Polyurethane or rubber with a low coefficient of friction.
- Size: 6‑inch diameter for most adult dogs; smaller (4‑inch) options for puppies.
- Maintenance: Clean after each use to remove dirt that can affect traction.
5. Handler Equipment
Comfort and safety for handlers translate into better team coordination.
- Cushioned Gloves: Reduce hand fatigue during repeated ball launches.
- Reflective Vests or Bands: Enhance visibility in low‑light conditions.
- Portable Water Bottle: Keep handlers hydrated, especially on hot days.
6. Dog‑Specific Equipment
- Harnesses or Collars: Use a lightweight, snug harness to avoid chafing during rapid acceleration.
- High‑Visibility Bandanas: Aids in spotting dogs on the track and reduces anxiety.
- Treadmill or Agility Pads: For off‑track conditioning; helps maintain muscle tone and joint flexibility.
7. Safety Checks & Routine Maintenance
A regular inspection routine ensures that equipment stays in top condition.
- Daily: Inspect rails, bars, and the pitching box for cracks or loose screws.
- Weekly: Clean all surfaces with mild soap; lubricate pivot points with silicone spray.
- Monthly: Replace worn rubber or silicone components; verify that the ball retains its shape and bounce.
Investing in quality equipment not only boosts performance but also protects your dogs from injury. Keep these items organized, label them clearly, and establish a checklist so every team member knows what to bring for each session. With the right gear in place, you’ll be ready to hit the track with confidence, speed, and safety.
Basic Rules and Scoring
Flyball is a fast‑paced, team sport that blends agility, speed, and precision. Understanding the official rules and how points are tallied is essential for both new competitors and seasoned veterans who want to refine their strategy.
1. Competition Structure
- Teams: Each team consists of four dogs and a handler. Dogs run in the order they were entered into the race.
- Course Layout: The standard course features five hurdles, one flyball box (a weighted platform with a spring-loaded door), and a finish line. The hurdles are 30 inches high for dogs under 40 lb and 34 inches for larger dogs.
- Running Order: Dogs start on the left side of the course and run to the right, cross the flyball box, then return to the handler. The next dog starts from a distance of at least one hurdle length behind the previous dog’s finish line.
2. Rules for Each Leg
- Hurdle Clearance: Dogs must clear each hurdle without knocking it over or touching the rail. Contact counts as a penalty and can result in disqualification if repeated.
- Flyball Box Interaction: The handler releases the dog, who triggers the spring door by stepping on the weighted platform. If the dog fails to trigger the door within 10 seconds, the handler may reset it—this counts as a penalty lap and adds 2 seconds to the team’s time.
- Return Leg: After triggering the box, dogs must immediately turn around and run back to their handler. A dog that stops or lags behind is considered “not ready” for the next dog; the handler may request a restart of the entire leg, costing 5 seconds.
- Finish Line: The dog must cross the finish line before any other dog on the course. If two dogs finish simultaneously, the first to have triggered the box is awarded the higher rank.
3. Scoring System
Flyball uses a time‑based scoring system: the team’s total race time is recorded and compared against other teams in the same heat or division.
| Event Type | Description | Penalty Impact |
|---|---|---|
| Hurdle Knock‑over | Dog knocks a hurdle over or touches the rail. | +2 seconds added to total time. Repeated knock‑overs may lead to disqualification. |
| Box Reset Penalty | Handler resets the flyball box after a dog fails to trigger it within 10 seconds. | +2 seconds added per reset. |
| Restart of Leg | Dog is not ready or stops running prematurely. | +5 seconds added to the total time for that leg. |
| False Start | Handler releases dog before the signal. | Team may be disqualified from the heat. |
4. Practical Tips for Maximizing Your Score
- Consistent Release Timing: Practice releasing each dog on a metronome or timer so they start at the same pace. A consistent release reduces hesitation and minimizes restart penalties.
- Hurdle Approach Drill: Use an obstacle course with adjustable hurdle heights to train dogs to maintain speed while clearing hurdles cleanly.
- Box Trigger Training: Place a small treat on the platform to reinforce the trigger action. Once reliable, replace it with the weighted box and practice until the dog consistently triggers within 2–3 seconds.
- Recovery Run Drill: After triggering the box, have dogs sprint back to the handler in isolation. This builds confidence that they can maintain momentum on the return leg without stopping.
- Team Coordination: Conduct a pre‑race huddle where each handler signals when their dog is ready. Visual cues (e.g., hand signals) help synchronize starts and prevent false starts.
By mastering these rules and scoring nuances, teams can shave precious seconds off their total time—every fraction matters in the high‑speed world of flyball.
Team Structure and Roles
The success of a flyball squad hinges on clear organization and well‑defined responsibilities. Below is a typical team structure that balances the needs of dogs, handlers, and support staff while maximizing performance during competitions.
- Lead Handler (Captain)
- Responsible for overall strategy: lane assignments, pacing, and communication with other handlers.
- Sets the training schedule and monitors each dog’s progress.
- Acts as the liaison between club leadership and team members.
- Secondary Handlers (Co‑Captains)
- Assist the Lead Handler in setting up the course and timing runs.
- Handle dogs that may need more individualized attention or have specific trigger issues.
- Provide backup during competitions if a dog is unable to run.
- Dog Trainer
- Develops the training curriculum: hurdle drills, sprint intervals, and obstacle sequencing.
- Uses video analysis to fine‑tune each dog’s technique.
- Works closely with handlers to ensure consistency in cues and reinforcement.
- Course Designer/Setup Crew
- Builds the course according to official flyball regulations (e.g., 10‑meter height, 12‑meter distance between hurdles).
- Checks for safety: stable hurdles, smooth landing surfaces, and adequate spacing.
- Adjusts the layout for different competition levels or weather conditions.
- Team Manager / Logistics Coordinator
- Handles registration, travel arrangements, and equipment inventory.
- Keeps track of dog health records, vaccination schedules, and competition results.
- Ensures all team members have the necessary gear (collars, leashes, treats).
- Nutritionist / Veterinary Advisor
- Recommends diet plans tailored to each dog’s energy demands and recovery needs.
- Monitors for injuries or signs of overexertion, providing early intervention.
- Educates handlers on supplements, hydration, and preventive care.
- Volunteer Support (e.g., Parents, Community Members)
- Assist with setup, cleanup, and crowd control during events.
- Offer moral support and help maintain a positive team culture.
- Provide financial or material sponsorships when needed.
Key Practices for an Effective Team:
- Regular Meetings: Hold weekly briefings to review progress, address concerns, and plan upcoming training sessions.
- Clear Communication Channels: Use group messaging apps or a dedicated Slack workspace so everyone stays informed about course changes or schedule updates.
- Documentation: Keep a shared spreadsheet tracking each dog’s training logs, health status, and competition results for data‑driven decision making.
- Role Rotation: Occasionally rotate handlers or trainers to expose dogs to different cues and prevent handler fatigue.
By aligning roles with the specific demands of flyball—speed, precision, teamwork—and fostering a culture of accountability and continuous improvement, your squad can consistently perform at its best both on and off the course.
Designing a Flyball Track
A well‑planned flyball track not only maximizes fun for your dogs but also ensures safety and consistency during competitions or casual play sessions. Below are detailed guidelines, practical examples, and expert tips to help you create an effective, tournament‑ready course.
1. Choose the Right Location
- Flat terrain: Aim for a level surface that’s free of sudden elevation changes. A gentle slope can be used as a challenge if you’re designing an advanced track, but keep it under 5%.
- Open space: Minimum recommended width is 30 ft (9 m) between start and finish lines to allow for safe passing of the relay dog. Length should be at least 60–80 ft (18–24 m) from start to finish, with additional room for the obstacle zone.
- Surface material: Natural grass is ideal for most clubs, but if you’re in an area with heavy foot traffic or extreme weather, consider a rubber matting or artificial turf. Avoid slippery surfaces; add traction strips where needed.
2. Layout the Course Geometry
While the official rules specify a straight line from start to finish, you can incorporate turns for training purposes. Here’s a typical layout:
- Start line (S): Mark with two cones or a white flag.
- Relay dog zone: 10 ft (3 m) wide strip directly behind the start where the first dog waits for the command.
- Obstacle zone (OZ): A 20‑ft (6 m) long stretch that includes the hurdles, boxes, and the jump itself. The obstacles should be evenly spaced: hurdle at 5 ft, box at 10 ft, and jump at 15 ft from the start.
- Finish line (F): Mark with a green flag or cone to signal completion.
3. Selecting Hurdles
The hurdle is the centerpiece of any flyball track. It must be sturdy, safe, and compliant with the official specifications (height: 28 inches / 71 cm).
- Material: Lightweight aluminum or PVC frames are common; ensure they’re reinforced at stress points.
- Footing: Attach a rubber base to prevent slippage. Some clubs use a sandbag weight on the back for stability.
- Safety check: Test the hurdle by dropping a weighted object (e.g., a 20‑lb bag) onto it from 5 ft height; there should be minimal bounce and no structural compromise.
4. Choosing Boxes
The box must hold the flyball container securely while allowing easy access for the dog. Official guidelines require a minimum height of 12 inches (30 cm) and width of 18 inches (45 cm).
- Construction: A plywood frame covered with weather‑resistant vinyl or canvas works well.
- Padding: Add a rubber mat inside the box to cushion the container and prevent it from sliding when dogs jump on it.
- Placement: Position the boxes side‑by‑side, 2 ft (0.6 m) apart to give the dog enough room for a clean hop.
5. Flyball Containers
Standard containers are typically plastic or metal boxes with a latch that releases when the dog’s weight is applied. For training, use a lightweight container (1–2 lb) to encourage quick jumps; for competition, use the official 6‑lb (≈2.7 kg) box.
- Testing: Verify that the latch releases under the weight of a single dog (~25 lb/11 kg).
- Cleaning: Keep the container free from debris to prevent tripping hazards.
6. Track Markings and Safety Features
- Line markers: Use brightly colored cones or tape (yellow for start, blue for finish) to delineate the path.
- Safety barriers: Install a low fence (2 ft/0.6 m) around the obstacle zone to prevent dogs from running off during training sessions.
- First‑aid kit: Keep a small kit (bandages, antiseptic wipes, tweezers) nearby in case of minor injuries.
7. Environmental Considerations
Weather can affect both the track and your dogs’ performance.
- Rain: Use a rain‑proof tarp over the obstacle zone or move the track to an indoor arena if possible.
- Sun exposure: Position the track so that the sun is behind the finish line, reducing glare for both dogs and handlers.
8. Training Progression on Your Track
Start with basic jumps and gradually increase difficulty.
- Phase 1 – Single Jump: Teach the dog to hop over a low hurdle (20 inches) into a box that holds a treat. Reward immediately.
- Phase 2 – Relay Dog: Introduce a second dog that must wait at the start line and release the first dog upon hearing “Go.”
- Phase 3 – Full Relay: Add a third dog to complete the circuit, ensuring each transition is smooth.
9. Maintenance Checklist
- Weekly: Inspect all obstacles for damage; tighten bolts and screws.
- Monthly: Clean boxes and containers; check for rust or wear.
- Seasonal: Re‑tape markers if faded; replace any
Training Phases Overview
The journey from a curious pup to a flyball champion is structured into three progressive phases: Foundation, Skill Development, and Competition Readiness. Each phase builds on the last, ensuring your dog develops confidence, speed, and precision while keeping training fun and injury‑free.
1. Foundation Phase (Weeks 1–4)
- Basic Obedience:
- Commands: sit, stay, come, heel.
- Focus on establishing a strong leash and hand signal connection.
- Jump Confidence:
- Use low hurdles (10–12 inches) to introduce the jump.
- Reward with treats or play after each successful clearance.
- Relay Awareness:
- Walk around a mock relay setup, letting your dog sniff and observe teammates.
- Encourage calm behavior with “quiet” cues when other dogs approach.
2. Skill Development Phase (Weeks 5–10)
- Speed & Timing:
- Introduce a stopwatch to track run times.
- Practice starts with a hand‑signal “go” and pause to emphasize the start-stop rhythm.
- Obstacle Mastery:
- Gradually increase hurdle height (up to 18 inches).
- Use a “jump cue” hand signal that mirrors the relay’s hand sign.
- Team Coordination:
- Set up a 4‑dog line and practice passing the baton (the toy or ball).
- Use “pause” cues to ensure each dog clears the jump before the next starts.
- Endurance Building:
- Long runs of 30–45 minutes at moderate pace with breaks.
- Introduce “cool‑down” stretches to prevent muscle tightness.
3. Competition Readiness Phase (Weeks 11–16+)
- Mock Meets:
- Simulate a full meet: start, relay, finish, and judge’s call.
- Record the run to analyze pacing and technique.
- Rule Familiarization:
- Teach your dog to react to the referee’s hand signals (e.g., “stop,” “start,” “jump”).
- Ensure they understand the penalty rules for improper starts or falls.
- Psychological Prep:
- Desensitize to loud noises and crowds by exposing them gradually.
- Use a “focus” cue to redirect attention when distractions arise.
- Nutrition & Recovery:
- Schedule high‑protein meals 2–3 hours before runs.
- Incorporate post‑run massage and ice packs if needed.
By following these phases systematically, you’ll create a well‑rounded flyball athlete ready to tackle any meet with confidence, speed, and teamwork.
Sprint Training Techniques
Flyball is the ultimate sprint‑driven sport for dogs, combining speed, agility, and teamwork. To excel on the course, your dog needs a structured sprint training program that builds power, improves reaction time, and reinforces positive motivation. Below are proven techniques you can implement right away.
1. Dynamic Warm‑Ups
- High‑Knee Marches: Lift knees to hip height for 30 seconds, alternating legs. This activates the hip flexors and improves stride length.
- Leg Swings: Hold your dog’s collar and swing each leg forward/backward and side‑to‑side. Helps loosen hips and shoulders.
- Side Lunges: Walk slowly, stepping wide to the side with a slight lunge. Repeats 5–7 times per side.
These movements increase blood flow and prepare your dog’s muscles for explosive action.
2. Plyometrics for Explosive Power
- Box Jumps: Use a sturdy, dog‑safe platform (12–18 inches). Let your dog jump onto it and step down safely. Start with 5 reps, gradually increasing.
- Tuck Jump Ladder: Place four low boxes in a line. Your dog jumps from one box to the next while tucking knees to chest. Focus on quick foot contact.
- Hurdle Push‑Ups: Set up a 6–8 inch hurdle. Encourage your dog to sprint, clear it, and immediately land in a crouched stance before the next hurdle. Repeat 3–4 times.
Plyometrics develop fast-twitch muscle fibers essential for Flyball’s burst‑of‑speed demands.
3. Controlled Sprint Intervals
Use a measured distance (e.g., 30–50 meters) and have your dog run from start to finish, rest for 2–3 minutes, then repeat.
- Start/Stop Cue: Use a hand signal or whistle. This trains the dog to accelerate immediately when the cue is given.
- Time Trials: Record each sprint time. Aim for gradual improvement—ideally shaving 0.5–1 second per session.
- Recovery Focus: After each sprint, walk back slowly to reinforce calmness before the next burst.
4. Combine Sprint with Agility Obstacles
Set up a mini course mirroring Flyball’s layout: start line, jump, hurdle, box, and back‑to‑start.
- Jump + Sprint: Run to the jump, clear it, then sprint to the next obstacle. Emphasize smooth transition.
- Hurdle + Box: After clearing a hurdle, immediately sprint to the box and perform a tuck jump.
- Use a treat‑reward at each finish line to reinforce speed and accuracy.
5. Core & Leg Strengthening
- Weighted Vest Training: Gradually add weight (starting at 1–2% of body weight) during short runs to build power.
- Resistance Bands: Attach a band to your dog’s collar and walk forward, creating slight resistance that forces stronger leg drive.
- Hill Runs: If accessible, run uphill for 20–30 seconds then recover downhill. Hill training increases cardiovascular capacity and leg strength.
6. Enhancing Reaction Time
The fastest dogs react instantly to the flyball starter’s cue.
- Start Signal Consistency: Use the same hand or whistle each time so your dog learns the exact cue.
- Short “Go” Commands: Pair a verbal command (“Go!”) with a visual signal. Keep it brief to avoid hesitation.
- Practice in Noise: Train near other dogs or background noise so your dog stays focused on the cue, not distractions.
7. Cool‑Down and Stretching
- Slow Walk: After intense sprint sessions, walk your dog for 5–10 minutes to lower heart rate.
- Static Stretches: Gently stretch the hamstrings, quadriceps, and calves. Hold each stretch for 20–30 seconds.
- Foam Rolling: Use a dog‑friendly foam roller on major muscle groups to relieve tightness.
Incorporating these recovery steps reduces the risk of strains and keeps your dog primed for the next training session.
8. Example Weekly Sprint Plan
| Day | Focus | Duration / Reps |
|---|---|---|
| Mon | Plyometrics + Warm‑Up | 20 min |
| Tue | S |
Box Jump Skill Development
The box jump is a fundamental component of the Flyball circuit that tests a dog’s agility, timing, and confidence in crossing obstacles. Mastering this skill not only improves performance on the track but also enhances overall athleticism and obedience.
Understanding the Box Jump
- Dimensions: Standard box jumps are 2 ft wide by 1 ft high, though variations (e.g., 4 ft or 5 ft) exist for advanced courses.
- Surface: Smooth, non‑slip material such as rubber or foam to reduce injury risk.
- Placement: Typically positioned at the start of a Flyball lane; dogs must clear it before bounding onto the next hurdle.
Rules for Box Jump in Flyball
- The dog must land on both front and hind paws simultaneously, without touching the ground with any paw or body part between the box and the landing zone.
- If a dog jumps but fails to clear the box entirely (e.g., only lifts one leg), the team receives a penalty of one point.
- In high‑level competitions, timing is critical: a dog that lands too early or hesitates may lose valuable seconds.
Benefits of Mastering Box Jumps
- Enhanced Explosiveness: Improves the dog’s ability to launch off the ground quickly, vital for the burst between hurdles.
- Improved Balance: Forces dogs to coordinate their limbs precisely, strengthening core stability.
- Confidence Building: Repeated successful jumps reduce hesitation and fear of obstacles.
Training Tips for Box Jump Skill Development
- Start Low: Begin with a small box (e.g., 12 in high) to build confidence. Gradually increase height as the dog shows comfort.
- Use Positive Reinforcement: Reward with treats and praise immediately after each successful jump to reinforce the behavior.
- Incorporate Treadmill Training: Running on a treadmill while jumping over a low box can simulate speed and momentum, helping dogs learn how to maintain forward motion during the jump.
- Practice in Sequence: After mastering a single jump, add a second box or combine with a hurdle to mimic race conditions.
- Work on Grounding Drills: Teach the dog to “stay” on the landing pad before jumping again. This helps maintain focus and reduces the risk of tail‑gating.
- Use Visual Cues: Place a small flag or colored tape on the box to give the dog a clear target, aiding in depth perception.
Common Mistakes to Avoid
- Jumping Too Low: Dogs may hop over without proper clearance. Ensure the box is tall enough for a full jump.
- Inconsistent Pace: A dog that starts too slow or hesitates before the jump can lose momentum. Use a consistent running cue (e.g., “Go!”) to maintain speed.
- Ignoring Body Language: Signs of anxiety, such as flattened ears or a tucked tail, should be addressed early with patience and additional confidence drills.
Sample Training Routine (4 Weeks)
| Week | Focus | Exercises |
|---|---|---|
| 1 | Box Introduction | Walk over a low box, reward; short runs to the box. |
| 2 | Height Increase | Add 2 inches each session; practice with a treat on top. |
| 3 | Speed Integration | Run to the box at a controlled pace, jump, land, and run again. |
| 4 | Full Circuit Simulation | Box → Hurdle → Box sequence; record timing. |
By systematically building confidence, speed, and precision through these drills, your dog will master the box jump and be well‑prepared for the dynamic challenges of Flyball competition.
Start‑Stop and Relay Drills
In Flyball, the “start‑stop” phase is the moment a dog leaps from the box onto the first rung of the ladder, while the “relay” portion involves the team’s coordination as each dog returns to its own box. These two elements are pivotal for speed, safety and consistency on race day.
1. The Start‑Stop Drill
This drill trains dogs to launch cleanly from the box, hit the first rung accurately, and maintain momentum without hesitation. Here’s how to structure it:
- Box Placement: Set up the start box on a flat, non‑slippery surface.
- Rung Distance: Place a ladder rung about 2–3 feet from the box’s front edge. Adjust distance based on your dog’s size and stride length.
- Visual Cue: Use a brightly colored flag or a hand signal to indicate “go.”
- Repetition: Have the dog run, jump, hit the rung, and land in the box. Repeat 10–15 times, gradually increasing speed.
- Reward System: Offer a high‑value treat or praise immediately after a successful start‑stop to reinforce the behavior.
Common Pitfalls & Fixes
- Hesitation at the Box: If the dog stalls, practice “box confidence” by placing treats inside the box and letting the dog explore while you hold the leash.
- Mis‑landing on Rung: Use a small obstacle (e.g., a low foam block) behind the rung to encourage the dog to aim for the center.
2. The Relay Drill
The relay drill focuses on smooth transitions between dogs, ensuring each team member returns quickly and safely to its box. Follow these steps:
- Team Layout: Arrange all boxes in a straight line with equal spacing (usually 5–7 feet apart).
- Signal System: Assign a distinct hand signal for each dog’s turn (e.g., thumbs up, fingers spread). Consistency helps the team anticipate their cue.
- Practice Runs: Have the first dog complete the start‑stop, then quickly retreat to its box. Once in position, it should be ready for the next dog’s launch.
- Timing Drills: Use a stopwatch to measure each dog's run time from the start box to the relay box. Aim for a total team time that meets your goal.
- Recovery Training: After completing the relay, have dogs practice returning to their boxes at different speeds (slow, moderate, fast) to build endurance.
Key Relay Tips
- Box Proximity: Keep the distance between the end of the ladder and each box minimal—about 1–2 feet—to reduce the dog’s stopping time.
- Leash Management: Use a short leash during practice so that dogs learn to release quickly when they reach their box, preventing tangling.
Practical Integration into Training Schedule
Incorporate these drills twice weekly for the first month, then increase frequency as confidence builds. Here’s a sample schedule:
| Week | Start‑Stop Focus | Relay Focus |
|---|---|---|
| 1–2 | Basic start‑stop, 5 reps each session | Team line-up, single dog relay |
| 3–4 | Increase speed, 10 reps; add obstacle behind rung | Full team relay, timing drills |
| 5–6 | Start‑stop with variable box positions | Relay with signal variations and recovery runs |
Equipment Checklist for Drills
- Ladder (adjustable rung spacing)
- Flyball boxes (standard or custom size)
- High‑value treats or clicker for positive reinforcement
- Stopwatch or timer app
- Leashes (short and medium lengths)
- Visual cue flags or hand signal markers
By mastering the start‑stop and relay drills, you’ll develop a well‑coordinated team capable of executing rapid, clean runs that maximize speed while minimizing risk. Consistent practice, clear cues, and positive reinforcement are your best tools for success on Flyball tracks.
Mental Focus and Confidence Building
Flyball is not just a test of speed; it’s a mental workout for your dog. The rapid changes in environment, the need to remember the sequence of hurdles and boxes, and the pressure of racing against other teams all require sharp concentration and self‑assurance. Below are practical ways to develop these skills on and off the track.
1. Structured Obstacle Courses at Home
- Set up a mini flyball circuit: Use PVC pipes or wooden boards for hurdles, and place small crates or boxes for the box jump. Run through it twice a day, rewarding with treats after each successful hop.
- Change the order: Randomize hurdle placement so your dog learns to stay alert rather than anticipating a fixed pattern.
2. Teach “Focus” Commands
Use commands like “Eyes on me,” “Stay,” or “Watch” to pull your dog’s attention back when distractions arise.
- Practice during walks: Stop at a curb, look into your dog’s eyes, and say the command before allowing them to move on. Reward with praise or a treat.
- Incorporate in flyball drills: Pause after each hurdle; ask for “eyes on me” and reward. This reinforces focus under pressure.
3. Gradual Exposure to Competition Stress
Start by attending local dog shows or community gatherings without the expectation of racing. Let your dog observe other dogs running, then slowly introduce short practice runs in a neutral area.
- Week 1–2: Walk with your dog around the track perimeter, keeping them calm and rewarded for staying beside you.
- Week 3–4: Perform a few short practice runs with no other dogs present. Focus on smooth execution of each hop.
- Week 5+: Gradually add a friendly competitor or two, maintaining the same routine and rewards.
4. Positive Reinforcement & Timing
Timing your praise is crucial. Reward immediately after the dog completes a hurdle or successfully jumps the box to create a clear association between the action and the reward.
- Use clickers: A clicker can signal the exact moment of success, especially useful for dogs that learn through precise feedback.
- Keep rewards small but high-value: Use treats like cheese cubes or peanut butter swabs to keep motivation high without overfeeding.
5. Mental Stimulation Beyond the Track
Engage your dog with puzzle toys, scent games, and obedience drills that require problem‑solving. These activities sharpen cognitive flexibility, which translates to better focus during flyball races.
6. Post-Race Reflection
After each race or practice session, spend a few minutes reviewing what went well and where improvement is needed. Praise the dog for effort and discuss any mistakes with gentle guidance.
- Example: If your dog hesitated at the first hurdle, explain calmly how to approach it next time, then practice that specific scenario again.
7. Consistency & Patience
Building mental focus and confidence is a marathon, not a sprint. Maintain regular training sessions, avoid pushing your dog too hard, and celebrate small victories to keep motivation high.
By incorporating these strategies, you’ll help your dog develop the sharp mental acuity and unwavering confidence needed to excel in flyball—and enjoy the journey as much as the finish line.
Nutrition & Hydration for Competitors
Just as a human athlete needs the right fuel, a flyball dog’s performance hinges on proper nutrition and hydration. Below you’ll find actionable guidelines, sample meal plans, and hydration strategies that help keep your four‑legged teammate energetic, focused, and injury‑free.
1. Energy Requirements: Calories & Macros
- Calorie Needs: A typical flyball dog (15–25 kg) requires about 35–45 kcal per pound of body weight per day, depending on age, activity level, and metabolism. Use a canine calorie calculator or consult your vet for personalized figures.
- Protein: Aim for 18–22% protein to support muscle repair and growth. Look for high‑quality sources such as chicken, turkey, beef, fish, or plant proteins (lentils, chickpeas) if you’re on a vegetarian diet.
- Fat: Healthy fats should make up 10–15% of the total caloric intake. Omega‑3 and omega‑6 fatty acids promote joint health, coat condition, and an optimal immune response.
- Carbohydrates: Carbs are a quick energy source; include whole grains (brown rice, oats), sweet potatoes, and legumes. Avoid refined sugars and artificial additives.
2. Sample Meal Plan for a Competitive Flyball Dog
| Meal | Ingredients (approx.) |
|---|---|
| Breakfast | 2 cups cooked brown rice, 1 cup shredded chicken, ½ cup steamed broccoli, 1 tsp fish oil |
| Mid‑Day Snack | Plain Greek yogurt with a drizzle of honey and chopped blueberries (optional) |
| Lunch | 1 cup lentil stew, ½ cup diced sweet potato, 1 tbsp olive oil, mixed leafy greens |
| Dinner | 3 oz grilled salmon, 2 cups quinoa, ½ cup green beans, ¼ cup pumpkin puree |
Tip: Adjust portion sizes based on body condition score (BCS) and training intensity. Use a digital scale for accuracy if you’re preparing homemade meals.
3. Hydration Strategy
- Daily Water Intake: A general rule is 1 oz of water per pound of body weight daily, but highly active dogs may need up to 1.5 oz/lb.
- Pre‑Competition Hydration: Offer fresh water 2–3 hours before the event and a small bowl (≈10% of body weight) during warm‑up. Avoid giving large volumes all at once; this can cause gastric upset.
- During Competition: Provide intermittent access to clean, cool water or a collapsible water bottle. Consider adding an electrolyte supplement (low sodium) if the event is hot and humid.
- Post‑Competition Rehydration: Offer a larger bowl of water and a recovery drink containing carbohydrates and electrolytes within 30 minutes to replenish glycogen stores and restore fluid balance.
4. Foods & Supplements to Avoid
- Toxic foods: Chocolate, grapes, raisins, onions, garlic, xylitol (in sugar‑free treats), avocado pits.
- High‑fat treats: Fatty cuts of meat or excessive cheese can lead to pancreatitis during high‑energy activities.
- Caffeine & Alcohol: Completely contraindicated.
5. Practical Tips for Competition Days
- Pre‑Event Meal Timing: Feed a light meal (≈25% of daily calories) 4–6 hours before the event to allow digestion while still providing energy.
- Portable Food: Pack pre‑measured dry kibble or dehydrated meals in a sealed bag; these are lightweight and have a long shelf life.
- Monitoring: Keep an eye on your dog’s weight, coat condition, and behavior. Sudden changes may indicate nutritional deficiencies or over‑exertion.
- Veterinary Check‑In: Schedule a pre‑competition health check to confirm the dog is fit for intense activity, especially if you’ve introduced new foods or supplements.
By aligning your flyball dog's diet with these guidelines—balanced macros, adequate calories, and disciplined hydration—you’ll give them the best chance to perform at peak levels, recover faster, and enjoy a longer competitive lifespan.
Injury Prevention & Recovery
Flyball is a high‑intensity, fast‑paced sport that can be exhilarating for both dogs and owners. Because the game involves rapid starts, stops, jumps, and repeated sprints over a short distance, it also carries a higher risk of musculoskeletal injuries if not managed properly. Below you’ll find a comprehensive guide to keeping your dog safe during training and competition, as well as practical recovery strategies when an injury does occur.
1. Warm‑Up & Cool‑Down Routines
- Dynamic Stretching (5–10 min): Light jogs, high knees, butt kicks, and leg swings to increase blood flow without overstressing the joints.
- Functional Drills: Ladder drills or cone weaving to mimic flyball movement patterns while keeping intensity low.
- Static Stretching (post‑session): Gentle hamstring, quadriceps, and calf stretches for 15–30 seconds each. Avoid bouncing; hold the stretch until a mild tension is felt.
2. Strength & Conditioning Program
Build a solid foundation of core strength, hip stability, and leg power. A balanced routine includes:
- Resistance Training: Body‑weight squats, lunges, and step‑ups (use a low platform or sturdy box). Aim for 3 sets of 8–12 reps.
- Plyometrics: Low‑impact jumps onto a foam pad or small obstacle to improve explosive power without joint stress.
- Core Workouts: Planks, side planks, and “dead bugs” help stabilize the pelvis during rapid direction changes.
3. Proper Equipment & Surface Considerations
- Shoes & Harnesses: Use a well‑fitted harness that distributes pressure evenly and prevents chafing on the chest or neck.
- Track Surface: Soft, even turf or rubber mats reduce impact forces. Avoid hard concrete or uneven grass that can cause ankle twists.
- Jump Bar Height: Adjust according to your dog’s size and athleticism; a bar set too high may force an awkward take‑off, while too low may not challenge the muscles adequately.
4. Training Volume & Frequency
Gradual progression is key. A typical weekly schedule might look like:
| Day | Activity |
|---|---|
| Mon | Light jog + dynamic warm‑up (30 min) |
| Tue | Flyball drills – 5 rounds of short runs + 10 jumps (focus on form) |
| Wed | Rest or active recovery (gentle walk, massage) |
| Thu | Strength training + core work (45 min) |
| Fri | Flyball practice – 10 rounds, gradually increasing speed |
| Sat | Long walk or swim (low impact cardio) |
| Sun | Rest / full recovery |
5. Common Injuries & Early Warning Signs
- Hip Dysplasia or Joint Pain: Lameness, reluctance to jump, or a “shaky” gait.
- Ligament Tears (e.g., cranial cruciate ligament): Sudden limp, swelling around the knee.
- Muscle Strains: Swelling, heat, and pain when touched; often after intense sprinting.
6. Immediate First Aid Protocols
- Stop the activity immediately.
- Apply ice: 15–20 min on the affected area, then rest for 24–48 hrs.
- Limit movement: Use a supportive wrap or sling if needed to keep joints stable.
- Seek veterinary care: If pain persists beyond 48 hrs or you notice swelling, bruising, or loss of function.
7. Rehabilitation & Return‑to‑Play Guidelines
After a vet clearance, follow these steps to ensure safe re‑entry into flyball:
- Phase I – Pain Management (0–2 weeks): Gentle passive range‑of‑motion exercises; no running or jumping.
- Phase II – Strengthening (2–4 weeks): Light resistance training, gradually increasing load by 10% each week.
- Phase III – Plyometrics & Agility (4–6 weeks): Low‑impact jumps, short sprints, and directional changes; monitor for pain or swelling.
- Phase IV – Full Flyball Drills: Start with 2–3 rounds at low intensity, adding a round each session if no discomfort is reported.
8. Nutrition & Supplements
A balanced diet rich in omega‑3 fatty acids, glucosamine, and chondroitin can support joint health. Consider consulting with your vet about supplements tailored to your dog’s needs.
9. Owner Mindset & Continuous Monitoring
- Listen to Your Dog: A playful bark or a hesitant jump may signal an underlying issue.
- Track Workload: Use a training log (date, distance, intensity, observations) to spot patterns that precede injury.</li
Conclusion
Flyball offers an exhilarating blend of speed, agility, and teamwork that can transform the way you train and bond with your dog. By understanding the official rules, reaping the physical and mental benefits, and following practical training tips, you’ll be well on your way to becoming a confident competitor or simply enjoying friendly meets in your local park.
Key Takeaways
- Rule Compliance: Always keep the course set to the correct length (20–25 ft) and ensure obstacles are properly spaced. A well‑prepared track saves time and reduces injury risk.
- Physical Conditioning: Regular sprint intervals, agility drills, and strength training build the stamina needed for 10‑to‑12 jumps per run.
- Mental Focus: Use positive reinforcement and short, high‑value rewards to keep your dog’s attention on the ball and the course.
- Team Coordination: Communicate clearly with teammates—especially when setting up the start box or timing the buzzer—to maintain a smooth flow during meets.
Practical Tips for Success
- Start Small: Begin with a single hurdle and a short sprint. Once your dog is comfortable, add more obstacles gradually.
- Use a Consistent Cue: A simple verbal command like “Go!” paired with a hand signal helps reinforce the desired sequence (run → jump → retrieve).
- Reward Timing: Offer treats immediately after the dog clears each hurdle to strengthen the association between the jump and the reward.
- Simulate Competition: Practice under slightly noisy conditions—such as a friend shouting “Go!” from the sidelines—to mimic real meet distractions.
- Recovery Matters: After each run, give your dog a cool‑down walk and stretch. Hydration and rest are essential for preventing overuse injuries.
Next Steps
• Join a local flyball club or attend an introductory meet to observe seasoned teams in action.
• Sign up for a beginner’s training class offered by many agility trainers. Many use the same equipment and terminology as official flyball events, making the transition smoother.
• Keep a training log—record distances, times, and any behavioral notes—to track progress and identify areas needing improvement.
Final Thought
Whether you’re racing for trophies or simply chasing that ball across a sunny field, flyball is a joyous way to challenge your dog’s speed, coordination, and willpower. With the right preparation, adherence to rules, and consistent practice, you’ll unlock a world of fun, fitness, and fierce camaraderie on every run.
Frequently Asked Questions
-
What is flyball?
Flyball is a high‑energy, team sport for dogs that combines speed, agility and teamwork. A line of hurdles leads to a box with a spring‑loaded platform; when a dog jumps over the hurdles, the platform drops, releasing a tennis ball that the dog must retrieve and bring back to its handler before the next dog starts. -
Which breeds are best suited for flyball?
Breeds with natural athleticism—such as Border Collies, Australian Shepherds, German Shepherds, Labrador Retrievers, Jack Russell Terriers and Golden Retrievers—excel. However, any dog that is healthy, well‑socialized and eager to run can participate with proper training. -
How do I get started?
1. Check the rules. Each federation (e.g., AKC, UKFC) sets weight classes, hurdle heights, and box dimensions.
2. Find a local club. Most clubs offer beginner clinics; ask for a trial meet.
3. Train your dog. Focus on speed drills, hurdle jumps, and retrieving from the box. Gradually increase intensity as confidence grows. -
What equipment do I need?
- Hurdles: 18‑inch high for most dogs.
- Flyball boxes: Standard size is 3 ft × 2.5 ft; spring mechanisms can be purchased or homemade with a sturdy board and rubber bands.
- Tennis balls: Use soft, lightweight ones to reduce injury risk.
- Leash and harness: A short leash (4‑6 ft) keeps the dog in line during training. -
What are the benefits for my dog?
• Physical fitness: Builds cardiovascular endurance, muscle strength and coordination.
• Mental stimulation: Requires focus to time jumps and retrieve balls.
• Social bonding: Enhances teamwork with handlers and teammates.
• Confidence boost: Overcoming hurdles improves self‑esteem. -
How do I prevent injuries?
- Warm up with light jogs and dynamic stretches.
- Use a gradual progression: start with low hurdles, then increase height.
- Inspect equipment for wear; replace cracked boxes or broken springs immediately.
- Monitor your dog’s joint health; consult a vet if you notice limping. -
Can I train at home?
Yes! Build a simple obstacle course with PVC pipes or garden fences, and practice box drills using a plastic container as a mock platform. Consistency is key—train 2–3 times per week for best results. -
What’s the typical competition format?
Teams of four dogs run in order; the first dog must complete its leg before the next can start. The team with the fastest cumulative time wins. Penalties are given for missed hurdles or dropped balls. -
How do I join a flyball club?
Search online for “flyball clubs near me,” contact local trainers, and attend an introductory meet. Many clubs provide equipment loan programs for beginners. -
Where can I find training videos?
- YouTube: Search “flyball drill” or “dog agility training.”
- AKC Flyball Resources.
- Local club websites often host step‑by‑step tutorials.
Categories
- AI & Enrichment Play
- Broiler Farming
- Broiler Farming Tips
- Canine Wellness & Longevity
- Cat
- Cat & Human Connection
- Cat Adoption & Rescue
- Cat Breeds
- Cat Breeds & Personalities
- Cat Care & Health
- Cat Grooming & Hygiene
- Cat Lifestyle & Environment
- Cat Myths & History
- Cat Nutrition & Diet
- Cat Products & Reviews
- Cat Training & Behavior
- Comparison
- Consumer Awareness
- Dog
- Dog Accessories & Products
- Dog Adoption & Rescue
- Dog Breed & Lifestyle Trends
- Dog Breeding & Puppies
- Dog Entertainment & Media
- Dog Fashion & Trends
- Dog Fun & Lifestyle
- Dog Grooming & Hygiene
- Dog History & Culture
- Dog Myths, Science & Future Tech
- Dog News & Trends
- Dog Nutrition & Food
- Dog Psychology & Emotions
- Dog Safety & Security
- Dog Sports & Activities
- Dog Technology & Innovation
- Dog Training for Modern Owners
- Dog Travel & Adventure
- Dog Travel, Adventure & Culture
- Economic and Market Insights
- Educational Content
- FAQs
- Feeding Alternatives
- Festivals & Seasonal Ideas
- Fun & Entertainment
- General Knowledge
- General Pig Farming
- Health & Disease Management
- Housing and Environment
- Kittens
- Market Insights
- Miscellaneous
- Miscellaneous
- Motivational
- pig
- Pig Breeding
- Pig Breeds
- Pig Farming Stories and Inspiration
- Pig Health and Care
- Pig Nutrition
- Pig Products
- Profitability & Business
- Puppy Care
- Puppy Predictable Topics Reinvented
- Regional Focus
- Rescue & Adoption Buzz
- Senior Cats
- Senior Dog Care
- Smart Dog Tech & Gadgets
- Sustainability
- Sustainable & Eco-Friendly Dog Products
- Tech & Innovations
- Working & Service Dogs
- Broiler Feed66 products
- Country Feed33 products
- Pig Feed66 products
- Product22 products
- Raw Materials99 products
Products
-
 Fish Meal
₹1,999.00 – ₹2,999.00Price range: ₹1,999.00 through ₹2,999.00Rated 0 out of 5
Fish Meal
₹1,999.00 – ₹2,999.00Price range: ₹1,999.00 through ₹2,999.00Rated 0 out of 5 -
 FATTENING BROILER FEED
₹2,299.00 – ₹2,349.00Price range: ₹2,299.00 through ₹2,349.00Rated 0 out of 5
FATTENING BROILER FEED
₹2,299.00 – ₹2,349.00Price range: ₹2,299.00 through ₹2,349.00Rated 0 out of 5 -
 LAYER COUNTRY FEED
₹1,549.00 – ₹1,649.00Price range: ₹1,549.00 through ₹1,649.00Rated 0 out of 5
LAYER COUNTRY FEED
₹1,549.00 – ₹1,649.00Price range: ₹1,549.00 through ₹1,649.00Rated 0 out of 5 -
 COUNTER BROILER FEED
₹1,199.00 – ₹1,299.00Price range: ₹1,199.00 through ₹1,299.00Rated 0 out of 5
COUNTER BROILER FEED
₹1,199.00 – ₹1,299.00Price range: ₹1,199.00 through ₹1,299.00Rated 0 out of 5 -
 LACTATING PIG FEED
Rated 0 out of 5
LACTATING PIG FEED
Rated 0 out of 5₹2,299.00Original price was: ₹2,299.00.₹1,740.00Current price is: ₹1,740.00. -
 Maize
Rated 0 out of 5
Maize
Rated 0 out of 5₹1,650.00Original price was: ₹1,650.00.₹1,300.00Current price is: ₹1,300.00. -
 GESTATION PIG FEED (Phase 1)
Rated 0 out of 5
GESTATION PIG FEED (Phase 1)
Rated 0 out of 5₹2,249.00Original price was: ₹2,249.00.₹1,699.00Current price is: ₹1,699.00. -
 Pre Starter Broiler Feed
₹2,399.00 – ₹2,499.00Price range: ₹2,399.00 through ₹2,499.00Rated 0 out of 5
Pre Starter Broiler Feed
₹2,399.00 – ₹2,499.00Price range: ₹2,399.00 through ₹2,499.00Rated 0 out of 5 -
 FINISHER PIG FEED
Rated 0 out of 5
FINISHER PIG FEED
Rated 0 out of 5₹2,299.00Original price was: ₹2,299.00.₹1,749.00Current price is: ₹1,749.00. -
 Broiler Premix
Rated 0 out of 5
Broiler Premix
Rated 0 out of 5₹820.00Original price was: ₹820.00.₹699.00Current price is: ₹699.00.