
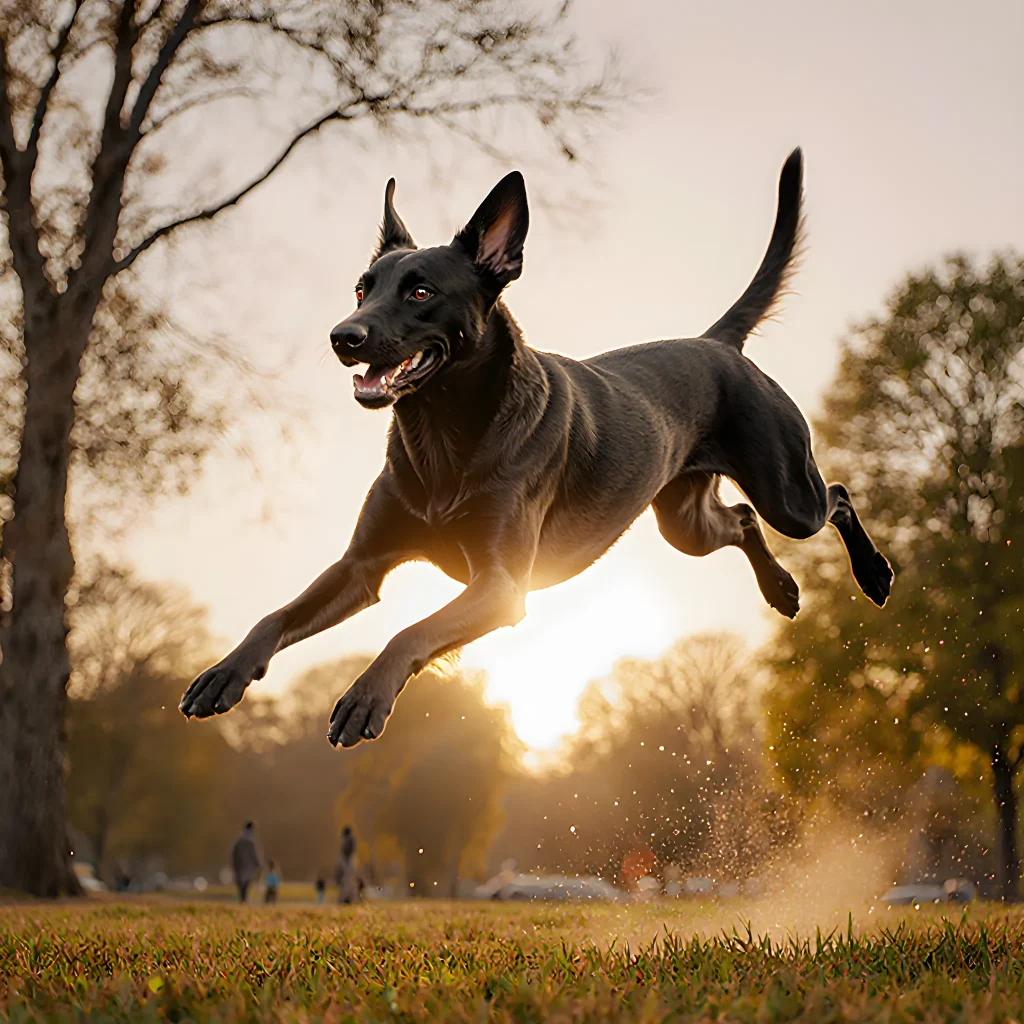
Unleash Your Pup’s Inner Champion
Pup Power Surge: Simple Steps to Agile Dog Mastery
Table of Contents
- Introduction
- Understanding Dog Agility Basics
- Choosing the Right Equipment
- Preparing Your Training Space
- Safety First: Health Checks and Permissions
- Basic Commands for Agility Success
- Introducing the Hurdle
- The T-rail: Jumping in Line
- Weave Poles: Turning Speed into Precision
- Jumps and Vaults: Building Confidence
- The A-Frame and Tunnels
- Combining Obstacles into a Simple Course
- Training Tips for Consistency and Progress
- Conclusion
- FAQ
Introduction
Agility training is more than just a fun activity; it’s an excellent way to build your dog’s confidence, improve their coordination, and strengthen the bond between you. Whether you’re a seasoned handler or a first‑time owner, this guide will walk you through the fundamentals of setting up an agility course, selecting the right equipment, and teaching your dog each obstacle with patience and consistency.
Why Start with Agility?
- Mental Stimulation: Dogs love solving puzzles; a simple jump or weave pole challenges their problem‑solving skills.
- Physical Fitness: Agility drills provide a balanced workout, improving muscle tone and cardiovascular health.
- Socialization: Training sessions often involve other dogs and handlers, helping your pet develop positive social behaviors.
Getting Started: Essential Equipment
Below is a beginner’s list of items you’ll need to build a basic course. If you’re on a budget, many components can be homemade or purchased second‑hand.
- Jumps: Adjustable PVC or wooden poles; start with low heights (12–18 inches).
- Weave Poles: Six to eight poles spaced 30–36 inches apart. Use smooth, sturdy materials to avoid injuries.
- Tunnel: A collapsible or folding tunnel that can be set up quickly and stored compactly.
- Pause Table: A small platform where the dog must stop and sit for a few seconds before proceeding.
- Markers & Flags: Clear, bright markers to define boundaries and help your dog navigate turns.
Step‑by‑Step Training Routine
The key to success is breaking each obstacle into manageable steps and rewarding progress consistently. Below is a sample weekly plan for a beginner’s first month.
| Week | Focus | Time Commitment |
|---|---|---|
| 1 | Jump Introduction – low jump, clicker training. | 15 minutes per session (3 sessions). |
| 2 | Weave Poles – guiding with treats, using a short leash. | 20 minutes per session (2–3 sessions). |
| 3 | Tunnel – lure through the entrance, then reward exit. | 15 minutes per session (3 sessions). |
| 4 | Pause Table & Course Integration – combine all obstacles in a simple circuit. | 25 minutes per session (2 sessions). |
Practical Tips for Success
- Use Positive Reinforcement: Treats, praise, and a favorite toy are the most effective motivators.
- Keep Sessions Short: Dogs have limited attention spans; 10–15 minute bursts maintain focus.
- Progress at Your Dog’s Pace: If they’re hesitant, reduce height or spacing before increasing difficulty.
- Stay Consistent with Commands: Use the same verbal cue (“Jump,” “Weave,” etc.) and hand signals every time.
- Record Your Sessions: Video helps identify body language cues you might miss in real‑time.
Common Pitfalls to Avoid
Even experienced trainers can fall into these traps. Watch out for:
- Overexertion: Dogs may tire quickly; always allow rest periods.
- Inconsistent Signals: Mixed cues confuse the dog, slowing progress.
- Ignoring Body Language: A hesitant dog needs a break or reduced challenge.
Next Steps
Once your dog masters the basics, you can add more advanced obstacles like the A‑frame, seesaw, or cargo box. Keep training sessions fun and reward-based, and you’ll see remarkable improvements in both performance and confidence.
Happy training!
Understanding Dog Agility Basics
Dog agility is more than just a fun pastime—it's a structured sport that combines speed, precision, and teamwork between owner and dog. Before you hit the obstacle course, it’s essential to grasp the foundational concepts that will make your training sessions safe, effective, and enjoyable.
1. What Is Dog Agility?
Agility is a competitive sport in which dogs navigate an obstacle course in the fastest time possible while staying under full control of their handler. The course typically includes jumps, tunnels, weave poles, seesaws, and A-frames. Unlike simple “toy play,” agility demands:
- Clear communication between handler and dog
- Consistent cues (e.g., “Go,” “Stop,” “Jump”) to trigger specific actions
- Physical conditioning—both endurance for long runs and strength for jumps
- Mental focus—dogs must quickly read the handler’s signals and adapt to changing course layouts.
2. Core Components of an Agility Course
| Obstacle | Description | Common Training Tips |
|---|---|---|
| Jumps | Low to high obstacles requiring the dog to lift its legs fully. | Start with a low jump; use treats or toys to encourage stepping over. Gradually increase height. |
| Tunnel | A straight, enclosed tube that the dog must run through. | Lead the dog through a short tunnel with a lure before letting it go alone. |
| Weave Poles | Series of poles spaced evenly; the dog weaves between them. | Use a long stick or rope as a visual guide, then transition to a hand cue. |
| A-Frame | Two slanted boards forming an “A” shape; the dog climbs up and down. | Encourage the dog to step onto the top with treats before moving onto the bottom side. |
| Seesaw (Teeter-Totter) | A board that tilts when the dog steps on one end. | Train the dog to step over the seesaw, using a “step” cue and rewarding balance. |
3. Basic Handling Commands
These are the building blocks of every agility routine:
- Go / Forward – Start of a course or an obstacle.
- Stop / Pause – The dog must halt and stay in place until released.
- Left / Right – Directional cues for turns.
- Jump / Over – Signals the dog to clear an obstacle.
- Step / Up / Down – For A-frames and seesaws.
4. Safety First: Equipment & Setup
- Use a sturdy, well-maintained harness or collar that fits snugly but comfortably.
- Check obstacles for damage—especially jump boards and poles—to prevent injuries.
- Ensure the training area is free of hazards (e.g., loose gravel, sharp objects).
- Always warm up before sessions: a 10–15 minute jog or play fetch to raise heart rate.
5. Training Progression for Beginners
The “Dog Agility Training for Beginners” step‑by‑step guide recommends the following phased approach:
- Phase 1 – Foundation (Weeks 1–2): Introduce each obstacle individually, focusing on confidence and basic cues.
- Phase 2 – Combination (Weeks 3–4): Link two obstacles together; practice short sequences like “Jump → Tunnel.”
- Phase 3 – Flow (Weeks 5–6): Build a full circuit, emphasizing smooth transitions and consistent speed.
- Phase 4 – Refinement (Weeks 7+): Polish timing, reduce hesitation, and start measuring completion time for competition readiness.
6. Practical Tips & Common Pitfalls
- Consistency is key: Use the same hand signals each day to avoid confusion.
- Positive reinforcement: Reward with treats, praise, or a favorite toy immediately after correct performance.
- Don’t rush: Allow the dog to master an obstacle before moving on; premature advancement leads to frustration.
- Watch for signs of fatigue: Slow breathing, drooling, or reluctance—take a break and hydrate.
- Mind the leash: A too‑tight leash can restrict movement; a loose but controlled leash is ideal.
7. Resources & Further Reading
For deeper dives into specific drills, equipment selection, and advanced techniques, consult:
- United States Dog Agility Association (USDAA)
- Waggle: Agility Training Guides
- AKC – Complete Guide to Dog Agility
By mastering these basics, you’ll create a solid foundation that will keep both you and your dog motivated and safe as you progress into
Choosing the Right Equipment
When you’re just starting out with dog agility, it can feel overwhelming to decide which obstacles and gear are essential. Below is a practical breakdown of each item’s purpose, how it benefits both you and your pup, and tips for selecting quality equipment that will grow with your training journey.
Core Obstacles Every Beginner Needs
- Jumps: Start with low, adjustable jumps (4–6 inches) to build confidence. Look for collapsible aluminum frames that allow height adjustments as your dog gains speed and power.
- Weave Poles: A set of 8–10 poles spaced evenly teaches focus and agility. Choose lightweight, non-slip poles with a smooth finish to prevent injury.
- Tunnels: A single, sturdy tunnel (12–14 feet) is great for teaching your dog to run straight through. Ensure the fabric is breathable and the frame is solid yet flexible enough for easy transport.
Optional Obstacles for Progression
Once your pup can comfortably navigate jumps, weave poles, and tunnels, you might consider adding:
- Weave-Through Poles: A variation that encourages tighter turns.
- Seesaw (A-Ball): Builds core strength; choose a balanced, low-to-the-ground version for beginners.
- Pause Table: Teaches obedience while on the move.
Essential Safety Accessories
- Collar or Harness: A snug, adjustable harness is recommended for better control during jumps. Avoid collars that can slip on the head.
- Training Whistle: A short-range whistle (around 100–200 feet) helps you communicate with your dog over noise and distance.
- First Aid Kit: Keep a kit handy for minor cuts, sprains, or dehydration. Include gauze, antiseptic wipes, and a small bandage roll.
How to Pick Durable Gear
- Material Matters: Aluminum frames are lightweight yet sturdy; PVC is cheaper but can break under heavy use.
- Weight Capacity: Check the manufacturer’s weight limit. For a 50‑lb dog, choose equipment rated for at least 200 lbs to ensure safety.
- Portability: If you’ll travel between parks, look for collapsible or foldable designs that fit into a standard SUV trunk.
- Warranty and Reviews: A good warranty (1–3 years) signals quality. Read customer reviews to spot common issues like uneven joints or rough edges.
Setting Up Your Training Area
Start with a clear, flat surface such as a local dog park, a backyard lawn, or an indoor gym floor. Arrange obstacles in a simple “L” shape to keep the course manageable:
- Place 2–3 jumps at the start.
- Follow with weave poles (8–10).
- End with a tunnel and a pause table before returning to the start.
Mark each obstacle’s distance from the start line using cones or chalk so you can track progress over time.
Keeping Your Equipment in Top Shape
- Inspect Daily: Look for loose screws, bent poles, and frayed fabric.
- Clean Regularly: Wipe down metal frames with mild soap to prevent rust. Launder tunnel fabric in a gentle cycle if it’s machine washable.
- Store Properly: Keep equipment in a dry place; avoid prolonged exposure to direct sunlight or dampness.
Investing in the right gear is foundational for a safe and enjoyable agility journey. Start simple, focus on quality over quantity, and gradually expand your obstacle set as your dog’s confidence and skill grow. With thoughtful equipment choices and consistent practice, you’ll both reap the rewards of improved fitness, bond, and fun.
Preparing Your Training Space
The first step in a successful agility training program is choosing and setting up an environment that keeps your pup safe, focused, and motivated. Whether you’re working on the sidewalk of your backyard or on a rented indoor court, the same core principles apply: clear boundaries, minimal distractions, and consistent surface conditions.
1. Choose the Right Location
- Outdoor vs. Indoor: Outdoor spaces provide natural light and ventilation but can be affected by weather. Indoor courts offer controlled temperatures and fewer wind or rain interruptions.
- Surface: Opt for a firm, flat surface that’s forgiving on joints—soft turf, packed sand, or rubber mats are ideal. Avoid uneven concrete or gravel which can lead to slips or injuries.
- Size: A minimum of 30 × 20 feet (≈9 × 6 meters) gives enough room for basic obstacles while still being manageable for a beginner’s pace.
2. Define the Training Boundaries
Use low, non‑intrusive barriers to keep your dog within the training area and prevent accidental escapes:
- Temporary fencing: Lightweight collapsible panels that can be set up in minutes.
- Soft rope or netting: Easy to tie around trees or posts, creating a “no‑go” zone.
- Natural obstacles: Arrange garden beds or shrubs strategically so they form a perimeter without posing a risk.
3. Minimize Distractions
Agility demands concentration; even subtle distractions can break momentum. Follow these guidelines:
- No loud traffic: If you’re on a street, choose a quiet block or schedule training during off‑peak hours.
- Limit other pets and people: Keep children or other animals out of the area during practice sessions.
- Sound control: Use a white noise machine or play calm background music to mask unexpected noises.
4. Prepare the Equipment Layout
Before you begin, arrange the obstacles in a logical sequence that matches your training plan.
- Start with simple jumps: Place two low jumps (30–45 cm) side by side to get the dog comfortable.
- Introduce weave poles: Position them just after the first jump; use a short distance (2–3 meters) between each pole.
- Add a tunnel: Place it next, ensuring enough space for the dog to run in and out without hitting walls.
- Finish with a pause table: Position it at the end of the sequence so the dog can practice stopping and turning.
5. Safety Checks Before Each Session
A quick inspection saves time and prevents accidents:
- Inspect obstacles: Look for loose bolts, splintered wood, or cracked surfaces.
- Check footing: Ensure the ground is even; remove any debris that could cause tripping.
- Hydration station: Place a bowl of fresh water within reach but not directly in front of obstacles.
6. Create a Routine
Dogs thrive on consistency. Set a regular training time—ideally when the dog’s energy levels are highest (morning or early evening). Keep sessions short, around 15–20 minutes, to avoid fatigue and keep the pup engaged.
Practical Example: Backyard Setup
Suppose you have a 30 × 25‑foot backyard with a soft grass surface. Here’s how you might arrange it:
- Mark the perimeter using low wooden posts and rope.
- Place two jumps (40 cm) about 5 meters apart.
- Set up six weave poles, spaced 1.2 meters apart, starting 3 meters after the second jump.
- Position a 4‑meter tunnel 10 meters from the weaves.
- Finish with a pause table placed 15 feet beyond the tunnel.
With these preparations, you’ll provide a safe, focused environment that encourages confidence and rapid progress for your dog’s agility journey.
Safety First: Health Checks and Permissions
Before you let your pup hit the agility course, it’s essential to ensure they’re physically ready and that you have all the necessary permissions in place. A healthy dog is a happy dog, and proper paperwork keeps everyone—owner, trainer, venue staff—informed and protected.
1. Vet Check‑In
- Full Physical Exam: Ask your vet to look for joint pain, ear infections, or any signs of injury that could be aggravated by agility training.
- Vaccination Status: Confirm up-to-date rabies, distemper, and parvovirus shots. Many clubs require proof before allowing participation.
- Microchip & ID: Ensure the chip is registered with your current contact details; an updated ID tag also helps in case of loss during a session.
- Fitness Assessment: If you’re new to agility, request a brief fitness evaluation. Your vet can advise on safe start‑up speed and obstacle tolerance.
2. Preventive Health Measures
- Heat & Hydration: Agility sessions are intense; always bring fresh water and a shaded spot for breaks.
- Footwear: Use sturdy, non‑slip shoes to protect your feet when navigating jumps or tunnels.
- First Aid Kit: Keep a kit handy—bandages, antiseptic wipes, tweezers (for loose nails), and a small plastic bag for any accidental injuries.
3. Venue Permissions & Rules
Every agility club or park has its own set of guidelines. Here’s what you should verify:
- Age & Weight Limits: Some clubs restrict the minimum age (often 6 months) and maximum weight to prevent injuries.
- Insurance Requirements: Many venues require proof that your dog is insured for accidents or property damage.
- Course Sign‑In: Most courses ask you to sign a waiver acknowledging the risks involved. Read it carefully before signing.
- Equipment Standards: Verify that the jumps, weave poles, and tunnels meet safety specifications (e.g., height tolerance, color visibility).
4. Training‑Specific Permissions
If you’re enrolling in a structured class or hiring a trainer, confirm these details:
- Trainer Credentials: Look for certifications from reputable bodies such as the Agility Association of North America (AANA) or UK’s Dog Agility Federation.
- Training Philosophy: Ensure the trainer uses positive reinforcement methods compatible with your dog’s temperament.
- Group Size & Dog‑Dog Interaction: Small groups reduce stress and allow for individualized attention, especially important for beginners.
5. Documentation Checklist
| Document | Status |
|---|---|
| Vaccination Record | ✔️ Updated within 30 days |
| Vet Health Certificate | ✔️ Signed & dated |
| Insurance Proof | ✔️ Covering liability |
| Venue Waiver/Consent Form | ✔️ Completed and signed |
| Trainer Certification (if applicable) | ✔️ Valid & current |
Keeping these health checks and permissions in order not only protects your dog but also builds trust with trainers and venue staff. When everyone is on the same page, you can focus on having fun, learning new tricks, and building a strong bond through agility training.
Basic Commands for Agility Success
Before you even touch the first obstacle, your dog needs to respond reliably to a handful of core commands. These cues form the foundation of every agility run and keep both you and your pup safe while having fun.
1️⃣ Come (Recall)
- Why it matters: In an obstacle course, a dog can become distracted by jumps, tunnels, or other dogs. A solid recall ensures you regain control instantly.
- How to train:
- Start in a quiet room with minimal distractions.
- Use a high‑value treat or your dog’s favorite toy.
- Say “Come!” in an upbeat tone, then step back 3–5 feet.
- If the dog returns within 2 seconds, reward immediately.
- Gradually increase distance and add mild distractions (e.g., a friend walking by).
- Practical tip: Use a long line or a short leash during early training so you can gently pull the dog back if they wander off. Remove the leash once recall is consistent.
2️⃣ Stay (Hold Position)
- Why it matters: Many agility obstacles require your dog to pause briefly before moving on. A reliable stay keeps them from running ahead or backing out.
- How to train:
- Ask for a sit, then say “Stay” and step back 2–3 feet.
- If the dog holds the position for 5 seconds, reward. Gradually increase to 10, 20, and eventually 30 seconds.
- Test in different locations: hallway, yard, or a park bench.
- Practical tip: Pair the stay with a “Leave it” cue. If your dog tries to move, use “Leave it” first and then release them with “Release” after they return to you.
3️⃣ Heel (Walk Beside You)
- Why it matters: During a run, your dog must stay at the front of the line, especially before jumps or tunnels.
- How to train:
- Hold a treat in each hand—one at your left side, one at your right side.
- Walk forward, encouraging your dog to stay beside you by moving the treat along.
- Use the cue “Heel” when they’re within a foot of you.
- Practice in various speeds: slow walk, trot, and eventually jog.
- Practical tip: Use a clicker or a short word like “Buddy!” to reinforce the correct position. When they slip behind you, pause and reward only when they’re back beside you.
4️⃣ Drop (Drop to Ground)
- Why it matters: Many agility obstacles require the dog to lie flat, such as at a jump take‑off or before entering a tunnel.
- How to train:
- Hold a treat in your hand and let your dog sniff it.
- Lower the treat slowly toward the ground while saying “Drop.” The natural reaction is to lie down.
- Reward immediately when they’re on their belly. Repeat until the cue alone triggers the behavior.
- Practical tip: Use a small toy or a ball that rolls into the dog’s nose—this encourages them to drop quickly and stay still.
5️⃣ Go (Release/Go Ahead)
- Why it matters: After a pause or a command like “Drop,” you’ll need to signal the dog to resume running.
- How to train:
- Hold a treat and say “Go!” in an excited tone.
- If the dog immediately takes off, reward. If they hesitate, gently push them forward with your hand.
- Practice this cue during walks and gradually combine it with obstacle transitions.
- Practical tip: Pair “Go” with a bright flash or a whistle to create a distinct auditory cue that’s easy for the dog to recognize on the course.
Combining Commands on the Course
Once each command is reliable in isolation, start chaining them together:
- Sit → Drop → Go before a jump.
- Stay → Heel → Go at the tunnel entrance.
- Use “Come” as an emergency recall if the dog gets stuck or distracted.
Remember to keep training sessions short (10–15 minutes) and end on a positive note. Consistency, patience, and plenty of high‑value rewards will see you both crossing that finish line in record time!
Introducing the Hurdle
The hurdle is one of the most iconic obstacles in dog agility and a perfect introduction for beginners. It tests your dog’s confidence, timing, and coordination while encouraging you to develop a strong, clear communication partnership.
Why Start with Hurdles?
- Low Physical Demand: Unlike jumps or tire swings, hurdles are relatively short (usually 24–30 inches for small breeds, up to 36 inches for larger dogs). This makes them easier to set up and reduces the risk of injury.
- Foundation for Advanced Obstacles: Mastering the hurdle builds a base of confidence that carries over to higher jumps, weave poles, and even the more complex A-frame or dog run.
- Skill Development: Hurdles require precise timing, body control, and focus—skills that are transferable across all agility events.
Setting Up Your First Hurdle
The classic hurdle design uses two poles set at a fixed height with a single bar. For beginners, keep the spacing narrow (about 30–36 inches) so your dog can see the finish line clearly.
- Choose the Right Height: Start low—around 24 inches for small breeds and 28 inches for medium/large breeds. You can gradually increase as confidence grows.
- Secure the Poles: Use sturdy wooden or PVC poles, at least 4 feet tall, secured with a weighted base or sandbags to prevent tipping.
- Bar Placement: The bar should be level and centered. If you’re using a flexible material (e.g., a sheet of plywood), ensure it’s taut enough to hold its shape but not so rigid that the dog can’t easily see it.
Training Steps: From First Jump to Consistent Performance
- Introduction: Let your dog explore the hurdle on a leash. Reward any curiosity or attempts to walk over the bar with treats and praise.
- Encouragement & Positive Reinforcement: Use a high-value treat or favorite toy placed just beyond the hurdle to entice the dog forward. Each successful jump earns a verbal cue (“Go!”) and a reward.
- Timing the Jump: Practice making the dog approach at a steady pace. Too fast can cause hesitation; too slow may lose momentum. A metronome app or tapping foot can help you maintain rhythm.
- Consistent Cue: Choose one verbal cue (“Jump!”) and a hand signal (e.g., an upward flick of the wrist). Keep them consistent to avoid confusion.
- Progression: Once your dog consistently clears the hurdle, increase height incrementally by 2–4 inches every few sessions. Monitor body language for signs of stress or hesitation.
Common Mistakes & How to Avoid Them
- Jumping Too Early: Dogs may leap before reaching the bar, causing them to miss the obstacle entirely. Counter this by teaching a “wait” cue just before the hurdle.
- Backpedaling: Some dogs hesitate or back off when they see the bar. Use a forward-moving cue and keep treats at eye level to maintain forward momentum.
- Inconsistent Height: Varying hurdle height can confuse your dog. Stick to one height until confidence is established before changing it.
Practical Tips for Home or Outdoor Training
- Use a Soft Surface: Grass or turf reduces impact on joints and makes the jump feel more natural.
- Mark the Finish Line: A cone or small flag just beyond the hurdle gives your dog a clear target, reinforcing forward motion.
- Keep Sessions Short: Agility is physically demanding. Limit training to 10–15 minutes per session with plenty of breaks.
Sample Training Session Outline (20 Minutes)
| Time | Activity | Notes |
|---|---|---|
| 0–2 min | Warm‑up walk & loose leash drill | Builds trust and readiness |
| 2–5 min | Hurdle introduction (no cue, just exploration) | Reward curiosity |
| 5–10 min | Basic jump with treat reward | Use “Jump!” cue and high‑value treat |
| 10–15 min | Progression: increase height by 2 inches | Check for hesitation |
| 15–20 min | Cool‑down walk & praise | Reinforce positive experience |
Conclusion
The hurdle may seem simple, but it’s a cornerstone of agility training. By focusing on clear cues, consistent height, and gradual progression, you’ll build confidence in both your dog and yourself—setting the stage for more complex courses down the line.
The T-rail: Jumping in Line
One of the most iconic obstacles in dog agility is the T‑Rail. It tests a dog's ability to maintain a straight line while navigating an obstacle that requires both precision and speed. Below you’ll find a step‑by‑step breakdown, practical tips, common mistakes to avoid, and how to progress from beginner to advanced.
1️⃣ Setting Up the T‑Rail
- Rails Length: Beginners start with a 12‑to‑14 ft rail; once comfortable, extend to 16–18 ft.
- Obstacle Height: Start at 6″ for small breeds and 8–10″ for larger dogs. Increase gradually as confidence grows.
- Rail Spacing: Keep the rails about 2 inches apart to reduce the chance of a dog’s paws getting caught.
- Ground Surface: Use a firm, non‑slippery surface (e.g., rubber mat or packed dirt). A smooth finish prevents slips.
2️⃣ Teaching Your Dog the “Line”
- Mark the Path: Use a long, flexible tape or a low pole to create a visual line. Let your dog walk along it while you reward them.
- Use a Cue: Once they’re comfortable following the line, introduce a verbal cue like “Line!” or a hand signal.
- Practice with Obstacles: Place a small low hurdle (2–3 in) in the middle of the line. Have your dog jump over it while staying on the line.
3️⃣ Introducing the T‑Rail
Start by placing the rail on the pre‑marked line. Keep the rail level and straight.
- First Pass: Walk your dog along the line, then let them run onto the rail. Reward immediately after they finish the jump.
- Encourage Straightness: If the dog veers off, gently guide them back with a leash or a hand signal. Avoid pulling; use positive reinforcement instead.
4️⃣ Common Mistakes & How to Fix Them
| Mistake | Fix |
|---|---|
| Dog’s paws catch in the rails | Widen the rail spacing and ensure the rails are not too close. |
| Dog strays from the line after the jump | Practice “line” drills before adding obstacles; use a high‑value treat at the end of the line to reinforce staying on course. |
| Jump height too low or high | Start with the lowest safe height and increase gradually as confidence builds. |
5️⃣ Progression Ideas
- Speed Work: Once your dog can consistently jump in line, add a timer. Aim for a new best time each session.
- Complex Rail Setups: Introduce a second rail that runs parallel but offset slightly to teach navigation under pressure.
- Obstacle Variations: Replace the simple rail with a T‑rail that has a low “jump” in the middle, requiring a quick change of direction.
6️⃣ Safety Checklist
- Inspect rails for cracks or loose bolts before each session.
- Make sure the rail is level; use a spirit level if necessary.
- Keep a first‑aid kit handy in case of minor knocks.
- Never force your dog into an obstacle. Use positive reinforcement and gradual exposure.
Mastering the T‑Rail is a rewarding milestone for both you and your pup. By focusing on line work, proper setup, and consistent practice, you’ll build confidence that carries over to every agility course. Happy training!
Weave Poles: Turning Speed into Precision
Weave poles are one of the most iconic obstacles in dog agility training, but they’re also among the easiest to master when you break them down into clear steps. Below is a step‑by‑step guide that will help beginners turn raw speed and excitement into smooth, controlled weaving.
1. Set Up Your Weave Poles Correctly
- Spacing: Use the standard 4‑foot spacing (about 1.2 m). If your dog is a smaller breed or just starting, try 3 ft to give them more room.
- Height: Poles should be 20–25 inches tall (50–63 cm) for most dogs; adjust downwards for puppies or very small breeds.
- Alignment: Keep the poles straight and parallel. A laser level or a long straight piece of wood can help maintain alignment over longer runs.
2. Teach Your Dog the “Weave Pattern”
The basic weave pattern is: start on the left, go right, left, right, left, finishing on the right side if you’re running clockwise. Use a simple cue like "weave" or "zig‑zag".
- First Pass: Lead your dog through the first three poles with gentle hand guidance. Reward them for staying on track.
- Second Pass: Let them go through the next two poles independently, rewarding smoothness and proper spacing.
3. Use “Tunnels” to Build Confidence
Place a small tunnel or a short obstacle in front of the first pole. This creates a clear target for your dog to focus on before entering the weave, reducing hesitation.
Practical Tip:
“If your dog stumbles over the first pole, reset by placing a treat just behind the second pole and walk them through that section again. Repeat until they pass the first two poles without hesitation.”
4. Gradual Speed Progression
Start with slow walking pace, then progress to a trot as confidence grows. Finally, incorporate a short burst of running between the second and third pole, which is where most dogs lose control.
- Slow: Walk at a steady pace; reward for staying in line.
- Trot: Increase speed to a trot; maintain eye contact and use a short leash if necessary.
- Run: Allow a brief sprint between the second and third pole. Use a hand signal or verbal cue (“go!”) for this burst.
5. Common Mistakes & How to Fix Them
| Mistake | Fix |
|---|---|
| Dog jumps over the first pole. | Use a shorter pole or add a “stop” cue right before the pole to keep them grounded. |
| Dog stays on one side and never switches. | Give a treat at each switch point; practice with just two poles first, then expand. |
| Lack of focus between poles. | Place a small target (e.g., a flag or toy) at the center of the second pole to keep their attention forward. |
6. Incorporating Weave Poles into a Full Agility Course
When weaving is mastered, integrate them with other obstacles:
- Sprint to the Weaves: Start with a short run or jump to build momentum.
- Weave + Jump Combo: Place a low jump immediately after the last pole for a smooth transition.
- Obstacle Sequence: Combine weave poles, tunnels, and jumps in a “mini‑course” that challenges both speed and precision.
7. Advanced Tricks for Seasoned Runners
- “Double Weave”:** Add an extra set of poles halfway through the run to test stamina.
- Weave + Turn: After the last pole, have your dog perform a quick 180° turn before heading back.
- Weave with Hand Signals Only: Replace verbal cues with hand signals for a cleaner run.
Conclusion
Mastering weave poles is all about turning speed into controlled precision. By setting up the obstacles correctly, teaching a clear pattern, and progressively increasing pace while avoiding common pitfalls, beginners can quickly see improvement. Remember: consistency, patience, and plenty of positive reinforcement are your best tools.
Jumps and Vaults: Building Confidence
For a beginner’s agility course, jumps and vaults are the cornerstone obstacles that teach dogs how to trust themselves and their handlers. They help a dog develop a sense of rhythm, timing, and spatial awareness while reinforcing the handler‑dog partnership. Below is a step‑by‑step guide on how to introduce these obstacles safely, with practical tips and real‑world examples.
1. Choose the Right Height and Style
- Start low: For a first‑time dog, use a jump at 6–8 inches off the ground or a simple “tunnel” style vault (a low pole with an arch). This reduces intimidation.
- Adjust gradually: Increase height by 2 inches each week if the dog shows comfort and confidence. A typical progression might be: 8″ → 12″ → 16″.
- Use open‑frame jumps: They provide a clear line of sight for the dog, encouraging them to focus on the goal rather than the obstacle’s frame.
2. Create a Positive Cue System
The handler should use consistent verbal cues (e.g., “Jump!” or “Vault!”) paired with a hand signal that clearly indicates direction. This consistency allows the dog to associate the cue with the action, reducing hesitation.
3. Practice in a Controlled Environment
- Start on flat ground: Place the jump or vault in a calm area free of distractions.
- Use treats and praise: When the dog clears the obstacle, reward immediately to reinforce success.
- Repeat the drill until the dog can perform it reliably (typically 5–10 successful attempts).
4. Introduce “Soft” Obstacles for Confidence Building
A “soft” jump or vault—one that is padded or has a forgiving surface—can help a nervous dog feel safe. For example, a rubber‑lined vault allows the dog to land gently if they misjudge the height.
5. Gradual Exposure to Complexity
- Sequential training: Once a dog can jump comfortably at one height, introduce a second jump of slightly higher or lower height to build adaptability.
- Incorporate other obstacles: After mastering jumps, add a short “tunnel” or “weave poles” segment before the next jump to keep training dynamic and fun.
6. Common Mistakes & How to Avoid Them
- Over‑exertion: Forcing a dog to jump too high can cause fear or injury. Always gauge the dog’s physical limits.
- Inconsistent cues: Mixing verbal and hand signals can confuse the dog. Pick one cue system and stick with it.
- Neglecting reward timing: Delayed praise may weaken the association between the obstacle and positive outcome.
7. Real‑World Example: “Baxter’s Breakthrough”
Baxter, a 10‑month‑old golden retriever, was hesitant to jump during his first agility session. The trainer started with an 8″ open‑frame jump and used the cue “Jump!” followed by a hand signal pointing forward. After five successful attempts, Baxter’s confidence grew; he then moved on to a 12″ jump and eventually a 16″ vault (a low pole arch). By week four, Baxter was clearing both obstacles in sequence without hesitation.
8. Practical Tips for Handlers
- Use a clear path: Keep the area around the obstacle free of debris or uneven surfaces.
- Maintain eye contact: The dog’s focus on the handler signals trust and reduces anxiety.
- Monitor body language: Signs of stress (ear flattening, tail tucked) indicate the need to step back a level.
- Celebrate small wins: Even a single successful jump is worth high praise.
9. Safety Checklists
- Inspect equipment for wear and tear before each session.
- Ensure the landing area is soft (grass or rubber mat).
- Use a harness or leash if the dog is still learning to keep them safe during practice.
By following these steps, beginners can turn jumps and vaults from intimidating obstacles into confidence‑boosting milestones. The key is gradual progression, consistent cues, and positive reinforcement—all of which create a supportive environment where both dog and handler thrive.
The A-Frame and Tunnels
When you’re just starting out with your pup’s agility course, the A‑frame (also called a jump) and tunnel are two of the most approachable obstacles. They teach basic body awareness, timing, and confidence without being overly intimidating.
Why These Obstacles Matter for Beginners
- A‑Frame: Builds a dog’s ability to jump over a single obstacle while maintaining balance. It’s the foundation for more complex jumps later on.
- Tunnel: Encourages forward motion and helps dogs learn to keep their head down, which improves overall body coordination.
Choosing the Right Size
Both obstacles should be scaled to your dog’s height. A general rule of thumb is that the A‑frame’s top should be about 1–2 inches higher than the dog’s shoulder line, and the tunnel’s entrance should be a few inches wider than the dog’s chest.
Step‑by‑Step Setup Instructions
- A‑Frame:
- Place the A‑frame on level ground, ensuring the legs are firmly anchored.
- Adjust the height using a lever or adjustable hinges if your frame allows.
- Mark the spot where you want your dog to begin the jump with a small flag or cone.
- Tunnel:
- Lay the tunnel flat and secure it so it doesn’t roll.
- If the tunnel has a removable floor, leave it in place for a smoother surface.
- Place a treat or toy at the far end to entice your dog forward.
Training Tips & Common Mistakes
| Tip | Description |
|---|---|
| Use a low starting height | Begin with the A‑frame at ground level and gradually raise it as confidence builds. |
| Encourage head down in tunnels | Hold a treat near the front of the tunnel to keep your dog’s head low. |
| Positive reinforcement | Reward immediately after the obstacle to reinforce correct behavior. |
| Avoid forcing a jump | If your dog hesitates, walk them over instead of jumping; this prevents injury. |
Sample Training Session (15 Minutes)
- Warm‑up (5 min): Gentle leash walks and light tug games to get the muscles loose.
- A‑Frame (4 min):
- Walk your dog over a low A‑frame three times, rewarding each successful jump.
- Increase height by 1–2 inches after each round if the dog is comfortable.
- Tunnel (4 min):
- Lead your dog through a short tunnel using a treat, gradually moving the treat farther back.
- After a few passes, allow your dog to run through on their own while you stand at the exit with a toy.
- Cool‑down (2 min): Light play and gentle petting to relax muscles.
Progressing Beyond the Basics
- Once your dog can confidently jump over a low A‑frame, add a slight incline or a second frame for series training.
- For tunnels, start using longer and narrower models to improve speed and agility.
Safety Checklist Before Each Session
- Inspect the A‑frame legs for cracks or loose bolts.
- Check the tunnel for dents or frayed fabric that could snag a paw.
- Ensure the training area is free of debris and has a non‑slippery surface.
With consistent practice, patience, and positive reinforcement, your dog will master both the A‑frame and tunnels—setting a solid foundation for all future agility challenges.
Combining Obstacles into a Simple Course
Once you’ve mastered the basics of each individual obstacle, it’s time to weave them together into a cohesive course. A well‑structured layout not only keeps your dog engaged but also ensures safety and progressive skill development.
1. Start with a Clear Flow
- Linear vs. Circular: For absolute beginners, a straight‑line course is easiest to understand. As confidence grows, you can loop the obstacles or add side turns.
- Keep it Short: Aim for 4–6 obstacles in your first layout. A longer course can overwhelm a new dog and lead to fatigue before they finish.
2. Choose Obstacle Order Strategically
The sequence should gradually increase in difficulty while giving the dog time to recover between more demanding moves.
- Tunnel: Starts with a low, open tunnel that encourages confidence and momentum.
- Jumps: Follow with a low jump (e.g., 12–18 inches) right after the tunnel to keep the dog’s speed up.
- Weave Poles: Place them next; they require steering but can be executed at a moderate pace.
- Balance Beam: Finish with a narrow beam to challenge focus before rewarding completion.
3. Use Markers and Visual Cues
Dogs rely on visual landmarks. Add bright cones or colored tape at each obstacle’s start and finish points. This helps the dog anticipate the next move and reduces hesitation.
4. Incorporate Rest Points
Even in a beginner course, give your dog a short pause after a set of obstacles:
- Water Station: A shallow bowl or splash pad can be used for hydration and a brief cool‑down.
- Reward Spot: Place a treat or favorite toy at the end of the first half to reinforce effort.
5. Practice “Redirection” Techniques
If your dog hesitates, use gentle redirection rather than forceful encouragement:
- Hand Signals: Teach a simple hand cue (e.g., “Go!”) that the dog associates with forward motion.
- Verbal Praise + Treats: Combine a short, enthusiastic voice with a treat when the dog successfully navigates an obstacle.
6. Gradually Increase Complexity
Once your dog consistently completes the course at a comfortable pace, start adding variations:
- Obstacle Height: Raise jumps by 2–4 inches each week.
- Speed Control: Use a stopwatch to time runs; aim for incremental reductions in completion time.
- Course Layout Changes: Rearrange obstacles or add a “pretzel” turn (a 180° pivot) between two jumps.
7. Safety First: Check the Course Regularly
Inspect each obstacle for wear, loose screws, or uneven surfaces before every session. A quick safety audit prevents injuries and builds trust with your dog.
8. Record Progress & Celebrate Milestones
Use a simple log (date, obstacles completed, speed) or take photos/video clips of each run. Reviewing these moments reinforces learning for both you and your dog.
Practical Example: A One‑Hour Beginner Session
| Time | Activity |
|---|---|
| 0–10 min | Warm‑up walk + treat distribution |
| 10–25 min | Tunnel (3 runs) → Jump (2 runs) |
| 25–35 min | Rest & water break |
| 35–50 min | Weave Poles (4 runs) → Beam (2 runs) |
| 50–60 min | Cool‑down walk + final reward session |
Remember, consistency and positive reinforcement are the keys to building a reliable, fun agility routine. As your dog’s confidence grows, you’ll find that even simple courses can spark excitement and enhance the bond between trainer and canine.
Training Tips for Consistency and Progress
Consistent, progressive training is the backbone of any successful dog agility program. Below are practical strategies that will keep you on track while ensuring your pup grows in confidence and skill.
1️⃣ Establish a Daily Routine
- Set fixed training times: Dogs thrive on predictability. Aim for two short sessions (10‑15 min) per day—morning and evening.
- Keep the environment stable: Train in the same area, use the same equipment, and maintain consistent lighting to reduce distractions.
- Use a cue card or app: A simple visual reminder can help you remember the order of drills (e.g., “Start → Jump → Tunnel → Finish”).
2️⃣ Leverage Positive Reinforcement
Reward-based training not only motivates but also builds trust.
- Treat selection: Choose small, high-value treats (e.g., bits of chicken or cheese). Rotate flavors to keep your dog intrigued.
- Timing is everything: Deliver the treat immediately after the desired action. Use a clicker if you prefer precise timing.
- Gradual fade-out: Once the behavior is reliable, start rewarding every other correct repetition and eventually transition to praise or play.
3️⃣ Progress Gradually
Jump from easy to challenging in small increments so your dog remains engaged without feeling overwhelmed.
- Jumps: Begin with a 6‑inch platform, then add 1‑inch each week until you reach the competition height (12–18 inches).
- Tunnels: Start by opening the tunnel for a few seconds and walking through; once comfortable, increase length and close the entrance.
- Weave poles: Use fewer poles at first; add one more pole every two sessions to maintain momentum.
4️⃣ Keep Sessions Short, Focused, and Fun
A 10‑minute burst of high-energy play is often more effective than a long, tedious session.
- Mix up drills: Alternate between jumps, tunnels, and agility games to keep your dog mentally stimulated.
- End on a positive note: Finish with a favorite game or a belly rub so the training feels rewarding.
5️⃣ Track and Celebrate Milestones
Keeping a log helps you spot patterns, celebrate successes, and adjust your plan as needed.
- Use a training journal: Note date, drill, duration, success rate, and any issues (e.g., hesitation, fatigue).
- Set measurable goals: “Complete 5 consecutive jumps without hesitation” or “Run the full course in under 30 seconds.”
- Reward milestones: Treat your dog to a special snack or an extra play session when a goal is reached.
6️⃣ Prioritize Safety
Safety measures protect both you and your pup from injury.
- Inspect equipment: Check for cracks or loose joints before each session.
- Use a well-fitted harness or collar: Avoid strain on the neck, especially during high jumps.
- Keep the area clear: Remove any debris that could cause slips or tripping.
7️⃣ Tailor Training to Your Dog’s Temperament
Every dog is unique—adjust intensity, pace, and rewards accordingly.
- High-energy dogs: They may benefit from more frequent, short bursts of activity with plenty of breaks.
- Shy or anxious dogs: Start with low-stakes drills (e.g., a simple "sit" before jumping) and build confidence gradually.
8️⃣ Seek Guidance When Needed
If you hit a plateau or encounter behavioral challenges, consider professional help.
- Enroll in a beginner class: Local clubs often offer structured programs with experienced trainers.
- Online resources: Many reputable agility coaches provide video tutorials and Q&A forums.
- Peer support: Connect with fellow owners for tips, motivation, and course reviews.
By incorporating these consistency and progress strategies into your routine, you'll create a solid foundation that turns novice agility training into an enjoyable, rewarding journey for both you and your dog. Remember: patience, positive reinforcement, and incremental challenges are the keys to long-term success.
Conclusion
In closing, mastering dog agility as a beginner is less about speed and more about building confidence—both yours and your pup’s—in each component of the course. By following the step‑by‑step approach outlined in Dog Agility Training for Beginners: Step‑By‑Step Guide, you’ll create a solid foundation that will keep training sessions fun, safe, and effective.
- Consistency is key: Practice each obstacle at least three times a day, keeping the duration short (5–10 minutes) to avoid fatigue or frustration. A routine of “warm‑up, skill work, cool‑down” mirrors what top trainers recommend for optimal learning.
- Use positive reinforcement: Treats, praise, and gentle verbal cues are your best tools. Reward every successful attempt—whether it’s a clear jump or a correct weave—so the dog associates effort with reward.
- Progress gradually: Start with low obstacles and simple courses, then increase height, speed, and complexity only when the dog consistently performs each element correctly. This progressive overload mirrors human athletic training principles.
- Incorporate fun challenges: Once your pup is comfortable, add playful distractions—like a moving ball or a friendly “buddy” to run alongside—to simulate real competition conditions and improve focus.
- Track progress: Keep a training log noting dates, obstacles tackled, times, and any setbacks. Reviewing this data helps you spot patterns, adjust intensity, and celebrate milestones.
Remember that agility is as much about the bond between handler and dog as it is about physical skill. Patience, clear communication, and consistent practice will turn your beginner routine into a rewarding partnership that can evolve into competitive success—or at least a highly enjoyable activity for both of you. Happy training!
FAQ
What equipment do I need to start a beginner agility course?
A basic starter kit includes:
- Weave poles: 6–8 poles, 2–3 feet tall, spaced 1–2 feet apart.
- Tunnel: Portable nylon or canvas tunnel, 10–12 feet long.
- Jumps: Adjustable PVC pipe jumps (4–6 feet span) with soft landing pads.
- A-Frame: A simple two‑bar frame that can be adjusted for height.
- Markers & Flags: For setting up boundaries and guiding your dog.
How do I introduce my dog to the first obstacle?
Use a step‑by‑step approach:
- Desensitization: Let your dog sniff and explore the obstacle while it’s off‑ground.
- Positive Association: Offer high‑value treats (e.g., small pieces of chicken) when the dog approaches or touches the pole.
- Guided Trial: Place a treat on top of the pole and gently guide your dog over it. Use a long leash to keep them safe.
- Repeat daily for 5–10 minutes, gradually increasing the number of poles crossed before rewarding.
What is the best way to keep my dog motivated during training?
Motivation stems from variety and rewards:
- Rotate Obstacles: Change the order of obstacles each session so your dog stays curious.
- Use a “Clicker” or Verbal Marker: A consistent cue signals success instantly.
- Short, Frequent Sessions: Dogs learn better in bursts than long marathons.
- Celebrate Successes: Give enthusiastic praise and a treat immediately after the dog completes an obstacle.
How can I prevent injury when my dog starts jumping higher?
Gradual progression and proper footing are key:
- Start Low: Begin with jumps at 12–18 inches, then increase by 2–4 inches every week.
- Soft Landing Pads: Place foam or rubber mats under each jump to cushion landings.
- Check Form: Ensure your dog lands on all four paws and keeps their body straight, not slouching.
- Rest Days: Include at least one rest day per week to allow muscle recovery.
Can I train my dog indoors?
Absolutely—though space is limited. Here are some indoor-friendly tips:
- Use a Mini A‑Frame: Built from PVC pipe or a sturdy bookshelf.
- Create Weave Poles: Use upright sticks or broom handles spaced closely.
- Practice Tunnels: Hang a lightweight fabric tunnel from the ceiling or use a folding play tunnel.
- Short Sessions: Keep indoor workouts under 10 minutes to avoid overheating.
What should I do if my dog gets frustrated or anxious?
Manage frustration by:
- Pause and Reset: Stop the activity, give a calm command (“sit,” “stay”), then resume.
- Use Low‑Intensity Tasks: Switch to a simple obedience drill before reintroducing obstacles.
- Reward Patience: Offer treats for simply approaching or staying calm near the obstacle.
- Seek Professional Help: If anxiety persists, consult a certified dog trainer or behaviorist.
How long does it usually take to see progress?
Progress varies by breed and individual temperament, but many dogs show noticeable improvement within:
- 2–4 weeks: Basic obstacle familiarity.
- 6–8 weeks: Consistent execution of a simple course.
- 3–6 months: Competitive-level agility skills.
What are some common mistakes to avoid?
Avoid these pitfalls for smoother progress:
- Over‑training: Dogs can get fatigued quickly; limit sessions to 10–15 minutes.
- Forcing Obstacles: Never push a dog through an obstacle—it leads to fear or injury.
- Inconsistent Commands: Use the same verbal cue and hand signals every time.
- Lack of Warm‑up: Skipping warm‑ups can cause muscle strains.
Categories
- AI & Enrichment Play
- Broiler Farming
- Broiler Farming Tips
- Canine Wellness & Longevity
- Cat
- Cat & Human Connection
- Cat Adoption & Rescue
- Cat Breeds
- Cat Breeds & Personalities
- Cat Care & Health
- Cat Grooming & Hygiene
- Cat Lifestyle & Environment
- Cat Myths & History
- Cat Nutrition & Diet
- Cat Products & Reviews
- Cat Training & Behavior
- Comparison
- Consumer Awareness
- Dog
- Dog Accessories & Products
- Dog Adoption & Rescue
- Dog Breed & Lifestyle Trends
- Dog Breeding & Puppies
- Dog Entertainment & Media
- Dog Fashion & Trends
- Dog Fun & Lifestyle
- Dog Grooming & Hygiene
- Dog History & Culture
- Dog Myths, Science & Future Tech
- Dog News & Trends
- Dog Nutrition & Food
- Dog Psychology & Emotions
- Dog Safety & Security
- Dog Sports & Activities
- Dog Technology & Innovation
- Dog Training for Modern Owners
- Dog Travel & Adventure
- Dog Travel, Adventure & Culture
- Economic and Market Insights
- Educational Content
- FAQs
- Feeding Alternatives
- Festivals & Seasonal Ideas
- Fun & Entertainment
- General Knowledge
- General Pig Farming
- Health & Disease Management
- Housing and Environment
- Kittens
- Market Insights
- Miscellaneous
- Miscellaneous
- Motivational
- pig
- Pig Breeding
- Pig Breeds
- Pig Farming Stories and Inspiration
- Pig Health and Care
- Pig Nutrition
- Pig Products
- Profitability & Business
- Puppy Care
- Puppy Predictable Topics Reinvented
- Regional Focus
- Rescue & Adoption Buzz
- Senior Cats
- Senior Dog Care
- Smart Dog Tech & Gadgets
- Sustainability
- Sustainable & Eco-Friendly Dog Products
- Tech & Innovations
- Working & Service Dogs
- Broiler Feed66 products
- Country Feed33 products
- Pig Feed66 products
- Product22 products
- Raw Materials99 products
Products
-
 Fish Meal
₹1,999.00 – ₹2,999.00Price range: ₹1,999.00 through ₹2,999.00Rated 0 out of 5
Fish Meal
₹1,999.00 – ₹2,999.00Price range: ₹1,999.00 through ₹2,999.00Rated 0 out of 5 -
 FATTENING BROILER FEED
₹2,299.00 – ₹2,349.00Price range: ₹2,299.00 through ₹2,349.00Rated 0 out of 5
FATTENING BROILER FEED
₹2,299.00 – ₹2,349.00Price range: ₹2,299.00 through ₹2,349.00Rated 0 out of 5 -
 LAYER COUNTRY FEED
₹1,549.00 – ₹1,649.00Price range: ₹1,549.00 through ₹1,649.00Rated 0 out of 5
LAYER COUNTRY FEED
₹1,549.00 – ₹1,649.00Price range: ₹1,549.00 through ₹1,649.00Rated 0 out of 5 -
 COUNTER BROILER FEED
₹1,199.00 – ₹1,299.00Price range: ₹1,199.00 through ₹1,299.00Rated 0 out of 5
COUNTER BROILER FEED
₹1,199.00 – ₹1,299.00Price range: ₹1,199.00 through ₹1,299.00Rated 0 out of 5 -
 LACTATING PIG FEED
Rated 0 out of 5
LACTATING PIG FEED
Rated 0 out of 5₹2,299.00Original price was: ₹2,299.00.₹1,740.00Current price is: ₹1,740.00. -
 Maize
Rated 0 out of 5
Maize
Rated 0 out of 5₹1,650.00Original price was: ₹1,650.00.₹1,300.00Current price is: ₹1,300.00. -
 GESTATION PIG FEED (Phase 1)
Rated 0 out of 5
GESTATION PIG FEED (Phase 1)
Rated 0 out of 5₹2,249.00Original price was: ₹2,249.00.₹1,699.00Current price is: ₹1,699.00. -
 Pre Starter Broiler Feed
₹2,399.00 – ₹2,499.00Price range: ₹2,399.00 through ₹2,499.00Rated 0 out of 5
Pre Starter Broiler Feed
₹2,399.00 – ₹2,499.00Price range: ₹2,399.00 through ₹2,499.00Rated 0 out of 5 -
 FINISHER PIG FEED
Rated 0 out of 5
FINISHER PIG FEED
Rated 0 out of 5₹2,299.00Original price was: ₹2,299.00.₹1,749.00Current price is: ₹1,749.00. -
 Broiler Premix
Rated 0 out of 5
Broiler Premix
Rated 0 out of 5₹820.00Original price was: ₹820.00.₹699.00Current price is: ₹699.00.