
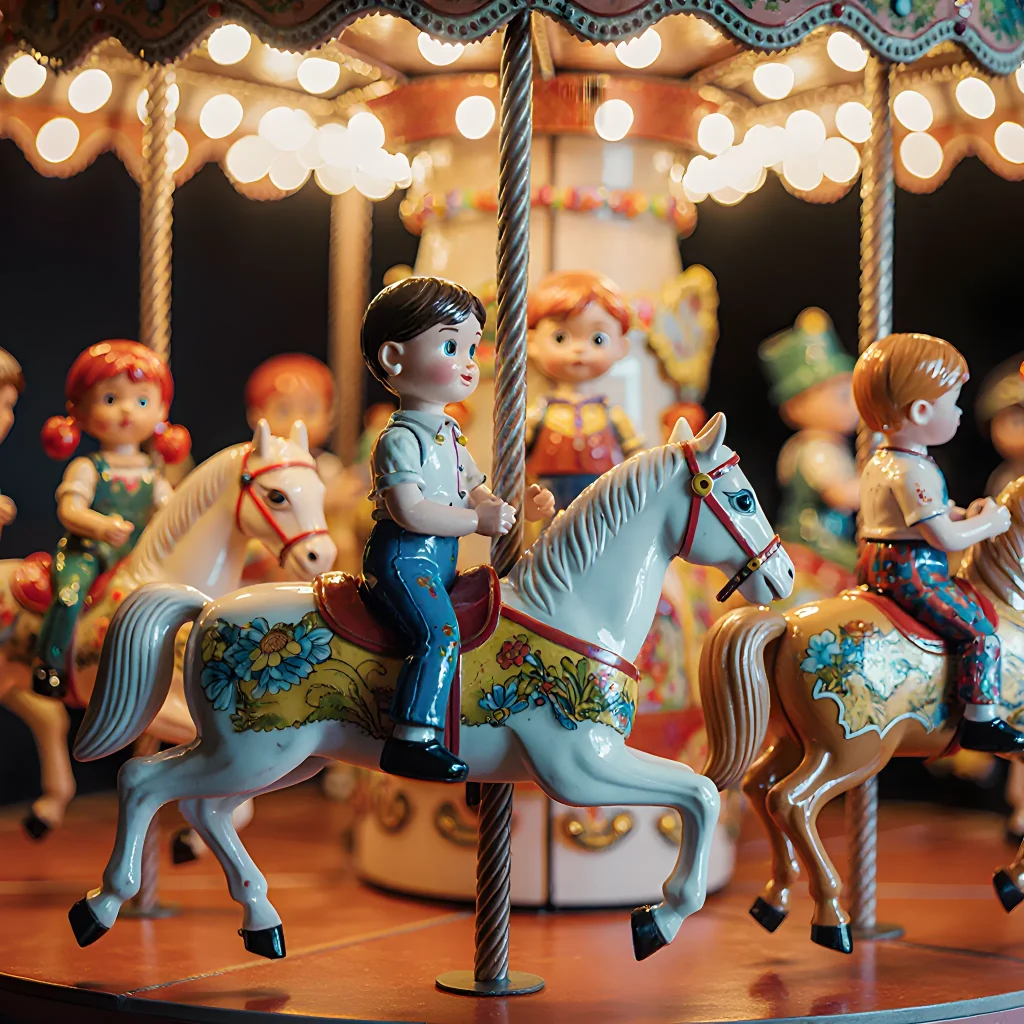
Revive Playtime—New Life for Classic Toys
Rotation Toy Hack: Keep Old Toys Exciting Again
Table of Contents
- Introduction
- Why Rotate Toys?
- Benefits for Kids
- Benefits for Parents
- Choosing the Right Toys
- Creating a Storage System
- Setting Up the Rotation Cycle
- Labeling and Organizing
- Involving Your Child
- Monitoring Engagement
- Adjusting the Plan
- Special Cases: Elderly or Differently‑Abled Kids
- Extending to Other Household Goods
- Conclusion
- FAQ
Introduction
Keep Your Child’s Playtime Fresh: The Power of the Rotation Toy Hack
When you first buy a new toy, the excitement is palpable—bright colors, fun sounds, and hours of play. But after a few weeks or months, that spark can fade as your child becomes accustomed to the novelty. Instead of letting those toys gather dust in drawers or boxes, why not reintroduce them with renewed enthusiasm? The Rotation Toy Hack is a simple yet effective strategy that keeps old favorites exciting again while keeping playtime varied and engaging.
The concept is straightforward: store most of your child’s toys out of sight, and only keep a handful on display or in reach at any given time. Every few weeks (or whenever you feel the excitement waning), swap the current set with new ones from storage. This creates a sense of “newness” without constantly buying fresh items.
Why It Works
- Psychological novelty: Children’s brains crave variety; rotating toys triggers curiosity and re-engages their interest.
- Reduces clutter: Only a limited number of toys are visible, which helps children focus on each one more deeply.
- Saves money:
- Audit Your Collection: Take inventory of all toys. Group them by category (blocks, vehicles, arts & crafts, plushies, etc.). Mark which ones are “favorites” and which can be stored.
- Create a Rotation Schedule: Decide how often to swap—bi‑weekly, monthly, or seasonally works well for most families. Use a calendar or simple sticky notes on the fridge.
- Choose Your Display Area: A low shelf, a dedicated toy box in the playroom, or even a “toy carousel” (a rotating basket) makes swapping easy and fun.
- Swap with Purpose: When you rotate, consider pairing a new item with an old one that has been out of sight for longer. This keeps both sides fresh.
- Involve the Child: Let them help decide which toys to bring out next or even create a “toy treasure hunt” where they search for hidden treasures in storage.
- Blocks and Construction Sets: Keep only 1–2 building sets on display at a time. Rotate them with different colors or themes (e.g., wooden blocks vs. magnetic tiles).
- Arts & Crafts: Store paint sets, markers, and craft supplies in labeled bins. Every month, bring out a new set of supplies to spark creativity.
- Stuffed Animals: Instead of keeping all plushies on the bed, place three or four in a “cuddle corner.” Rotate them with other favorites every few weeks.
- Books & Puzzles: Keep only a handful of books visible. Swap them out for new titles or puzzles to maintain interest.
- Teaching Organization: Children learn how to store and retrieve items, reinforcing responsibility.
- Encouraging Creativity: Fresh toys inspire new play scenarios and imaginative storytelling.
- Environmental Impact: Reducing the need for constant toy replacement supports sustainability.
- Too Many Toys Visible: Overloading the display area can overwhelm children. Stick to a manageable number (3–5 items).
- Lack of Routine: Inconsistent rotation schedules may lead to confusion or boredom. Keep your calendar handy.
- Neglecting Safety Checks: When swapping, inspect toys for wear and tear to ensure they’re still safe to use.
The Rotation Toy Hack transforms how children experience play. By reintroducing familiar items as “new” again, you maintain excitement, reduce clutter, and teach valuable life skills—all without breaking the bank. Start small—pick one category of toys to rotate—and watch your child’s enthusiasm soar.
Why Rotate Toys?
Children’s attention spans are short and their interests evolve quickly. When a toy sits untouched on a shelf for weeks or months it loses its allure. Rotating toys keeps the play environment fresh, encourages imaginative use of everyday objects, and can even save money by extending the life of each item.
Benefits of Toy Rotation
- Stimulates creativity: A familiar block set might become a spaceship one day and a castle the next when paired with new accessories.
- Reduces clutter: Only a handful of toys are visible at any time, making cleanup faster and less stressful for parents.
- Prevents overstimulation: A rotating selection helps children focus on one activity without being bombarded by too many options.
- Saves money: By giving each toy a “rest period,” you reduce the temptation to buy new items for novelty.
How to Implement a Rotation System (Rotation Toy Hack)
- Audit your collection: Separate toys into categories—building sets, action figures, arts & crafts, books, etc. Count how many you have per category.
- Set a rotation schedule: A simple rule is “every two weeks swap out one toy from each category.” Adjust the interval based on your child’s age and interest level.
- Use storage bins or baskets: Label each bin with its category. Keep the current play toys in clear, easily accessible containers; store the rest behind closed doors.
- Involve the child: Let them choose which toy to “hide” and which one to bring out next. This gives a sense of ownership and excitement.
- Track usage: A quick sticker chart or a simple spreadsheet can help you remember when each item was last played with, ensuring nothing gets forgotten.
Practical Examples
Example 1 – Building Blocks: Keep one set of wooden blocks on the play mat. Two weeks later, swap in a magnetic construction kit. After another two weeks, bring back the wooden set and introduce a new themed block set (e.g., “castle” or “space”).
Example 2 – Action Figures: Rotate between a superhero lineup, dinosaur figures, and space explorer characters. Pair each rotation with related books or simple role‑play scenarios to deepen engagement.
Example 3 – Arts & Crafts: Cycle through painting supplies, bead kits, and origami paper. Each new craft session can be themed (e.g., “underwater world” or “fairy tale”) to give context and spark imaginative storytelling.
Tips for Success
- Keep the rotation predictable: Consistency helps children anticipate when new toys will appear, building excitement.
- Incorporate learning goals: Align rotations with developmental milestones—introduce puzzles during fine‑motor skill growth periods, or science kits when curiosity spikes.
- Use the “two‑week rule” as a guideline: Some families find one week works best; others prefer monthly. Observe your child’s response and adjust accordingly.
- Involve siblings: If you have multiple children, let each child choose their own rotation schedule for shared toys to prevent conflicts.
By embracing the Rotation Toy Hack, you transform playtime into a dynamic adventure that keeps your child engaged, nurtures creativity, and declutters your living space—all while extending the life of every beloved toy.
Benefits for Kids
When you swap out a few toys every week or month, you create an ever‑changing play environment that keeps your child engaged and stimulates multiple areas of growth. Below are the most noticeable benefits, backed by research and real‑world examples.
- Cognitive Flexibility – Switching between different types of toys forces children to adapt their thinking strategies. A study from the University of California found that kids who played with rotating sets performed 15% better on problem‑solving tasks than those with a static collection.
- Creativity & Imagination – Fresh toys spark new narratives. When your child receives a set of building blocks after a month of plush animals, they’re likely to invent an entirely new story or structure that wouldn’t have emerged otherwise.
- Motor Skill Development – Rotating toys can introduce varied physical challenges: stacking cubes for fine motor control, large wooden pieces for gross motor strength, or puzzle pieces for hand‑eye coordination. This variety keeps all muscle groups engaged.
- Reduced Clutter Anxiety – A tidy play area with fewer items on display lowers sensory overload and promotes calmness. Children learn to appreciate what they have rather than constantly demanding more.
- Social Skills & Sharing – When toys rotate, older siblings or friends may need to negotiate access to a newly introduced toy. This encourages turn‑taking, empathy, and conflict resolution.
Practical Tips for Implementing the Rotation System
- Create a “Toy Bank” – Keep all unused toys in labeled bins (e.g., “Seasonal,” “Holiday,” “Extra”). Store them in a closet or under the bed to keep them out of sight but easily reachable.
- Set a Schedule – Decide on a rotation frequency that fits your family’s routine: weekly for younger kids, monthly for older ones. Use a calendar reminder so you don’t forget.
- Involve Your Child – Let them pick which toys to bring out next. This gives them ownership and teaches decision‑making skills.
- Rotate by Theme – Group toys into categories (e.g., “Construction,” “Arts & Crafts,” “Outdoor”). Switching themes can help children see connections between seemingly unrelated play items.
- Document the Process – Take a photo each time you rotate. Over time, your child will notice how their collection changes and may feel proud of the evolving “toy gallery.”
Real‑World Example: The Smith Family’s 30‑Day Rotation Challenge
The Smiths swapped out a new set of magnetic building blocks every week. After four weeks, their son Alex could build structures that required three‑step instructions—something he hadn’t done before the rotation. Parents reported that Alex was less likely to get frustrated when a toy didn’t work as expected because the novelty kept his curiosity high.
Common Misconceptions Debunked
- “Kids won’t miss their old toys.” – Many children actually look forward to seeing what’s new, especially when they’re given a small “treasure hunt” for the rotating items.
- “Rotating is just a gimmick.” – Evidence shows that regular exposure to new stimuli boosts memory retention and learning speed.
- “It’s expensive.” – The rotation hack works with any toy you already own; the real cost is time, which is usually free.
By integrating a simple rotation system into your household, you’re not only extending the life of your toys but also creating an enriching, dynamic play space that supports your child’s growth across multiple dimensions. Try it today and watch your little ones thrive!
Benefits for Parents
The rotation toy hack is not just a game‑time trick—it’s a powerful tool that can transform your parenting routine and give you more peace of mind.
- Reduced Clutter: By keeping only a handful of toys on display at any one time, you’ll notice fewer items scattered around the house. This makes cleanup faster and keeps play areas safer for little ones.
- Simplified Decision‑Making: With a curated set of toys, choosing what to play with next becomes almost automatic. Parents save precious minutes that would otherwise be spent scrolling through endless options or debating which toy is “best.”
- Time for Quality Interaction: When your child isn’t constantly hunting for new gadgets, you can focus on engaging conversations, storytelling, and shared play—key moments that build strong parent‑child bonds.
- Encourages Creativity: Rotating toys forces children to use the same objects in fresh ways. Parents can guide them toward imaginative scenarios, encouraging problem‑solving and narrative skills.
- Promotes Mindful Consumption: Demonstrates to kids that toys don’t need to be bought constantly for fun. This sets a foundation for responsible consumer habits early on.
- Lowered Stress Levels: Knowing you have a system in place means fewer last‑minute toy dilemmas when the baby is fussy or when you’re preparing for school drop‑offs.
Practical Tips to Get Started
- Create a “Toy Box”: Use a large bin or a set of labeled baskets. Each week, pull out one basket and place its contents in the play area.
- Schedule Rotations: Set a calendar reminder (e.g., every Sunday evening) to swap toys. This routine becomes part of your weekly rhythm.
- Involve Your Child: Let them pick one or two favorite pieces from the rotating set. Ownership increases their excitement and reduces resistance when new items arrive.
- Document the Process: Take a photo of each rotation cycle. Over time, you’ll have a visual record that can be shared with grandparents or used as a nostalgic keepsake.
- Pair Toys with Themes: Align rotations with seasonal themes (e.g., “Spring Garden” or “Space Adventure”). This adds an extra layer of excitement and helps your child learn about seasons, science, and more.
Real‑World Example
Case Study: Emily & Ben (Age 2–4)
- Emily’s parents used a rotating set of 12 toys—blocks, plush animals, and simple puzzles.
- They rotated the toys every two weeks, aligning with the school curriculum (e.g., counting blocks during math lessons).
- Result: Emily’s tantrums over “too many toys” dropped by 70%, cleanup time cut in half, and parents reported feeling more relaxed during bedtime routines.
By adopting the rotation toy hack, you’re not just keeping your child’s environment fresh—you’re also investing in smoother daily life, stronger relationships, and lifelong learning habits. Give it a try and watch both you and your little ones thrive!
Choosing the Right Toys
When you’re selecting toys for your child, it’s easy to get caught up in the latest trends or that shiny new gadget everyone is talking about. However, a thoughtful approach—combined with a smart rotation strategy—can keep playtime fresh, foster creativity, and even reduce clutter.
1. Understand Your Child’s Developmental Stage
- Ages 0‑2: Soft plushies, rattles, and textured blocks help develop sensory skills.
- Ages 3‑5: Building sets, simple puzzles, and pretend play items (kitchen sets, dress‑up clothes) encourage fine motor development and imagination.
- Ages 6‑8: STEM kits, board games with strategy, and art supplies spark logical thinking and creativity.
- Ages 9‑12+: Complex puzzles, coding toys, and sports equipment support advanced problem solving and physical coordination.
2. Prioritize Quality Over Quantity
Invest in durable, well-made toys that can withstand rough handling. A sturdy wooden block set will outlast a plastic one that falls apart after a few months. Look for:
- Non‑toxic materials: BPA‑free plastics or natural wood.
- Smooth edges and finishes: Avoid splinters or sharp corners.
- Versatile play options: Pieces that can be used in multiple ways (e.g., building blocks that double as art supplies).
3. Consider the Space You Have
If you live in a small apartment, choose toys that are compact and stackable. A set of magnetic letters or a pull‑away bookshelf can provide endless play without taking up permanent floor space.
4. Encourage Open‑Ended Play
Toys that allow for multiple uses—like wooden train sets, clay, or recycled materials—help children develop problem‑solving skills and imagination. Avoid overly prescriptive toys that limit how a child can interact with them.
5. The Rotation Toy Hack: Keep Old Toys Exciting Again
Instead of buying new toys every month, try the rotation toy hack. This method involves:
- Set a schedule: Rotate toys weekly or bi‑weekly.
- Create storage bins: Label each bin with its contents and the date it was last played with.
- Introduce “new” favorites: When a toy is rotated back in, it feels brand new to your child.
Benefits of rotation:
- Reduces clutter: You only need enough space for the current set.
- Sparks curiosity: Kids learn to appreciate what they have and anticipate upcoming toys.
- Extends toy life: Toys aren’t used continuously, so wear and tear is minimized.
6. Practical Tips for Implementing a Rotation System
- Start small: Begin with 10–15 key toys that cover different play types (building, art, pretend).
- Use clear bins or drawers: Transparency makes it easy for kids to see what’s inside.
- Involve your child: Let them help decide which toy goes back in and when.
- Schedule “toy parties”: Every time a new set arrives, make a mini celebration to keep excitement high.
7. Final Checklist Before Buying
- Is the toy age‑appropriate?
- Does it support multiple forms of play?
- Will it fit into my rotation system?
- Can I find it in a durable, safe material?
- How does it fit with the space I have available?
By combining thoughtful toy selection with a smart rotation strategy, you’ll keep your child’s playtime fresh, reduce household clutter, and encourage lifelong learning through exploration.
Creating a Storage System
The Rotation Toy Hack is a simple yet powerful way to keep your child’s playtime fresh without buying new toys all the time. By creating an organized storage system that supports rotating playthings, you give each toy its moment in the spotlight and maintain a clutter‑free environment.
Why Rotation Works
- Prevents boredom: When a child sees the same toys every day, they quickly lose interest.
- Saves money: Rotating existing items reduces the need for frequent purchases.
- Encourages mindful play: Kids learn to appreciate what they have and explore different aspects of each toy.
Step‑by‑Step Guide to Building Your Rotation System
-
Audit your current toys: Sort all items into three categories:
- Daily play: Toys that are safe, durable, and loved by the child.
- Occasional play: Items that spark imagination but aren’t needed every day.
- Seasonal/holiday play: Themes tied to times of year (e.g., Halloween costumes).
-
Create storage zones:
- Daily zone: A low‑profile, easy‑to‑access bin or shelf.
- Rotation drawer: A pull‑out drawer with labeled compartments for each toy group.
- Seasonal box: A decorative storage box placed in a closet or under the bed.
- Label everything: Use clear, child‑friendly labels (e.g., bright stickers with pictures). This helps kids understand where to find and return items.
-
Set a rotation schedule: Decide on a weekly or bi‑weekly cycle. For instance:
- Week 1: Daily zone = “Building Blocks.”
- Week 2: Daily zone = “Art Supplies.”
- Swap the contents of the rotation drawer at the end of each cycle.
- Involve your child: Let them help choose which toys go into the daily zone. This gives them ownership and reduces tantrums during transitions.
Practical Tips for Success
- Keep it simple: Avoid over‑categorizing; too many bins can confuse both you and your child.
- Use clear containers: Transparent bins let kids see what’s inside, making selection easier.
- Rotate with a calendar: Place a small sticky note calendar near the storage area to remind everyone when it’s time for a swap.
- Re‑evaluate regularly: Every 3–4 months, reassess which toys are still engaging. Discard or donate items that no longer spark interest.
- Incorporate sensory play: Rotate items that provide different textures (soft plush, rough wood blocks, smooth plastic cars) to stimulate development.
Example Setup: A 4‑Year‑Old’s Rotation System
| Week | Daily Zone (Open Shelf) | Rotation Drawer | Seasonal Box |
|---|---|---|---|
| Week 1 | Stacking Cups | Action Figures, Play Kitchen Set | Halloween Costumes (October) |
| Week 2 | Art Supplies (crayons, paper) | Board Games, Puzzles | Christmas Decorations (December) |
| Week 3 | Building Blocks | Remote‑Controlled Cars, Musical Instruments | Summer Beach Toys (June) |
By following this system, you give each toy a chance to shine, keep your play area organized, and foster a sense of anticipation in your child’s daily routine. Happy rotating!
Setting Up the Rotation Cycle
A well‑structured rotation cycle keeps your child’s playtime fresh and prevents boredom with even the most beloved toys. Below is a step‑by‑step guide, complete with timelines, storage tips, and fun variations to keep things exciting.
Step 1: Inventory & Categorize
- List every toy: Create a simple spreadsheet or use a notebook. Note the child’s age, play value, and any special care instructions.
- Group by theme or function:
- Construction sets
- Action figures & vehicles
- Arts & crafts supplies
- Educational games
- Outdoor play equipment
- Identify “high‑frequency” items: Toys that your child uses most often (e.g., building blocks, stuffed animals) will stay in the active rotation longer.
Step 2: Store Wisely
Storage should be as accessible to your child as it is organized for you. Consider these options:
- Clear bins with labels: Transparent containers let kids see what’s inside, encouraging self‑service.
- Under‑bed drawers or rolling carts: Great for items that need to be kept out of sight but easy to retrieve.
- Wall shelves with baskets: Ideal for small toys and craft supplies; add a “new arrivals” spot to highlight recently rotated items.
Step 3: Set Your Timeline
The length of each cycle depends on your child’s age and play habits. A common framework is:
| Toy Category | Active Period (Weeks) | Storage Duration (Months) |
|---|---|---|
| Construction & Building Sets | 4–6 | 2–3 |
| Action Figures / Vehicles | 2–4 | 1–2 |
| Arts & Crafts | 3–5 | 2–3 |
| Educational Games | 4–6 | 3–4 |
| Outdoor Equipment | 6–8 | 4–5 |
Step 4: The Big Swap
- Set a date: Mark the rotation on a calendar or set a phone reminder.
- Involve your child: Let them help choose which toys go out and which go back. This fosters ownership and reduces resistance.
- Refresh the display area: Arrange the new set in an appealing way—perhaps grouping by color or size.
Step 5: Bring Back Old Toys with a Twist
When toys return to the rotation, make them feel brand new. Try these strategies:
- Renovate: Add a fresh paint coat or replace worn parts.
- Re‑packaging: Use a themed bag or box (e.g., “Space Adventure Pack”) to change the perception.
- New Contexts: Pair an old toy with a different play scenario—an action figure becomes part of a new superhero storyline.
Step 6: Monitor & Tweak
Keep an eye on engagement levels. If a toy consistently goes unused, consider:
- Removing it from the rotation permanently.
- Donating or gifting it to someone who will appreciate it.
- Replacing it with a similar item that sparks more interest.
Practical Tips for Success
- Use a “New & Old” sign: A simple sticker in the play area signals when fresh toys are available.
- Keep a backup list: In case a toy breaks or is lost, you’ll know which category needs replenishment.
- Celebrate each rotation: Turn it into a mini‑party—hand out stickers or small rewards to mark the transition.
Ready to revitalize your child’s playroom? Grab a notebook, start inventorying today, and watch as their excitement for toys grows again!
Labeling and Organizing
The heart of a successful toy rotation system is clear labeling and organized storage. When kids can find what they need quickly, the excitement stays high and the clutter never builds back up.
- Use Bright, Durable Labels: Choose waterproof or laminated stickers so labels survive playtime. For each container or shelf section, write a simple word (e.g., “Blocks”, “Dolls”) in large print. Adding an emoji or color code can help younger children match items faster.
- Color‑Coded Bins: Assign a specific color to each rotation cycle: green for the current set, yellow for the next, red for storage. Store the bins on low shelves so kids can see which bin is “active.” When it’s time to switch, they’ll know exactly where to put the toys back.
- Create a “Toy Menu”: Place a small poster or laminated card beside the rotation area that lists all categories and their current status. For example:
      🎲 Blocks – Green
      🚗 Cars – Yellow
      🧸 Dolls – Red
This visual cue keeps everyone on the same page. - Label Storage Boxes: Even the bins that hold “out of rotation” toys should have clear labels. Write both the toy category and the season or theme (e.g., “Seasonal: Snow”) so you can easily pull out the right set when needed.
- Use a Rotating Calendar: Attach a small whiteboard or magnetic calendar near the play area. Mark the rotation dates with simple icons. This helps children understand that toys change regularly and builds anticipation.
Practical Steps to Set Up Your Labeling System
- Choose Your Containers: Grab sturdy plastic bins or fabric bags that fit your space. If you’re using shelves, consider adding dividers.
- Create a Master List: Write down every toy category and decide how many rotation sets you’ll keep (e.g., two for each group). This list will guide the number of labels needed.
- Label Everything: Stick the labels on all bins, shelves, and the “Toy Menu.” Use a consistent font size so it’s easy to read from a distance.
- Set a Rotation Schedule: Decide whether you’ll rotate weekly or bi‑weekly. Write the schedule on the calendar next to each bin’s label.
- Teach Your Kids: Show them how to put toys back in the correct bin and explain why rotating keeps playtime fresh. Encourage them to check the “Toy Menu” before starting a new game.
By combining clear labeling with organized storage, you’ll create an environment where children can easily access their favorite toys, maintain excitement, and reduce mess—all while keeping your living space tidy.
Involving Your Child
One of the biggest challenges parents face is keeping their children engaged with a cluttered playroom full of toys that have lost their novelty. A simple yet powerful solution is to implement a toy rotation system. By cycling toys in and out, you create an ever‑new experience without spending money on new items.
Why Rotation Works
- Psychological novelty: Children’s brains crave new stimuli. When a toy reappears after a period of absence, it feels fresh.
- Reduced clutter: With fewer toys on display at once, the play area stays organized and less overwhelming.
- Encourages creativity: Kids learn to value what they have and can repurpose old items in imaginative ways.
Setting Up Your Rotation System
-
Select a rotation schedule:
- Weekly: Ideal for younger children who quickly lose interest.
- Monthly: Works well for older kids with more nuanced preferences.
-
Create a storage solution:
Use labeled bins, clear plastic drawers, or a simple basket system. Label each container with the rotation cycle (e.g., “Week 1,” “Week 2”).
-
Involve your child in selection:
Let them choose which toys go into the “current” bin and which are stored away. This fosters decision‑making skills and ownership.
-
Set a reminder:
Use an app or calendar alert to prompt you (and your child) when it’s time to swap sets.
Practical Tips for Success
- Keep a “new” bin: When you receive new toys, place them in a separate container until they’re ready for rotation. This prevents immediate clutter.
- Use themed rotations: Group toys by theme (e.g., dinosaurs, space, construction). Kids will anticipate the upcoming theme and feel excitement.
- Incorporate learning objectives: Pair a new toy with an activity card that encourages specific skills—like counting blocks or matching shapes.
- Rotate based on age milestones: Adjust the complexity of toys as your child grows. For example, swap simple wooden cars for magnetic building sets once they master basic mechanics.
Examples in Action
Case Study: Emma (4 years old)
- Emma’s parents use a two‑bin system labeled “Week A” and “Week B.” They rotate her toy cars, dolls, and puzzle sets every week.
- When a new stuffed animal arrives, it goes into the “Upcoming” bin and is introduced during the next rotation.
- The result: Emma shows renewed interest in each set, spends less time in front of screens, and the playroom stays tidy.
Common Pitfalls to Avoid
- Too frequent changes: Switching toys daily can confuse children. Stick to a consistent schedule.
- Ignoring preferences: Forcing a rotation that excludes a child’s favorite toy may lead to frustration.
- Lack of labeling: Without clear labels, you’ll waste time searching for toys and may forget what’s stored where.
Final Thought
The rotation toy hack is more than a decluttering tool—it’s an educational strategy that nurtures curiosity, decision‑making, and appreciation for the resources you already have. Try it out, tweak the schedule to fit your family’s rhythm, and watch as old toys spark new adventures.
Monitoring Engagement
Once you’ve set up a toy rotation schedule, the next step is to keep an eye on how your child reacts to each item. Monitoring engagement ensures that the rotation remains effective, keeps the toys fresh, and helps identify which types of play are most stimulating.
1. Keep a Simple Log
- Date & Time: Note when the toy is introduced.
- Duration: How long did the child engage with it?
- Behavior Notes: Look for excitement, curiosity, frustration, or disinterest.
- Favorite Moments: Record any specific actions (e.g., building a tower, coloring a picture).
A basic table in Google Sheets or a handwritten notebook works fine. For example:
| Date | Toy | Duration (min) | Engagement Level | Notes |
|---|---|---|---|---|
| 2025-09-01 | Block Set A | 15 | High | Loves stacking high towers. |
| 2025-09-02 | Dinosaur Figures | 4 | Low | Seems uninterested; no interaction. |
2. Look for Patterns Over Time
If a toy consistently shows low engagement, consider removing it from the rotation or replacing it with a similar item that might spark more interest. Conversely, toys that maintain high engagement across multiple rotations may indicate a developmental need (e.g., spatial reasoning, storytelling).
Example Pattern:
- Blocks: High engagement every week → keep in rotation.
- Dinosaur Figures: Low engagement after the first week → replace with a new animal set.
3. Use Visual Cues for Quick Assessment
Place a colored sticker on each toy’s storage box that reflects its engagement level: green (high), yellow (medium), red (low). This visual system allows you to spot at a glance which toys need attention before the next rotation.
4. Involve Your Child in the Process
Ask simple questions after playtime:
- "Did you like that toy?"
- "What was your favorite part?"
- "Would you want to play with it again?"
Their answers can provide qualitative data that complements the log.
5. Adjust Based on Developmental Milestones
As children grow, their interests shift. For instance, a toddler might favor sensory toys early on but later show interest in storybooks or simple puzzles. Keep your rotation flexible and update it when you notice developmental changes.
6. Set Reminders for Rotation Check-Ins
Use calendar alerts (Google Calendar, phone reminders) to review the engagement log every 2–4 weeks. This routine ensures you’re not missing subtle shifts in preferences.
7. Celebrate Successes and Share Insights
When a rotation cycle ends with increased playtime or new skills, share your findings on parenting forums or blogs. Others can learn from your data-driven approach to toy management.
By systematically monitoring engagement, you’ll keep the Rotation Toy Hack fresh and tailored to your child’s evolving needs, ensuring that playtime remains both exciting and developmental.
Adjusting the Plan
The rotation strategy is a living system that evolves as your child grows and their interests shift. Below are practical ways to fine‑tune the plan, ensuring that every toy cycle feels fresh and engaging.
1. Track Engagement Metrics
- Observation Log: Keep a simple spreadsheet or journal noting how often each toy is used per week. If a toy drops below one play session in two weeks, it’s likely ready for rotation.
- Child Feedback: Ask your child what they liked about the last set and what they'd like to see next. This can be as informal as a quick chat or a “toy rating” sticker sheet.
2. Introduce Thematic Bundles
Instead of random toys, group them by theme—e.g., “Space Explorers”, “Garden Builders”, or “Storyteller’s Corner.” This gives the child a narrative arc and helps them anticipate what’s coming next.
3. Mix in New and Familiar Items
Every rotation should blend a brand‑new toy with one that has already proven its worth. The familiar toy provides comfort, while the new item sparks curiosity. For example:
- New: A magnetic drawing board.
- Familiar: Classic wooden blocks.
4. Re‑package Old Toys with a Twist
If you’re hesitant to discard toys that still have value, re‑package them creatively:
- Turn a set of plastic cars into a “Race Track” by adding paper track pieces.
- Convert an old dollhouse into a “Restaurant” with cardboard cut‑outs and food items.
5. Seasonal or Holiday Themes
Tie rotations to the calendar—e.g., winter snow play, summer beach set, Halloween costumes. This natural rhythm keeps the plan aligned with your child’s excitement levels throughout the year.
6. Involve Your Child in the Process
Let them help choose which toys to bring out next. Provide a simple “Toy Choice Box” where they can pick a card indicating their preference. This empowerment boosts ownership and reduces resistance when a favorite toy goes back into storage.
7. Keep an “Emergency Toy” Shelf
A small stash of quick‑grab, low‑maintenance toys (stickers, crayons, plastic animals) is invaluable for days when your child needs instant entertainment or when you’re on the go.
8. Review and Reset Every 6–12 Months
At the end of each cycle, evaluate which toys stayed in rotation longer than planned and why. Adjust future timing—perhaps some items deserve a longer stay due to their popularity.
Practical Example: A One‑Year Rotation Cycle
- January–March: “Building Block Adventure” (wooden blocks, magnetic tiles, plastic construction set).
- April–June: “Outdoor Explorer” (sack of rocks, toy binoculars, mini gardening kit).
- July–September: “Water Play” (plastic boats, beach toys, small pool).
- Re‑package the plastic boats into a “Pirate Ship” by adding cardboard sails.
- October–December: “Storytime & Dress‑Up” (costumes, puppet set, storybooks).
By continuously refining your rotation plan—tracking use, incorporating themes, re‑imagining old toys—you’ll keep playtime fresh and your child’s curiosity alive.
Special Cases: Elderly or Differently‑Abled Kids
When designing playtime experiences, it’s essential to consider users who may have mobility challenges, sensory sensitivities, or cognitive differences. The “Rotation Toy Hack”—replacing a single toy with a rotating set of age‑appropriate items—offers a flexible solution that can be adapted for both elderly adults and differently‑abled children.
Why Rotation Works for All Ages
- Reduced Cognitive Load: Switching between familiar objects keeps the brain engaged without overwhelming it.
- Physical Comfort: Rotating toys can be positioned at various heights and angles, making them accessible to people with limited reach or balance.
- Sensory Variety: Different textures, colors, and sounds cater to sensory preferences, which is especially beneficial for children on the autism spectrum.
Practical Setup Tips
- Choose Universal Design Toys: Look for items with large buttons, smooth edges, or adjustable grips. Examples: oversized building blocks, magnetic puzzles, or soft plush animals.
- Use a Low‑Profile Rotator: A simple turntable or rotating stand (like a lazy Susan) can be fitted to a table or the floor. For elderly users, add non‑slip rubber feet and an armrest for support.
- Label with High Contrast: Use large fonts and contrasting colors so that labels are easily readable by those with visual impairments.
- Incorporate Assistive Tech: Pair the rotation system with a smartphone or tablet running an app that can announce each toy’s name when it comes into view. This is helpful for children who struggle with language processing.
Example Scenarios
| Scenario | Toy Rotation Example |
|---|---|
| Elderly user with limited hand strength | Rotate between a soft ball, a large‑button puzzle, and a weighted stress toy. Each item is placed within easy reach on the rotating tray. |
| Differently‑abled child with sensory processing disorder | Include a plush animal (soft), a textured ball (rough), and a small light‑up cube. The rotation allows the child to choose based on current sensory needs. |
Safety Checklist
- Ensure all rotating parts are locked when not in use to prevent accidental spinning.
- Verify that toys have no small detachable pieces that could pose a choking hazard.
- Test the rotation speed; it should be slow enough for users with tremors or balance issues.
By thoughtfully rotating toys and tailoring the setup to individual needs, you create an inclusive environment where everyone—from young children to senior citizens—can enjoy playtime safely and happily.
Extending to Other Household Goods
The “Rotation Toy Hack” is a simple yet powerful idea: keep items fresh by periodically swapping them out of sight and reintroducing them later. This principle works far beyond children’s toys—it can revitalize any household item that tends to lose its appeal over time. Below are concrete ways you can apply this rotation strategy to furniture, décor, kitchen gadgets, and more.
1. Furniture & Upholstery
- Sectional Couch Rotation: Cover one or two seats with a removable fabric cover that matches your current décor. When you want a change, swap the cover for a different color or pattern every few months.
- Cushion Swaps: Keep an extra set of throw pillows in storage. Switch them out during a seasonal refresh to instantly update the look of any sofa or armchair.
- Ottoman Storage: Use ottomans with removable, washable covers that can be swapped for seasonal fabrics (e.g., light linen in summer, cozy wool in winter).
2. Décor & Accessories
- Wall Art Rotation: Store a few pieces of artwork or framed photos behind a sliding door or within a picture frame that opens from the front. Change displays every month to keep your walls dynamic.
- Vase & Centerpiece Variety: Keep a small collection of vases, candle holders, and other centerpieces. Rotate them weekly to give each room a fresh focal point.
- Seasonal Throw Blankets: Store lightweight blankets in the closet and pull out heavier ones for winter. Swap them on a rotating schedule so you’re always prepared for the next season.
3. Kitchen & Dining Essentials
- Utensil Organization: Use a pull‑out drawer or hanging rack to store a set of “extra” utensils, spice jars, or serving dishes. Switch them out periodically so your kitchen feels less cluttered.
- Cookware Rotation: Keep a backup set of pots and pans in a closet. Rotate them with the primary set every few months—this helps prevent wear on the everyday pieces and keeps the storage area tidy.
- Baking Sheet & Pan Swaps: Store an extra baking sheet or cake pan in a pantry bin. Change it out after each bake to keep your kitchen organized and avoid mixing up sizes.
4. Outdoor & Garden Gear
- Garden Tool Rotation: Store seasonal tools (e.g., pruning shears, rakes) in a dedicated shed or garage shelf. Swap them out when the gardening season changes to keep the space clutter-free.
- Potted Plants & Planters: Keep a rotating set of planters that match your current garden theme. Move plants between them every few weeks to create new visual interest.
5. Tech Gadgets & Accessories
- Cable Management: Store an extra set of cable organizers or charging stations in a drawer. Swap them out when you upgrade your devices, ensuring that cables are always neatly arranged.
- Smart Home Devices: Keep spare smart bulbs or plugs in storage. Rotate them into use as needed to test new settings without cluttering the main area.
Practical Tips for a Successful Rotation System
- Create a Calendar: Mark rotation dates on a wall calendar or digital reminder so you never forget when to swap items.
- Use Labeling: Label storage bins with item names and intended rotation period (e.g., “Spring Vases”).
- Keep an Inventory List: Maintain a simple spreadsheet or note app that tracks what’s stored where, making retrieval quick.
- Consider Accessibility: Store items you’ll use most frequently in easily reachable places. Less‑used items can go higher up or deeper in storage.
- Involve the Whole Household: Encourage family members to suggest rotation ideas, ensuring everyone feels invested and the system stays fresh.
By extending the Rotation Toy Hack to other household goods, you’ll maintain a living space that feels constantly renewed without adding clutter. The key is consistency: set a schedule, keep organized storage, and enjoy the surprise of seeing familiar items in new contexts.
Conclusion
Keeping your child’s playtime fresh doesn’t require a constant stream of new toys. By adopting a rotation toy hack, you can extend the life of every item in your inventory, reduce clutter, and give each toy its moment to shine.
The core idea is simple: store most of your kid’s toys out of sight—under beds, behind doors, or in labeled bins—and bring a curated selection into play every few weeks. When you change the set, the “new” toys feel exciting again, while the ones that were stored become treasures waiting to be rediscovered.
Here are some practical steps to implement this system:
- Audit and categorize: Separate toys by type (blocks, stuffed animals, arts & crafts) and age appropriateness. Label each storage bin with a photo or emoji for easy identification.
- Create a schedule: Use a simple calendar or sticky notes to plan rotation dates—weekly, bi‑weekly, or monthly depending on your child’s interest span.
- Involve the kids: Let them pick which toys go in the next “new” batch. This gives them agency and reduces resistance when you change the selection.
- Store thoughtfully: Use clear bins so items are visible, or wrap toys in fabric bags to keep dust off while still allowing a quick look.
- Track usage: Keep a small log of which toys have been played with most often. This helps you identify favorites that may need replacement sooner and ensures older items get their turn.
Benefits of this hack extend beyond mere organization:
- Psychological freshness—children experience a sense of novelty each time they encounter a “new” toy, boosting engagement.
- Environmental impact—reusing existing toys reduces waste and the need for frequent purchases.
- Financial savings—parents can allocate budget toward educational or high‑quality items rather than constantly buying new gadgets.
In summary, a well‑planned rotation system turns every toy into a potential highlight. It encourages mindful play, fosters appreciation for what you already own, and keeps the joy of discovery alive in your child’s daily routine.
FAQ
What is the Rotation Toy Hack?
The Rotation Toy Hack is a simple yet powerful strategy for keeping children’s old toys fresh and engaging. By rotating the available toy collection on a set schedule—weekly, bi‑weekly, or monthly—you give kids new experiences without buying constantly.
How do I create a rotation schedule?
- Inventory your toys: Sort all items into categories (e.g., blocks, action figures, art supplies).
- Choose a time frame: Decide how often you’ll rotate. For toddlers, weekly rotations work best; older kids may enjoy monthly changes.
- Create a calendar: Mark the rotation dates on a wall calendar or use a digital reminder app.
- Label storage bins: Use clear plastic bins with labels like “Week 1 – Building Blocks” to make swapping easy.
What are the benefits for kids?
- Creativity boost: New toys spark imaginative play and reduce repetitive behaviors.
- Reduced clutter: Only a subset of toys is visible at any time, keeping play areas tidy.
- Learning opportunities: Rotating themes can align with educational goals (e.g., introduce science kits during the “Science Week” rotation).
How do I keep older toys in good condition?
Store out‑of‑season items in a cool, dry place. Use protective covers for delicate items like wooden blocks or plush animals. Regularly inspect and clean the toys before reintroducing them to playtime.
Can I involve my child in the rotation process?
Absolutely! Letting kids choose which toy comes out next encourages responsibility and decision‑making. Create a “toy ballot” where they can vote on the upcoming rotation.
What if I run out of toys to rotate?
Consider swapping with friends or neighbors, borrowing from community playgroups, or repurposing everyday objects (e.g., cardboard boxes as forts). The goal is variety, not quantity.
How does this hack help parents?
- Cost savings: No need to constantly purchase new items.
- Time efficiency: A structured rotation system reduces daily decision fatigue.
- Sustainability: Reusing existing toys lowers environmental impact.
Where can I find more resources?
Check out parenting blogs, toy‑review sites, and local libraries that often host “toy swap” events. Many communities have online groups dedicated to sharing playtime ideas.
Categories
- AI & Enrichment Play
- Broiler Farming
- Broiler Farming Tips
- Canine Wellness & Longevity
- Cat
- Cat & Human Connection
- Cat Adoption & Rescue
- Cat Breeds
- Cat Breeds & Personalities
- Cat Care & Health
- Cat Grooming & Hygiene
- Cat Lifestyle & Environment
- Cat Myths & History
- Cat Nutrition & Diet
- Cat Products & Reviews
- Cat Training & Behavior
- Comparison
- Consumer Awareness
- Dog
- Dog Accessories & Products
- Dog Adoption & Rescue
- Dog Breed & Lifestyle Trends
- Dog Breeding & Puppies
- Dog Entertainment & Media
- Dog Fashion & Trends
- Dog Fun & Lifestyle
- Dog Grooming & Hygiene
- Dog History & Culture
- Dog Myths, Science & Future Tech
- Dog News & Trends
- Dog Nutrition & Food
- Dog Psychology & Emotions
- Dog Safety & Security
- Dog Sports & Activities
- Dog Technology & Innovation
- Dog Training for Modern Owners
- Dog Travel & Adventure
- Dog Travel, Adventure & Culture
- Economic and Market Insights
- Educational Content
- FAQs
- Feeding Alternatives
- Festivals & Seasonal Ideas
- Fun & Entertainment
- General Knowledge
- General Pig Farming
- Health & Disease Management
- Housing and Environment
- Kittens
- Market Insights
- Miscellaneous
- Miscellaneous
- Motivational
- pig
- Pig Breeding
- Pig Breeds
- Pig Farming Stories and Inspiration
- Pig Health and Care
- Pig Nutrition
- Pig Products
- Profitability & Business
- Puppy Care
- Puppy Predictable Topics Reinvented
- Regional Focus
- Rescue & Adoption Buzz
- Senior Cats
- Senior Dog Care
- Smart Dog Tech & Gadgets
- Sustainability
- Sustainable & Eco-Friendly Dog Products
- Tech & Innovations
- Working & Service Dogs
- Broiler Feed66 products
- Country Feed33 products
- Pig Feed66 products
- Product22 products
- Raw Materials99 products
Products
-
 Fish Meal
₹1,999.00 – ₹2,999.00Price range: ₹1,999.00 through ₹2,999.00Rated 0 out of 5
Fish Meal
₹1,999.00 – ₹2,999.00Price range: ₹1,999.00 through ₹2,999.00Rated 0 out of 5 -
 FATTENING BROILER FEED
₹2,299.00 – ₹2,349.00Price range: ₹2,299.00 through ₹2,349.00Rated 0 out of 5
FATTENING BROILER FEED
₹2,299.00 – ₹2,349.00Price range: ₹2,299.00 through ₹2,349.00Rated 0 out of 5 -
 LAYER COUNTRY FEED
₹1,549.00 – ₹1,649.00Price range: ₹1,549.00 through ₹1,649.00Rated 0 out of 5
LAYER COUNTRY FEED
₹1,549.00 – ₹1,649.00Price range: ₹1,549.00 through ₹1,649.00Rated 0 out of 5 -
 COUNTER BROILER FEED
₹1,199.00 – ₹1,299.00Price range: ₹1,199.00 through ₹1,299.00Rated 0 out of 5
COUNTER BROILER FEED
₹1,199.00 – ₹1,299.00Price range: ₹1,199.00 through ₹1,299.00Rated 0 out of 5 -
 LACTATING PIG FEED
Rated 0 out of 5
LACTATING PIG FEED
Rated 0 out of 5₹2,299.00Original price was: ₹2,299.00.₹1,740.00Current price is: ₹1,740.00. -
 Maize
Rated 0 out of 5
Maize
Rated 0 out of 5₹1,650.00Original price was: ₹1,650.00.₹1,300.00Current price is: ₹1,300.00. -
 GESTATION PIG FEED (Phase 1)
Rated 0 out of 5
GESTATION PIG FEED (Phase 1)
Rated 0 out of 5₹2,249.00Original price was: ₹2,249.00.₹1,699.00Current price is: ₹1,699.00. -
 Pre Starter Broiler Feed
₹2,399.00 – ₹2,499.00Price range: ₹2,399.00 through ₹2,499.00Rated 0 out of 5
Pre Starter Broiler Feed
₹2,399.00 – ₹2,499.00Price range: ₹2,399.00 through ₹2,499.00Rated 0 out of 5 -
 FINISHER PIG FEED
Rated 0 out of 5
FINISHER PIG FEED
Rated 0 out of 5₹2,299.00Original price was: ₹2,299.00.₹1,749.00Current price is: ₹1,749.00. -
 Broiler Premix
Rated 0 out of 5
Broiler Premix
Rated 0 out of 5₹820.00Original price was: ₹820.00.₹699.00Current price is: ₹699.00.