
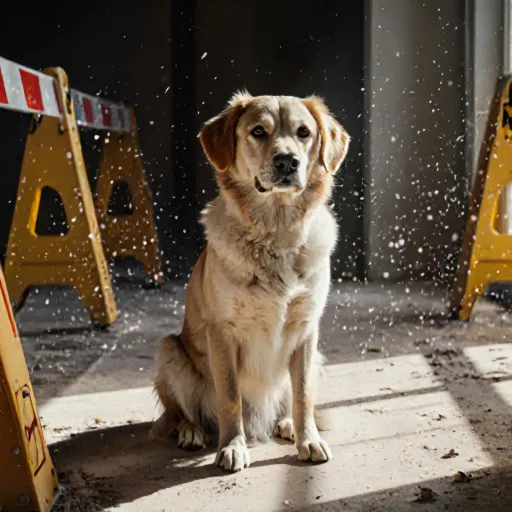
Keep Paws Safe During Home Renovations
Shield Your Dog From Remodeling’s Hidden Dangers
Table of Contents
- Introduction
- Assessing the Renovation Plan
- Choosing a Safe Dog-Friendly Zone
- Preparing Your Dog for the Change
- Securing Hazardous Materials
- Managing Noise and Vibrations
- Ventilation and Air Quality Control
- Keeping Your Dog Hydrated and Fed
- Providing Comfortable Rest Areas
- Monitoring Stress Indicators
- Adjusting Exercise Routines
- Using Positive Reinforcement and Distractions
- Post-Renovation Cleanup and Safety Checks
- Conclusion
- FAQ
Introduction
Renovating a house can be a stressful experience for everyone in the household—especially for our four‑legged companions. Construction noise, sharp tools, toxic paints and chemicals, and open spaces filled with debris all pose serious risks to dogs. By planning ahead and taking proactive steps, you can keep your pup safe, calm, and healthy throughout the renovation process.
1. Create a Safe Zone
- Choose a dedicated room or area: Ideally one that is farthest from the construction site, has no open windows or doors to the hallway, and can be sealed off with a sturdy door or curtain.
- Equip it with essentials: Comfortable bedding, water bowl, toys, and a familiar blanket or scent item help reduce anxiety.
- Use temporary fencing or pet gates: Secure the perimeter so your dog cannot wander into hazardous areas. Consider a double‑gate system to prevent accidental openings.
2. Protect Against Toxic Substances
- Keep chemicals out of reach: Paints, solvents, sealants and cleaners should be stored in locked cabinets or high shelves inaccessible to pets.
- Use pet‑friendly products: Whenever possible choose low‑VOC (volatile organic compound) paints and non‑toxic finishes. Look for certifications such as GREENGUARD Gold or Green Seal.
- Label containers clearly: Dogs may chew on paint cans or other containers; clear labeling reduces accidental ingestion.
3. Control Noise and Vibrations
- Schedule loud work during your dog’s rest times: If possible, plan heavy drilling or sanding for when the dog is sleeping or on a long walk.
- Use sound‑proofing measures: Hang thick blankets or foam panels over windows and doors to dampen noise. A white‑noise machine can mask sudden sounds.
- Provide distraction tools: Chew toys, puzzle feeders, or interactive games keep your dog mentally engaged while construction noises play in the background.
4. Prevent Physical Injuries
- Avoid sharp edges and exposed nails: Keep the renovation area free of loose boards, broken tiles, or protruding screws. Store all tools securely when not in use.
- Secure ladders and scaffolding: Ensure that any equipment is stable and covered with safety nets if possible.
- Wear protective gear for your dog: In situations where the dog might be near construction dust or debris, consider a lightweight protective vest and closed‑toe shoes.
5. Maintain Hygiene
- Clean up spills immediately: Paint drips or solvent splashes can be toxic if ingested. Use pet‑safe cleaners to wipe surfaces.
- Ventilate the house: Open windows (if safe) and use fans to circulate fresh air, reducing fumes that could irritate your dog’s respiratory system.
- Wash bedding regularly: Dust accumulation can affect dogs with allergies or asthma. Wash blankets and mats weekly during renovation.
6. Monitor Your Dog’s Health
- Watch for signs of distress: Excessive barking, panting, shaking, or lethargy may indicate anxiety or chemical exposure.
- Check for injuries: Look for cuts, bruises, or foreign objects lodged in the paw pads after your dog returns from a walk near construction zones.
- Consult your vet if needed: If you suspect chemical poisoning (vomiting, drooling, seizures), seek immediate veterinary care.
7. Plan for Post‑Renovation Clean‑Up
- Use pet‑safe cleaning products: After finishing the renovation, clean all surfaces with non‑toxic cleaners to eliminate lingering fumes.
- Dispose of debris responsibly: Securely bag and remove construction waste that could be hazardous if ingested or chewed.
- Reintroduce familiar items gradually: Allow your dog to explore the renovated space slowly, offering treats and praise to rebuild confidence.
By combining these strategies—designating a safe area, controlling chemicals and noise, preventing injuries, maintaining hygiene, and monitoring health—you can transform a potentially chaotic renovation into a manageable project that keeps both you and your dog safe and stress‑free. Remember, the key is preparation: the more you plan ahead, the smoother the process will be for everyone involved.
Assessing the Renovation Plan
Before you break ground on a renovation, take a moment to review every detail of the project and how it may impact your canine companion. A well‑planned approach reduces stress for both you and your dog while keeping safety at the forefront.
1. Map Out the Work Zones
- Living Areas: These are often the most frequently visited spaces. If drywall or flooring is being replaced, schedule work during times when the dog has been confined elsewhere (e.g., midday for a cat‑friendly home).
- Kitchen & Bathroom: These rooms contain sharp tools and chemicals. Keep your pet out of reach with sturdy gates or temporary walls.
- Utility Rooms: Electrical panels, HVAC ducts, and water lines are high‑risk zones. Consider hiring a professional to handle these areas so the dog never has to approach.
2. Create a “Safe Haven” for Your Dog
A dedicated space that is completely off-limits to contractors can help your pet feel secure and reduce anxiety. Here’s how to set it up:
- Choose a Quiet Room: Ideally, one with minimal foot traffic—think bedroom or spare office.
- Equip the Space: Provide fresh water, a comfortable bed, toys, and familiar bedding. Adding a few treats can reinforce positive associations.
- Use Visual Barriers: A room divider or a curtain can signal to your dog that this area is off limits. Make sure it’s sturdy enough to withstand any accidental nudges.
3. Plan for Noise and Light Management
Construction noise and bright lights can be disorienting. Here are practical steps:
- Schedule Loud Work Early: If possible, schedule heavy machinery or power tools during the day when you’re home to supervise.
- Use Dim Lighting: Keep lights low in the dog’s safe haven; bright overhead fixtures can startle them.
- White Noise Machines: A fan or a white noise app can mask drilling and hammering sounds.
4. Coordinate with Contractors
Clear communication reduces accidental mishaps:
- Ask contractors to keep pets out of the work area at all times.
- Provide a clear outline of the safe zones and a schedule that aligns with your dog’s routine.
- If you’re hiring a pet sitter, give them detailed instructions about emergency contacts and any special care needs.
5. Review Safety Equipment & Materials
Not all renovation materials are dog‑friendly. Check the following:
| Material | Potential Risk | Safe Alternative |
|---|---|---|
| Paint & Solvents | Toxic fumes and skin irritation | Low‑VOC or water‑based paints; ensure proper ventilation. |
| Wood Glue & Adhesives | Inhalation hazard if splashed on fur | Non‑toxic, pet‑safe brands; keep out of reach. |
| Electrical Wiring | Electric shock & chewing hazards | Use protective covers and secure all loose wires. |
6. Conduct a Final Walk‑Through
Before the contractor starts, walk through each zone with your dog’s needs in mind:
- Check that all gates and barriers are secure.
- Verify that no sharp objects or loose tools are within reach.
- Confirm that all chemicals are stored safely and out of sight.
7. Monitor Post‑Renovation Recovery
Once the work is finished, give your dog a little time to acclimate:
- Reintroduce them slowly to each renovated area, rewarding calm behavior.
- Inspect for any lingering hazards—unfinished seams or exposed nails can still pose risks.
- If you notice signs of anxiety (whining, hiding), consider a short break from the new environment and consult your vet if symptoms persist.
By carefully assessing each element of your renovation plan with your dog’s safety in mind, you’ll create a smoother, stress‑free experience for everyone involved. Happy renovating!
Choosing a Safe Dog-Friendly Zone
When you’re renovating, the first decision is where your dog will spend most of its time. A well‑chosen zone reduces stress for both pet and homeowner while protecting the animal from hazards such as wet paint, sharp tools, or exposed electrical wiring.
1. Pick a Dedicated Room or Area
- Bedroom or Living Room: If your dog is used to sleeping in a bed that’s not disturbed by construction noise, keep it there. Cover the bedding with a waterproof blanket or use a plastic sheet.
- Garage or Basement: These spaces are often already isolated from living areas and can be sealed off easily. Just ensure proper ventilation if you’re using power tools.
- Outdoor Enclosure: If you have a fenced yard, consider moving the dog outside during noisy phases (e.g., sanding or drilling). Use a crate with bedding to keep it calm.
2. Create Physical Barriers
Use child gates, plastic sheeting, or temporary walls to block off work zones. Make sure the barriers are high enough (at least 30 inches) so a curious pup can’t jump over.
Example:
#1: Place a sturdy 36‑inch child gate at the doorway of your bedroom.
#2: Cover any exposed nails or screws with adhesive tape or plastic wrap.
#3: Set up a small crate on a padded mat inside the room.
3. Keep Essentials Within Reach
- Water: A shallow bowl filled daily, placed near the dog’s sleeping area.
- Treats & Chews: Use a small basket so the pup can self‑serve and feel rewarded.
- Comfort Items: A familiar blanket or toy helps reduce anxiety during the renovation.
4. Maintain Routine Feeding Times
Dogs thrive on consistency. Feed your dog at its usual times, even if you’re busy with renovations. This reduces restlessness and potential accidents in the house.
5. Monitor Temperature & Ventilation
- During sanding or painting, dust can accumulate. Use a HEPA filter or keep windows open for airflow—if it’s safe to do so.
- If you’re using a garage, consider installing a temporary fan to prevent heat buildup from power tools.
6. Plan for Breaks and Exercise
Give your dog short walks or play sessions outside the renovation zone each hour. This keeps them active and helps release built‑up stress.
Practical Tip:
Use a timer or an app to remind yourself to take your dog out for a quick walk every 60–90 minutes. Even a 5‑minute stroll can make a big difference in their mood and behavior.
7. Test the Zone Before Starting Work
Move your dog into the chosen area for a few hours before you begin heavy work. Observe if they seem comfortable or show signs of distress—such as pacing, whining, or chewing on furniture. Adjust the environment accordingly.
- Select a room/area with minimal noise exposure.
- Secure physical barriers and cover sharp edges.
- Place water, treats, and comfort items within reach.
- Maintain regular feeding times.
- Ensure proper ventilation and temperature control.
- Schedule frequent breaks for exercise.
- Conduct a trial run to confirm the dog’s comfort.
By carefully choosing and preparing a safe zone, you protect your canine companion from injury while keeping their stress levels low. This proactive approach ensures that both your renovation project and your pet’s wellbeing stay on track.
Preparing Your Dog for the Change
Home renovations can be a major source of stress for your canine companion. By planning ahead and implementing simple strategies, you can keep them calm, safe, and healthy throughout the project.
1. Create a Safe Space
- Choose a quiet room: Ideally one that doesn’t have windows or doors open to renovation noise. A bedroom or a spare bathroom works well.
- Set up familiar items: Place their bed, favorite toys, and a piece of your clothing so they can smell you.
- Use a crate if appropriate: Crates provide a den-like environment. Keep the door open so they can leave when needed.
2. Gradual Desensitization
If your dog is prone to anxiety, expose them slowly to renovation sounds before construction starts.
- Play recorded construction noises: Start with low volume and gradually increase over several days.
- Associate the sound with positive reinforcement: Offer treats or play their favorite game during playback.
3. Maintain Routine
Dogs thrive on consistency. Keep feeding, walking, and training schedules as normal as possible.
- Morning walks: Stick to the same route and timing to give them a sense of stability.
- Training sessions: Short, positive sessions can help distract from noise and reinforce good behavior.
4. Provide Mental Stimulation
Engage your dog’s mind to reduce boredom and anxiety.
- Puzzle toys: Fill them with kibble or treats.
- Hide‑and‑seek games: Hide small rewards around the safe room.
- Interactive apps: There are dog-friendly tablet games that can keep them occupied.
5. Physical Exercise
A tired dog is a calm dog. If possible, increase exercise before the renovation begins.
- Longer walks or runs: Aim for at least 30–45 minutes daily.
- Play fetch or tug‑of‑war: Use a sturdy rope toy to burn excess energy.
6. Keep Them Hydrated and Fed
Stress can suppress appetite, so offer small, frequent meals and fresh water.
- Use a spill‑proof bowl: Prevent accidental spills in the safe zone.
- Consider a calming supplement: Products like L-theanine or CBD oil (consult your vet first) can help reduce anxiety.
7. Monitor Health Indicators
Look for signs of stress such as excessive panting, drooling, or pacing. If you notice persistent changes:
- Contact your vet: Discuss potential medication or therapy.
- Adjust the safe space: Make it cooler, quieter, or add a fan if needed.
8. Post‑Renovation Transition
Once construction ends, gradually reintroduce your dog to the full house.
- Open one new door at a time: Let them explore each area at their own pace.
- Maintain routine: Continue regular meals and walks for at least a week.
- Check for injuries: Look for cuts, scratches, or broken bones from hidden nails or tools.
By following these steps, you’ll help your dog navigate the upheaval of home renovations with confidence and calm. Remember: a well‑prepared pet is a happy, healthy companion—no matter how many drills and saws are in the house.
Securing Hazardous Materials
When you’re remodeling, the most hidden threat to your dog often comes from hazardous materials—paint fumes, cleaning chemicals, and even loose nails or broken glass. Dogs can sniff out these substances easily, but their curiosity can also lead them into dangerous situations. Below is a practical guide on how to keep your canine companion safe while you’re busy revamping your home.
1. Identify the Hazardous Areas
- Paint and Primer: Most commercial paints contain volatile organic compounds (VOCs) that can cause respiratory distress or skin irritation in dogs.
- Cleaning Agents: Bleach, ammonia, and degreasers are highly toxic if ingested.
- Paint Chips & Dust: Even dried paint can be harmful when chewed.
- Loose Nails & Screws: Small metal pieces pose a choking hazard or can puncture the stomach lining.
2. Secure Physical Access
- Use Childproof Locks: Install temporary locks on cabinets and storage units where chemicals are kept.
- Elevate Storage: Keep hazardous items in high shelves or locked cupboards out of reach.
- Cover Open Work Areas: Use a sturdy plastic sheet or a workbench with a lid to cover exposed surfaces.
3. Create a Dog‑Free Zone
A designated “safe zone” keeps your dog away from the renovation site. Choose an area that is:
- Well ventilated to avoid buildup of fumes.
- Far enough from active workspaces (at least 10–15 feet).
- Comfortable with a familiar blanket, toys, and a water bowl.
4. Use Physical Barriers
Employ temporary fencing or a sturdy cardboard box to block access to specific rooms or workspaces:
- DIY Barrier: Cut a piece of plywood and secure it with door stoppers.
- Professional Fencing: Rental companies offer collapsible fencing that can be set up quickly.
5. Monitor Ventilation and Air Quality
Good airflow is essential to disperse fumes. Use a fan or open windows (if weather permits) but keep your dog in the safe zone while this happens. Consider an air purifier with HEPA and activated carbon filters to remove VOCs.
6. Dispose of Waste Properly
- Paint Scraps: Seal paint chips in a plastic bag before discarding.
- Cleaning Cloths: Place them in a sealed container to prevent your dog from chewing on damp, chemical‑laden cloths.
- Never leave loose nails or screws on the floor; collect them and store them in a metal container.
7. Keep Your Dog’s Routine Intact
Stress can make dogs more curious. Stick to regular feeding times, walks, and play sessions outside the renovation zone. A calm dog is less likely to explore risky areas.
8. Have an Emergency Kit Ready
- Pet First Aid Kit: Include gauze, antiseptic wipes, and a pet‑safe pain reliever (consult your vet).
- Emergency Contact List: Vet’s phone number, emergency animal hospital, and poison control hotline.
9. Educate Household Members
Make sure everyone knows the rules: no dog in the renovation area, always close cabinets after use, and report any spills immediately.
10. Post‑Renovation Clean‑Up
- Vacuum thoroughly to remove paint dust and debris.
- Check all surfaces for leftover chemicals or sharp objects.
- Give your dog a clean, safe environment before allowing it back into the newly renovated space.
By following these steps, you’ll create a safer renovation environment that protects both your canine companion and your home. Happy remodeling—and keep those paws out of the paint!
Managing Noise and Vibrations
Home renovations can generate a lot of noise and vibration, both of which can be distressing to dogs. Below are practical steps you can take to keep your furry friend calm during construction.
1. Use Sound‑Dampening Materials
- Acoustic Panels: Hang lightweight panels on walls or ceilings to absorb echo and reduce overall decibel levels.
- Weather Stripping: Seal gaps around windows, doors, and vents. This prevents high‑frequency noise from leaking into living areas.
- Double‑Glazed Windows: If you’re renovating the exterior, consider installing double‑glazing to block external construction sounds.
2. Schedule Loud Work Wisely
Plan heavy machinery or power tools for times when your dog is less active—early morning or late evening—so they’re not exposed during peak activity periods.
3. Create a Quiet Zone
- Sound‑Proof Room: If possible, move the dog to a room that has thick walls and insulated windows. A bedroom or bathroom often works well.
- Use White Noise: A fan or white noise machine can mask construction sounds and help your dog focus on something constant rather than startling noises.
4. Minimize Ground Vibrations
Heavy equipment should be kept away from the dog’s sleeping area. If you must work on floors, consider using vibration‑dampening mats or placing a thick rug over the floor to absorb some impact.
5. Keep Dogs Away From Construction Zones
- Physical Barriers: Use pet gates or temporary fencing to keep your dog out of high‑activity areas.
- Leash & Collar: If you need to escort the dog, use a short leash so you can quickly pull them away from any sudden noise.
6. Calming Aids
- Dog‑Safe Music: Play classical or specifically engineered pet calming music at a low volume.
- Aromatherapy: Use dog‑friendly essential oils (e.g., lavender) in a diffuser, but ensure the scent is mild and well‑ventilated.
- Comfort Items: Keep their favorite blanket or bed in the quiet zone to provide familiar scents and textures.
7. Monitor Stress Levels
Watch for signs of anxiety—panting, pacing, whining, or excessive chewing. If you notice these behaviors persist, give your dog a break and return them to the quiet zone until they calm down.
Real‑World Example: Kitchen Renovation
- Step 1: Seal all door gaps with weather stripping.
- Step 2: Move the dog to the bedroom and set up a fan for white noise.
- Step 3: Schedule cabinet installation during daylight hours when you’re home.
- Step 4: After finishing, give your dog a walk in a nearby park to decompress before returning indoors.
Real‑World Example: Basement Flooring
- Lay down a thick rubber mat under the floor tiles to absorb vibrations.
- Keep construction equipment out of the basement for at least 30 minutes before allowing the dog back in.
By proactively managing noise and vibration, you can protect your dog's well‑being while still completing necessary renovations. Remember: a calm environment not only keeps your pup safe but also makes the whole renovation process smoother for everyone involved.
Ventilation and Air Quality Control
During any home renovation—whether you’re repainting a room, installing new flooring, or tearing down walls—the air inside your house can become laden with dust, mold spores, volatile organic compounds (VOCs), and other pollutants that are hazardous to both humans and pets. Dogs, in particular, are more sensitive to airborne irritants because of their rapid breathing rate and tendency to sniff deeply. Below is a comprehensive guide on how to maintain optimal ventilation and air quality while keeping your canine companion safe.
1. Pre‑Renovation Preparation
- Seal Off the Work Area: Use sturdy plastic sheeting or heavy-duty paint drop cloths to cover all furniture, flooring, and pets’ bedding in the renovation zone.
- Relocate Your Dog: Move your dog to a dedicated “safe room”—a space that can be sealed off from dust and fumes. This could be a spare bedroom or even an outdoor kennel with ventilation.
- Ventilation Check: Ensure the safe room has at least one operable window or an exhaust fan that can be turned on when needed to circulate fresh air.
2. During Renovation: Ventilation Strategies
- Use High‑Efficiency Particulate Air (HEPA) Filters:
Attach HEPA filters to portable fans or use commercial-grade air purifiers. These units can capture particles as small as 0.3 microns, including fine dust and mold spores.
- Install Exhaust Fans:
If the renovation involves sanding, demolition, or spray painting, install temporary exhaust fans in the work area. Make sure the outlet leads to a window or a vent shaft that directs air outside.
- Control VOC Emissions:
- Choose low‑VOC or zero‑VOC paints and sealants whenever possible.
- Store these products in sealed containers away from the work area until they are used.
- Ventilate immediately after application by opening windows or running fans for at least 30 minutes.
- Maintain a Clean Work Flow:
Start with the largest debris removal before moving to sanding and painting. This reduces the amount of dust that needs to be filtered later.
3. Post‑Renovation Air Quality Testing
- Mold Swab Tests: Use a mold testing kit or hire professionals to swab surfaces and air samples in the renovated area.
- Airborne Particle Count: Portable particle counters can give you real‑time data on dust levels. Aim for counts below 500 particles per cubic foot before reintroducing pets.
- Keep windows open for at least 48 hours, and run fans or dehumidifiers to reduce humidity—mold thrives in damp environments.
4. Practical Tips for Dog Owners
- Use Protective Gear: Consider a pet respirator mask (designed for dogs) if your dog must enter the renovation zone briefly for inspections or to check on progress.
- Hydration and Comfort: Keep fresh water and a shaded area in the safe room. Dogs can become stressed by confined spaces; ensure they have adequate space to move around.
- Monitor Health Symptoms:
- Signs of respiratory distress: coughing, wheezing, rapid breathing, or lethargy.
- If you notice any of these symptoms, move your dog immediately to fresh air and consult a veterinarian if they persist.
- Use Natural Air Fresheners: Instead of chemical sprays, opt for baking soda or activated charcoal in the safe room to absorb odors without releasing additional VOCs.
5. Long‑Term Ventilation Maintenance
After renovation, continue regular maintenance of your home’s HVAC system:
- Replace or clean furnace and air conditioning filters every 1–3 months.
- Schedule annual inspections for ductwork to detect leaks that could carry dust into living spaces.
- Use a hygrometer to keep indoor humidity between 30% and 50%—this helps prevent mold growth.
By implementing these ventilation and air quality control measures, you’ll protect not only your home’s interior but also the health of your beloved dog during and after renovations. A well‑ventilated environment reduces exposure to harmful particles and chemicals, ensuring a safer space for everyone.
Keeping Your Dog Hydrated and Fed
When you’re tearing down walls or installing new flooring, it’s easy to forget that your dog still needs fresh water and regular meals. A dehydrated or hungry pup can become irritable, anxious, or even develop health problems during the renovation period.
1. Create a Dedicated Feeding Zone
- Choose a quiet corner: Set up a small table or counter with your dog’s bowls away from the construction zone.
- Use elevated feeders: If you’re working on a raised platform, give your dog a low‑profile food and water station so they don’t have to jump over debris.
2. Keep Fresh Water Within Reach
Dogs can become dehydrated quickly when surrounded by dust or strong smells. Follow these tips:
- Multiple water bowls: Place one near the feeding area and another in a different room to reduce traffic over dirty floors.
- Use a water dispenser: A self‑refilling bottle keeps water flowing without the need for constant refills.
- Check the temperature: Warm weather can increase thirst; cool, shaded bowls help prevent overheating.
3. Maintain a Regular Feeding Schedule
Consistency helps reduce stress. Even if you’re busy with paint and sawdust, set timers or alarms to remind yourself to feed your dog at the same times each day.
- Meal portions: Stick to the amount recommended by your vet; avoid over‑feeding to prevent digestive upset.
- Use a meal timer or reminder app: Many pet apps will alert you when it’s time for food, ensuring you don’t miss a feeding.
4. Offer Treats Wisely
Avoid giving your dog sugary or salty construction‑related snacks (e.g., leftover crumbs from baking). Instead, use low‑calorie treats that are safe to eat during stressful times.
5. Monitor Your Dog’s Health Indicators
- Lethargy or panting: Could signal dehydration or overheating.
- Sneezing or coughing: Dust inhalation can irritate the respiratory tract; consider a temporary muzzle or mask if your dog is highly reactive.
6. Practical Tools for Busy Renovators
- Water station kit: A portable water bowl with built‑in filter ensures clean drinking water, even on dusty floors.
- Meal prep containers: Pre‑portion meals in airtight containers to avoid spills and keep food fresh.
- Dog-friendly cleaning wipes: Keep a small pack handy for quick spot cleans of paws or fur after dust exposure.
7. Safety Checklist
| Item | Action |
|---|---|
| Clean Water | Refill every 6 hours or after heavy dusting. |
| Meal Time | Feed at scheduled times; avoid late evening meals to prevent nighttime accidents. |
| Dust Exposure | Use a mask or keep the dog in a closed room during high‑dust activities. |
| Heat Stress | Provide shade and cool water if temperatures rise above 80°F (27°C). |
By establishing a clear feeding routine, ensuring constant access to fresh water, and monitoring your dog’s behavior, you can keep them comfortable and healthy throughout the renovation process. This not only protects their well‑being but also helps maintain a calmer, more productive home environment for everyone involved.
Providing Comfortable Rest Areas
When your home is undergoing a renovation, the usual routine of your dog can be disrupted in many ways: new smells, loud noises, unfamiliar sounds from power tools, and restricted access to familiar spots. A key strategy for keeping your pup calm is to create a dedicated, cozy sanctuary that feels safe and familiar, even when the rest of the house feels like a construction site.
1. Choose the Right Spot
- Quiet corner: Pick a room or hallway away from the main work zone. The quieter the space, the less your dog will be exposed to vibration and noise.
- Keep it consistent: If possible, keep the same location throughout the renovation so the dog learns that this spot is always safe.
2. Make It Familiar
Your dog associates comfort with scent and memory. To replicate that:
- Bring familiar bedding: Use the same blanket or crate mattress your dog has used before.
- Use a scent anchor: Place a piece of clothing that smells like you, or a favorite toy with a strong smell in the area.
- Consider a dog crate if your dog is crate-trained; it provides a den-like environment that many dogs instinctively find safe.
3. Keep the Environment Calm
Noise and motion are the biggest stressors during renovations:
- Soundproofing: If you have a spare room, cover windows with heavy blankets or use a white‑noise machine to mask construction sounds.
- Temperature control: Keep the area at a comfortable temperature. A fan or heater may be needed if the renovation causes drafts.
4. Provide Mental Stimulation
A quiet environment can also become monotonous for an active dog. Counteract this by:
- Treat‑dispensing toys: Kongs, puzzle feeders, or stuffed treat balls keep their mind occupied.
- Rotate toys: Keep a small selection of favorite toys and rotate them every few days to maintain novelty.
5. Maintain Routine
Dogs thrive on predictable schedules. Even during renovations, try to keep feeding times, walks, and play sessions consistent. If you cannot walk your dog daily due to safety concerns, consider a “doggy walker” service or schedule short indoor exercise sessions.
6. Use Calming Aids
If your dog is particularly anxious, mild calming aids can help:
- Feliway‑type diffusers (for dogs):** These emit synthetic pheromones that reduce stress.
- Adaptil collars or sprays:** Offer a gentle scent that promotes relaxation.
- Always consult your veterinarian before starting any supplement.
7. Keep the Area Clean and Safe
Construction debris can be hazardous. Ensure:
- No loose tools, nails, or sharp objects near the rest area.
- The floor is free of dust that could irritate your dog’s nose or eyes.
- A clean water bowl and easy access to fresh water.
8. Evaluate and Adjust
Observe how your dog reacts in the rest area:
- If they seem restless or avoid the spot, consider moving it further away from noisy zones.
- Use a small camera or pet tracker to monitor their activity if you’re not home during renovation peak times.
By carefully setting up and maintaining a dedicated, comforting space, you can protect your dog’s well‑being throughout the stress of home renovations. The key is consistency, familiarity, and proactive measures that reduce noise, motion, and anxiety.
Monitoring Stress Indicators
When you’re renovating your home, the noise, movement, and unfamiliar smells can be overwhelming for dogs. Paying close attention to their behavior helps you catch early signs of stress before they become serious problems. Below is a practical guide on what to look for, how often to check, and what steps to take when you notice a red flag.
Common Stress Signals in Dogs
- Body Posture: A lowered tail, tucked chin, or crouched stance indicates fear or anxiety. Conversely, an overly stiff posture may signal defensive tension.
- Facial Expressions: Ears flattened against the head, a dilated pupil, or a mouth that appears closed but is not chewing can all be signs of discomfort.
- Vocalization: Whining, whimpering, growling, or excessive barking at construction noises are clear stress cues. A sudden change in volume or pitch can also signal distress.
- Excessive Salivation: Licking lips or drooling more than usual often accompanies anxiety.
- Changes in Activity Level: Sudden hyperactivity, pacing, or the opposite—apathy and lethargy—can indicate that your dog is reacting to the renovation environment.
Behavioral Patterns That Warrant Attention
- Repeated Pacing: Dogs may circle a specific area or repeatedly walk back and forth in a hallway, especially near the construction zone. This is often an attempt to “reset” their environment.
- Inappropriate Elimination: Littering inside the house or scratching at doors can be a sign of stress-induced confusion about safe spaces.
- Avoidance of Human Interaction: If your dog suddenly withdraws from eye contact or refuses to come when called, they may be experiencing heightened fear.
Daily Monitoring Checklist
| Time of Day | Checkpoints | Observations |
|---|---|---|
| Morning (pre‑work) | Body language, vocalization level, food intake | Record any deviations from normal routine. |
| Midday (construction peak) | Proximity to noise source, pacing frequency, drooling | Note if the dog retreats or shows increased agitation. |
| Evening (post‑work) | Restlessness, sleeping position, appetite | Check for signs of lingering anxiety. |
When to Take Action: Practical Steps
- Immediate Safe Space: If a dog shows extreme distress (e.g., shaking, frantic pacing), move them to a pre‑designated calm area—preferably a room with minimal noise and familiar bedding.
- Use of Calming Aids: Consider pheromone diffusers (Adaptil), calming treats, or low‑frequency music specifically engineered for dogs. These can reduce cortisol levels within minutes.
- Gradual Desensitization: Play a recording of construction noises at a very low volume and reward the dog with treats to create positive associations.
- Professional Intervention: If stress indicators persist beyond 48 hours or you notice physical symptoms (vomiting, diarrhea), consult your veterinarian. In severe cases, a certified animal behaviorist may be necessary.
Case Study: A Renovation Success Story
Background: Bella, a 7‑year‑old Labrador, lived in an older house undergoing kitchen remodeling. Her owners noticed she was pacing the hallway each time they heard hammering.
Action Taken: They installed a “quiet zone” bedroom with a heavy door and a small fan that produced white noise. A calming collar was added, and Bella’s owner played soft classical music during peak construction hours.
Result: Within two weeks, Bella’s pacing decreased by 80%, and she began sleeping through the renovation period without drooling or whimpering.
Final Thoughts
Monitoring stress indicators is an ongoing process. By staying observant and proactive, you can turn a potentially stressful home renovation into a manageable transition for your dog. Remember: early detection leads to quick relief, and the happier your pet is, the smoother your renovation will go.
Adjusting Exercise Routines
When a home renovation is underway, the usual exercise routine for your dog can be disrupted by noise, dust, and limited space. However, you can keep your canine companion active and mentally stimulated without exposing them to the hazards of construction. Below are practical strategies, examples, and step-by-step tips to help you adjust your dog's workout plan safely.
1. Identify Safe Zones
- Basement or Garage: If these areas are free from moving equipment, they can serve as temporary exercise spaces.
- Backyard Fenced Enclosure: A secure outdoor area keeps your dog away from open windows and construction dust.
- Indoor Room with Minimal Dust: Choose a room that’s not directly adjacent to the renovation site, preferably one with good ventilation.
2. Reduce Exercise Duration
Construction noise can overstimulate your dog. Shorten walk times or break exercise into multiple shorter sessions.
- Example: Instead of a single 30‑minute walk, do three 10‑minute walks spaced throughout the day.
3. Use Low-Impact Activities
High-impact exercises like running or jumping might be unsafe if surfaces are uneven or dusty.
- Indoor Agility: Set up a makeshift obstacle course using pillows, cardboard boxes, and tunnels made from blankets.
- Tug‑of‑War: A safe indoor game that burns energy without requiring large spaces.
4. Incorporate Mental Stimulation
Cognitive exercises keep dogs engaged and can reduce anxiety during renovations.
- Puzzle Toys: Hide treats in a Kong or use treat‑dispensing puzzles.
- Training Sessions: Teach new tricks or reinforce basic commands. Short, focused sessions are effective.
5. Schedule Exercise Around Construction Peaks
Construction crews often work in shifts. Plan walks and playtime during quieter hours (early morning or late evening).
6. Monitor Your Dog’s Health
- Watch for Signs of Stress: Panting, whimpering, or avoidance behaviors may indicate discomfort.
- Check for Respiratory Issues: Dust can irritate lungs; if your dog coughs frequently, consider a temporary indoor routine and use an air purifier.
7. Example Routine: “Renovation‑Friendly Daily Plan”
- Morning (6:30 am – 7:00 am): Short walk in the backyard, followed by a 10‑minute tug session inside.
- Midday (12:00 pm – 12:15 pm): Indoor agility course using household items.
- Evening (6:30 pm – 7:00 pm): Quiet playtime and a brief training session with treats.
8. Safety Tips for the Renovation Site
- Keep your dog on a leash or in a fenced area if they must be nearby.
- Avoid exposing them to open windows where dust can blow inside.
- Use pet‑safe cleaning products to minimize chemical exposure.
9. When to Seek Professional Help
If your dog shows persistent signs of anxiety or respiratory distress, consult a veterinarian for guidance and consider professional dog training services that specialize in stress management during environmental changes.
By proactively adjusting exercise routines and creating safe play environments, you’ll protect your dog’s health and keep them happy throughout the home renovation process.
Using Positive Reinforcement and Distractions
When you’re renovating, the combination of new sounds, smells, and visual stimuli can be overwhelming for your dog. One of the most effective ways to keep them calm is through positive reinforcement—rewarding calm behavior—and strategic distractions that redirect their focus away from stressful triggers.
1. Treat‑Based Reward System
- Choose high‑value treats: Use small, soft biscuits or a dab of peanut butter (no xylitol) that your dog loves and finds irresistible.
- Reward calm moments: As soon as you notice your pup remaining still or following a command during a noisy moment, give the treat immediately. Timing reinforces the connection between calm behavior and reward.
- Keep treats small: This allows for frequent rewards without overfeeding. A “good dog” token can also be a quick clicker sound paired with a verbal cue like “yes!”
2. Structured Play Sessions
Before each renovation phase, schedule a short play session that mimics the upcoming environment:
- Simulate noise: Play recorded construction sounds at low volume for a minute while your dog is engaged in a game of fetch or tug.
- Introduce new scents: Sprinkle a little fresh paint odor (in a sealed container) near the play area. If they approach calmly, reward them.
3. Distraction Toys and Puzzles
- Chew toys: Durable chew items keep mouths busy and help reduce anxiety spikes.
- Puzzle feeders: Stuff a Kong or a puzzle bowl with wet food; the mental stimulation occupies their mind while you’re working.
- Interactive games: Hide-and-seek with treats encourages them to focus on scent trails instead of construction noises.
4. Use of Scented Calming Products
Consider diffusing a dog‑safe calming pheromone, such as Adaptil, in the area where your dog spends most of their time during renovations. Combine this with treats to reinforce that the space is safe.
5. Positive Reinforcement with Commands
- "Quiet" command: When they stop barking at a new sound, say “quiet,” give a treat. Repeating this builds an association between silence and reward.
- "Stay" during construction: Teach them to stay in a designated spot while you work; reward with a treat each time they hold the position for 10–15 seconds.
6. Practical Tips for Success
- Keep routines consistent: Even if the home is changing, maintain regular feeding and walking times.
- Short, frequent breaks: Take your dog outside during major noise bursts to let them stretch and relieve themselves.
- Limit exposure: If possible, keep the renovation area off‑limits for sensitive dogs; use a sturdy crate or a safe room as a refuge.
By pairing immediate rewards with engaging distractions, you give your dog clear signals that the new environment is not dangerous. Over time, they’ll associate construction noises with positive experiences rather than fear, making home renovations less stressful for both of you.
Post-Renovation Cleanup and Safety Checks
After the hammering stops and the paint dries, it’s time to make sure your home is safe for everyone—including your four‑legged family members. Dogs are especially sensitive to lingering chemicals, sharp objects, and structural changes that can affect their behavior or health. Follow these steps to create a clean, secure environment.
1. Thoroughly Vacuum and Sweep
- Dust & debris: Use a HEPA‑filtered vacuum to capture fine dust particles that can irritate your dog’s nose and lungs.
- Hard surfaces: After sweeping, mop with an ammonia‑free cleaner. Ammonia fumes are toxic to pets.
2. Inspect for Sharp Objects and Loose Materials
- Check corners of newly installed trim or baseboards for loose nails or splinters.
- Remove any exposed wiring, broken tiles, or leftover construction debris that could cause cuts or choking hazards.
3. Test New Paints and Finishes
Even “low‑VOC” paints can release volatile organic compounds (VOCs) for several days after application.
- Ventilation: Keep windows open for at least 48 hours or use an air purifier with a HEPA filter and activated carbon cartridge.
- Spot test: Place a small cloth on the freshly painted surface; if it smells strong after a day, allow more ventilation before letting your dog roam freely.
4. Secure New Fixtures
- Verify that all new cabinets, shelves, and countertops are firmly attached to walls or studs.
- Check that any newly installed stair railings have no gaps large enough for a dog’s head to slip through.
5. Check Flooring for Residual Chemicals
If you installed new hardwood, laminate, or carpet:
- Hardwood: Let the floor air out for a full week before allowing pets on it.
- Laminate & vinyl: Clean with a mild soap solution; avoid harsh chemicals that can leave residues.
- Carpet: Vacuum thoroughly and consider a professional cleaning to remove any glue or adhesives left behind.
6. Re‑establish Familiar Routines
Dogs thrive on consistency. After renovations, quickly return to their normal feeding times, walks, and play schedules to reduce stress.
7. Conduct a Final Safety Walk‑through
- Walk through each renovated area with your dog’s leash to observe any potential hazards they might notice.
- Use a flashlight if you’re checking dimly lit corners—dogs can be more sensitive to unexpected light changes.
8. Keep Hazardous Materials Out of Reach
Store all leftover paint cans, solvents, and cleaning supplies in a locked cabinet or high shelf that is inaccessible to pets.
9. Monitor Your Dog’s Health Post‑Renovation
- Watch for signs of respiratory irritation: coughing, wheezing, or sneezing.
- If your dog shows any unusual symptoms within a week, consult your veterinarian promptly.
By following these cleanup and safety steps, you’ll ensure that the fresh look of your renovated home is not just beautiful for humans but also safe and welcoming for your beloved canine companions.
Conclusion
Home renovations can be a stressful environment for both you and your furry friend. By planning ahead, setting clear boundaries, and using the right tools, you can keep your dog safe, calm, and healthy throughout the process.
1. Create a Safe Space
- Designated Area: Set up a quiet room or space with familiar bedding, toys, and a water bowl. This will serve as your dog’s refuge when the noise level spikes.
- Physical Barriers: Use baby gates or pet crates to keep your dog out of high‑traffic zones where tools are stored or contractors work.
2. Maintain a Routine
Dogs thrive on consistency. Keep feeding, walking, and play times as regular as possible even if the renovation schedule changes.
3. Use Protective Gear
- Ear Protection: Lightweight dog ear muffs or earmuffs designed for pets can reduce hearing damage from loud drills and jackhammers.
- Paw Safety: Consider using paw pads or protective booties if the renovation site has hot tiles, sharp nails, or exposed chemicals that could burn or irritate your dog’s feet.
4. Keep Hazardous Materials Out of Reach
Paints, solvents, and cleaning agents should be stored in locked cabinets. If you’re using a chemical cleaner, ventilate the area well and keep your dog away until fumes dissipate.
5. Manage Noise Levels
- Schedule Work: Whenever possible, plan loud work during times when your dog is likely to be sleeping or in a safe space.
- Use Soft-Edged Tools: Opt for hand tools instead of power tools where feasible. When power tools are necessary, use vibration dampeners and keep the tool away from your dog’s ears.
6. Provide Distractions
Interactive toys, puzzle feeders, or chew treats can keep your dog mentally engaged and help reduce anxiety during chaotic moments.
7. Monitor Health Indicators
- Stress Signs: Excessive barking, pacing, or attempts to escape may indicate discomfort.
- Physical Symptoms: Vomiting, diarrhea, or lethargy could be signs of chemical exposure—consult your vet immediately if these occur.
8. Communicate with Contractors
Let workers know that you have a dog on the property and ask them to keep their tools away from pet areas. A simple courtesy can prevent accidental injuries.
9. Plan for Post‑Renovation Cleanup
- Dust Control: Use HEPA vacuums or damp mopping to reduce airborne particles that could irritate your dog’s eyes and lungs.
- Check for Residual Hazards: Inspect paint chips, nails, and loose screws before reintroducing your dog to the renovated space.
10. Seek Professional Advice When Needed
If you notice persistent behavioral changes or health issues after renovations, consult a veterinarian or an animal behaviorist for tailored guidance.
By implementing these strategies, you’ll create a safer, more comfortable environment for your dog during the inevitable chaos of home renovation. Your pet’s well‑being is just as important as the final finish—take the time to protect them, and they’ll reward you with loyalty and love.
FAQ
Renovating a house can be stressful for both you and your furry friend. Dust, loud noises, unfamiliar smells, and open spaces can trigger anxiety or even lead to injury. Below are practical steps to keep your dog safe and calm while you transform your home.
1. Plan the Renovation Around Your Dog’s Schedule
- Choose quieter days: If possible, schedule major demolition work on weekends or when family members are away so your dog isn’t constantly exposed to noise.
- Set a routine: Dogs thrive on consistency. Keep feeding times, walks, and bedtime the same even during renovations.
2. Create a Safe, Secluded Space
Provide a quiet retreat where your dog can escape from construction noise.
- Use a crate or playpen: Line it with familiar bedding and leave a favorite toy inside.
- Soundproofing: Cover windows with heavy curtains and add a white‑noise machine to mask drilling or hammering sounds.
- Keep doors closed: Prevent accidental wandering into hazardous areas like open stairwells, unfinished rooms, or work zones with exposed nails and sharp tools.
3. Keep Hazardous Materials Out of Reach
Renovations often involve chemicals that can be toxic to pets.
- Paint & solvents: Store in sealed, child‑proof cabinets and ensure they’re labeled clearly.
- Acetone, paint thinner, and other fumes: Keep ventilation open when these are used but keep the dog away from the area until it’s fully aired out.
- Use pet‑safe cleaning products whenever possible to avoid accidental ingestion or skin irritation.
4. Protect Your Dog’s Health During Dusty Work
Dust can irritate eyes, nose, and lungs.
- Wear a mask: If you’re working in the dog’s living area, use an N95 or equivalent to filter out fine particles.
- Ventilate properly: Open windows only after work is finished and before letting your dog back inside.
- Use HEPA air purifiers if available; they trap microscopic dust that a simple fan cannot remove.
5. Monitor for Signs of Stress or Pain
Even with precautions, some dogs may still exhibit anxiety or discomfort.
- Behavioral cues: Whining, pacing, hiding, or excessive licking are red flags.
- Pain indicators: Limping, reluctance to move, or sensitivity when touched can signal injury from falling debris.
- If you notice any of these signs, pause the work and give your dog a calm break in its safe zone. Consider consulting a vet if symptoms persist.
6. Use Positive Reinforcement to Keep Calm
Reward your dog for staying in their safe space or showing calm behavior during noisy moments.
- Treats and praise: Offer small, tasty treats when they remain quiet.
- Consider using a calming aid such as a pheromone diffuser (Adaptil) or a dog‑specific anxiety vest if your pet is prone to stress.
7. Plan for Post‑Renovation Clean‑Up
After construction, ensure the environment is safe before reintroducing your dog.
- Check for loose nails and sharp edges: Use a flashlight to inspect floors and walls.
- Remove all hazardous materials: Dispose of paint cans, solvents, and construction debris properly.
- Vacuum thoroughly: Pick up dust from carpets, rugs, and baseboards.
8. When to Seek Professional Help
If your dog displays extreme anxiety or physical symptoms that you cannot manage at home, don’t hesitate to contact a veterinarian or an animal behaviorist for tailored advice.
By planning ahead, creating safe zones, and monitoring your dog’s well‑being throughout the renovation process, you can ensure a smoother transition back to a peaceful, comfortable home for both of you.
Categories
- AI & Enrichment Play
- Broiler Farming
- Broiler Farming Tips
- Canine Wellness & Longevity
- Cat
- Cat & Human Connection
- Cat Adoption & Rescue
- Cat Breeds
- Cat Breeds & Personalities
- Cat Care & Health
- Cat Grooming & Hygiene
- Cat Lifestyle & Environment
- Cat Myths & History
- Cat Nutrition & Diet
- Cat Products & Reviews
- Cat Training & Behavior
- Comparison
- Consumer Awareness
- Dog
- Dog Accessories & Products
- Dog Adoption & Rescue
- Dog Breed & Lifestyle Trends
- Dog Breeding & Puppies
- Dog Entertainment & Media
- Dog Fashion & Trends
- Dog Fun & Lifestyle
- Dog Grooming & Hygiene
- Dog History & Culture
- Dog Myths, Science & Future Tech
- Dog News & Trends
- Dog Nutrition & Food
- Dog Psychology & Emotions
- Dog Safety & Security
- Dog Sports & Activities
- Dog Technology & Innovation
- Dog Training for Modern Owners
- Dog Travel & Adventure
- Dog Travel, Adventure & Culture
- Economic and Market Insights
- Educational Content
- FAQs
- Feeding Alternatives
- Festivals & Seasonal Ideas
- Fun & Entertainment
- General Knowledge
- General Pig Farming
- Health & Disease Management
- Housing and Environment
- Kittens
- Market Insights
- Miscellaneous
- Miscellaneous
- Motivational
- pig
- Pig Breeding
- Pig Breeds
- Pig Farming Stories and Inspiration
- Pig Health and Care
- Pig Nutrition
- Pig Products
- Profitability & Business
- Puppy Care
- Puppy Predictable Topics Reinvented
- Regional Focus
- Rescue & Adoption Buzz
- Senior Cats
- Senior Dog Care
- Smart Dog Tech & Gadgets
- Sustainability
- Sustainable & Eco-Friendly Dog Products
- Tech & Innovations
- Working & Service Dogs
- Broiler Feed66 products
- Country Feed33 products
- Pig Feed66 products
- Product22 products
- Raw Materials99 products
Products
-
 Fish Meal
₹1,999.00 – ₹2,999.00Price range: ₹1,999.00 through ₹2,999.00Rated 0 out of 5
Fish Meal
₹1,999.00 – ₹2,999.00Price range: ₹1,999.00 through ₹2,999.00Rated 0 out of 5 -
 FATTENING BROILER FEED
₹2,299.00 – ₹2,349.00Price range: ₹2,299.00 through ₹2,349.00Rated 0 out of 5
FATTENING BROILER FEED
₹2,299.00 – ₹2,349.00Price range: ₹2,299.00 through ₹2,349.00Rated 0 out of 5 -
 LAYER COUNTRY FEED
₹1,549.00 – ₹1,649.00Price range: ₹1,549.00 through ₹1,649.00Rated 0 out of 5
LAYER COUNTRY FEED
₹1,549.00 – ₹1,649.00Price range: ₹1,549.00 through ₹1,649.00Rated 0 out of 5 -
 COUNTER BROILER FEED
₹1,199.00 – ₹1,299.00Price range: ₹1,199.00 through ₹1,299.00Rated 0 out of 5
COUNTER BROILER FEED
₹1,199.00 – ₹1,299.00Price range: ₹1,199.00 through ₹1,299.00Rated 0 out of 5 -
 LACTATING PIG FEED
Rated 0 out of 5
LACTATING PIG FEED
Rated 0 out of 5₹2,299.00Original price was: ₹2,299.00.₹1,740.00Current price is: ₹1,740.00. -
 Maize
Rated 0 out of 5
Maize
Rated 0 out of 5₹1,650.00Original price was: ₹1,650.00.₹1,300.00Current price is: ₹1,300.00. -
 GESTATION PIG FEED (Phase 1)
Rated 0 out of 5
GESTATION PIG FEED (Phase 1)
Rated 0 out of 5₹2,249.00Original price was: ₹2,249.00.₹1,699.00Current price is: ₹1,699.00. -
 Pre Starter Broiler Feed
₹2,399.00 – ₹2,499.00Price range: ₹2,399.00 through ₹2,499.00Rated 0 out of 5
Pre Starter Broiler Feed
₹2,399.00 – ₹2,499.00Price range: ₹2,399.00 through ₹2,499.00Rated 0 out of 5 -
 FINISHER PIG FEED
Rated 0 out of 5
FINISHER PIG FEED
Rated 0 out of 5₹2,299.00Original price was: ₹2,299.00.₹1,749.00Current price is: ₹1,749.00. -
 Broiler Premix
Rated 0 out of 5
Broiler Premix
Rated 0 out of 5₹820.00Original price was: ₹820.00.₹699.00Current price is: ₹699.00.