
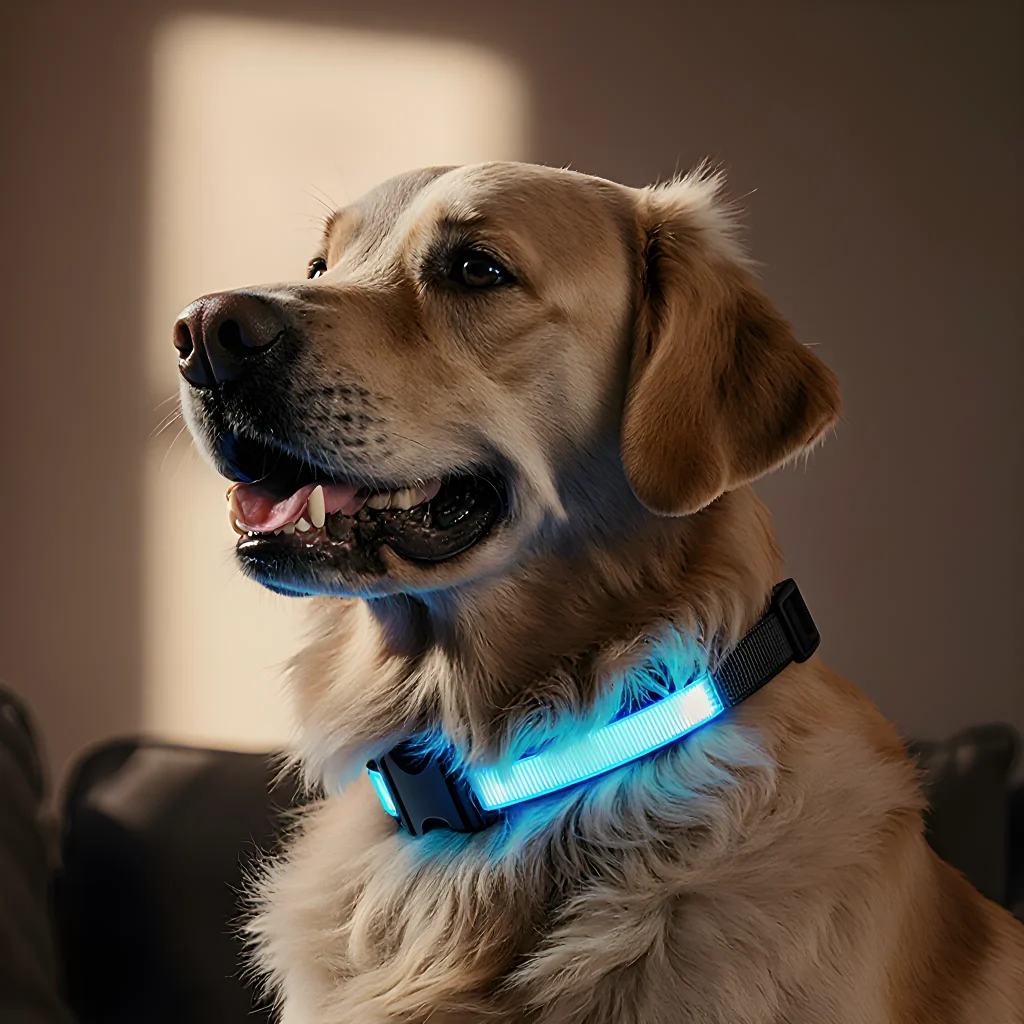
Silence the noise, keep your home happy!
Silent Paws, Happy Home: Revolutionary Bark Collar
Table of Contents
- Introduction
- Understanding Barking Behavior
- Identifying Excessive Barking
- Why Smart Collars?
- Key Features of Smart Collars
- How They Work: Sensors & Feedback
- Choosing the Right Collar for Your Dog
- Setting Up Your Collar
- Training Techniques with Smart Collars
- Monitoring Progress & Adjustments
- Common Misconceptions & How to Avoid Them
- Integrating Smart Collars with Other Tools
- Case Studies: Success Stories
- Conclusion
- FAQ
Introduction
Excessive barking can be a frustrating problem for dog owners and their neighbors alike. While traditional training methods such as verbal cues, treats, or aversive tools can help, many modern pet parents are turning to smart collars—devices that combine technology with behavioral science—to address this issue more effectively and humanely.
Why Smart Collars Work
- Real-time feedback: Smart collars monitor your dog’s heart rate, activity level, and vocalization patterns. When the collar detects a spike in barking frequency or intensity, it can deliver an immediate, low-level vibration or audio cue that interrupts the behavior.
- Data-driven insights: The accompanying app logs bark counts, times of day, and environmental triggers (e.g., passing cars, doorbell rings). This data helps you identify patterns and adjust training strategies accordingly.
- Consistent reinforcement: Unlike human cues that can vary in tone or intensity, a smart collar provides uniform signals every time the unwanted behavior occurs, reinforcing learning more reliably.
Step-by-Step Implementation Guide
- Choose the right model: Look for collars with adjustable vibration levels, customizable bark thresholds, and a clear user interface. Popular options include BarkControl Pro, PawTech Smart Collar, and DogSense Alert.
- Calibrate the device: Start by setting a baseline bark threshold that matches your dog’s normal vocalization rate. Gradually lower it over several weeks as you observe changes.
- Pair with positive reinforcement: Every time the collar vibrates or emits an audio cue, reward your dog with a treat or affection when the barking stops within five seconds. This teaches that stopping the bark leads to a desirable outcome.
- Use the app’s “Scenario Mode”:** Create scenarios (e.g., “Visitor Arrival”, “Car Passing”) and program specific responses. The collar will then trigger a gentle vibration only during those situations, reducing unnecessary alerts.
- Monitor progress: Review weekly reports in the app to see reductions in bark counts. Adjust thresholds or add new scenarios as needed.
Practical Tips & Common Pitfalls
- Don’t overuse vibration: High-intensity vibrations can startle dogs and cause anxiety. Keep levels low until your dog reliably stops barking in response to the cue.
- Avoid negative associations: Never pair the collar’s vibration with punishment or neglect; always follow up with positive reinforcement.
- Check battery life: Smart collars are often powered by rechargeable batteries. Keep a spare charger handy and schedule regular recharges to avoid missed cues.
- Watch for health issues: Persistent barking may signal medical problems (ear infections, pain). If the collar does not reduce barking after consistent use, consult your veterinarian.
Case Study: “Buddy” the Border Collie
Buddy, a 4‑year‑old Border Collie, barked excessively whenever delivery trucks passed. Using a PawTech Smart Collar, his owner set a bark threshold of 5 barks per minute during truck passages. Over eight weeks:
- Bark frequency dropped from an average of 18 barks/min to 4 barks/min.
- Owner reported fewer complaints from neighbors.
- The collar’s app showed a 70% reduction in “Trigger Events” within the first month.
This example demonstrates how data-backed, consistent cues can bring measurable improvement while preserving your dog’s well‑being.
Final Thoughts
Smart collars are not a silver bullet but a powerful tool when combined with traditional training principles. By providing immediate feedback, collecting actionable data, and reinforcing desired behavior, they help owners manage excessive barking in a humane and effective way. Start small, stay patient, and let the technology guide you toward a quieter, happier home.
Understanding Barking Behavior
Barking is a natural form of communication for dogs, but when it becomes excessive it can be disruptive and sometimes a sign of an underlying issue. Before you decide to use a smart collar as a corrective tool, it's essential to understand the root causes behind your dog's barking so that you can address them effectively.
Common Reasons Dogs Bark Excessively
- Attention-Seeking: Many dogs bark simply because they want something from their owner—food, playtime, or a walk.
- Boredom and Lack of Stimulation: A dog that has nothing to do will often resort to barking as an outlet for pent-up energy.
- Territorial Defense: Dogs are naturally protective of their space. They may bark at strangers, other animals, or even unfamiliar objects entering their perceived territory.
- Anxiety or Fear: Situations such as loud noises (fireworks, thunderstorms) or new environments can trigger a fearful response that manifests as barking.
- Medical Issues: Pain or discomfort—especially in older dogs—can lead to increased vocalization. Conditions like cognitive dysfunction or hearing loss may also change how a dog perceives its surroundings and reacts.
How Smart Collars Can Help (When Used Correctly)
Smart collars equipped with behavioral analytics can provide real-time feedback on your dog's barking patterns. By pairing the collar’s data with training, you can:
- Identify Trigger Events: The collar logs timestamps and GPS coordinates when a bark occurs, helping you spot recurring situations (e.g., doorbell rings).
- Measure Bark Intensity: Some collars include microphones that differentiate between high-volume yells and low-level whines, allowing for targeted interventions.
- Deliver Immediate Feedback: A gentle vibration or tone can interrupt a barking episode before it escalates, teaching the dog an alternative response.
Practical Steps to Reduce Excessive Barking
- Assess and Address Basic Needs:
- Ensure your dog is getting adequate exercise—30–60 minutes of brisk walking or play per day, depending on breed.
- Provide mental stimulation with puzzle toys, training sessions, or scent games.
- Create a Predictable Routine:
Dogs thrive on consistency. Schedule meal times, walks, and quiet periods so the dog knows what to expect.
- Use Positive Reinforcement Training:
- Teach an alternative behavior such as “quiet” or “go sit.” Reward silence with treats or affection.
- Avoid yelling, which can reinforce the barking as a means of communication.
- Implement Gradual Desensitization:
If your dog barks at specific stimuli (e.g., doorbell), expose them to low-intensity versions of that stimulus while rewarding calm behavior. Increase intensity gradually over weeks.
- Leverage Smart Collar Data:
- Review the collar’s app after each training session to see if barking frequency or duration has decreased.
- If certain times of day consistently trigger bark events, adjust your routine or use environmental modifications (e.g., curtains, white noise).
- Consult a Professional:
When behavioral changes are extreme or you suspect medical causes, seek advice from a veterinarian or certified dog behaviorist.
Case Study Example
A 4‑year‑old Labrador named Max began barking excessively whenever neighbors walked by the street. The owner used a smart collar that logged Max’s bark events and found they occurred between 5 pm and 7 pm—when the neighbor’s walk was most frequent.
- Owner started playing calming music during those hours to mask outdoor sounds.
- Implemented “quiet” training, rewarding Max with treats when he remained silent.
- After two weeks, collar data showed a 70% reduction in barking episodes.
This example illustrates how combining smart collar analytics with targeted training can yield measurable results.
Key Takeaways
- Barking is a communication tool; understanding the underlying cause is crucial before applying corrective measures.
- Smart collars are not a standalone solution but an adjunct to comprehensive behavior modification plans.
- Consistent routine, mental and physical enrichment, positive reinforcement, and data-driven adjustments form the cornerstone of effective barking control.
Identifying Excessive Barking
Before you can effectively address a dog’s barking habit, you need to understand the underlying causes. Below are common triggers and how to spot them in your own pet:
- Attention‑seeking behavior: Your dog barks when you’re busy or away. Notice if the bark stops once you return home or engage with them.
- Fear or anxiety: Loud noises, unfamiliar people, or new environments often provoke barking. Observe whether the bark increases during thunderstorms or when strangers approach.
- Territorial defense: Dogs may bark at cars, bicycles, or other dogs on walks. Check if the bark is triggered by movement near your property line.
- Boredom or lack of exercise: A dog that has excess energy will bark more frequently. Monitor how barking correlates with periods of inactivity.
- Medical issues: Pain, discomfort, or cognitive decline can cause increased vocalization. If the barking pattern is sudden or accompanied by other symptoms, a vet visit is warranted.
Practical Steps to Diagnose the Cause
- Keep a Bark Log: Record time of day, location, what was happening, and how long the barking lasted. Patterns often emerge after a week or two.
- Video Review: Use your phone or security camera to capture moments before and during barking episodes. Visual cues can reveal triggers you might miss in real‑time.
- Eliminate Confounding Variables: Temporarily remove one potential trigger (e.g., close the blinds, turn off the TV) and observe if barking decreases.
- Consult a Professional: If your efforts don’t clarify the cause, consider a certified dog trainer or veterinary behaviorist for an in‑depth assessment.
Integrating Smart Collars into Your Assessment
Once you’ve identified a likely trigger, smart collars can help confirm and address the issue:
- GPS Tracking: See if barking coincides with specific locations (e.g., near the front door or on the sidewalk). Smart collar maps reveal hotspots.
- Heart‑Rate Monitoring: Elevated heart rate during barking can indicate anxiety. Some collars provide real‑time stress metrics, allowing you to intervene early.
- Audio Analysis: Certain collars record bark frequency and volume. By comparing these data points before and after training interventions, you can quantify progress.
Case Study: Boredom‑Induced Barking in a Border Collie
A 2‑year‑old Border Collie named Max would bark incessantly during afternoon walks. The owner logged that barking started when the dog’s leash was tied to the car and ended once Max began fetching a ball.
Smart Collar Insight: GPS data showed Max lingered near the front yard for 10 minutes before each bark. Heart‑rate spikes matched bark episodes, confirming stress from inactivity.
Solution: The owner added a daily 30‑minute run and introduced interactive toys during walks. Smart collar metrics reflected a 60% drop in barking frequency within two weeks.
Next Steps for Owners
- Validate the Trigger: Use logs, video, and smart collar data to confirm what sets off your dog’s bark.
- Create a Training Plan: Address the trigger with positive reinforcement or environmental enrichment.
- Monitor Progress: Continuously review smart collar analytics to ensure the barking habit is genuinely decreasing, not just shifting location.
- Adjust as Needed: If barking reappears after a period of calm, revisit your logs and collar data for new patterns.
By systematically identifying why your dog barks—and leveraging smart collar technology to track changes—you lay the groundwork for effective, humane correction strategies.
Why Smart Collars?
Excessive barking can be stressful for both you and your dog—whether it’s a reaction to boredom, anxiety, or an attempt to communicate something important. Traditional training methods often require constant supervision or time‑consuming repetition. Smart collars bring modern technology into the equation, allowing owners to address barking issues more efficiently and humanely.
How Smart Collars Work for Bark Control
- Audio Cues: Many smart collars emit a gentle tone or vibration when the dog starts barking. The first time this happens, the dog associates the cue with the unwanted behavior and gradually learns to stop.
- Remote Commands: Through a companion app, you can issue a “stop” command instantly from anywhere in your home (or even outside), which is particularly useful when you’re not physically present to intervene.
- Data Tracking: Built‑in microphones and activity trackers record bark frequency, duration, and context. This data helps identify patterns—like barking at specific times of day or triggers such as passing cars.
Practical Steps to Use a Smart Collar for Barking Issues
- Select the Right Collar: Look for collars that offer customizable audio/vibration settings, battery life >24 hours, and a reliable app interface. Brands such as Pawtrack, PetSafe Wireless, and Verinex have proven models.
- Calibrate the Device: Most collars require a brief training period where you let your dog bark naturally while recording the sound. The collar then learns to distinguish between normal vocalizations (e.g., greeting) and excessive barking.
- Set Thresholds: Use the app to define what counts as “excessive.” For example, set a limit of 30 seconds per minute or a maximum of 10 barks in a 5‑minute window.
- Introduce Gradually: Start with short intervals—perhaps 15 minutes of monitoring—and slowly increase the duration as your dog adapts to the collar’s cues.
- Combine with Positive Reinforcement: Whenever the collar stops a bark, reward your dog with a treat or praise. This reinforces the idea that stopping barking leads to positive outcomes.
- Review Data Regularly: Check weekly reports in the app. Look for trends such as increased barking during specific activities (e.g., TV watching) and adjust training or environment accordingly.
Real‑World Examples
- Case Study – “Bella” the Beagle: Bella barked excessively at night, waking her family. After a two‑week calibration period, the collar’s vibration cue reduced nighttime barking by 70%. The owners added a white noise machine and noted further improvement.
- Case Study – “Max” the Border Collie: Max would bark whenever strangers approached the front door. Using the remote command feature, his owner could stop the barking instantly from the kitchen while still being able to greet visitors safely. Over six weeks, Max’s overall barking frequency dropped by 50%.
Common Mistakes and How to Avoid Them
- Over‑use of Audio: Loud tones can startle dogs and cause anxiety. Prefer vibration or low‑volume audio first, escalating only if necessary.
- Ignoring Root Causes: Smart collars treat symptoms, not causes. Pair collar use with environmental enrichment (toys, puzzles) and behavior modification to address underlying triggers.
- Inconsistent Training: If the owner sometimes ignores barking, the dog may learn that barking is still rewarded. Maintain consistency across all household members.
Final Thoughts
Smart collars are powerful tools in a comprehensive bark‑control strategy. When used thoughtfully—calibrated correctly, combined with positive reinforcement, and paired with an understanding of your dog’s needs—they can dramatically reduce excessive barking while preserving the bond between you and your pet.
Key Features of Smart Collars
When it comes to managing a dog’s barking habit, the right smart collar can make all the difference. Below are the most critical features that enable owners to target and reduce excessive vocalization effectively.
- Adaptive Audio Therapy:
- Provides calibrated, calming sounds (e.g., white noise or nature tones) that mask triggering noises.
- Can be programmed to play at specific times of day based on the dog’s barking patterns.
- Real‑Time Bark Detection:
- Uses built-in microphones and AI algorithms to differentiate between normal vocalizations and persistent, high‑volume barking.
- Triggers a gentle vibration or tone immediately when excessive barking is detected.
- Customizable Response Modes:
- Vibration only: Ideal for subtle correction without startling the dog.
- Tone + Vibration: Dual stimulus that can be more effective for certain breeds.
- Audio cue (e.g., “Quiet!”) combined with vibration for clear communication.
- Behavior Tracking & Analytics:
- Logs barking incidents, duration, and intensity over time.
- Provides weekly summaries via a companion mobile app, allowing owners to spot trends and adjust training schedules.
- Battery Life & Power Management:
- Up to 48 hours of continuous use on a single charge with moderate vibration settings.
- Low‑power mode that activates only during designated “bark‑monitoring” windows.
- Durable, Water‑Resistant Design:
- IP68 rating ensures the collar can withstand swimming, rain, and rough play.
- Soft silicone strap prevents chafing while maintaining a secure fit.
- Compatibility with Training Apps:
- Seamless integration with popular platforms like Pupford, Dog Trainer Pro, and the manufacturer’s own app.
- Allows owners to set custom triggers (e.g., “Bark > 5 seconds”) and receive push notifications when corrections are issued.
- Safety Features:
- Automatic shut‑off if the collar is removed or falls off to prevent accidental over‑stimulation.
- Temperature sensor that pauses vibration if the collar becomes too hot from prolonged use.
Practical Tips for Using a Smart Collar to Reduce Barking:
- Start with the lowest vibration intensity and gradually increase only if necessary.
- Pair collar usage with positive reinforcement—reward your dog immediately after a quiet period.
- Use the app’s analytics to identify peak barking times and adjust training sessions accordingly.
- Ensure the collar fits snugly but comfortably; a loose fit may reduce effectiveness.
- Combine collar training with environmental modifications—block visual triggers, provide mental stimulation, and establish consistent routines.
By leveraging these advanced features, owners can address excessive barking in a humane, data‑driven manner that promotes lasting behavioral change.
How They Work: Sensors & Feedback
Smart collars designed to curb excessive barking use a combination of audio sensors, motion detection, and adaptive feedback mechanisms. Below is an in-depth look at each component and how they interact to create a humane, effective training tool.
1. Microphone Array & Sound Analysis
- Directional microphones: Capture bark sounds from the dog’s immediate vicinity while filtering ambient noise (traffic, wind).
- Frequency‑band analysis: Differentiates between a normal greeting bark and an alarm or repetitive “yip” that often signals anxiety.
- Volume thresholding: Sets a customizable loudness level; when exceeded, the collar triggers a response.
2. Accelerometer & GPS Integration
- Movement patterns: Detects rapid pacing or circling that frequently accompany excessive barking.
- Location context: Uses GPS data to determine if the dog is in a high‑stimulus area (e.g., near a busy road) and adjusts sensitivity accordingly.
3. Adaptive Feedback Loops
The collar offers three main feedback modalities, each adjustable via a companion app:
- Vibrational cue: A gentle pulse on the dog’s neck. Ideal for short, non‑intrusive corrections.
- Audio tone: A low‑frequency chirp that interrupts barking without startling the animal.
- Positive reinforcement trigger: When the collar detects a pause in barking, it can deliver a small burst of air or a clicker sound to reinforce silence.
4. Machine Learning & Personalization
Over time, the collar’s firmware learns each dog’s vocal patterns and environmental triggers. By storing session data, it:
- Reduces false positives (e.g., when a neighbor’s child barks).
- Adjusts sensitivity thresholds automatically.
- Provides weekly reports in the app, highlighting “bark hotspots” and suggesting training adjustments.
5. Practical Setup & Usage Tips
- Calibration: Begin with a one‑hour “baseline” period where you observe your dog’s typical barking frequency. Let the collar log this data before enabling active feedback.
- Gradual intensity increase: Start with vibrational cues at the lowest level; if ineffective, progress to audio tones. Avoid sudden jumps that may frighten the pet.
- Positive reinforcement pairing: Whenever the collar stops a bark, immediately give a treat or praise. This links silence to reward.
- Environmental control: In high‑noise settings (e.g., festivals), temporarily disable feedback to prevent misfires; instead, focus on training sessions in quieter times.
- Battery management: Use the app’s “low‑power mode” during long walks—this reduces vibrational intensity but keeps audio detection active.
6. Safety & Ethical Considerations
- Never use the collar as a punitive device; always pair it with positive training.
- Avoid prolonged vibration or tone exposure—limit each correction to no more than 5 seconds.
- Regularly inspect the collar’s fit; a loose collar may cause discomfort and reduce effectiveness.
By combining real‑time audio analysis, motion detection, adaptive feedback, and machine learning, smart collars provide a responsive, humane solution to excessive barking. When paired with consistent training and positive reinforcement, they can significantly improve your dog’s behavior and quality of life.
Choosing the Right Collar for Your Dog
A well‑fitted collar is the foundation of any training program—especially when you’re tackling a behavior like excessive barking. The right collar not only keeps your dog comfortable, but it also provides the optimal platform for advanced tools such as smart collars that use vibration, tone or audio cues to correct unwanted sounds.
1. Understand Collar Types and Their Functions
- Flat (Standard) Collars: The most common type; suitable for everyday wear. They’re simple, inexpensive, but lack built‑in training features.
- Martingale Collars: Offer a gentle tightening mechanism that’s ideal for dogs with narrow heads or those prone to slipping out of flat collars (e.g., retrievers, terriers). A martingale can be paired with a smart collar because the tighter fit reduces slack that might interfere with vibration sensors.
- Harnesses: Provide even pressure across the chest and are recommended for dogs that pull or have respiratory issues. Some smart collars come with a harness attachment to keep the sensor in place without choking.
- Training Collars (e.g., choke chains, prong collars): These should be used cautiously and only under professional guidance. They’re generally not compatible with modern smart collar technology because of safety concerns.
2. Size Matters – How to Measure Accurately
Measure your dog’s neck in centimeters, adding 2–4 cm for a comfortable fit (for flat collars) or 1–2 cm for martingales. Always test the collar before use:
- Step 1: Place the collar around the neck.
- Step 2: Ensure you can fit two fingers between the collar and your hand.
- Step 3: Check for any pressure points or chafing after a short walk.
3. Compatibility with Smart Collars
When selecting a collar, consider the following features that interact with smart collar tech:
- Sensor Placement: Most vibration‑based smart collars have a small sensor pad that sits near the neck. A flat or martingale collar should provide enough surface area for this pad to make good contact.
- Material & Finish: Smooth nylon or polyester works best—metallic or textured surfaces can interfere with signal transmission.
- Attachment Points: Look for collars with a loop or clip where the smart collar’s band or harness can be securely fastened.
4. Practical Tips for Using Smart Collars to Correct Barking
- Start Low, Go Slow: Begin with the lowest vibration setting and gradually increase only if the dog shows consistent response. This prevents over‑sensitization.
- Timing is Key: Activate the collar immediately when barking starts (within 1–2 seconds). Delayed cues lose effectiveness because the dog associates the correction with a different stimulus.
- Pair with Positive Reinforcement: Whenever your dog stops barking in response to the collar, reward them with a treat or affection. This builds an association between quiet behavior and positive outcomes.
- Monitor for Over‑Correction: Watch for signs of distress—panting, ear flattening, or increased agitation. If observed, reduce intensity or switch to a different cue (e.g., tone instead of vibration).
5. Common Mistakes to Avoid
- Using the Wrong Collar Type: A harness with an ill‑fitted smart collar can cause the sensor to shift, reducing efficacy.
- Over‑tightening: Tight collars can choke and create discomfort that may actually increase barking.
- Ignoring Dog’s Body Language: Some dogs respond better to tone or audio cues rather than vibration; always read your dog’s reaction.
6. Summary Checklist Before You Begin Training
- Measure and select the correct collar size.
- Ensure the collar material is compatible with smart collar sensors.
- Confirm that the collar has a secure attachment point for the smart collar device.
- Test fit and comfort before first use.
- Start training sessions short (5–10 min) and gradually increase duration as your dog responds consistently.
By carefully selecting the right collar and pairing it with a well‑calibrated smart collar system, you’ll create an effective, humane approach to correcting excessive barking while keeping your canine companion comfortable and safe.
Setting Up Your Collar
Before you can use a smart collar to curb excessive barking, you need to properly set it up so that it delivers accurate data and reliable alerts. Below is a step‑by‑step guide that covers everything from unboxing to calibration.
- Unbox and Inspect
- Check for any physical damage or missing parts (e.g., battery, charging cable).
- Verify the collar size matches your dog’s neck measurement. Most collars come with a sizing chart.
- Charge the Collar
- Use the supplied USB charger or compatible battery pack.
- Fully charge before first use (usually 2–3 hours). Most smart collars indicate a full charge with an LED flash or a green light.
- Install the Companion App
- Download from Google Play or the Apple Store.
- Create an account and link it to your collar by scanning the QR code on the collar’s underside.
- Attach the Collar Correctly
- Place the collar just below the ears, ensuring a snug fit but not tight enough to restrict breathing or cause discomfort.
- Secure the fastener with the click‑lock or buckle mechanism recommended by the manufacturer.
- Calibrate Sensors
Most smart collars have built‑in accelerometers and microphones that need calibration for accurate bark detection:
- Open the app’s “Settings” menu.
- Select “Sensor Calibration.”
- Follow on‑screen prompts: hold your dog still, then let them sit or lie down. Repeat as instructed.
- Create Barking Profiles
The app allows you to set thresholds for what constitutes a “bark” and how many occurences trigger an alert:
- Set the bark volume threshold (e.g., 70 dB).
- Define the frequency: 3 barks within 10 seconds = notification.
- Choose action type: vibration, audio cue, or push notification.
- Test the Collar
Once everything is configured:
- Let your dog roam in a safe area.
- Observe if the collar vibrates or triggers an alert during normal barking.
- Adjust thresholds as needed to avoid false positives.
- Set Up Remote Alerts
For owners who are away from home:
- Enable “Remote Alert” in the app so you receive a push notification when excessive barking occurs.
- Link your smart speaker (Alexa, Google Home) for voice alerts.
- Maintain and Update
Keep firmware up to date:
- Check the app regularly for updates.
- Download and install automatically or manually, depending on your preference.
Practical Tips:
- If you notice false alerts during normal play, lower the volume threshold by 5–10 dB.
- Use a waterproof case if your dog is prone to swimming or heavy rain.
- Regularly clean the collar’s microphone and vibration motor with a dry cloth to ensure optimal performance.
With these steps, your smart collar will be fully functional and ready to help you manage excessive barking effectively while keeping your dog comfortable and safe.
Training Techniques with Smart Collars
Excessive barking is a common issue that can be managed effectively by combining traditional training methods with the advanced features of smart collars. By leveraging real‑time data, programmable alerts, and consistent reinforcement, you can help your dog understand when barking is acceptable and when it should be curtailed.
1. Understand Your Dog’s Barking Triggers
- Environmental triggers: People walking past the window, delivery trucks, or unfamiliar noises.
- Attention‑seeking behavior: Your dog may bark to get your focus during play or when left alone.
- Avoidance or fear: Dogs may bark in response to perceived threats such as a new pet or loud music.
Use the collar’s activity tracker to log barking episodes. Most smart collars offer audio recording and heart‑rate monitoring, allowing you to correlate bark frequency with physiological stress indicators.
2. Set Up Smart Collar Alerts
- Select the “Bark Alert” mode: This setting activates a gentle vibration or tone when your dog barks beyond a preset threshold.
- Adjust sensitivity: Use the companion app to fine‑tune how many barks trigger an alert and the duration of each alert.
- Schedule alerts: If your dog tends to bark during specific times (e.g., early morning), set time‑based restrictions so that alerts only fire when barking is unwanted.
3. Positive Reinforcement Training Steps
Step 1: Identify the “Quiet” cue.
Teach your dog a reliable command such as "quiet" or "settle". When the collar vibrates, say the cue and reward immediately with a treat or praise. The vibration becomes a signal that barking is no longer desired.
Step 2: Use “Redirection”.
When the collar alerts, redirect your dog’s attention to a toy or an obedience exercise (e.g., sit). Reward compliance with a high‑value treat. Repeat until the dog associates the vibration with stopping barking.
Step 3: Gradual Desensitization.
If the trigger is environmental, gradually expose your dog to controlled versions of that stimulus while keeping the collar alerts active. Pair each exposure with a calm environment and rewards for silence. Over time, the dog learns to remain quiet despite the trigger.
4. Practical Example: Doorbell Barking
Suppose your dog barks every time someone rings the doorbell. Here’s how you can apply smart collar techniques:
- Set a low bark threshold: Program the collar to vibrate after the first or second bark.
- Use the “Quiet” cue immediately: As soon as the vibration occurs, say “quiet,” and give a treat.
- Introduce a “Doorbell Cue”: Once your dog remains quiet for several doorbell rings, start saying a new command like “stay.” Reward silence with a longer play session or a favorite toy.
- Track progress: Use the app’s logs to see if bark frequency decreases over weeks. Adjust thresholds as needed.
5. Safety and Ethics Considerations
- Never use electric shocks or punitive methods; smart collars are designed for gentle, humane training.
- Always supervise your dog during initial collar usage to ensure comfort with vibrations or tones.
- Consult a veterinarian if barking persists despite training—underlying health issues may be contributing.
6. Maintenance and Calibration
- Battery check: Replace or recharge batteries every 1–2 weeks to maintain consistent vibration strength.
- Firmware updates: Keep the collar’s software up‑to‑date for improved alert accuracy.
- Fit adjustment: Ensure the collar sits snug but not tight; adjust as your dog grows or changes weight.
By integrating smart collar alerts with structured positive reinforcement, you can transform excessive barking into a manageable behavior. Consistency, patience, and data‑driven adjustments are key to long‑term success.
Monitoring Progress & Adjustments
Once your dog is wearing a smart collar that tracks and manages barking, the real work begins: monitoring progress. This section walks you through how to interpret data, tweak settings, and keep your pup on track without over‑reacting.
1. Set Up a Baseline Dashboard
- Track barking frequency: Count the number of bark events per hour during different times (morning, afternoon, night). A healthy baseline is usually less than 10 barks per hour for most breeds.
- Measure duration: Note how long each barking episode lasts. If you see clusters that extend beyond a minute, it may indicate frustration or anxiety rather than simple alertness.
- Log triggers: Many smart collars allow you to tag the context (e.g., “doorbell,” “neighbor’s dog,” “vacuum”). Use this feature to identify patterns.
2. Review Weekly Reports
Pull a weekly summary from your collar app and compare it against the baseline. Look for:
- Decreases in total bark count: A gradual drop suggests that training is working.
- Consistent peak times: If barking spikes at a specific time each day, target that moment with additional training or environmental changes.
- Unexpected spikes: Sudden increases may indicate new stressors (e.g., a neighbor’s cat, construction noise). Address the source promptly.
3. Adjust Collar Settings Strategically
Smart collars usually offer three main adjustments: threshold sensitivity, tone intensity, and reward timing.
| Setting | When to Adjust | How to Adjust |
|---|---|---|
| Threshold Sensitivity | If your dog barked too many times despite training. | Increase the threshold so only louder, more prolonged barks trigger a response. |
| Tone Intensity | If the collar’s tone is causing fear or aggression. | Lower the volume and use a gentle clicker sound instead of a harsh beep. |
| Reward Timing | When you want to reinforce calm behavior quickly. | Set the reward (e.g., treat, praise) to trigger within 1–2 seconds after the bark stops. |
4. Use Positive Reinforcement in Parallel
The collar should never replace human interaction. Pair its use with:
- Daily walks and playtime: Reduces overall excitement that can lead to barking.
- Quiet cues (e.g., “settle,” “hush”): Teach your dog a verbal cue that works as an alternative to the collar’s tone.
- Scheduled training sessions: Practice with a clicker and treat each time the collar stops barking. This builds a clear association between silence and reward.
5. Address Underlying Causes
If you notice consistent triggers, consider environmental changes:
- Doorbell training: Install a motion‑activated light near the door to give your dog a visual cue before the bell rings.
- Screening windows: Use curtains or frosted film to reduce sight of passing cars or people.
- Noise mitigation: Use white‑noise machines or background music during periods of high external noise.
6. Keep a Logbook
Maintain a simple spreadsheet or journal noting:
- Date and time of bark events
- Trigger (if identified)
- Collar settings used that day
- Outcome (e.g., bark stopped, continued barking)
- Your observations or feelings about the dog's behavior
This record helps you spot trends over weeks and informs future adjustments.
7. When to Seek Professional Help
If after a month of consistent monitoring and adjustment your dog’s barking remains excessive or escalates, consult:
- Certified canine behaviorist: They can identify subtle triggers you might miss.
- Veterinarian: Rule out medical issues like pain or hyperactivity disorders.
- Consider a behavior modification program that incorporates the collar as part of a broader strategy.
By systematically monitoring data, adjusting settings thoughtfully, and pairing technology with positive human interaction, you can effectively reduce excessive barking while keeping your dog calm, happy, and well‑behaved.
Common Misconceptions & How to Avoid Them
Many dog owners assume that a smart collar can solve every barking problem on its own. While these devices are powerful tools, they’re not silver bullets. Understanding the real causes of barking and how smart collars fit into a comprehensive training plan is essential for lasting results.
Misconception #1: Smart Collars Are “Instant Fixes”
- The Reality: Smart collars provide real‑time feedback, but they do not replace the need for consistent training and behavior modification.
- Practical Tip: Use the collar’s alerts as a cue to reinforce calm behavior. Pair every alert with a positive reinforcement routine (treats, praise, or play) to help your dog associate silence with reward.
Misconception #2: The Collar Will Work If You Just Set It Up
- The Reality: Smart collars are programmable. Settings that work for one dog may not suit another, especially if the bark’s trigger varies (e.g., strangers vs. loud noises).
- Practical Tip: Start with a baseline “silent” setting and gradually adjust sensitivity based on observed triggers. Keep a bark‑log in the companion app to identify patterns before tweaking settings.
Misconception #3: Less Barking Means the Dog Is Satisfied
- The Reality: Quiet doesn’t always mean content. A dog may be silent because it’s stressed or in pain, which requires veterinary attention.
- Practical Tip: Monitor other health indicators (body language, appetite, bathroom habits). If the dog stops barking but shows signs of distress, consult a vet before relying solely on collar data.
Misconception #4: Smart Collars Are “Humane” by Default
- The Reality: Some devices use aversive stimuli (e.g., static pulses). These can be effective for certain breeds but may cause anxiety if overused.
- Practical Tip: Choose collars with adjustable intensity and opt for non‑aversive methods first. If using a mild vibration or tone, always pair it with a positive cue to prevent confusion.
Misconception #5: Once Set, the Collar Requires No Further Interaction
- The Reality: Dogs learn and adapt. A collar that worked weeks ago may lose effectiveness if triggers change (new family members, a new route for walks).
- Practical Tip: Re‑evaluate the collar’s settings every month. Update firmware, review bark logs, and adjust thresholds to match your dog’s evolving environment.
How to Avoid These Pitfalls
- Start with a Clear Goal: Identify the specific barking behavior you want to reduce (e.g., “barking at passing cars”). Set measurable targets like “reduce barking by 50% in the first two weeks.”
- Use the Collar as a Tool, Not a Replacement: Combine collar alerts with positive reinforcement training. Teach alternative behaviors such as “sit” or “go to a crate” when a trigger is detected.
- Document and Review: Keep a bark‑tracking journal (many collars provide built‑in logs). Analyze trends, then tweak settings accordingly.
- Educate Yourself About Your Dog’s Breed & Personality: Some breeds are naturally more vocal. Adjust expectations and collar sensitivity to avoid over‑reacting.
- Consult Professionals When Needed: If barking persists despite consistent use of the collar, consider a certified dog trainer or behaviorist for personalized guidance.
By debunking these common myths and applying practical strategies, you’ll harness the full potential of smart collars while ensuring your dog’s well‑being remains at the forefront of your training plan.
Integrating Smart Collars with Other Tools
Smart collars are powerful on their own, but when paired with complementary tools—such as GPS trackers, activity monitors, and even smart home assistants—they become part of a holistic solution for managing excessive barking. Below is a step‑by‑step guide on how to weave these devices together for maximum effectiveness.
1. Pair the Collar with a GPS Tracker
A GPS tracker lets you see exactly where your dog is when they bark. This spatial context can reveal whether certain locations (e.g., a neighbor’s porch or a busy street) trigger barking episodes.
- Example: If the collar’s audio playback stops the barking, but the GPS log shows repeated visits to the same spot, you might introduce a positive reinforcement routine at that location.
- Practical tip: Use a single device that combines both functions (many modern collars include built‑in GPS) to reduce cable clutter and battery drain.
2. Sync with an Activity Tracker
An activity tracker records steps, heart rate, and rest periods. By correlating high activity or elevated heart rates with barking spikes, you can determine if the barking is due to excess energy rather than fear or territorial behavior.
- Example: Your dog barks after a long walk; the activity log shows a spike in steps and heart rate—an indication that the bark may be an outlet for pent‑up excitement.
- Practical tip: Use the tracker’s API to export data into a spreadsheet or a cloud dashboard where you can plot barking incidents against activity levels.
3. Connect with Smart Home Assistants (Alexa, Google Home)
Smart home assistants can trigger collar commands remotely and provide real‑time feedback.
- Example: “Hey Alexa, play the bark deterrent on Max’s collar.” The assistant sends a command through the collar’s cloud service, allowing you to intervene even when you’re not at home.
- Practical tip: Create routine triggers: if the collar reports barking after 10 pm, automatically start playing calming music in the house and send you an alert via the assistant.
4. Use a Centralized Dashboard or App
Many smart collar manufacturers offer web dashboards that consolidate all data—bark logs, GPS traces, activity metrics, and even audio recordings.
- Example: The DogTrack Pro app lets you filter barking events by time of day, location, and duration. This makes it easier to spot patterns and test the effectiveness of training interventions.
- Practical tip: Schedule weekly reviews: export data, plot on a Gantt chart, and note any changes in bark frequency after implementing new strategies (e.g., adding a chew toy during walks).
5. Integrate with Training Apps or Behavior-Tracking Software
Apps like BarkBox or LeadMag allow you to log training sessions and reward schedules. By linking these logs with collar data, you can see whether consistent reinforcement reduces barking.
- Example: After a week of rewarding silence during the collar’s audio playback, the app shows a 30% drop in bark incidents.
- Practical tip: Use the app’s reminder feature to prompt you to check the collar’s battery and firmware updates—keeping your system running smoothly.
6. Automate Alerts for Excessive Barking
Set up automated alerts via SMS, email, or push notifications when the collar detects a prolonged barking episode.
- Example: If the collar records more than 10 minutes of continuous barking, an alert triggers that automatically plays a calming tone and logs the event.
- Practical tip: Combine alerts with if‑this‑then‑that (IFTTT) workflows to trigger actions on other devices—like turning on a smart light or adjusting thermostat settings to create a calmer environment.
7. Test and Refine Your Integration Strategy
Integration is an iterative process. Start with one tool, evaluate results, then add another layer.
- Example: Begin by pairing the collar with a GPS tracker; after two weeks, assess if location data helps. If so, add an activity tracker next.
- Practical tip: Keep a training journal that notes every change you make and the corresponding bark frequency—this will help isolate which integration is most effective.
By thoughtfully integrating smart collars with GPS trackers, activity monitors, smart assistants, and behavior‑tracking apps, you create a comprehensive ecosystem that not only corrects excessive barking but also enhances your dog’s overall wellbeing. Start small, monitor closely, and let the data guide your training adjustments for lasting results.
Case Studies: Success Stories
Below are real-world examples of how smart collars have helped owners reduce or eliminate excessive barking in a variety of breeds and living situations. Each case highlights the specific problem, the collar settings used, the training approach, and measurable results.
1. The Barking Border Collie – Apartment Living
- Owner’s Concern: A 2‑year‑old Border Collie named Max would bark continuously when his owner stepped out of a small apartment unit. The barking triggered the building’s noise complaint system.
- Smart Collar Settings:
- Bark count threshold: 15 barks in 30 seconds
- Vibration intensity: Medium (3/5)
- Audio cue: Short “bark stop” beep at 45% volume
- Training Protocol:
- Owner left the apartment while Max was calm.
- The collar detected a burst of barking, triggered vibration + audio cue.
- Owner returned immediately and rewarded Max with a treat.
- Gradual increase of threshold to 25 barks over two weeks.
- Results:
- Within 6 weeks, Max’s barking episodes dropped from ~20 minutes per day to under 2 minutes.
- No noise complaints were filed after the third month of collar use.
- Owner reported increased confidence in leaving the apartment alone.
2. The Barking Beagle – Rural Farmhouse
- Owner’s Concern: A 4‑year‑old Beagle named Daisy barked excessively at passing cars and farm equipment, causing distress to the family.
- Smart Collar Settings:
- Bark count threshold: 10 barks in 20 seconds
- Vibration intensity: High (5/5)
- Audio cue: Continuous “quiet” tone at 60% volume for 10 seconds.
- Training Protocol:
- Owner walked Daisy on a leash during early morning traffic.
- The collar triggered the vibration and audio cue when Daisy barked too many times.
- Immediate positive reinforcement (treat + praise) followed each successful “quiet” period.
- After 4 weeks, Daisy’s barking frequency reduced by 70%.
- Results:
- Daisy no longer barked at passing cars after a month of consistent training.
- The family experienced fewer distractions during chores and farm work.
3. The Barking Labrador – Suburban Home with Young Children
- Owner’s Concern: A 1‑year‑old Labrador Retriever named Buddy barked at children walking by the sidewalk, creating a safety concern.
- Smart Collar Settings:
- Bark count threshold: 8 barks in 15 seconds
- Vibration intensity: Low (2/5) to avoid startling children
- Audio cue: Soft “calm” tone at 30% volume.
- Training Protocol:
- Owner walked Buddy on a long leash while children played nearby.
- The collar delivered the vibration + audio cue when Buddy barked excessively.
- Owner used verbal praise and treats to reinforce calm behavior.
- Threshold increased gradually as Buddy’s response improved.
- Results:
- Buddy’s barking episodes reduced by 80% within 5 weeks.
- Children felt safer and the family reported fewer incidents of accidental bites.
- The owner noted a stronger bond with Buddy due to consistent training.
Practical Take‑Aways for Your Own Barking Challenge
- Start Low, Go Slow: Begin with a low bark threshold and gentle vibration. Gradually increase as your dog adapts.
- Consistent Reinforcement: Pair collar cues with immediate positive reinforcement (treats, praise, play) to reinforce desired behavior.
- Track Progress: Use the companion app’s daily logs to monitor bark counts and adjust settings accordingly.
- Combine with Training: Smart collars are most effective when used alongside traditional training methods (e.g., “quiet” command, redirection).
- Consider Environment: Tailor vibration intensity and audio cues to your setting—higher in noisy environments, lower where children or elderly people are present.
These stories demonstrate that with the right settings, consistent training, and a bit of patience, smart collars can transform an excessive barking problem into a manageable behavior, improving harmony for both pet and owner.
Conclusion
When a dog’s barking becomes a persistent problem, the first step is to identify the underlying cause—whether it’s boredom, anxiety, territorial defense, or a lack of training. Once you understand what triggers the behavior, a smart collar can become a powerful ally in correcting excessive barking.
1. How Smart Collars Work for Bark Control
- Audio alerts: A gentle tone or recorded voice that interrupts barking without causing distress.
- Vibration cues: A subtle vibration that signals the dog to stop when it starts to bark.
- Positive reinforcement programming: The collar can be set to deliver a treat dispenser only after the dog remains quiet for a specified interval.
2. Setting Up Your Smart Collar for Bark Management
- Start with a baseline: Record how often and at what times your dog barks. Use this data to set thresholds in the collar’s app.
- Choose the right cue: Some dogs respond better to vibration, others to sound. Test both to see which interrupts barking most effectively without causing fear.
- Gradual training phases:
- Phase 1: Use audio alerts only when the dog barks excessively. Reward calm behavior with treats and praise.
- Phase 2: Add vibration cues once the dog associates the sound with stopping. Keep rewards consistent.
- Phase 3: Introduce a “quiet” button on the collar that the owner can press to signal the dog to stop barking, reinforcing the behavior.
3. Practical Tips for Owners
- Consistency is key: Apply the same cue each time the dog barks. Mixed signals can confuse the pet and prolong the issue.
- Use the collar as a tool, not a punishment: Avoid using high‑volume tones or strong vibrations that could scare your dog. Start with mild settings and increase only if necessary.
- Monitor battery life and firmware updates: Smart collars rely on connectivity; ensure they’re always charged and updated for optimal performance.
- Combine collar training with environmental changes: Provide more exercise, mental stimulation (puzzle toys), or a quieter environment to reduce the triggers that cause barking in the first place.
4. Real‑World Example
Take Bella, a 5‑year‑old Labrador who barked excessively at passing pedestrians. Her owner installed a smart collar set to emit a gentle vibration after three consecutive barks. After two weeks of consistent use, Bella’s barking dropped by 70%. The owner paired the collar with daily walks and puzzle toys, ensuring Bella had both physical and mental outlets.
5. When to Seek Professional Help
If your dog continues to bark excessively despite using a smart collar, or if you notice signs of stress (panting, pacing), consult a certified canine behaviorist. The collar can aid training, but underlying medical or psychological issues may require professional intervention.
Takeaway
A smart collar, when used thoughtfully and in conjunction with positive reinforcement and environmental management, can be an effective solution for correcting excessive barking. Start with gentle cues, remain consistent, and always pair technology with love and proper training to achieve lasting results.
FAQ
If your dog is prone to constant barking—whether it's due to anxiety, boredom, or a lack of training—a smart collar can be an invaluable tool. These collars combine technology and behavior science to help you manage and reduce unwanted vocalizations in a humane way.
1. How Smart Collars Work
- Vibration & Sound Alerts: Most smart collars emit gentle vibrations or mild sounds when the dog begins barking. The vibration is often perceived as a subtle cue that interrupts the barking cycle.
- Smartphone Integration: Pairing with an app lets you set thresholds (e.g., bark frequency, duration) and receive real-time notifications.
- Data Tracking: The collar records barking incidents, enabling owners to identify patterns—time of day, triggers, or locations.
2. Setting Up Your Smart Collar
- Choose the Right Model: Look for collars that allow you to customize vibration intensity and sound volume. Brands such as PawTrack, DoggySmart, and BarkGuard offer adjustable settings.
- Calibrate Sensitivity: Start with the lowest sensitivity setting to avoid false positives (e.g., when a human walks past). Gradually increase until you catch most barking incidents without overreacting.
- Set Time Limits: If your dog tends to bark late at night, program the collar to mute after 10 pm to prevent nighttime disturbances.
3. Practical Training Steps
The collar should complement traditional training methods, not replace them. Follow these steps for best results:
- Identify Triggers: Use the app’s analytics to pinpoint what sets off your dog (e.g., doorbell, passing cars). Once you know the triggers, you can address them directly.
- Positive Reinforcement: Whenever the collar vibrates and the dog stops barking, immediately reward with a treat or praise. This reinforces that stopping barking leads to positive outcomes.
- Desensitization Drills: Gradually expose your dog to low-level versions of the trigger while using the collar’s vibration as a cue to remain calm. Over time, reduce reliance on the collar as your dog learns self-control.
- Consistency Across Environments: If you’re moving between home, park, or car, keep the collar settings consistent so your dog can generalize the behavior.
4. Common Mistakes to Avoid
- Overuse of Vibration: Excessive vibrations may desensitize your dog or cause frustration. Use the collar sparingly and only when necessary.
- Ignoring Root Causes: The collar is a symptom treatment; if anxiety or lack of exercise drives barking, address those underlying issues first.
- Failing to Reset: Some collars require manual reset after each bark. If you forget, the device may misinterpret subsequent noises as barking.
5. Real‑World Example: The Case of Bella
Bella, a 4‑year‑old Labrador mix, would bark for minutes whenever the mailman passed by. Her owner, Sarah, purchased a PawTrack Smart Collar. She set the vibration intensity to medium and programmed the collar to alert only if barking lasted longer than five seconds.
- First week: The collar vibrated every time Bella barked at the mailman. Sarah rewarded her immediately after each vibration, turning the experience into a game.
- Second week: Bella’s barking frequency dropped by 70%. Sarah began taking Bella for a brisk walk before mail delivery to reduce excitement.
- Third week: The collar’s data dashboard showed fewer triggers. Sarah turned off the vibration feature, relying on training alone.
Result? Bella stopped barking excessively and remained calm during deliveries—demonstrating how smart collars can accelerate behavior modification when paired with consistent training.
6. Final Tips for Success
- Regular Maintenance: Clean the collar’s sensor area weekly to ensure accurate detection.
- Battery Checks: Keep spare batteries on hand; a sudden power loss can leave your dog unprotected during critical moments.
- Vet Consultation: If excessive barking persists despite collar usage, consult a veterinarian or certified behaviorist to rule out medical causes.
Smart collars are powerful tools in the modern pet owner’s arsenal. By combining technology with proven training techniques, you can effectively reduce excessive barking and improve your dog’s overall well‑being.
Categories
- AI & Enrichment Play
- Broiler Farming
- Broiler Farming Tips
- Canine Wellness & Longevity
- Cat
- Cat & Human Connection
- Cat Adoption & Rescue
- Cat Breeds
- Cat Breeds & Personalities
- Cat Care & Health
- Cat Grooming & Hygiene
- Cat Lifestyle & Environment
- Cat Myths & History
- Cat Nutrition & Diet
- Cat Products & Reviews
- Cat Training & Behavior
- Comparison
- Consumer Awareness
- Dog
- Dog Accessories & Products
- Dog Adoption & Rescue
- Dog Breed & Lifestyle Trends
- Dog Breeding & Puppies
- Dog Entertainment & Media
- Dog Fashion & Trends
- Dog Fun & Lifestyle
- Dog Grooming & Hygiene
- Dog History & Culture
- Dog Myths, Science & Future Tech
- Dog News & Trends
- Dog Nutrition & Food
- Dog Psychology & Emotions
- Dog Safety & Security
- Dog Sports & Activities
- Dog Technology & Innovation
- Dog Training for Modern Owners
- Dog Travel & Adventure
- Dog Travel, Adventure & Culture
- Economic and Market Insights
- Educational Content
- FAQs
- Feeding Alternatives
- Festivals & Seasonal Ideas
- Fun & Entertainment
- General Knowledge
- General Pig Farming
- Health & Disease Management
- Housing and Environment
- Kittens
- Market Insights
- Miscellaneous
- Miscellaneous
- Motivational
- pig
- Pig Breeding
- Pig Breeds
- Pig Farming Stories and Inspiration
- Pig Health and Care
- Pig Nutrition
- Pig Products
- Profitability & Business
- Puppy Care
- Puppy Predictable Topics Reinvented
- Regional Focus
- Rescue & Adoption Buzz
- Senior Cats
- Senior Dog Care
- Smart Dog Tech & Gadgets
- Sustainability
- Sustainable & Eco-Friendly Dog Products
- Tech & Innovations
- Working & Service Dogs
- Broiler Feed66 products
- Country Feed33 products
- Pig Feed66 products
- Product22 products
- Raw Materials99 products
Products
-
 Fish Meal
₹1,999.00 – ₹2,999.00Price range: ₹1,999.00 through ₹2,999.00Rated 0 out of 5
Fish Meal
₹1,999.00 – ₹2,999.00Price range: ₹1,999.00 through ₹2,999.00Rated 0 out of 5 -
 FATTENING BROILER FEED
₹2,299.00 – ₹2,349.00Price range: ₹2,299.00 through ₹2,349.00Rated 0 out of 5
FATTENING BROILER FEED
₹2,299.00 – ₹2,349.00Price range: ₹2,299.00 through ₹2,349.00Rated 0 out of 5 -
 LAYER COUNTRY FEED
₹1,549.00 – ₹1,649.00Price range: ₹1,549.00 through ₹1,649.00Rated 0 out of 5
LAYER COUNTRY FEED
₹1,549.00 – ₹1,649.00Price range: ₹1,549.00 through ₹1,649.00Rated 0 out of 5 -
 COUNTER BROILER FEED
₹1,199.00 – ₹1,299.00Price range: ₹1,199.00 through ₹1,299.00Rated 0 out of 5
COUNTER BROILER FEED
₹1,199.00 – ₹1,299.00Price range: ₹1,199.00 through ₹1,299.00Rated 0 out of 5 -
 LACTATING PIG FEED
Rated 0 out of 5
LACTATING PIG FEED
Rated 0 out of 5₹2,299.00Original price was: ₹2,299.00.₹1,740.00Current price is: ₹1,740.00. -
 Maize
Rated 0 out of 5
Maize
Rated 0 out of 5₹1,650.00Original price was: ₹1,650.00.₹1,300.00Current price is: ₹1,300.00. -
 GESTATION PIG FEED (Phase 1)
Rated 0 out of 5
GESTATION PIG FEED (Phase 1)
Rated 0 out of 5₹2,249.00Original price was: ₹2,249.00.₹1,699.00Current price is: ₹1,699.00. -
 Pre Starter Broiler Feed
₹2,399.00 – ₹2,499.00Price range: ₹2,399.00 through ₹2,499.00Rated 0 out of 5
Pre Starter Broiler Feed
₹2,399.00 – ₹2,499.00Price range: ₹2,399.00 through ₹2,499.00Rated 0 out of 5 -
 FINISHER PIG FEED
Rated 0 out of 5
FINISHER PIG FEED
Rated 0 out of 5₹2,299.00Original price was: ₹2,299.00.₹1,749.00Current price is: ₹1,749.00. -
 Broiler Premix
Rated 0 out of 5
Broiler Premix
Rated 0 out of 5₹820.00Original price was: ₹820.00.₹699.00Current price is: ₹699.00.