
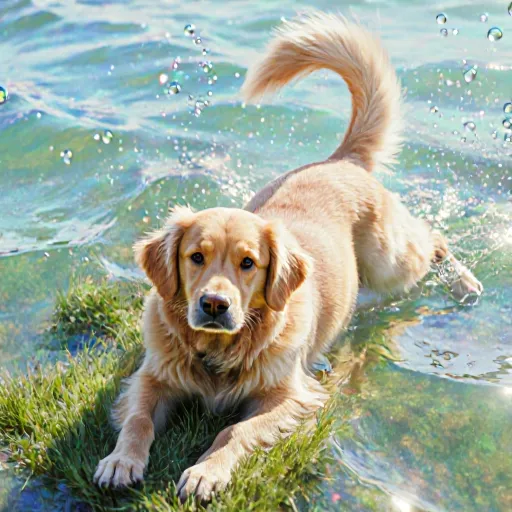
Revive Your Pet’s Freedom
“Swim‑Soothe Secrets: Restore Flexibility in Furry Friends”
Table of Contents
- Introduction
- Benefits of Swimming for Dogs With Joint Problems
- Safety Considerations Before Starting
- Necessary Equipment and Setup
- Warm‑Up Exercises
- Exercise 1: Knee to Water Transition
- Exercise 2: Hip Rotation in the Pool
- Exercise 3: Lateral Swim Drills
- Exercise 4: Vertical Push‑Ups on Water Surface
- Exercise 5: Foam Rubber Treadmill Walks
- Exercise 6: Lane Swim with Slow Pace
- Exercise 7: Heel‑to‑Toe Stretching in Water
- Exercise 8: Backward Swim for Balance
- Exercise 9: Slow Circles Around a Floating Anchor
- Cool‑Down Exercises and Posture Checks
- Conclusion
- FAQ
Introduction
When a dog suffers from arthritis, hip dysplasia, or any joint-related issue, traditional land‑based workouts can aggravate pain and inflammation. Water provides natural buoyancy that supports the animal’s weight while allowing full range of motion with minimal impact on joints. Below we dive into how to safely incorporate swimming into your canine’s routine, what benefits it offers, and practical tips for beginners.
Why Swimming Is a Joint‑Friendly Exercise
- Buoyancy: The water lifts up to 90% of the dog’s body weight, reducing strain on knees, hips, and shoulders.
- Resistance training: Gentle resistance from the water helps strengthen muscles without overloading joints.
- Therapeutic temperature: Warm water can increase circulation, ease stiffness, and promote healing.
- Low injury risk: The softness of water cushions accidental slips or falls.
Getting Started: Equipment & Safety Checklist
- Choose the right pool: A shallow, non‑chlorinated pond or a pet‑friendly indoor pool with temperature control (ideally 78–82°F). Avoid pools with sharp corners or strong currents.
- Use a dog life jacket: For dogs that are not confident swimmers, a snug life jacket keeps them afloat and lets you monitor their distance from the pool edge.
- Check water quality: Test for pH (7.2–7.8) and chlorine levels (< 1 ppm). Chlorine can irritate sensitive skin and joints.
- Safety gear: Goggles or eye protection if the dog has eye issues; a towel to dry them after each session.
Sample Swimming Routine for Joint‑Affected Dogs
Start with short, gentle sessions and gradually increase duration as your dog tolerates. A typical beginner routine might look like this:
| Day | Duration | Notes |
|---|---|---|
| Mon, Wed, Fri | 5–10 minutes | Light paddling; focus on relaxed breathing. |
| Tues, Thu | 0 minutes (rest) | Hydration and light stretching on land. |
| Sat | 10–15 minutes | Introduce mild backstroke or belly‑drag to engage core muscles. |
| Sun | Rest day | Optional: gentle massage or physiotherapy session. |
Practical Tips for Success
- Observe your dog’s reaction: Watch for signs of fatigue, pain (whining, limping), or overheating. Stop immediately if any are observed.
- Use positive reinforcement: Treats and praise encourage confidence and help the dog associate water with fun.
- Keep sessions short but frequent: Consistency builds endurance without overexertion.
- Combine with land exercises: Gentle walks or controlled tug‑games complement swimming by strengthening tendons on land.
- Hydrate and cool down: Offer fresh water after each session; use a fan or cool towel to lower body temperature if needed.
Case Study: Bella, an 8‑Year‑Old Labrador
Bella was diagnosed with mild hip dysplasia and began swimming under veterinary supervision. After just six weeks of three short sessions per week, her owner reported a noticeable decrease in stiffness and an increase in mobility during walks. Bella’s vet confirmed improved joint cartilage health through follow‑up imaging.
When to Avoid Swimming
- Active infections or open wounds near the skin (risk of contamination).
- Severe heart or lung conditions that could be exacerbated by water pressure.
- Dogs with a history of panic or severe anxiety around water—consider gradual acclimation or alternative low‑impact therapies.
Incorporating swimming into your dog’s exercise routine can dramatically improve joint health, reduce pain, and enhance overall quality of life. Always consult with your veterinarian before beginning any new program, especially if your pet has preexisting medical conditions.
Benefits of Swimming for Dogs With Joint Problems
If your dog is dealing with arthritis, hip dysplasia, or any other joint discomfort, you’ll be relieved to know that swimming can be a game‑changer. Water therapy offers a low‑impact environment that lets your canine move freely without the pain that comes from walking or running on hard surfaces.
1. Reduces Weight on Joints
The buoyancy of water supports most of your dog’s body weight—often up to 80%—which means joints like hips, knees, and shoulders experience far less compression than they would during land-based exercise.
2. Strengthens Muscles Without Strain
When a dog paddles or kicks in the water, it works the same muscle groups used on land but without the impact forces that can aggravate arthritis. Over time, this builds lean muscle mass that helps stabilize joints and improves overall mobility.
3. Improves Range of Motion
Gentle, continuous movement in water encourages joint flexibility. For dogs with stiffness or limited range of motion, swimming can help maintain or even increase the ability to move through their full natural gait.
4. Promotes Circulation and Healing
The resistance of water forces blood to circulate more efficiently, delivering oxygen and nutrients to joint tissues while helping remove metabolic waste products that contribute to inflammation.
5. Lowers Pain and Inflammation
Because the load on joints is minimized, many owners notice a decrease in pain signals and less reliance on anti‑inflammatory medications after consistent aquatic therapy sessions.
6. Boosts Mental Well‑Being
Swimming can be a fun, engaging activity that reduces stress and anxiety—particularly important for older dogs who may feel lonely or restless during periods of limited mobility.
Practical Tips for Introducing Your Dog to Water
- Start Small: Begin with short sessions (5–10 minutes) and gradually increase duration as your dog becomes comfortable.
- Choose the Right Environment: A calm pool, a shallow lake, or even a backyard pond can work—just ensure the water is clean and safe.
- Use a Dog Life Jacket: For dogs that are not natural swimmers or who may become exhausted, a life jacket provides buoyancy and safety.
- Monitor Body Temperature: Water can be cooler than your dog’s body temperature; consider using a warm towel after the session to keep them cozy.
- Watch for Signs of Fatigue: If your dog appears panting, whimpering, or slowing down, it’s time to finish the session.
Sample Swimming Exercise Routine
Here’s a simple routine you can try, especially if your dog has joint issues:
- Warm‑Up Walk (5 minutes): Lightly walk around the pool perimeter.
- Paddle Drills (10 minutes): Encourage the dog to use front paws like a swimmer, then switch to using hind legs for kicking. Keep each segment short.
- Floating Stretch (5 minutes): Gently help your dog lie flat on their side or belly and slowly lift one leg at a time, mimicking a stretch.
- Cool‑Down Swim (5 minutes): Let the dog swim freely but keep it low intensity.
Always consult your veterinarian before starting any new exercise program, especially if your dog has a serious joint condition. With patience and consistency, swimming can help your dog live more comfortably and happily for years to come.
Safety Considerations Before Starting
Swimming is often hailed as the “perfect” low‑impact exercise for dogs suffering from arthritis or other joint issues. However, before you dive in with your four‑legged companion, there are several practical factors to consider that will help ensure a safe and enjoyable experience.
1. Vet Consultation
Get a baseline assessment: Have your veterinarian perform a thorough physical exam and possibly imaging (X‑ray or ultrasound) to confirm the extent of joint degeneration. This will give you a clear picture of what activities are safe and which should be avoided.
- Ask whether swimming is recommended for your dog’s specific condition.
- Discuss any medications that might affect balance or muscle function (e.g., corticosteroids).
2. Choose the Right Water Environment
The quality and characteristics of the water are crucial:
- Temperature: Warm water (70–80 °F) helps relax muscles, but avoid hot pools that can cause overheating.
- Depth: Start in shallow water where your dog can stand comfortably. Gradually increase depth as confidence builds.
- Current and waves: Calm, flat surfaces are safest for dogs with mobility issues; avoid strong currents or surf that could create extra strain.
3. Equipment & Safety Gear
Proper gear can prevent injuries and enhance comfort:
- Dog life jacket: Even if your dog is a good swimmer, a buoyancy aid keeps them from getting tired or disoriented.
- Floatation devices for joints: Some manufacturers offer neoprene sleeves or braces that provide gentle support while swimming.
- Towel & dry area: Keep a towel handy to wipe excess water and a warm, dry spot nearby to prevent chill after the session.
4. Start Slow – Gradual Progression
Just like human rehabilitation programs, incremental increases in time and intensity are key:
- Initial exposure: Let your dog explore the water for a few minutes while you supervise closely.
- Short sessions: Begin with 5–10 minutes of swimming or floating, once or twice daily.
- Monitor response: Watch for signs of fatigue (labored breathing, limping) and stop if any occur.
- Progression: Add a minute or two each week until you reach the target duration (typically 20–30 minutes).
5. Monitor Body Language & Physical Signs
Dogs may hide pain, so be vigilant for subtle cues:
- Reluctance to jump in or out of water.
- Stiffness after swimming.
- Whining or vocalization during movement.
- Visible swelling or heat over joints.
If any of these appear, reduce intensity or consult your vet immediately.
6. Post‑Swim Care
After each session, ensure proper drying and warm-up:
- Use a towel to dry the dog thoroughly, especially around joints.
- Apply a gentle massage or light stretching to promote circulation.
- Offer water and a light snack if your dog shows increased appetite from exertion.
7. Avoid Over‑Exertion & Environmental Hazards
Even low‑impact activities can become high impact if overdone:
- Don’t force the dog to swim for long periods; fatigue can exacerbate joint pain.
- Avoid sudden changes in water temperature or harsh chemicals that may irritate skin and joints.
8. Record Keeping & Adjustments
Maintain a simple log:
- Date, time, duration of swim.
- Dog’s demeanor before, during, and after.
- Any observed issues or improvements.
This data will help you adjust the program over time and provide useful information for your vet.
Practical Example: A Step‑by‑Step Plan for a Senior Labrador with Osteoarthritis
- Week 1: 5 minutes of gentle floating in shallow water (depth < 2 ft) with life jacket. Observe breathing and joint comfort.
- Week 2–3: Increase to 8 minutes, introduce light paddling while holding onto a floating board.
- Week 4–5: Add a few short “swim” laps (dog can keep pace) in depth of 3–4 ft. Ensure no signs of strain.
- Week 6+: Maintain 15–20 minutes with optional side‑by‑side swimming to support posture, always monitoring for fatigue.
Remember: each dog’s tolerance varies. Consistency, patience, and close observation are your best tools for a safe swimming routine that supports joint health while providing mental enrichment.
Necessary Equipment and Setup
Before you let your dog hop into the water, it’s essential to gather the right gear and create a safe environment. Proper equipment not only protects your pet but also maximizes the therapeutic benefits of aquatic therapy.
Choosing the Right Body of Water
- Indoor Swimming Pools: Provide a controlled temperature (between 80–90°F) and consistent depth, which is ideal for dogs with joint pain.
- Outdoor Ponds or Lakes: Great if you have a private backyard pond; ensure the water is clean, free of debris, and that the shore is level to prevent slips.
- Dog-Friendly Pools: Many pet stores offer small inflatable pools (e.g., 4–5 ft deep) that can be filled with warm water at home. These are especially useful for dogs who cannot travel far.
Essential Safety Gear
- Dog Life Jacket: Look for a buoyancy vest that fits snugly but comfortably. For dogs with mobility issues, choose one with adjustable straps and a padded chest area.
- Waterproof Harness: If your dog is still learning to swim or is nervous in water, a harness can provide extra support while keeping the life jacket off the neck.
- Non-Slip Mats & Towels: Place these around the pool edges and on the shore to prevent slips. After each session, dry your dog’s coat thoroughly to avoid chill.
- First Aid Kit: Include items such as antiseptic wipes, a small pair of scissors for trimming wet fur, and a towel or blanket for drying.
Tools to Enhance Aquatic Therapy
- Floating Toys: Lightweight, buoyant toys encourage dogs to push against the water. Use a plush toy or a rubber ball that can be tossed gently.
- Aqua‑Paddle: A small paddle attached to your dog’s paw (or a weighted stick) helps build muscle strength and improves gait patterns.
- Resistance Bands: For more advanced dogs, a water-resistant resistance band can be wrapped around the dog's front legs to provide gentle resistance during walking or running in the pool.
Practical Setup Advice
- Temperature Check: Use a waterproof thermometer to ensure water stays between 80–90°F. Cold water can trigger muscle spasms, while overly warm water may cause overheating.
- Depth Gradation: Start with shallow water (no more than 6–8 inches) and gradually increase depth as your dog becomes comfortable. A gradual transition reduces anxiety and joint strain.
- Consistent Routine: Aim for 2–3 sessions per week, each lasting 5–10 minutes depending on the dog's stamina. Consistency is key to building strength without overexertion.
- Supervision & Guidance: Never leave your dog unattended in water. Use a leash or tether if necessary, and keep an eye on signs of fatigue (e.g., excessive panting, shivering).
- Post‑Session Care: Rinse off any chlorinated or mineral residue with fresh water. Dry the dog thoroughly and apply a light moisturizer if needed to prevent dry skin.
Sample Equipment Checklist
- Dog life jacket (size XL)
- Waterproof harness with adjustable straps
- Non-slip mat for pool edges
- Inflatable dog paddle or resistance band
- Soft floating toy (e.g., plush ball)
- First aid kit tailored for pets
- Waterproof thermometer
Final Practical Advice
Remember, every dog is unique. Monitor your pet’s reaction to water and adjust equipment or session length accordingly. If you’re unsure about any aspect—especially if the joint issue is severe—consult a veterinarian or a certified canine rehabilitation therapist before starting aquatic exercises.
Warm‑Up Exercises
Before any swimming session, it’s essential to get your dog’s muscles and joints ready. A proper warm‑up reduces the risk of strain or injury, especially for dogs with arthritis or other joint issues.
1. Gentle Walk (5–10 minutes)
- Why it matters: Walking increases blood flow to the muscles and joints without putting excessive load on them.
- How to do it: Keep the pace slow and steady. If your dog has a stiff back or hip, avoid sudden turns or uphill walks.
2. Dynamic Stretching (3–5 minutes)
Dynamic stretches involve moving parts of the body through a full range of motion, which helps improve joint mobility.
- Limb Circles: Hold your dog’s front paw and slowly rotate it in circles, first clockwise then counter‑clockwise. Repeat with the hind paws.
- Hip Swings: While standing on a stable surface, gently swing each leg forward and back like a pendulum.
3. Low‑Impact Mobility Drills (2–4 minutes)
These drills mimic the movements your dog will perform in water but with minimal load.
- Heel‑to‑Toe Walk: Encourage your dog to step heel first, then roll onto the toe. This activates the calf muscles and supports ankle stability.
- Shoulder Rolls: While standing or walking slowly, lift each front paw slightly and rotate the shoulder joint in a gentle circle.
4. Breathing Control (1 minute)
Teach your dog to breathe steadily as they prepare for water entry.
- Hold a treat near their nose and let them sniff slowly, then exhale softly.
- Repeat until the dog appears calm and focused.
Practical Tips for Dogs with Joint Problems
- Use a support harness: It helps distribute weight evenly and reduces strain on hips or shoulders during walking.
- Shorten the warm‑up: If your dog shows signs of fatigue, cut the session short to avoid overexertion.
- Check for pain: Watch for whimpering or reluctance to move. Stop immediately if you notice any discomfort.
Transition to Water
Once the warm‑up is complete, gently introduce your dog to shallow water. Use a life jacket if needed and keep sessions short at first—about 5–10 minutes—gradually increasing duration as your dog’s tolerance improves.
Exercise 1: Knee to Water Transition
The knee-to-water transition is a gentle way for dogs with joint problems to acclimate to swimming without overloading their knees and hips. By gradually introducing the water, you help your dog build confidence, improve muscle tone, and reduce pain associated with sudden immersion.
Why It Matters
- Reduced Joint Stress: The buoyancy of water supports body weight, easing pressure on knees, hips, and ankles.
- Muscle Rebuilding: Moving through shallow water activates core and limb muscles that may have weakened due to inactivity.
- Confidence Building: A controlled entry into the pool fosters a positive association with swimming.
Step‑by‑Step Guide
- Preparation:
- Choose a calm, shallow area of your pool or lake where the depth is no more than 2–4 inches.
- Place a non-slip mat or towel on the edge to give your dog traction when stepping out.
- Keep treats and a favorite toy handy for positive reinforcement.
- Initial Contact:
- Invite your dog to step onto the mat and gently guide them towards the water’s edge.
- If they hesitate, use a verbal cue like “step” or “water.”
- Encourage small steps into the shallowest part of the pool while rewarding calm behavior.
- Knee to Water:
- Ask your dog to lift one leg (the one with joint issues) and place the knee gently in the water. The goal is just a brief splash, not full immersion.
- Use a handhold or support pole if necessary, ensuring you don’t pull too hard on their leg.
- Reward immediately—treats, praise, or a quick tug‑toy play—to reinforce the positive experience.
- Progression:
- After several successful knee touches, allow both legs to dip in shallow water while still keeping their paws on the mat.
- Gradually increase depth by adding a few more inches each session—never exceed 6–8 inches until your vet gives the green light.
- Observe gait and comfort; if signs of pain appear, reduce depth or pause training.
- Safety Tips:
- Never leave a dog unattended in water, even shallow.
- Use a life vest for dogs with severe mobility issues or those that may panic.
- Check the temperature of the water—cold can exacerbate joint stiffness.
- Consult your veterinarian before starting any new exercise routine if your dog has arthritis, hip dysplasia, or other chronic conditions.
- Daily Routine:
- Start with 5–10 minutes of knee-to-water exercises, gradually adding a minute each week as tolerated.
- Incorporate light walking on the mat before and after water sessions to keep joints lubricated.
- Track progress in a training log—note depth, duration, and any discomfort signs.
Practical Examples
- Case Study – Bella (10‑year‑old Labrador): Bella had mild hip osteoarthritis. After 4 weeks of knee-to-water practice, she could stand in shallow water for 30 seconds without limping.
- Case Study – Max (8‑year‑old Boxer): Max struggled with deep water. By limiting sessions to the first 6 inches and using a floating support belt, he improved his confidence and reduced lameness after 6 weeks.
Tools & Equipment
| Item | Description |
|---|---|
| Non‑Slip Mat | Provides traction on pool edges. |
| Support Pole or Handhold | Helps guide the dog into water safely. |
| Lifesaver Vest | Optional for dogs with severe mobility issues. |
| Treats & Favorite Toy | Positive reinforcement during training. |
Final Thoughts
The knee-to-water transition is a foundational exercise that can dramatically improve joint health and overall quality of life for dogs with mobility challenges. By proceeding slowly, rewarding progress, and staying attuned to your dog’s comfort level, you’ll create a safe and enjoyable swimming experience.
Exercise 2: Hip Rotation in the Pool
The gentle buoyancy of water takes pressure off your dog’s hips while allowing full range‑of‑motion hip rotation. This exercise is especially beneficial for dogs with osteoarthritis, hip dysplasia, or after surgery.
How to Perform Hip Rotation in Water
- Warm‑up: Begin with a light swim or walking on the pool edge for 5 minutes to loosen muscles.
- Positioning: Hold your dog’s forelimbs at shoulder height. If your dog is anxious, use a flotation collar or a floating support board.
- Hip Rotation: Gently pull the hind leg out to the side while keeping the knee slightly bent. Slowly rotate the hip through the full arc of motion (approximately 90°). Hold for 2–3 seconds before returning to neutral.
- Repetition: Perform 8–12 rotations per side, alternating sides each session.
Practical Tips
- Use a shallow depth first. This reduces resistance and makes it easier for the dog to control movements.
- Keep sessions short. Start with 5 minutes per side, gradually increasing as comfort improves.
- Monitor temperature. Warm water (82–86°F) relaxes muscles more effectively than cold water.
- Observe for pain. Any signs of discomfort or limping should stop the exercise immediately.
Sample Routine for Dogs with Joint Problems
| Day | Exercise | Duration / Sets |
|---|---|---|
| Mon & Fri | Hip Rotation (both sides) | 2 sets of 10 reps per side |
| Wed | Floating Walks + Light Kicks | 15 minutes |
| Sat | Rest & Gentle Stretching on Land | 10 minutes |
Benefits Beyond Pain Relief
- Improved Circulation: Water pressure stimulates blood flow to the hip joint.
- Muscle Strengthening: Resistance from water builds quadriceps and hamstrings without overstressing cartilage.
- Confidence Building: Dogs learn that swimming is safe, reducing fear of movement.
When to Consult a Vet
If your dog shows signs of swelling, heat, or persistent lameness after the exercise, schedule a veterinary check‑up. A physiotherapist may tailor specific resistance levels or suggest adjunct therapies like aquatic massage.
Exercise 3: Lateral Swim Drills
Lateral swim drills are a gentle yet effective way to strengthen your dog’s shoulder and hip joints while keeping the exercise low-impact. By focusing on side-to-side movements, you encourage balanced muscle development and improve joint stability—essential for dogs suffering from arthritis or other joint issues.
Why Lateral Drills Matter
- Joint Alignment: Lateral movement forces the joints to work in a controlled, side-to-side motion rather than only forward and backward. This helps correct any muscular imbalances that may contribute to pain or stiffness.
- Reduced Weight Bearing: Swimming distributes weight evenly across all limbs, so lateral drills keep stress off the affected joint while still providing resistance.
- Improved Core Strength: Maintaining a stable body position during side-to-side strokes engages core muscles that support the spine and hips.
Equipment You’ll Need
- A calm, shallow pool (2–4 feet deep) or a swimming area with a gentle current.
- An adjustable dog life jacket if your dog is not an experienced swimmer.
- Optional: A lightweight paddle or floating stick for visual guidance.
Step‑by‑Step Guide
- Warm‑up: Begin with a few minutes of gentle walking around the pool perimeter to get your dog’s muscles ready.
- Side‑to‑Side Glide:
- Place your dog at the edge, gently guide them into the water.
- Encourage a slow “sweep” motion: move their hindquarters to the left, then back to center, and finally to the right. Keep the front limbs relaxed.
- Repeat 5–10 times on each side, pausing for breath after every set.
- Side Stroke with Paddle:
- Hold a lightweight paddle in your hand and let the dog follow it as you move it left to right across their body.
- This visual cue helps maintain proper alignment and encourages a smooth, controlled motion.
- Perform 3–5 sets of 8–10 strokes per side.
- Cool‑down:
- Finish with gentle floating or slow swimming to relax the muscles.
- Offer a treat and praise to reinforce positive behavior.
Practical Tips for Dogs with Joint Problems
- Start Slow: If your dog is new to swimming, begin with short sessions (2–3 minutes) and gradually increase duration as they build confidence.
- Monitor Temperature: Warm water (about 80°F/27°C) reduces muscle stiffness and joint pain.
- Check for Pain Signals: Watch for signs like limping, whining, or reluctance to move. If these occur, stop the drill and consult your vet.
- Use Supportive Gear: A dog life jacket can reduce anxiety and keep the dog buoyant without overexerting joints.
- Consistent routine: Aim for 2–3 sessions per week, allowing at least one rest day between sessions to prevent overuse injuries.
Sample Routine (30‑Minute Session)
| Time | Activity |
|---|---|
| 0–5 min | Warm‑up walk around pool |
| 5–10 min | Lateral glide (20 reps total) |
| 10–15 min | Side stroke with paddle (3 sets of 8 strokes each side) |
| 15–20 min | Rest & treat break |
| 20–25 min | Lateral glide again (20 reps total) |
| 25–30 min | Cool‑down floating + praise |
When to Seek Veterinary Advice
If you notice persistent swelling, difficulty breathing during the exercise, or a sudden change in mobility, contact your veterinarian immediately. They may recommend adjustments such as reducing session length, adding physical therapy modalities, or prescribing joint supplements.
With patience and consistent practice, lateral swim drills can become a cornerstone of your dog’s rehabilitation program—promoting healthier joints, increased confidence, and an overall better quality of life.
Exercise 4: Vertical Push‑Ups on Water Surface
This exercise combines buoyancy and resistance to strengthen a dog’s core, shoulders, and back while keeping joints relaxed. It is especially beneficial for dogs with arthritis or hip dysplasia because the water supports body weight, reducing joint compression.
How to Perform the Exercise
- Choose the right pool: A shallow (12–18 inches) area with a flat, non‑slippery bottom is ideal. The water temperature should be between 80–86°F (27–30°C).
- Position your dog: Hold your dog’s collar or harness and gently guide them to stand upright on the pool edge.
- Encourage a vertical stance: Use treats or a favorite toy to coax the dog into standing tall with its front paws lifted slightly off the ground. The back should be straight, and the tail relaxed.
- Initiate the push‑up: Ask your dog to “push” their front paws downward while keeping the body vertical. They should use a controlled motion—no sudden jerks.
- Count repetitions: Aim for 5–10 slow, deliberate pushes per session, allowing rest between each set if needed.
Progression Tips
- Increase hold time: Once your dog can comfortably push once, have them hold the lowered position for 2–3 seconds before returning to vertical.
- Add a weighted vest: For older dogs with good joint health, a light weighted vest (5–10% of body weight) can increase resistance gradually.
- Vary angles: Perform the exercise on slightly inclined surfaces to target different muscle groups.
Safety Considerations
Always supervise your dog closely. If you notice signs of fatigue, pain (whining, limping), or overheating, stop immediately and dry your dog off. Keep the pool clean to prevent skin irritation and maintain a consistent temperature.
Practical Advice for Owners
- Use positive reinforcement: Treats, praise, and gentle petting keep motivation high.
- Keep sessions short: 5–10 minutes per day is sufficient; overexertion can worsen joint issues.
- Integrate with other water drills: Pair push‑ups with floating, gentle paddling, or “doggy yoga” stretches for a full aquatic routine.
Benefits Highlighted by Veterinary Experts
According to Dr. Emily Hartman, DVM, aquatic therapy reduces joint loading by up to 50% while preserving muscle strength and improving range of motion in dogs with chronic arthritis. The vertical push‑up specifically targets core stability, which is crucial for maintaining balance during everyday activities.
Sample Routine (5‑Minute Session)
- Warm‑up: 30 seconds of gentle floating with front paws dangling.
- Vertical push‑ups: 5 sets of 2–3 reps, resting 10 seconds between sets.
- Cool‑down: 1 minute of slow swimming or side‑laying on the surface.
Remember to always consult your veterinarian before starting any new exercise program, especially if your dog has a pre‑existing joint condition.
Exercise 5: Foam Rubber Treadmill Walks
The foam rubber treadmill is an excellent low‑impact exercise for dogs suffering from joint problems such as arthritis or hip dysplasia. By using a padded surface, you reduce the shock on their knees, hips and ankles while still allowing them to maintain muscle tone and circulation.
Why It Works
- Shock Absorption: Foam rubber provides about 50–70 % less impact than a standard treadmill or hard floor.
- Controlled Environment: You can set the speed, incline and duration precisely to match your dog’s tolerance level.
- Consistent Warm‑up: Repeated sessions help keep joints lubricated and reduce stiffness.
Getting Started
- Choose the Right Treadmill: Look for models with a wide, cushioned deck (at least 24 inches). Many commercial treadmills now come in “dog‑friendly” sizes.
- Inspect the Deck: Ensure there are no cracks or worn spots where the foam might compress unevenly.
- Introduce Gradually: Begin with a few minutes at a very slow pace (0.5–1 mph). Let your dog get used to the sensation before increasing time.
Sample Routine
| Session | Speed (mph) | Duration (min) |
|---|---|---|
| Day 1–3 | 0.5 | 5 |
| Day 4–6 | 0.75 | 7 |
| Day 7–10 | 1.0 | 10 |
After each session, give your dog a short walk outside or in the yard to help flush out any residual stiffness.
Practical Tips & Safety Checklist
- Monitor Body Language: Stop immediately if you see limping, whining or a sudden change in gait.
- Use Positive Reinforcement: Treats and praise at the end of each session reinforce good habits.
- Keep the Deck Clean: Wipe down after every use to prevent bacteria buildup.
- Check for Wear: Replace foam sections if they become hard or develop holes.
Common Pitfalls and How to Avoid Them
Too Fast: Many owners instinctively increase speed after a few sessions, but this can overload joints. Stick to the gradual plan unless you see clear improvement.
Long Sessions: Even on a cushioned surface, excessive time can cause fatigue. Aim for 10–15 minutes maximum per day and observe your dog’s response.
Case Study: Bella the Border Collie
Bella was diagnosed with early hip osteoarthritis at 4 years old. Her vet recommended low‑impact cardio on a foam treadmill. Over eight weeks, she went from a hesitant walk of 2 minutes to a steady 12 minute session at 1 mph. Bella’s gait improved noticeably and her daily activity level increased by 30 %. This routine also allowed her owners to stay consistent during inclement weather.
Conclusion
Foam rubber treadmill walks provide an effective, controlled way for dogs with joint issues to stay active without risking further injury. By following a structured plan and watching for signs of discomfort, you can help your canine companion maintain mobility and enjoy the benefits of regular exercise.
Exercise 6: Lane Swim with Slow Pace
Purpose: This exercise focuses on controlled, low-impact movement in a swimming lane. It helps dogs with joint problems maintain muscle tone and flexibility without overloading their joints.
Equipment Needed
- A shallow pool or a designated swimming lane (preferably a flat-bottomed indoor pool)
- Floatation aid (e.g., dog life jacket, lightweight swim ring)
- Optional: Treadmill mode on the pool if available for gentle resistance
Step‑by‑Step Instructions
- Warm Up: Begin with a short walk or light stretching around the pool area. This helps loosen joints before water entry.
- Entry: Gently guide your dog into the shallow end, allowing them to adjust to the water temperature. Use a floatation aid if necessary.
- Slow Pace Swimming: Encourage your dog to move slowly and steadily along the lane. Keep their body level with minimal kicking. Focus on short bursts of movement followed by rest periods.
- Duration: Start with 2–3 minutes per session, gradually increasing up to 10 minutes as tolerance improves. Always monitor for signs of fatigue or discomfort.
- Exit and Drying: Carefully pull your dog out of the pool, towel them down, and provide a warm environment to prevent muscle stiffness.
Practical Tips
- Temperature Matters: Water that is too cold can tighten muscles; aim for a temperature between 80–86°F (27–30°C).
- Use Gentle Resistance: If your pool has a treadmill mode, set it to the lowest setting to provide mild resistance without forcing joints.
- Check Water Depth: Keep the water at or just below the dog’s waist. Deeper water increases joint load and may exacerbate pain.
- Observe Body Language: Signs of discomfort (head shaking, reluctance to move) warrant an immediate pause.
Benefits for Dogs with Joint Problems
Swimming in a controlled lane reduces impact forces on weight-bearing joints while still promoting cardiovascular health. The slow pace allows dogs to maintain joint lubrication and muscle tone without overexertion, making it an ideal complement to land-based rehabilitation.
Sample Routine (4‑Week Plan)
| Week | Session Duration | Notes |
|---|---|---|
| 1 | 2 minutes (3 sessions) | Focus on comfort; use floatation aid. |
| 2 | 4 minutes (3 sessions) | Add light resistance if tolerated. |
| 3 | 6 minutes (3 sessions) | Encourage slight increase in speed. |
| 4 | 8–10 minutes (3 sessions) | Monitor for fatigue; maintain slow pace. |
Safety Checklist
- Consult your veterinarian before starting any new exercise program.
- Avoid swimming during extreme weather or if the pool is dirty.
- Keep a first‑aid kit nearby in case of slips or injuries.
- Never leave your dog unattended in the water.
Remember, consistency and patience are key. Gradual progression ensures that dogs with joint problems can safely enjoy the therapeutic benefits of swimming without compromising their comfort.
Exercise 7: Heel‑to‑Toe Stretching in Water
Water offers a low‑impact environment that’s ideal for dogs with joint pain or arthritis. This exercise focuses on gently extending the hind limbs from heel to toe, helping maintain flexibility and circulation without stressing the joints.
Why It Matters for Dogs with Joint Problems
- Reduced Weight Bearing: Buoyancy lessens the load on hips, knees, and ankles, allowing dogs to move freely.
- Improved Range of Motion: Slow, controlled movements encourage joint flexibility without overexertion.
- Enhanced Circulation: Warm water promotes blood flow, aiding in tissue repair and pain relief.
Equipment & Setup
- Pool or shallow lake: Depth should be just enough to support the dog’s belly but not so deep that they must lift their front legs to stay afloat.
- Water temperature: Aim for 80–86 °F (27–30 °C) – warm enough to relax muscles but cool enough to avoid overheating.
- Optional flotation aid: A lightweight dog life jacket can help beginners maintain balance.
Step‑by‑Step Instructions
- Warm‑up: Let your dog splash around for 2–3 minutes to acclimate and loosen muscles.
- Positioning: Gently guide the dog’s hind leg forward so that the heel is near the water surface while the toes remain slightly submerged. The dog should keep its back legs straight, resembling a “heel‑to‑toe” alignment.
- Hold & Release: Hold the position for 5–10 seconds, then slowly release. Observe the dog’s comfort level; if any resistance or pain appears, stop immediately.
- Repetition: Perform 8–12 repetitions per hind leg, alternating sides to maintain symmetry.
- Cool‑down: Finish with gentle paddling and a few minutes of relaxed floating.
Practical Tips for Success
- Use Treats & Praise: Positive reinforcement keeps the dog motivated and reduces anxiety.
- Monitor Breathing: The dog should breathe normally; increased panting may signal overheating or discomfort.
- Start Slowly: If your dog is new to water, begin with short sessions (5–10 min) and gradually increase duration.
- Consult a Vet: Prior to starting any exercise regimen for joint issues, obtain veterinary clearance.
Common Mistakes & How to Avoid Them
| Mistake | Consequence | Correction |
|---|---|---|
| Forcing the toes into water too deep | Increased strain on ankles and knees | Keep toes just below the surface; use shallow depth. |
| Rapid movements or jerky pulls | Joint irritation, muscle strain | Use slow, controlled motions with steady hand guidance. |
| Ignoring signs of pain (whining, stiff posture) | Persistent injury or flare‑up | Stop immediately and reassess; consult vet if symptoms persist. |
Success Stories & Real‑World Examples
- Max, a 9‑year‑old Labrador Retriever: After starting heel‑to‑toe stretching in the pool twice weekly, Max reported less stiffness and could walk longer distances with fewer lameness episodes.
- Sasha, a senior Golden Retriever: A combination of water therapy and controlled land-based extensions helped Sasha maintain joint mobility for another active year.
Next Steps & Additional Resources
Pair this exercise with gentle swimming laps, side‑to‑side leg lifts, and core strengthening routines to create a comprehensive aquatic rehabilitation program. For more detailed guidance, refer to:
- Swim for Arthritis: Tips for Dogs
- AKC Water Therapy Guide
- PetMD: Swimming Benefits for Dogs with Joint Problems
Remember, consistency and patience are key. With the right approach, water therapy can significantly improve your dog’s joint health and overall quality of life.
Exercise 8: Backward Swim for Balance
Backward swimming is a low‑impact exercise that encourages your dog to engage core muscles, improve proprioception, and enhance joint stability—all crucial for dogs with arthritis or hip dysplasia. Unlike forward strokes, backward swimming forces the dog to hold a more upright position, which can help strengthen stabilizing musculature around the hips and knees.
Why It Works for Joint Problems
- Reduced Load on Joints: Water buoyancy lessens weight on the limbs while still providing resistance.
- Improved Core Strength: Engaging abdominal and back muscles promotes better posture, which alleviates joint strain.
- Balance Training: The unpredictable water surface forces the dog to constantly adjust, enhancing neuromuscular control.
Step‑by‑Step Guide
- Choose a Calm Pool: A shallow, calm area with no strong currents is ideal. Avoid hot or cold water; the temperature should be around 78–82°F (25–28°C).
- Introduce Slowly: Let your dog acclimate to the pool by wading and standing on the edge first.
- Encourage Backward Motion: Use a floating toy or a light tug rope behind the dog’s hindquarters. Gently guide them backward, encouraging them to keep their head up and spine straight.
- Maintain Balance: As they swim, adjust your hand position if they start to drift forward or lose balance. A supportive buoy (e.g., a life jacket) can be used for beginners.
- Set Duration: Start with 1–2 minutes and gradually increase up to 5 minutes as comfort improves.
Practical Tips & Safety Checklist
- Watch the Pace: Dogs often tire quickly in water. Keep sessions short initially, especially for older dogs.
- Use a Treadmill or Pool with a Gentle Current: If available, these can help maintain a steady backward pace without your constant assistance.
- Check Joint Comfort: After each session, feel the knees and hips for swelling or stiffness. Adjust intensity accordingly.
- Hydration & Rest: Provide fresh water after swimming and allow ample rest between sessions.
Sample Routine (5‑Week Plan)
| Week | Duration | Notes |
|---|---|---|
| 1–2 | 1 min per session, 3 times/week | Focus on getting comfortable in water. |
| 3–4 | 2–3 mins per session, 4 times/week | Add light resistance with a tug rope. |
| 5 | 4–5 mins per session, 5 times/week | Introduce slight variations (e.g., alternating backward and forward strokes). |
Common Mistakes to Avoid
- Forcing the Dog: Never push them into a stroke they’re uncomfortable with; let them lead.
- Ignoring Pain Signals: If your dog whines or pulls away, stop immediately and consult your vet.
- Overexertion: Older dogs may tire faster; keep sessions brief to avoid overuse injuries.
Conclusion
Backward swimming is a gentle yet effective exercise that can help dogs with joint problems maintain mobility and reduce discomfort. By combining proper technique, gradual progression, and attentive monitoring, you’ll give your canine companion a safe way to strengthen joints and improve overall balance—key components of a healthy, active life.
Exercise 9: Slow Circles Around a Floating Anchor
This exercise combines gentle aquatic resistance with controlled movement to help dogs with joint problems strengthen the muscles around their hips, shoulders, and spine while reducing impact on the joints. The floating anchor (a lightweight weighted ball or buoy that stays at a consistent depth) serves as a stable point for the dog to perform slow circles, encouraging balance and proprioception.
Why It Works for Joint Health
- Low Impact: Water supports body weight, so joints experience minimal stress.
- Resistance Training: The buoyant anchor provides a mild resistance that builds muscle without overloading the joints.
- Improved Range of Motion: Slow, controlled circles promote joint flexibility and joint capsule lubrication.
- Balance & Coordination: Maintaining position around the anchor enhances proprioceptive feedback, crucial for dogs with arthritis or hip dysplasia.
Equipment Needed
- Swimming pool or calm lake/pond (water depth: at least 18–24 inches)
- Floating anchor – a small weighted ball, buoy, or even a rubber duck with a metal weight inside.
- Tethering rope (optional) to keep the dog within sight if needed.
Step‑by‑Step Instructions
- Introduce the Anchor: Place the floating anchor on the pool floor and let your dog sniff and investigate it. Reward with treats to create a positive association.
- Guided Circles: Stand beside the pool, hold the anchor in one hand (or attach a short leash). Gently encourage your dog to walk around the anchor at a slow pace, using a calm voice and a treat as a lure. Aim for about 5–10 meters of distance before turning.
- Slow Movement: Ensure the dog keeps its pace steady—no sudden bursts or skidding. The goal is to maintain smooth circular motion.
- Direction & Repetition: Alternate directions (clockwise, then counter‑clockwise) for each set. Perform 2–3 sets of 8–10 circles per session.
- Duration: A typical session lasts 5–7 minutes, depending on the dog's stamina and comfort level.
Practical Tips & Variations
- Use a Tether: For dogs that are anxious or prone to running away, attach a short leash to the anchor so you can gently guide them around.
- Increase Resistance: Add a small weighted strap to the anchor if your dog is comfortable and needs more muscle engagement.
- Incorporate a Cue: Teach a simple verbal cue such as “circle” or “loop” to signal when the exercise starts, aiding consistency during training.
- Adjust Depth: For dogs with severe joint pain, keep them closer to the surface where buoyancy is higher and resistance lower.
- Combine With Other Aquatic Exercises: Pair slow circles with gentle paddle strokes or “doggy walks” on a floating platform for a comprehensive swim routine.
Safety Checklist
- Always supervise the dog during water activities.
- Check that the anchor is secure and will not drift away—use a small weight or tether if necessary.
- Avoid overexertion; watch for signs of fatigue such as rapid breathing, excessive panting, or reluctance to continue.
- If your dog has severe joint disease, consult with your veterinarian before starting any new exercise routine.
Sample Routine (10‑Minute Session)
| Time | Activity |
|---|---|
| 0:00–0:30 | Warm‑up swim—easy paddle, 2–3 laps. |
| 0:30–1:30 | Slow circles clockwise (5 circles). |
| 1:30–2:00 | Rest & water sip. |
| 2:00–3:00 | Slow circles counter‑clockwise (5 circles). |
| 3:00–4:00 | Optional “doggy walk” on a floating platform. |
| 4:00–5:00 | Cool‑down swim—easy paddle, 1 lap. |
Consistent practice of slow circles around a floating anchor can help dogs with joint problems build muscle support, improve circulation, and maintain functional mobility—all while keeping the exercise enjoyable and low‑impact. Remember to tailor intensity to your dog’s specific condition and progress gradually over weeks.
Cool‑Down Exercises and Posture Checks
A proper cool‑down is as essential for dogs with joint problems as it is for human athletes. It helps reduce stiffness, maintain range of motion, and prevents injury recurrence.
1. Gentle Walking & Stretching Routine (5–10 minutes)
- Slow-paced walk: 2–3 minutes at a relaxed pace around the pool perimeter or in a shaded garden area.
- Dynamic stretches:
- Hip circles – 10 reps each side, keeping the hips low to avoid strain.
- Shoulder rolls – gentle forward and backward movements, 8 reps per direction.
- Limb swings – hold each leg for 3–5 seconds while supporting gently with your hand.
2. Posture Check: “Dog‑Friendly Alignment”
Use a simple visual cue to ensure your dog’s spine stays neutral during and after swimming:
- Backbone line: Imagine a straight line from the base of the skull, through the spine, down to the tail base. The hips should sit directly under this line.
- Shoulder alignment: Shoulders should be level; avoid raising one shoulder higher than the other during turns or surface breathing.
- Pelvic tilt: A slight forward tilt is natural, but excessive posterior tilting can compress joints – correct by gently lifting the chest.
3. Water‑Based Posture Checks
While your dog swims, periodically pause for a quick posture check:
- Surface breathing: Ensure the head remains parallel to the water surface; avoid pulling the neck down, which can strain cervical joints.
- Kick technique: Kicks should originate from the hip rather than the knee to reduce joint loading.
- Use a floating aid (e.g., a lightweight dog life jacket) to observe posture without forcing movement.
4. Post‑Swim Stretching & Massage (5–8 minutes)
- Quadriceps stretch: Gently pull the hind leg toward the body while supporting the knee; hold for 10–15 seconds.
- Hamstring release: Sit on the floor, extend one leg, and reach toward the toes. Repeat on both sides.
- Shoulder roll & gentle massage: Use circular motions with your fingertips over the shoulder blades to increase circulation.
5. Practical Tips for Owners
- Use a non‑slip mat: Place a rubber or textured surface where your dog will walk after swimming to prevent slipping.
- Monitor temperature: Warm water (around 85–90°F) reduces muscle stiffness and joint stress compared to cold pools.
- Limit duration: For dogs with severe arthritis, keep sessions under 15 minutes and increase gradually.
- Check for pain: Watch for signs such as limping, reluctance to move, or vocalization; if observed, stop the activity and consult a vet.
6. Sample Cool‑Down Flowchart
Below is a quick reference you can print out or keep on your phone:
- Walk (2–3 min) → Hip circles (10 reps) → Shoulder rolls (8 reps)
- Surface breathing check → Kick origin check
- Quadriceps stretch (10 s) → Hamstring release (15 s) → Shoulder massage (30 s)
Consistent cool‑downs and posture checks are the cornerstone of a safe, enjoyable swimming routine for dogs with joint problems. By incorporating these steps into every session, you help preserve mobility, reduce discomfort, and extend your dog’s happy swimming years.
Conclusion
Swimming is one of the most effective low‑impact activities you can offer your dog when they’re dealing with joint pain or arthritis. By keeping the weight off their limbs while still providing resistance and muscle engagement, a well‑planned aquatic routine can help maintain mobility, reduce inflammation, and improve overall quality of life.
When you start a swimming program for a dog with joint issues, keep these practical steps in mind:
- Start slow. Begin with short sessions—5 to 10 minutes—and gradually increase the duration as your dog shows comfort and stamina. This helps avoid overexertion and reduces the risk of muscle soreness.
- Choose the right environment. A shallow, warm pool (around 82–86°F or 28–30°C) is ideal. Warm water relaxes muscles and improves circulation, while a calm setting minimizes anxiety.
- Use supportive gear. Dog life jackets keep them buoyant and prevent fatigue, especially for larger breeds. For dogs with severe pain, consider flotation vests that distribute weight evenly.
- Incorporate gentle strokes. Encourage belly‑flopping or freestyle swimming—strokes that allow the dog to propel themselves without stressing joints. Avoid high‑impact movements like lunges or rapid turns.
- Monitor for signs of discomfort. Watch for limping, reluctance to dive in, or excessive panting. If any of these occur, shorten the session and consult your veterinarian before resuming.
Beyond physical benefits, swimming also offers mental stimulation. The novelty of water can help distract a dog from chronic pain, fostering a positive association with exercise. It’s not just about staying active; it’s about feeling good while moving comfortably.
Finally, remember that every dog is unique. Pair your aquatic routine with other joint‑friendly activities—such as gentle leash walks or controlled indoor fetch—and always keep an eye on how your pet responds. With patience, consistency, and the right guidance, swimming can become a cornerstone of a healthier, happier life for dogs suffering from joint problems.
FAQ
- Is swimming safe for dogs with arthritis or hip dysplasia?
-
Yes, when done correctly. Water provides buoyancy that reduces joint load, allowing your dog to move freely without the pain of ground impact.
- Start slowly: Begin with short sessions (2–3 minutes) and gradually increase as tolerated.
- Monitor temperature: Warm water (around 90°F/32°C) is best; cold water can tighten muscles.
- Use a life jacket: Especially for older dogs or those with balance issues.
- What are the best swimming exercises for joint health?
-
Focus on low-impact, repetitive movements that strengthen muscles while preserving range of motion:
- Floating laps: Encourage your dog to paddle forward, then turn around. Use a gentle rhythm.
- Side-to-side glides: Keep the dog in a horizontal position and push gently from one side to the other, mimicking a “treading” motion.
- Underwater fetch: Throw a buoyant toy just below the surface. The dog will swim up, then down, engaging core and hind limbs.
- Slow backstroke: For dogs that can handle it, let them push with their forelimbs while keeping the hind legs relaxed.
- How often should I swim my dog with joint problems?
-
Consistency beats intensity. Aim for 2–4 sessions per week, each lasting 5–10 minutes, depending on your dog's comfort level.
Tip: Combine swimming with a short walk or light resistance training to keep overall conditioning balanced.
- What signs should I watch for that indicate the exercise is too much?
-
- Painful vocalization: Whining or growling during or after swimming.
- Excessive panting or fatigue: Beyond normal exertion.
- Swelling or stiffness post-swim: Noticeable in joints.
If any of these occur, reduce session length and consult your veterinarian.
- Can I use a pool or open water for my dog?
-
Pool: Controlled environment, consistent temperature, easy to clean. Ideal for beginners.
Open water (lake, river): Great for variety but requires caution: check currents, depth, and water quality. Use a life jacket and supervise closely.
- What equipment do I need?
-
- Dog-friendly life jacket: Fits snugly but not too tight.
- Floating toys or weighted toys: For fetch and resistance exercises.
- Non-slip mat: Place on pool deck to prevent slipping during entry/exit.
- Should I consult a vet before starting?
-
Absolutely. Your veterinarian can assess your dog's specific joint condition, recommend an exercise plan, and rule out any contraindications (e.g., severe osteoarthritis, heart issues).
- Can swimming help with weight management?
-
Yes. Water resistance provides a low-impact workout that burns calories without overloading joints—perfect for overweight dogs suffering from joint pain.
- How do I keep my dog motivated?
-
- Use positive reinforcement: Treats and praise after each session.
- Make it fun: Play games like “swim chase” or use scent trails in the water.
- Gradual progression: As your dog gets comfortable, increase distance or add light resistance (e.g., a weighted vest).
- What if my dog dislikes swimming?
-
Not all dogs are natural swimmers. Try the following:
- Water acclimation: Let them explore shallow water with their paws, then gradually introduce more depth.
- Use a pool ladder or step stool: Helps them feel secure entering and exiting.
- Consider alternatives: If swimming remains stressful, try low-impact activities like underwater treadmills (available at some veterinary clinics) or gentle leash walks on smooth surfaces.
Remember: Every dog is unique. Tailor the exercise routine to your pet's comfort level and always keep an eye out for signs of discomfort or fatigue.
Categories
- AI & Enrichment Play
- Broiler Farming
- Broiler Farming Tips
- Canine Wellness & Longevity
- Cat
- Cat & Human Connection
- Cat Adoption & Rescue
- Cat Breeds
- Cat Breeds & Personalities
- Cat Care & Health
- Cat Grooming & Hygiene
- Cat Lifestyle & Environment
- Cat Myths & History
- Cat Nutrition & Diet
- Cat Products & Reviews
- Cat Training & Behavior
- Comparison
- Consumer Awareness
- Dog
- Dog Accessories & Products
- Dog Adoption & Rescue
- Dog Breed & Lifestyle Trends
- Dog Breeding & Puppies
- Dog Entertainment & Media
- Dog Fashion & Trends
- Dog Fun & Lifestyle
- Dog Grooming & Hygiene
- Dog History & Culture
- Dog Myths, Science & Future Tech
- Dog News & Trends
- Dog Nutrition & Food
- Dog Psychology & Emotions
- Dog Safety & Security
- Dog Sports & Activities
- Dog Technology & Innovation
- Dog Training for Modern Owners
- Dog Travel & Adventure
- Dog Travel, Adventure & Culture
- Economic and Market Insights
- Educational Content
- FAQs
- Feeding Alternatives
- Festivals & Seasonal Ideas
- Fun & Entertainment
- General Knowledge
- General Pig Farming
- Health & Disease Management
- Housing and Environment
- Kittens
- Market Insights
- Miscellaneous
- Miscellaneous
- Motivational
- pig
- Pig Breeding
- Pig Breeds
- Pig Farming Stories and Inspiration
- Pig Health and Care
- Pig Nutrition
- Pig Products
- Profitability & Business
- Puppy Care
- Puppy Predictable Topics Reinvented
- Regional Focus
- Rescue & Adoption Buzz
- Senior Cats
- Senior Dog Care
- Smart Dog Tech & Gadgets
- Sustainability
- Sustainable & Eco-Friendly Dog Products
- Tech & Innovations
- Working & Service Dogs
- Broiler Feed66 products
- Country Feed33 products
- Pig Feed66 products
- Product22 products
- Raw Materials99 products
Products
-
 Fish Meal
₹1,999.00 – ₹2,999.00Price range: ₹1,999.00 through ₹2,999.00Rated 0 out of 5
Fish Meal
₹1,999.00 – ₹2,999.00Price range: ₹1,999.00 through ₹2,999.00Rated 0 out of 5 -
 FATTENING BROILER FEED
₹2,299.00 – ₹2,349.00Price range: ₹2,299.00 through ₹2,349.00Rated 0 out of 5
FATTENING BROILER FEED
₹2,299.00 – ₹2,349.00Price range: ₹2,299.00 through ₹2,349.00Rated 0 out of 5 -
 LAYER COUNTRY FEED
₹1,549.00 – ₹1,649.00Price range: ₹1,549.00 through ₹1,649.00Rated 0 out of 5
LAYER COUNTRY FEED
₹1,549.00 – ₹1,649.00Price range: ₹1,549.00 through ₹1,649.00Rated 0 out of 5 -
 COUNTER BROILER FEED
₹1,199.00 – ₹1,299.00Price range: ₹1,199.00 through ₹1,299.00Rated 0 out of 5
COUNTER BROILER FEED
₹1,199.00 – ₹1,299.00Price range: ₹1,199.00 through ₹1,299.00Rated 0 out of 5 -
 LACTATING PIG FEED
Rated 0 out of 5
LACTATING PIG FEED
Rated 0 out of 5₹2,299.00Original price was: ₹2,299.00.₹1,740.00Current price is: ₹1,740.00. -
 Maize
Rated 0 out of 5
Maize
Rated 0 out of 5₹1,650.00Original price was: ₹1,650.00.₹1,300.00Current price is: ₹1,300.00. -
 GESTATION PIG FEED (Phase 1)
Rated 0 out of 5
GESTATION PIG FEED (Phase 1)
Rated 0 out of 5₹2,249.00Original price was: ₹2,249.00.₹1,699.00Current price is: ₹1,699.00. -
 Pre Starter Broiler Feed
₹2,399.00 – ₹2,499.00Price range: ₹2,399.00 through ₹2,499.00Rated 0 out of 5
Pre Starter Broiler Feed
₹2,399.00 – ₹2,499.00Price range: ₹2,399.00 through ₹2,499.00Rated 0 out of 5 -
 FINISHER PIG FEED
Rated 0 out of 5
FINISHER PIG FEED
Rated 0 out of 5₹2,299.00Original price was: ₹2,299.00.₹1,749.00Current price is: ₹1,749.00. -
 Broiler Premix
Rated 0 out of 5
Broiler Premix
Rated 0 out of 5₹820.00Original price was: ₹820.00.₹699.00Current price is: ₹699.00.