
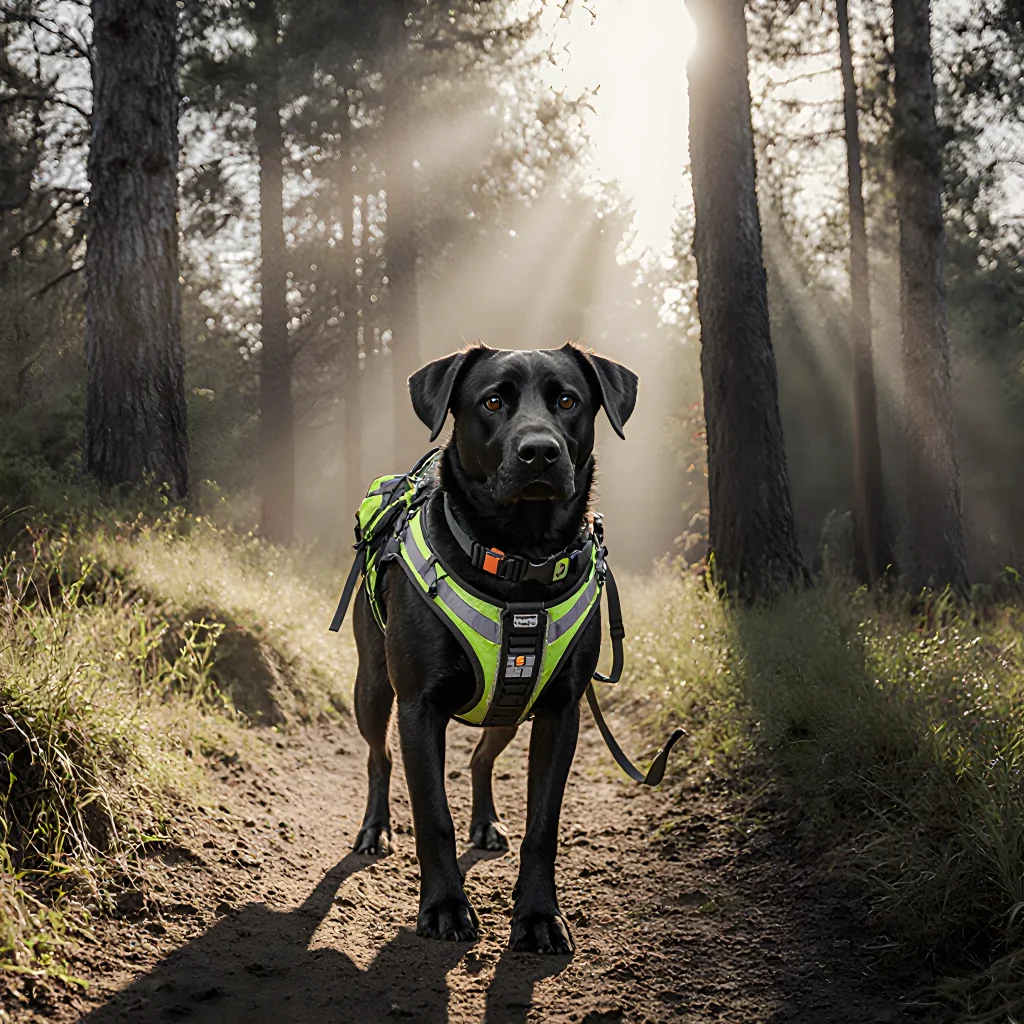
Unleash adventure—gear up your pup for the wild!
Trail‑blazing Tails: Equip Your Dog for Wild Escapes
Table of Contents
- Introduction
- Gear Basics
- Food & Water Needs
- Health & Safety Tips
- Identification & Microchip
- Training Tips for Hiking
- Appropriate Clothing and Footwear
- Portable Shelter Options
- Navigation & Map Essentials
- Waste Management Practices
- First Aid Kit for Dogs
- Trail Etiquette and Leave No Trace
- Finding Dog-Friendly Trails
- Post-Hike Care & Recovery
- Conclusion
- FAQ
Introduction
When you plan a trail excursion, the first thing that comes to mind is usually your own gear: sturdy boots, hydration pack, and a reliable map. But if you’re bringing an adventure dog along, you need to make sure they have everything they need to stay safe, comfortable, and happy on the trail.
1. Proper Identification & Microchip
Even the most well‑trained dogs can wander off or get lost in unfamiliar terrain. A collar with up-to-date identification tags (owner name, phone number, vet address) is essential. In addition, microchipping provides a permanent record that can be retrieved even if the collar is misplaced.
2. Leash & Harness
A lightweight, adjustable harness is preferable to a traditional collar because it distributes pressure evenly across the chest and shoulders, reducing strain on a dog’s neck. A short‑to‑medium length leash (4–6 ft) allows you to maintain control while still giving your dog enough freedom to sniff and explore.
3. Hydration System
Dogs lose water at roughly the same rate as humans—about one ounce per pound of body weight every 15 minutes in hot weather. A collapsible bowl, water‑tethered pouch, or a small hydration pack designed for dogs can keep your pup hydrated without having to stop and fetch a bottle.
4. Trail‑Safe Food & Treats
Pack high‑energy, easy‑to-digest treats (e.g., small jerky pieces, freeze‑dried kibble). Avoid foods that are toxic to dogs (chocolate, grapes, onions) or overly fatty items that could cause upset stomach. Keep food in a sealed container and carry it in a cool bag if the hike will be long.
5. First‑Aid Kit
A compact dog first‑aid kit should include gauze pads, antiseptic wipes, tweezers (for splinters or burrs), and an emergency blanket. Consider adding specific items like a tourniquet for severe bleeding or a quick‑draw bandage for cuts.
6. Protective Footwear & Paw Care
Many dogs have sensitive pads that can burn on hot rocks or get nicked by thorns. Dog booties protect against heat, ice, and rough terrain. If you’re hiking in colder climates, consider a paw balm with beeswax to prevent cracking.
7. Weather‑Appropriate Clothing
In cooler temperatures or wet conditions, a lightweight, breathable jacket can help keep your dog warm without overheating. Waterproof outer layers are useful if you’ll encounter streams or rain.
8. Identification of Trail Rules & Dog Policies
Before heading out, verify that the trail allows dogs and check for any specific regulations (leash requirements, restricted areas). Some parks require a dog permit or have seasonal closures to protect wildlife.
- Pre‑Hike Vet Check: Ensure your dog’s vaccinations are current and that they’re fit for strenuous activity. A quick check-up can catch any underlying health issues that might flare up on the trail.
- Gradual Conditioning: Build stamina by gradually increasing distance and elevation over weeks. This helps prevent muscle strain or joint injury.
- Pack in Layers: Store gear in a way that’s easy to reach—place heavier items near the front of the pack, with lighter, essential items (water, treats) at the top.
- Observe Wildlife & Trail Etiquette: Keep your dog on a leash and away from wildlife. Teach them to stay off vegetation and not disturb nesting sites.
- Post‑Hike Care: After the trek, rinse paws with fresh water to remove debris. Check for cuts or foreign objects before allowing your dog to rest.
By equipping yourself and your canine companion with these essential items and following best practices, you’ll both enjoy a safe, rewarding hiking adventure.
Gear Basics
When you plan a hike with your canine companion, the right gear can make the difference between a fun outing and an uncomfortable or even dangerous situation. Below is a comprehensive list of must‑have items, complete with practical tips on how to choose, pack, and use them.
1. Harness & Leash System
- Harness: A well‑fitting harness distributes pressure across the dog’s chest and back, preventing strain on the neck. Look for adjustable straps, padded foam, and quick‑release buckles for emergencies.
- Leash: A 4–6 ft retractable leash is ideal for trails with loose terrain. For more control in rugged areas, use a fixed‑length lead (5–7 ft) so the dog can explore without getting tangled.
- Practice: Before heading out, practice the “pull‑back” technique—teach your dog to come back when you pull gently. This builds trust and reduces tension on the leash.
2. Backpack for Your Dog (Optional)
If your dog is large or will be hiking long distances, a lightweight backpack can carry extra water, treats, or a small first‑aid kit. Make sure it fits snugly: 10–15 % of the dog's body weight is a safe rule of thumb.
3. Water & Hydration System
- Water Bottle: A collapsible, BPA‑free bottle that your dog can drink from via a built‑in sipper or a portable bowl.
- Hydration Pack for You: Keep yourself hydrated so you can stay alert and help your dog if needed.
- Water Treats: Freeze treats in the water bottle to keep them cool and encourage drinking.
4. Trail‑Safe Food & Treats
- High‑energy, easily digestible snacks (e.g., small kibble or commercial trail treats).
- A small lunch box with a balanced meal for the dog’s size and activity level.
- Pack food in airtight containers to avoid attracting wildlife.
5. First‑Aid Kit (Dog‑Specific)
- Bandages, gauze, and elastic wrap for minor injuries.
- Antiseptic wipes or spray safe for dogs.
- Instant cold pack or a small towel to apply if your dog gets overheated.
- Emergency contact information (veterinarian, local animal rescue).
6. Protective Footwear & Grooming Gear
- Boots: Dog boots protect paws from hot rocks, sharp roots, and cold ground.
- Paw Balm: Apply before hikes to prevent cracking or drying.
- Regular paw checks for cuts, debris, or blisters during the hike.
7. Identification & Tracking
- Microchip and up‑to‑date collar tags with your contact info.
- Portable GPS tracker or a small satellite beacon if you’ll be in remote areas.
8. Sun Protection
Dogs can get sunburned on their ears, noses, and paw pads. Use pet‑safe sunscreen on exposed areas and consider a light dog jacket for high‑altitude hikes where UV is stronger.
9. Cooling Gear (Summer)
- Cooling vest or bandana that can be soaked in water.
- Ice packs wrapped in towels for hot days.
10. Trail Etiquette & Safety Checklist
- Check the weather forecast and trail conditions before leaving.
- Carry a map, compass, or GPS device.
- Leave no trace: pack out all trash, food wrappers, and waste.
- Respect wildlife—keep your dog on a short leash near animals.
Pro Tip: Test each piece of gear during a shorter walk before committing to a long hike. Adjust the harness for comfort, ensure treats stay secure in the backpack, and confirm that the water bottle works smoothly under different conditions.
Food & Water Needs
Your adventure dog’s energy requirements increase dramatically when you’re hiking, so it’s crucial to plan meals and hydration carefully. Below are practical guidelines, examples of portable foods, and hydration strategies that keep your pup safe and energized.
1. Calorie Planning: How Much Energy Do They Need?
- Baseline calculation: Multiply your dog’s resting metabolic rate (RMR) by an activity factor. For moderate hiking, use a factor of 2.0; for strenuous climbs, go up to 3.5.
- Example: A 25‑lb Beagle with an RMR of 400 kcal/day would need about 800–1400 kcal during a long hike. Split this into two or three meals.
2. Portable, High‑Energy Food Options
| Food Type | Calories per 100 g | Why It Works |
|---|---|---|
| Dog‑specific trail mix (nuts, dried fruit, kibble) | 350–400 | High fat & protein for sustained energy. |
| Hard cheese cubes or jerky strips | 300–450 | Easy to carry, palatable, and rich in fats. |
| Freeze‑dried dog food packs (ready‑to‑eat) | 400–500 | Lightweight, no prep needed, high protein. |
3. Hydration Strategy: Water Intake & Storage
- Daily water need: Roughly 1 oz per pound of body weight. For a 30‑lb dog, that’s about 30 oz (≈900 ml) over the hike.
- Carry capacity: Use a collapsible water bottle or a hydration bladder with a built‑in hose for easy access.
- Refill points: Plan to refill at every major stream or water source; test water safety before giving it to your dog (boil or use a portable filter).
4. Feeding Schedule While Hiking
- Pre‑trip meal: Feed a moderate-sized dinner the night before to avoid an empty stomach.
- First break (2–3 hrs in): Offer a small snack (~200 kcal) and fresh water.
- Mid‑hike (5–6 hrs in): Provide a larger meal (~300–400 kcal) if the terrain is steep.
- Final stretch: A light snack (~150 kcal) and water before reaching your destination.
5. Special Considerations
- Allergies & sensitivities: Pack an alternative food (e.g., fish‑based kibble) if your dog has known allergies.
- Cold weather: Add a higher fat content to the diet; consider a thermal blanket to keep your pup warm and reduce calorie loss.
- Heat stress: Keep water cool, provide shade, and avoid feeding immediately after strenuous activity.
6. Quick Checklist for Food & Water Pack
• Collapsible water bottle or hydration bladder (1–2 L capacity)
• Portable filter or purification tablets
• 4‑5 servings of high‑energy dog food (trail mix, jerky, freeze‑dried packs)
• Small bowls for feeding and water
• Treats for motivation and training breaks
• Extra water bottles in case of emergency
By carefully calculating calories, selecting lightweight yet nutritious foods, and ensuring a reliable hydration plan, you’ll keep your adventure dog energized, hydrated, and ready to tackle the trail ahead.
Health & Safety Tips
When you bring your dog along on a trail, their well‑being is just as important as yours. Below are essential health and safety guidelines to keep both of you safe, comfortable, and ready for the next adventure.
1. Pre‑Trip Vet Check
- Vaccinations: Make sure core shots (distemper, parvovirus, rabies) are up to date. Non‑core shots like Lyme disease or canine influenza may be recommended for certain regions.
- Parasite Prevention: Use flea, tick, and heartworm preventatives at least a week before the hike. Check for ticks after each trail stop.
- Fitness Assessment: Have your vet evaluate your dog’s cardiovascular health. Dogs with joint issues or obesity may need modified routes or shorter distances.
2. Hydration & Nutrition on the Trail
- Water Supply: Bring at least 1 L of water per 20 kg of body weight per hour. Use a collapsible bowl and a lightweight hydration pack.
- Cooling Gear: For hot days, use a cooling vest or a damp towel wrapped around the neck.
- Food & Energy Bars: Pack high‑protein snacks for quick energy. Avoid giving your dog sugary treats that can cause stomach upset.
3. Trail Gear Checklist
- Collapsible Bowls: Portable water and food bowls save space.
- First Aid Kit: Include tweezers, gauze, antiseptic wipes, and a small pair of scissors.
- Litter & Waste Bags: Use biodegradable bags to clean up after your dog.
- Identification Tags & Microchip: Ensure tags have current contact info; microchips should be registered with your latest address.
4. Managing Environmental Hazards
- Ticks & Mosquitoes: Apply a dog‑safe insect repellent and check for ticks every 30–45 minutes.
- Wildlife: Keep your dog on a short leash near predators. Avoid areas with bear or mountain lion activity.
- Temperature Extremes: In cold weather, use booties to protect paws from ice and salt; in hot climates, avoid hiking during peak sun hours (10 a.m.–4 p.m.).
5. Training & Behavior Preparation
- Leash Skills: Practice walking on a short leash before the hike to prevent pulling or lunging.
- Obedience Commands: Reinforce “sit,” “stay,” and “come” in varied environments so your dog responds even with distractions.
- Socialization: Expose your dog to other dogs, hikers, and unfamiliar sights during training walks.
6. Trail Etiquette & Leave No Trace
- Yielding: Yield to larger animals and hikers by moving aside or staying on the side of the trail.
- Waste Disposal: Pack out all waste; use designated disposal points where available.
- Trail Rules: Some parks restrict dogs during certain seasons. Always check local regulations before heading out.
7. Emergency Preparedness
- First Aid Knowledge: Learn basic canine first aid—how to treat cuts, sprains, and heatstroke.
- Emergency Contact Info: Carry a list of local veterinarians, emergency clinics, and your vet’s number.
- Signal Devices: Consider a whistle or GPS collar for locating lost pets in remote areas.
By preparing thoroughly and staying vigilant on the trail, you’ll ensure that both you and your adventure dog enjoy safe, healthy, and memorable hikes.
Identification & Microchip
When you’re heading out into the wilderness with your adventurous pup, making sure they can be found if they wander off is as important as packing a first‑aid kit or enough water. Proper identification protects both of you and gives peace of mind while exploring remote trails.
1. Microchip – The Invisible Lifesaver
- Why it matters: A microchip is a tiny, permanent ID that embeds a unique number into your dog’s body. If lost in the backwoods, a vet or shelter can scan and trace you instantly.
- What to look for:
- Chip size: 1.6 mm × 4 mm (standard ISO 11784/11785).
- Manufacturer: Reliable brands like Avacta, Equine, or Microchip America.
- Practical steps:
- Get the chip inserted by a licensed veterinarian.
- Immediately register the chip number with your local pet registry and update contact info (phone, address, emergency contact).
- Carry a quick‑reference card with the chip number in case you’re asked to provide it on the trail.
2. Collars & Tags – The Visible First Line of ID
- Collar material: Choose a durable, weather‑resistant nylon or neoprene collar with a breakaway feature for safety.
- Tag design:
- Use a stainless‑steel tag to prevent rust.
- Include: name, owner’s phone number (or “Call” if you prefer), and microchip number.
- Consider a reflective or glow‑in‑the‑dark tag for night hikes.
- Fit check:
- Insert two fingers between the collar and your dog’s neck.
- Never tighten too tightly; it should be snug but not restrictive.
3. Emergency Contact & Vet Information
Keep a small, waterproof card in your pack with:
- Your name and phone number (or “Call” if you prefer).
- Local emergency services contact.
- Nearest veterinary clinic or animal hospital address.
- Microchip company’s customer service number.
4. Routine Checks & Updates
Before every trip, perform a quick ID audit:
- Verify collar tag legibility and secure fit.
- Confirm microchip registration is up to date (especially after moving).
- Check for any new health conditions that might affect your dog’s ability to navigate trails safely.
5. Real‑World Example: The Lost Trail Incident
During a multi‑day trek in the Sierra Nevada, a 12‑year‑old golden retriever slipped into a ravine and was unable to return. Thanks to a microchip, the local ranger office scanned the dog’s collar tag, located his chip, and traced him back to his owners within hours—saving both time and stress.
6. Bottom Line: Identification is Non‑Negotiable
A well‑maintained microchip, a secure collar with an up‑to‑date tag, and readily available emergency contacts form the backbone of responsible hiking for adventure dogs. Treat these elements as essential gear—no trail should be tackled without them.
Training Tips for Hiking
If you’re planning to hit the trails with your four‑legged companion, proper training is just as important as packing the right gear. Below are practical steps and examples that will help both you and your dog stay safe, comfortable, and ready for any adventure.
1. Build a Strong Foundation: Basic Obedience
- Recall (Come When Called): Practice in a quiet area first, then gradually introduce distractions. Use high‑value treats or a favorite toy to reinforce the command. Aim for consistent responses before heading out.
- Leash Control: Train your dog to walk calmly on a short leash (4–6 ft). Practice “heel” and “leave it” commands so they’re not overly excited by squirrels, streams, or other hikers.
- Stay/Wait: Essential for trail crossings. Teach your dog to pause at the curb or a natural marker until you give a release cue.
2. Trail‑Specific Skills
- Water Crossing: Start by letting your dog explore shallow streams in a safe area, gradually increasing depth. Encourage them to step carefully and reward calm behavior.
- Obstacle Navigation: Use logs, rocks, or fallen branches to practice stepping over and around obstacles. Keep sessions short to avoid fatigue.
- Noise Tolerance: Expose your dog to varied sounds—motorcycles, other dogs, wind—to prevent startle reactions on the trail.
3. Positive Reinforcement Techniques
- Use a clicker or verbal marker (“Good!”) right when the desired behavior occurs, then give a treat.
- Keep training sessions under 10 minutes to maintain focus and avoid over‑exertion.
- Gradually increase difficulty: longer walks, more distractions, higher stakes (e.g., a busy trail).
4. Physical Conditioning & Stamina Building
- Incorporate brisk walks and short jogs into daily routines to boost cardiovascular fitness.
- For larger breeds or older dogs, start with shorter hikes (1–2 mi) and progressively extend the distance.
- Include hill training: gentle inclines help build leg strength without excessive strain.
5. Safety & Health Checks Before Each Hike
- Vaccinations & Parasite Prevention: Ensure all shots are up‑to‑date and deworming is current.
- Hydration: Carry a collapsible water bowl and treat the dog every 20–30 minutes on hot days.
- Tire & Foot Care: Inspect paws for cuts, blisters, or foreign objects after each hike.
6. Practical Examples: Sample Training Routine
Week 1–2: 10‑minute leash walks in a quiet park; practice recall and “heel.”
Week 3–4: Add short obstacle courses (e.g., low jumps, weave poles). Begin water crossing drills.
Week 5–6: Simulate trail conditions: uneven ground, moderate traffic, varied scents. Increase walk duration to 20‑30 minutes.
7. Post‑Hike Care
- Clean paws with a damp cloth or dog‑safe paw wash solution.
- Check for any signs of fatigue or injury before allowing the dog to rest fully.
- Reward your dog with a favorite treat and praise, reinforcing the positive association with hiking.
By combining consistent training, gradual exposure to trail challenges, and proper care, you’ll create memorable adventures that keep both you and your dog healthy, happy, and ready for the next trek.
Appropriate Clothing and Footwear
When you’re heading out on a trail with your adventure dog, the right apparel can make all the difference—both for you and your canine companion. Proper clothing protects against weather extremes, reduces fatigue, and keeps you comfortable so you can focus on enjoying the journey.
Human Gear Basics
- Layering System: Start with a moisture‑wicking base layer to keep sweat off your skin, add an insulating midlayer (fleece or down), and finish with a waterproof/breathable outer shell. This tri‑layer approach allows you to adjust as temperatures change.
- Sun Protection: A wide‑brimmed hat, UV‑blocking sunglasses, and SPF 30+ sunscreen are essential on sunny days—especially when the trail is at higher elevations where UV rays intensify.
- Footwear: Trail shoes or hiking boots with good ankle support, a grippy rubber outsole, and breathable upper material are key. For wet or icy trails, consider waterproof boots with crampon-compatible soles.
Dog Gear Basics
Your dog’s comfort is just as important as yours. While many dogs can handle natural conditions, certain breeds and sizes benefit from additional protection.
- Fleece or Thermal Jackets: Ideal for short‑haired or older dogs in cooler climates. Look for adjustable Velcro straps to secure the fit without restricting movement.
- Waterproof Coats: For breeds with thin coats (e.g., Greyhounds, Chihuahuas) or during rainy hikes, a waterproof dog coat prevents moisture from soaking into their fur and keeps them warm.
- Booties: Protect paws from hot rocks, ice, salt, and rough terrain. Choose booties with non‑slip soles and adjustable closures to fit snugly.
Practical Advice for Packing
- Pack Light: Only bring what you’ll actually need. A small, lightweight jacket can often replace a bulky one if the weather is mild.
- Check Fit Before Hike: Test all gear in your home environment to ensure it doesn’t restrict movement or cause chafing.
- Keep Extras Accessible: Store an extra set of socks, a spare jacket, and dog booties in the back pocket of your backpack for quick access if conditions change.
Case Study: Mountain Trail with a Short‑Haired Dog
A 45‑minute hike up Bear Creek Ridge with a 30‑lb Jack Russell Terrier. The temperature dropped from 70°F at the trailhead to 40°F at the summit.
- Human gear: Moisture‑wicking T‑shirt, down vest, waterproof shell, hiking boots.
- Dog gear: Fleece jacket with Velcro straps, dog booties for rocky terrain.
- Result: Both stayed warm and dry; no signs of fatigue or overheating. The dog’s paws remained intact thanks to the booties.
Bottom Line
Invest in quality, breathable layers for both you and your dog. Prioritize fit, weather protection, and ease of adjustment—especially on unpredictable trails. With the right clothing and footwear, you’ll be ready to tackle any adventure, no matter how challenging the terrain.
Portable Shelter Options
When you’re heading out on a multi‑day trek with your adventure dog, the shelter you bring can be the difference between comfort and discomfort for both of you. Below are several practical options that blend portability, durability, and suitability for canine companions.
Backpack Dog Shelters
- Compact Design: These shelters attach directly to a standard hiking backpack. Ideal for dogs that are accustomed to sleeping in their own space.
- Ventilation: Look for mesh panels on all sides so your dog can breathe even during hot days.
- Weight Considerations: Most models weigh between 1–3 lb (0.5–1.4 kg). A lightweight option keeps the overall pack load down.
Example: The Outward Hiker Dog Backpack Shelter is a popular choice for dogs up to 20 lb. It folds into a small pouch that fits in your main pack’s side pocket.
Collapsible Tents (Dog‑Specific or Multi‑Use)
- Separate Dog Tent: Many manufacturers offer tents sized for dogs only. They usually feature a single door, a lightweight frame, and easy‑set‑up mechanisms.
- Dual‑Purpose Tents: If you’re traveling with family or other pets, consider a tent that can accommodate both humans and dogs by adding an extra sleeping pad or inflatable mattress for the dog.
Practical tip: Before heading out, test your tent’s set‑up in the park to ensure it takes no longer than 5 minutes. Quick deployment saves valuable time when you’re on a tight schedule.
Dog Hammocks
- Air‑Flow and Comfort: Hammocks made of breathable mesh or perforated canvas keep your dog cool during warm nights.
- Weight & Size: Most hammocks weigh less than 1 lb (0.45 kg) and can support dogs up to 30 lb.
- Installation: They attach to trees, poles, or a trekking pole with a simple hook system.
Example: The Hammock Hound Pro is rated for dogs up to 35 lb and comes with an adjustable strap that ensures the hammock stays level even on uneven ground.
Portable Dog Beds (Inflatable or Foldable)
- Inflatable Beds: These are extremely lightweight and can be inflated in under a minute with a manual pump. They often have an extra layer of insulation on the bottom.
- Foldable Foam Pads: Some foam pads fold into a compact shape and are easy to carry, but they’re usually heavier than inflatable options.
Practical advice: Choose a bed with a non‑slip base if you’ll be sleeping on uneven terrain. A rubberized underside prevents the bed from sliding off rocks or packed soil.
Factors to Consider
- Size: Measure your dog’s length (from nose to tail base) and height at the withers. Compare these dimensions to the shelter’s interior measurements.
- Temperament: Some dogs prefer a closed environment, while others thrive in open, airy spaces. If your dog is anxious, a hammock might reduce stress by keeping them off the ground.
- Climatic Conditions: In cold climates, choose shelters with insulation or a thermal liner. For hot regions, prioritize ventilation and shade.
What to Pack Alongside Your Shelter
- Dog sleeping pad (or extra blanket)
- Portable water bowl or collapsible dish
- Food and treats for the night
- A small first‑aid kit tailored to your dog’s needs
- Extra leash or harness in case you need to secure the shelter
By selecting a shelter that balances portability, comfort, and suitability for your dog’s size and temperament, you’ll ensure both of you have a safe and enjoyable night under the stars.
Navigation & Map Essentials
When you’re heading out on a trail with your adventure dog, having the right navigation tools is just as important as a sturdy leash or a good water bottle. A reliable map and navigation system not only keeps you on track but also gives you peace of mind in case of emergencies.
1. Topographic Maps
- Why they’re essential: Topo maps show contour lines, elevation changes, water sources, vegetation, and man‑made features such as trails and roads.
- Practical tip: Carry a laminated copy of the map for quick reference. If you’re hiking in a protected area, download a PDF version from the park’s website and print it on waterproof paper.
- Example: A 1:24,000 scale map of the Appalachian Trail will reveal ridgelines that could be hazardous if your dog pulls ahead.
2. GPS Devices & Smart Devices
- Portable GPS units: Devices like Garmin eTrex or Garmin Oregon are rugged, have long battery life, and allow you to pre‑load routes.
- Smartphone apps: Google Maps, Gaia GPS, OruxMaps, and AllTrails offer offline maps. Sync them before leaving town so they work without cellular data.
- Dog‑specific GPS collars: Collars such as the Whistle or Tractive let you track your dog’s location in real time—critical if you get separated.
3. Compass & Altimeter
- A magnetic compass paired with a handheld altimeter (like a Garmin GPSMAP) helps confirm your position and elevation when digital signals fail.
- Practice reading the compass before you go—knowing how to orient yourself using cardinal directions is a lifesaver.
4. Route Planning & Markers
- Plot your route on paper or an app, noting key landmarks: waterfalls, viewpoints, and rest stops.
- Carry small trail markers (e.g., colored flags) to help you re‑establish the path if you lose it. Place them in a pattern that’s visible from above but won’t attract wildlife.
5. Emergency Communication Devices
- Satellite messenger: Devices like Garmin InReach or SPOT let you send SOS messages and share your coordinates with rescuers, even when there is no cell coverage.
- Emergency beacon: A personal locator beacon (PLB) can transmit a distress signal to search‑and‑rescue teams. Keep it in an easily accessible pocket or attach it to your dog’s collar.
6. Practical Checklist for Your Dog’s Navigation Gear
| Item | Purpose |
|---|---|
| GPS collar (real‑time tracking) | Know the dog’s location at all times. |
| Waterproof map case | Protect maps from rain and splashes. |
| Miniature first‑aid kit for pets | Treat minor injuries if you’re off trail. |
7. Training Your Dog to Use Navigation Tools
Even though dogs can’t read maps, they can help you stay on track by following a leash or a scent line. Train your dog to respond to “back” and “forward” cues so that when the trail becomes confusing, you can quickly get them back on course.
8. Summary Checklist
- Topographic map (laminated or waterproof)
- Portable GPS device or smartphone with offline maps
- Compass and altimeter
- Trail markers & color flags
- Satellite messenger or PLB for emergencies
- Dog‑specific GPS collar
- Waterproof case & first aid kit for pets
Equipping yourself with these navigation essentials ensures that you and your adventure dog can explore confidently, safely, and enjoy every step of the journey.
Waste Management Practices
Proper disposal of your dog’s waste is essential not only for the environment but also for maintaining a clean trail network and ensuring a safe, enjoyable experience for everyone.
1. Carry the Right Equipment
- Dog Waste Bags: Choose biodegradable bags that break down quickly in soil. A common size is 9 × 12 inches, which fits most adult dogs. Keep a spare pack in your backpack.
- Portable Litter Box or Poop Scoop: For larger dogs or when you’re on a long trek, a lightweight scoop can help gather waste before bagging it up.
- Trash Bag for Decomposition: After sealing the dog’s waste in a bag, place it into a secondary plastic or compostable bag that will be buried or disposed of at the trailhead.
2. Follow the “Leave No Trace” Principles
- Pack In, Pack Out: Never leave any waste on the trail. Even small amounts can accumulate and harm wildlife.
- Burial Depth: If you must bury the waste (for example, when there’s no trash receptacle), dig a hole at least 12 inches deep to prevent scavengers from accessing it.
- No Public Land Disposal: Avoid dumping bags in public areas, streams, or near water sources. This protects aquatic ecosystems and keeps trails sanitary.
3. Use Designated Waste Stations
Many parks provide dog waste stations equipped with bags, scoopers, and trash bins. When available:
- Fill the station’s bag with your dog’s waste.
- Seal the bag securely before placing it in the bin.
- Always double‑check that you’re using the correct disposal container—some stations separate pet waste from general trash.
4. Plan Ahead for Long Treks
If your hike will take several hours or a full day, consider:
- Bringing extra bagging supplies and a small plastic bag for double‑bagging.
- Choosing a trail with adequate waste disposal facilities at both ends.
- Scheduling breaks that allow you to manage waste without interrupting the flow of the hike.
5. Educate Your Pack and Community
Encourage fellow hikers, family members, and friends to adopt these practices:
- Show them how to properly bag and dispose of waste.
- Share the importance of keeping trails clean for wildlife and future hikers.
- Lead by example—always pack out what you bring in.
6. Quick‑Fix Tips for Unplanned Situations
Sometimes you’ll encounter a spot without a waste station:
- Portable Dog Waste Bagging Kit: Keep a small kit (bags, scooper, and a sealable plastic bag) in your pocket.
- Use a Leave‑No‑Trace Backpack Compartment: Many hiking backpacks have dedicated waste pockets for this purpose.
- Plan a “Drop‑Off” Point: Identify the nearest trash receptacle or ranger station where you can leave your sealed bags.
By integrating these waste management practices into your hiking routine, you help preserve natural trails, protect wildlife habitats, and ensure that future adventurers enjoy the same pristine environment you cherish today.
First Aid Kit for Dogs
When you’re out exploring the great outdoors with your four‑legged companion, an unexpected injury or illness can turn a fun hike into a stressful situation. A well‑packed first‑aid kit gives you confidence that you can handle minor mishaps and stabilize more serious conditions until professional help arrives.
Why Every Dog Needs a First‑Aid Kit
- Rapid Response: The sooner you treat a wound or shock, the better the outcome.
- Limited Medical Access: Remote trails often lack nearby veterinary services.
- Preventing Complications: Minor cuts can become infections if not cleaned properly.
Essential Items and How to Use Them
| Item | Purpose | Practical Tip |
|---|---|---|
| Sterile Gauze Pads (4–6 sizes) | Cover cuts, scrapes, and abrasions. | Apply a clean pad over the wound and secure with a bandage; replace if soiled. |
| Adhesive Bandages (small & medium) | Hold gauze in place and protect from dirt. | Use on small lacerations or to secure a dressing after cleaning. |
| Antiseptic Wipes | Clean wounds before applying gauze. | Gently wipe around the wound; avoid excessive rubbing. |
| Hydrogen Peroxide (3%) | Initial cleaning of deep cuts. | Apply sparingly and let it bubble for 30 seconds before rinsing with water. |
| Tweezers | Remove splinters or debris. | Hold the splinter as close to the skin as possible; pull in the same direction it entered. |
| Scissors (small, blunt‑ended) | Trim gauze and bandages. | Cut away only what’s necessary to avoid cutting skin. |
| Disposable Gloves | Maintain hygiene while treating injuries. | Change gloves between patients or after each major task. |
| Heat Pack (reusable or disposable) | Relieve muscle soreness and reduce swelling. | Wrap in a towel before applying to the affected area. |
| Cold Pack (instant or reusable) | Reduce acute inflammation and pain. | Apply for 10–15 minutes, then remove; repeat as needed. |
| Emergency Blanket | Prevent hypothermia in case of exposure or shock. | Wrap the dog snugly but avoid compressing limbs. |
| Basic Medication (e.g., ibuprofen for dogs, but only if prescribed) | Manage mild pain and inflammation. | Only use medications recommended by a vet; never give human meds without approval. |
| First‑Aid Manual (dog‑specific guide) | Quick reference for emergency procedures. | Keep it in a waterproof folder or laminated card. |
Assembling the Kit
- Choose a durable, waterproof container: A small plastic backpack or zip‑lock bag works well.
- Organize by category: Keep cleaning supplies separate from bandages to avoid contamination.
- Label everything clearly: Use waterproof markers or pre‑printed tags.
- Check expiration dates: Replace any expired items before your next trip.
Practical Scenarios
- Minor Scrape on a Rocky Trail: Clean with antiseptic wipes, apply gauze and an adhesive bandage, then monitor for infection.
- Severe Bite or Laceration: Apply pressure to stop bleeding, clean the wound, cover with sterile gauze, and seek veterinary care as soon as possible.
- Heat Stroke Symptoms (e.g., excessive panting, drooling): Move your dog to shade, offer cool water in small sips, apply a cold pack to the neck, and contact emergency services.
Training Your Dog for First‑Aid Situations
Before hitting the trail, practice letting your dog wear a harness or collar with a “first‑aid” tag. Gradually expose them to handling of bandages and gentle cleaning so they remain calm during an actual emergency.
Final Tips
- Carry the kit in both a backpack and on a leash strap for quick access.
- Review basic canine first‑aid skills annually, especially if you’re traveling to remote areas.
- Keep an updated list of local veterinary clinics or emergency hotlines in your travel region.
By investing a little time and space into your dog’s first‑aid kit, you’ll ensure that any unexpected mishap becomes a manageable situation rather than a crisis. Happy trails!
Trail Etiquette and Leave No Trace
When you hit the trail with your four‑legged companion, remember that you’re sharing a public resource. Good trail etiquette and Leave‑No‑Trace (LNT) practices protect wildlife, other hikers, and the environment for future adventures.
1. Keep Your Dog on a Short Leash Near Trails
- Why: A short leash (2–4 ft) prevents dogs from running into wildlife, causing disturbance or injury.
- Practical tip: Use a lightweight, reflective leash for visibility during dawn/dusk hikes. Attach a harness with an ID tag and microchip info in case your dog wanders off.
2. Respect Trail Signage & Bypass Sensitive Areas
- Why: Many trails have seasonal closures to protect nesting birds, fragile vegetation, or water quality.
- Practical tip: Carry a printed trail map or use an offline GPS app. If you see a “No Dogs” sign, pull over and give the area a respectful buffer zone.
3. Pack Out Everything You Bring In
- Why: Dog waste is a major source of water contamination and disease spread.
- Practical tip:
- Carry a biodegradable poop bag (e.g., Eco‑Pooch) and a small shovel or scoop.
- Seal waste in a resealable bag, then double‑bag it for extra protection before disposing in the nearest trash bin or designated dog‑waste station.
4. Minimize Impact on Natural Features
- Why: Dogs can inadvertently trample fragile plants, disturb burrows, or spread invasive species through their paws.
- Practical tip:
- Use a dog bootie that’s waterproof and has a non‑slip sole to protect both your dog’s feet and the trail surface.
- Keep dogs away from wetlands, alpine meadows, or any area with visible erosion. If you’re unsure, ask park staff for guidance.
5. Practice “Right‑of‑Way” Etiquette
- Why: Trail users come from all directions; respecting right‑of‑way ensures safety and smooth flow.
- Practical tip:
- If you encounter a group heading in the opposite direction, pause a few yards ahead of them. Speak politely, “Hi, we’re going the same way.”
- Use the “two‑mile rule”: if you can’t see each other within 2 miles (≈3 km), it’s safer to let others pass.
6. Be Mindful of Other Hikers’ Experience
- Why: Loud barking or over‑excited dogs can be a nuisance and may cause other hikers to feel unsafe.
- Practical tip:
- Train your dog to respond to a “quiet” cue before you leave the trailhead.
- If your dog is barking at wildlife, use a gentle leash tug or a treat to redirect attention.
7. Leave No Trace When Camping with Your Dog
- Why: Campsites amplify human impact; dogs can cause soil compaction, disturb wildlife nesting sites, and spread seeds of invasive plants.
- Practical tip:
- Select a designated dog‑friendly campsite. If none exist, stay at least 200 ft away from water sources and avoid setting up near vegetation.
- Use a campfire ring or fire pit—never build an open fire where your dog might lick the embers or inhale smoke.
8. Dispose of Food Waste Properly
- Why: Food attracts wildlife, leading to dangerous human‑wildlife interactions.
- Practical tip:
- Store all food in sealed containers or bear‑proof bags. If you’re hiking a day trip, pack out leftover snacks in a reusable cooler.
- Never leave any food scraps near your campsite or trail; use designated trash receptacles only.
9. Keep Your Dog Hydrated and Healthy on the Trail
- Why: Dehydration can lead to heat stroke, especially in hot climates or high elevations.
- Practical tip:
- Carry a collapsible water bowl and enough water for both you and your dog (rule of thumb: 1 gal per 1‑hour hike for the dog).
- If natural water sources are present, treat with a portable filter or purification tablets before giving it to your dog.
10. Report Any Issues to Park Authorities
- Why: Reporting trail damage, dog waste left behind, or wildlife disturbances helps maintain the park’s health.
- Practical tip: Keep a small notebook or use your phone to note the location (e.g., GPS coordinates) and type of issue. Submit it through the park’s online reporting system or speak with rangers at the next ranger station.
By integrating these etiquette guidelines into every adventure, you not only protect the environment but also ensure that all trail users—including your loyal companion—can enjoy a safe, beautiful experience for years to come.
Finding Dog-Friendly Trails
When you’re planning a hike with your canine companion, the first step is to locate trails that welcome dogs. Below are proven strategies and tools to help you find dog‑friendly paths, along with practical tips to ensure both of you have a safe and enjoyable adventure.
1. Use Dedicated Trail‑Finding Apps
- AllTrails: Filter by “Pets Allowed” in the search settings. Each trail page lists user comments that often note leash policies, dog behavior, and any seasonal closures.
- TrailLink (National Forest Service): Search for state or national forest trails and check the “Pet Policy” section on the trail’s detail page.
- DogTrails: Specifically designed for pet owners, this app provides a map of dog‑friendly parks, beaches, and hiking routes with user ratings.
2. Check State and Local Park Websites
Most state park systems publish a list of trails that allow pets. Look for sections titled “Pet Policy,” “Dog Rules,” or “Outdoor Recreation.” Example: the U.S. Forest Service Wilderness Areas page lists whether dogs are permitted on each trail and any restrictions.
3. Ask at Visitor Centers or Local Dog Clubs
Staff at visitor centers often know the most up‑to‑date trail conditions and can advise on seasonal closures due to wildlife. Local dog clubs (e.g., Paws Seeking Adventure Club) organize group hikes and maintain a database of trails that work best for dogs.
4. Verify Leash Laws and Dog‑Specific Rules
- Leash Requirements: Many trails require leashes beyond certain distances from water sources or within wildlife habitats.
- No‑Dog Zones: Some parks have “no dogs” sections (e.g., near campgrounds, picnic areas). Use the trail map to plan detours.
- Off‑Trail Hiking: If you plan to wander off the main path, confirm that the area is open for pets and be mindful of local wildlife protection laws.
5. Consider Trail Difficulty and Dog’s Fitness Level
Select trails that match your dog’s age, breed, and training level. For example, a 10‑mile loop with steep climbs may be fine for an athletic Labrador but too taxing for an older Beagle.
6. Test the Trail on a Short Run First
If you’re unfamiliar with a trail, consider running it once before committing to a full hike. This allows you to gauge:
- Water availability and quality (if your dog will drink from streams).
- Potential hazards such as loose rocks or sudden drops.
- How other hikers react to dogs on the trail.
7. Keep a Trail‑Specific “Dog Hike Log”
Maintain a small notebook or use a note‑taking app to record:
- Trail name, length, and elevation gain.
- Any observed restrictions (e.g., leash-only sections).
- Weather conditions and how they affected your dog’s performance.
This log becomes a valuable reference for future trips and helps you share insights with other pet‑friendly hikers.
Post-Hike Care & Recovery
After a long day on the trail, your adventure dog needs a structured recovery routine to stay healthy and happy. Below is a step‑by‑step guide that covers everything from hydration to mental stimulation.
1. Cool Down Walk (10–15 min)
- Purpose: Prevent muscle stiffness and aid circulation.
- What to do: Keep the pace slow, let your dog sniff the ground, and avoid high‑impact surfaces like asphalt.
- Tip: Use a soft leash or a no‑pull harness for better control during the cooldown.
2. Hydration Check
- Immediate rehydration: Offer cool water in a collapsible bowl or a dog‑friendly hydration pack.
- Electrolyte balance: For hikes longer than 4 hours, use an electrolyte supplement formulated for dogs (e.g., Pedialyte diluted to half strength).
- Signs of dehydration: Dry gums, sunken eyes, lethargy. If any are present, consult a vet.
3. Rest and Shelter
- Temperature control: Provide shade or a cooling mat if the weather is hot; use a blanket for cooler nights.
- Sleeping surface: A well‑ventilated crate or a designated dog bed reduces fatigue and helps maintain body temperature.
- Duration: Allow at least 30–60 minutes of rest before resuming activities.
4. Post‑Hike Inspection
- Skin & coat: Check for cuts, insect bites, or mud buildup that could cause irritation.
- Limbs & joints: Look for swelling, pain, or abnormal gait; treat immediately if you notice any issues.
- Use a gentle wipe with a damp cloth to remove dirt before the dog enters the house.
5. Nutrition Refuel
- Protein & carbs: Offer a balanced meal or a high‑protein snack (e.g., boiled chicken, turkey, or commercial recovery food).
- Fiber: A small amount of pumpkin helps digestion after heavy exertion.
- Avoid sudden changes in diet; keep the routine consistent to prevent stomach upset.
6. Mental Recovery & Bonding
- Gentle play: Light tug or fetch keeps the dog engaged without overexertion.
- Training refreshers: Short recall or sit‑stay drills reinforce good behavior and provide mental stimulation.
- Positive reinforcement: Use treats and praise to reward calmness and compliance.
7. Documentation & Follow‑Up
- Log details: Record trail length, elevation gain, weather conditions, and any incidents.
- Health monitoring: Note changes in weight or activity level over the next week to catch potential issues early.
- Share this log with your vet if you notice persistent concerns.
Practical Tips from “Hiking Essentials for Adventure Dogs”
- Pre‑Trail Warm‑Up: Just like humans, dogs benefit from a short warm‑up to reduce injury risk.
- Hydration Packs: Carry enough water for both you and your dog; use a dual‑compartment pack if possible.
- First Aid Kit: Include gauze, antiseptic wipes, tweezers (for ticks), and a small tube of pet‑safe lubricant for any gear adjustments.
- Dog‑Friendly Trail Maps: Know the terrain ahead; avoid trails with excessive mud or loose rocks that could damage paws.
By following this post‑hike care routine, you’ll help your adventure dog recover faster, reduce injury risk, and maintain the bond built during those memorable outdoor adventures.
Conclusion
As we wrap up our guide on Hiking Essentials for Adventure Dogs, it’s clear that preparing the right gear, nutrition, and safety measures can transform a potentially stressful trek into an unforgettable bonding experience. By investing in quality equipment—such as a sturdy harness, a comfortable backpack, reliable water bottles, and a first‑aid kit—you give your dog the best chance to thrive on the trail.
Remember that pre‑planning is paramount. Map out routes that match your pup’s fitness level, check weather forecasts, and always have an emergency plan in place. A well‑structured itinerary keeps both of you safe while allowing time for rest, hydration, and exploration.
Practical tips to keep in mind:
- Pack Light but Smart: Bring only essential items—food, water, first aid, a leash, a collar with ID tags, and a small towel. Avoid over‑packing, which can make the backpack heavy and uncomfortable.
- Hydration First: Dogs lose water quickly in hot or high‑altitude environments. Use collapsible water bottles that are easy to refill on the go, and consider adding electrolytes to your dog’s water if you’re hiking for several hours.
- Nutrition Matters: High‑energy treats and a balanced diet help maintain stamina. For longer hikes, include a small portion of high‑protein snacks that are easy to digest.
- Safety Gear: Reflective vests or collars, a whistle, and a headlamp for nighttime hikes keep you visible and audible in case of emergencies.
- First Aid Preparedness: A compact kit with bandages, antiseptic wipes, tweezers, and an emergency contact sheet can be lifesaving. Know how to treat common injuries like cuts or mild sprains.
Finally, always monitor your dog’s behavior throughout the hike. Signs of fatigue—panting heavily, reluctance to move, drooling excessively—signal that it’s time for a break or to turn back. By staying vigilant and prepared, you’ll not only protect your pup but also create lasting memories on the trail.
Happy trails! Keep exploring responsibly and let every hike strengthen the bond between you and your adventurous companion.
FAQ
-
What kind of harness should I use?
A properly fitting, breakaway harness is essential. Look for models with a quick‑release buckle and padded chest straps to prevent chafing during long hikes. For dogs that like to pull, consider a “no‑pull” harness or a head collar for better control. -
How much water should I carry?
A general rule is one liter of water per 20 kg (44 lbs) of body weight per hour. For example, a 30 kg dog needs about 1.5 L each hour in moderate heat. Use collapsible bowls or hydration packs with attached reservoirs so the dog can drink without you having to stop. -
Should I bring treats?
Treats are great for motivation, but keep them low‑calorie and easy to digest (e.g., freeze‑dried chicken or small kibble pieces). Avoid high‑fat treats that could cause stomach upset on the trail. -
What about a first aid kit?
Include bandages, antiseptic wipes, tweezers for splinters, and a quick‑release dog bandage. For tick‑prone areas, add a tick remover tool and a small container of insect repellent safe for dogs (e.g., 10% permethrin). -
How do I protect my dog's paws?
Inspect trails for hot rocks, ice, or sharp debris. Consider dog booties for extreme conditions; otherwise, use paw wax to prevent cracking. Check paws after each hike and clean any dirt with warm water. -
What are the signs of dehydration in dogs?
Dry gums, lethargy, rapid breathing, and a loss of skin elasticity (pinch the skin on the back of the neck; it should snap back quickly). If you notice these symptoms, stop hiking, provide water, and seek veterinary care if they persist. -
Can I bring my dog’s regular food?
Bring a small portion of familiar kibble or canned food for after the hike. Avoid unfamiliar foods that might upset their stomach; also, avoid table scraps as they can cause digestive issues on long walks. -
What should I do in case of an emergency?
Know the nearest veterinary clinic and carry a copy of your dog’s medical records. Keep a phone charger for your GPS device, and have a plan to call for help if you lose track of the trail or encounter wildlife. -
How can I train my dog for hiking?
Start with short walks on familiar terrain, gradually increasing distance. Use positive reinforcement, reward treats, and practice commands like “stay,” “come,” and “leave it.” If your dog is prone to pulling, use a harness and leash training techniques such as the “stop‑and‑go” method. -
Is it safe to hike with older dogs?
Older dogs may need more frequent breaks and shorter distances. Monitor for signs of joint pain or fatigue, and adjust pace accordingly. Consult your vet before embarking on strenuous hikes.
Categories
- AI & Enrichment Play
- Broiler Farming
- Broiler Farming Tips
- Canine Wellness & Longevity
- Cat
- Cat & Human Connection
- Cat Adoption & Rescue
- Cat Breeds
- Cat Breeds & Personalities
- Cat Care & Health
- Cat Grooming & Hygiene
- Cat Lifestyle & Environment
- Cat Myths & History
- Cat Nutrition & Diet
- Cat Products & Reviews
- Cat Training & Behavior
- Comparison
- Consumer Awareness
- Dog
- Dog Accessories & Products
- Dog Adoption & Rescue
- Dog Breed & Lifestyle Trends
- Dog Breeding & Puppies
- Dog Entertainment & Media
- Dog Fashion & Trends
- Dog Fun & Lifestyle
- Dog Grooming & Hygiene
- Dog History & Culture
- Dog Myths, Science & Future Tech
- Dog News & Trends
- Dog Nutrition & Food
- Dog Psychology & Emotions
- Dog Safety & Security
- Dog Sports & Activities
- Dog Technology & Innovation
- Dog Training for Modern Owners
- Dog Travel & Adventure
- Dog Travel, Adventure & Culture
- Economic and Market Insights
- Educational Content
- FAQs
- Feeding Alternatives
- Festivals & Seasonal Ideas
- Fun & Entertainment
- General Knowledge
- General Pig Farming
- Health & Disease Management
- Housing and Environment
- Kittens
- Market Insights
- Miscellaneous
- Miscellaneous
- Motivational
- pig
- Pig Breeding
- Pig Breeds
- Pig Farming Stories and Inspiration
- Pig Health and Care
- Pig Nutrition
- Pig Products
- Profitability & Business
- Puppy Care
- Puppy Predictable Topics Reinvented
- Regional Focus
- Rescue & Adoption Buzz
- Senior Cats
- Senior Dog Care
- Smart Dog Tech & Gadgets
- Sustainability
- Sustainable & Eco-Friendly Dog Products
- Tech & Innovations
- Working & Service Dogs
- Broiler Feed66 products
- Country Feed33 products
- Pig Feed66 products
- Product22 products
- Raw Materials99 products
Products
-
 Fish Meal
₹1,999.00 – ₹2,999.00Price range: ₹1,999.00 through ₹2,999.00Rated 0 out of 5
Fish Meal
₹1,999.00 – ₹2,999.00Price range: ₹1,999.00 through ₹2,999.00Rated 0 out of 5 -
 FATTENING BROILER FEED
₹2,299.00 – ₹2,349.00Price range: ₹2,299.00 through ₹2,349.00Rated 0 out of 5
FATTENING BROILER FEED
₹2,299.00 – ₹2,349.00Price range: ₹2,299.00 through ₹2,349.00Rated 0 out of 5 -
 LAYER COUNTRY FEED
₹1,549.00 – ₹1,649.00Price range: ₹1,549.00 through ₹1,649.00Rated 0 out of 5
LAYER COUNTRY FEED
₹1,549.00 – ₹1,649.00Price range: ₹1,549.00 through ₹1,649.00Rated 0 out of 5 -
 COUNTER BROILER FEED
₹1,199.00 – ₹1,299.00Price range: ₹1,199.00 through ₹1,299.00Rated 0 out of 5
COUNTER BROILER FEED
₹1,199.00 – ₹1,299.00Price range: ₹1,199.00 through ₹1,299.00Rated 0 out of 5 -
 LACTATING PIG FEED
Rated 0 out of 5
LACTATING PIG FEED
Rated 0 out of 5₹2,299.00Original price was: ₹2,299.00.₹1,740.00Current price is: ₹1,740.00. -
 Maize
Rated 0 out of 5
Maize
Rated 0 out of 5₹1,650.00Original price was: ₹1,650.00.₹1,300.00Current price is: ₹1,300.00. -
 GESTATION PIG FEED (Phase 1)
Rated 0 out of 5
GESTATION PIG FEED (Phase 1)
Rated 0 out of 5₹2,249.00Original price was: ₹2,249.00.₹1,699.00Current price is: ₹1,699.00. -
 Pre Starter Broiler Feed
₹2,399.00 – ₹2,499.00Price range: ₹2,399.00 through ₹2,499.00Rated 0 out of 5
Pre Starter Broiler Feed
₹2,399.00 – ₹2,499.00Price range: ₹2,399.00 through ₹2,499.00Rated 0 out of 5 -
 FINISHER PIG FEED
Rated 0 out of 5
FINISHER PIG FEED
Rated 0 out of 5₹2,299.00Original price was: ₹2,299.00.₹1,749.00Current price is: ₹1,749.00. -
 Broiler Premix
Rated 0 out of 5
Broiler Premix
Rated 0 out of 5₹820.00Original price was: ₹820.00.₹699.00Current price is: ₹699.00.