
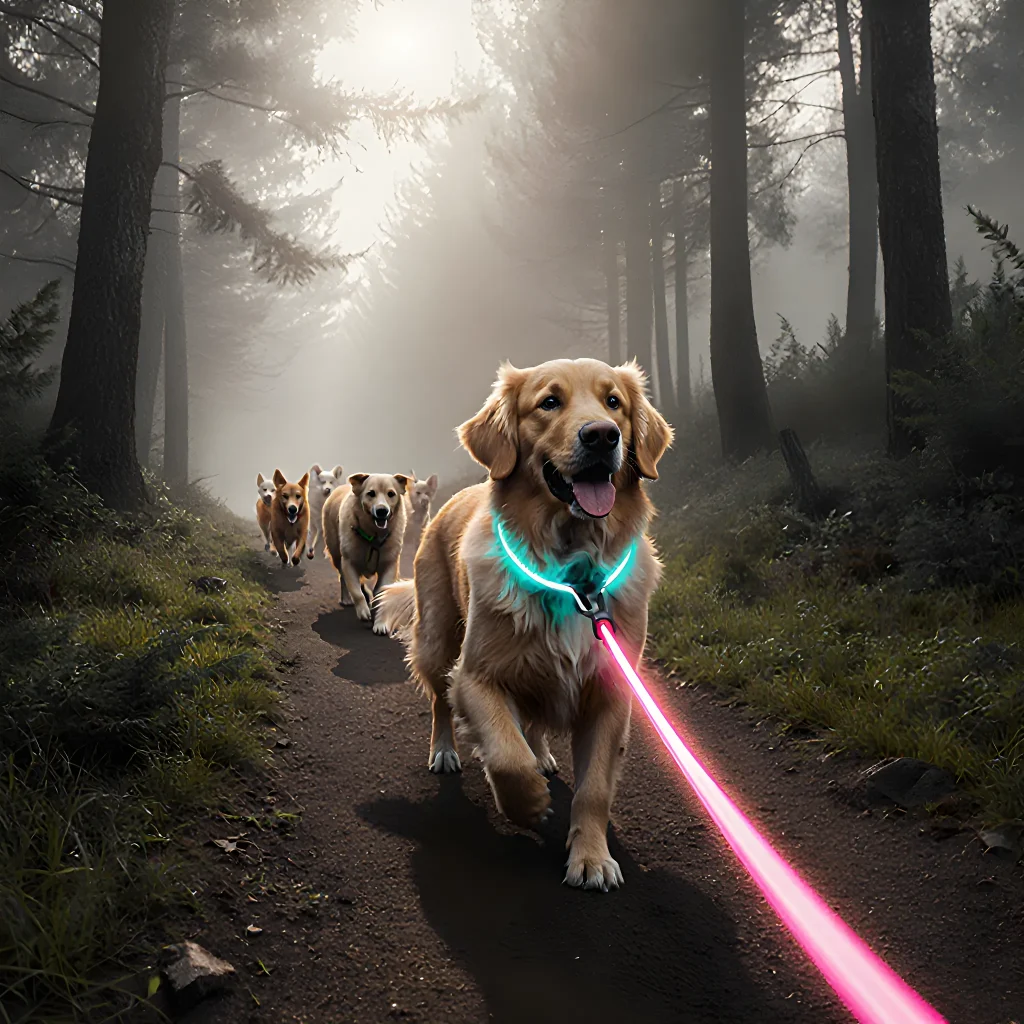
Secure Your Dog’s Adventure Today
Trailblazing Trust: Secrets to Secure Doggy Journeys
Table of Contents
- Introduction: Why Safe Hiking Matters
- Choosing the Right Trail for Your Dog
- Pre‑Hike Health Check and Vaccinations
- Proper Hydration for You and Your Dog
- Essential First Aid Kit Items
- Dog‑Friendly Gear: Leashes, Harnesses & ID Tags
- Choosing the Right Footwear and Clothing for Dogs
- Managing Dog’s Temperature on Hot Days
- Avoiding Dangerous Plants and Wildlife
- Leave No Trace: Proper Waste Disposal
- Emergency Situations: What to Do When Something Happens
- Training Tips for Calm Trail Behavior
- Planning Your Route and Checking Weather Conditions
- Conclusion: Enjoying the Trail Safely Together
- FAQ: Quick Answers for Common Questions
Introduction: Why Safe Hiking Matters
When you hit the trail with your canine companion, safety isn’t just a nice-to-have—it’s an absolute necessity. Trails can be unpredictable: sudden weather shifts, uneven terrain, wildlife encounters, and human traffic all pose risks. A well‑planned, informed hike protects both you and your dog from injury, illness, and even death.
1. Protecting Your Dog’s Health
- Heat Exhaustion & Heat Stroke: Dogs lack sweat glands on their skin, so they rely heavily on panting to cool down.
- Plan hikes for early morning or late afternoon.
- Carry plenty of water and a collapsible bowl.
- Watch for signs: rapid breathing, drooling, lethargy.
- Dehydration: Even short hikes can deplete a dog’s fluid levels.
- Use a water‑weight bottle or a portable pet hydration pack.
- Fill the bowl at every rest stop, not just when thirsty.
- Injuries: Rough trails can cause sprains, cuts, and even broken bones.
- Check your dog’s paws for scratches or foreign objects after each segment.
- Carry a small first‑aid kit with gauze, antiseptic wipes, and tweezers.
2. Ensuring Human Safety on the Trail
- Trail Etiquette: Keep your dog under control to avoid startling other hikers or wildlife.
- Noise Management: Loud barking can disturb the natural serenity and may attract predators.
- Leave No Trace: Clean up after your pet—use waste bags, dispose of them properly, and keep trails pristine.
3. Legal & Ethical Considerations
Many parks now require dogs to be on a leash or have specific rules for dog‑friendly areas. Check local regulations before you go:
- Some trails are strictly off‑limits for pets.
- Leash laws vary—some allow “off‑leash” zones, others require a minimum leash length.
4. Practical Gear Checklist
| Item | Why It Matters | Recommended Brands / Models |
|---|---|---|
| Water Bottle with Built‑in Filter | Ensures clean drinking water on remote trails. | LifeStraw Go, CamelBak M3 |
| Collapsible Bowl or Hydration Pack | Convenient for refilling on the go. | Vargo Collapsible Bowls, GoDogGo Hydration Pack |
| First‑Aid Kit (Pet Edition) | Handles cuts, scrapes, and emergency situations. | Blue-Alert Dog First Aid Kit, Petco Vet First Aid |
| Leash & Harness Combo | Provides control while keeping the dog comfortable. | Mighty Paw LEO, RUFFMAKERS 3‑Way Leash |
| Paw Protection (Boots or Wax) | Protects from hot rocks, ice, and sharp debris. | GoDogGo Paw Gear Boots, BarksBar Paw Wax |
5. Pre‑Trip Planning Tips
- Vet Check: Make sure your dog is up to date on vaccinations and has a recent health clearance.
- Training Refresh: Revisit basic commands—stay, come, heel—to maintain control in challenging environments.
- Route Research: Study trail maps for elevation changes, water sources, and potential hazards.
- Buddy System: If hiking with a group, let someone know your route and expected return time.
By treating safety as an integral part of the adventure rather than an afterthought, you can enjoy the beauty of nature without compromising the well‑being of your beloved dog. The next section will dive deeper into specific Safe Hiking with Dogs: Tips and Gear, equipping you with actionable strategies to keep both of you safe on every trail.
Choosing the Right Trail for Your Dog
Finding a trail that suits both you and your canine companion is essential for a safe, enjoyable outing. Below are practical steps to help you make an informed decision.
1. Assess Your Dog’s Physical Condition
- Age & Health: Puppies and senior dogs need shorter, flatter routes. If your dog has joint issues or a chronic condition, choose a trail with gentle inclines and smooth surfaces.
- Breed Size: Large breeds often tire faster on steep climbs; smaller breeds may be more susceptible to overheating. Match the trail’s difficulty to your dog’s stamina.
- Exercise History: A well-trained, active dog can handle longer distances, while a newer or less-conditioned dog should start with easy loops.
2. Understand Trail Difficulty Levels
Most parks use a color-coded system (green = easy, blue = moderate, black = hard). When selecting a trail:
- Read the official trail guide or website for terrain details.
- Check elevation gain and total length.
- Look for trailhead parking availability and distance from your car.
3. Check Trail Conditions Before You Go
Weather can dramatically alter trail safety:
- Rainy Weather: Muddy paths can be slippery; use traction aids like dog booties.
- Hot Days: Avoid midday hiking. Opt for early morning or late afternoon, and bring plenty of water.
- Check park alerts for trail closures due to wildlife activity or maintenance.
4. Consider the Environment & Wildlife
Some trails run through habitats with snakes, ticks, or aggressive wildlife:
- Use a dog harness and keep your pup on a short leash in high-risk areas.
- Carry a first‑aid kit for bites or stings.
- Keep an eye out for signs of wildlife and respect local regulations (e.g., no dogs near nesting birds).
5. Trail Etiquette & Dog-Friendly Policies
Always check the park’s dog policy before heading out:
- Some trails allow off‑leash play in designated zones; others require leashes at all times.
- Respect other hikers by keeping your dog under control and cleaning up after them.
- If the trail is crowded, consider a less popular route or a later time to avoid congestion.
6. Test the Trail with Short Runs
Before committing to a long hike, do a short test run:
- Observe how your dog handles inclines and turns.
- Check for signs of fatigue or discomfort.
- Use this feedback to adjust the trail length or difficulty for future outings.
7. Use Technology Wisely
Apps like AllTrails, Gaia GPS, and local park apps can provide:
- Trail maps with elevation profiles.
- Recent reviews noting dog-friendliness.
- Real-time weather updates and alerts.
Practical Checklist for Trail Selection
| Factor | What to Look For |
|---|---|
| Dog’s Age & Health | Short, flat loops; low elevation gain. |
| Trail Difficulty Color | Green for beginners; blue or black only if experienced. |
| Weather Forecast | Avoid trails during heavy rain or heat waves. |
| Wildlife Risk | Leash in snake-prone areas; keep dog close to you. |
| Park Dog Policy | Check leash requirements and designated off-leash zones. |
By carefully evaluating these factors, you’ll choose a trail that keeps both you and your dog safe, healthy, and happy on the great outdoors.
Pre‑Hike Health Check and Vaccinations
Before you lace up your hiking boots and put a leash on your canine companion, it’s essential to ensure that both of you are in optimal health. A simple pre‑trip check can prevent discomfort, reduce the risk of disease transmission, and keep the adventure enjoyable for everyone.
Essential Health Checklist
| Item | Recommended Action | Notes & Tips |
|---|---|---|
| Primary Vaccinations | Rabies, Distemper, Parvovirus, Hepatitis, Bordetella (Kennel Cough) | Check the vet’s record for dates and ensure a booster is up‑to‑date. Some regions require proof of rabies vaccination before entering trails. |
| Parasite Prevention | Flea, tick, heartworm preventative (oral or topical) | Apply the preventive a few days prior to hiking; keep product in a sealed container during the trip. |
| Microchip & ID Tags | Confirm microchip number is current and visible ID tags are intact | Replace any worn or missing tags immediately. Keep contact info on your phone and a backup in a waterproof pouch. |
| Physical Examination | Full vet check-up (weight, gait, skin condition) | Look for signs of joint pain or skin irritation that could worsen during hiking. |
| Dental Health | Brush teeth & check for gum disease | A healthy mouth reduces the risk of infections that can spread via saliva. |
Vaccination Timeline (for a new dog)
If you’re bringing a puppy or recently adopted dog, here’s a typical schedule to keep in mind before your first hike:
- 6–8 weeks: First rabies shot, core vaccine series begins.
- 10–12 weeks: Second rabies dose, second round of core vaccines.
- 14–16 weeks: Third core vaccine; consider a booster for kennel cough if your dog will be in group settings.
- 6 months+: Annual rabies booster (or 3‑year booster if approved).
Practical Tips for the Trail
- Carry a Vet’s Contact Info: Keep your vet’s phone number and address on hand. In case of an emergency, you’ll need to act quickly.
- Keep Vaccination Records Accessible: Store a copy in a waterproof folder or digital format (PDF) on your phone.
- Use a First‑Aid Kit: Include items like gauze, antiseptic wipes, tweezers for tick removal, and a small bottle of oral rehydration solution.
- Test Your Dog’s Tolerance: Before the hike, try a short walk in a similar environment to gauge stamina and observe any reactions (e.g., overheating, coughing).
- Hydration & Nutrition: Pack dog‑friendly electrolytes and small treats that are easy to digest. Avoid giving your dog large meals right before the hike.
Case Study: The “Trailblazer” Dog
Meet Max, a 4‑year‑old Labrador mix who loves the outdoors. Prior to his first long‑haul trek, his owner took these steps:
- Verified all core vaccines were current.
- Administered a tick collar and an oral heartworm preventative two weeks ahead of the trip.
- Had Max microchipped and updated the ID tags with his phone number.
- Conducted a vet check‑up that noted mild hip joint wear, leading to a recommendation for low‑impact exercises during the hike.
- Packaged a small first‑aid kit and a bottle of electrolytes.
Result? Max enjoyed a safe, comfortable hike without any health setbacks. The key takeaway: a thorough pre‑hike health check is as important as packing the right gear.
Helpful Resources
- American Veterinary Medical Association (AVMA) – Vaccination Guidelines
- World Health Organization – Dog Parasite Prevention
- PetMD – Dog Vaccination Overview
By taking the time to ensure your dog’s health and vaccination status are in order, you’re setting the stage for a memorable, worry‑free adventure together.
Proper Hydration for You and Your Dog
When you hit the trail, staying hydrated is just as essential for your canine companion as it is for you. A dehydrated dog can suffer from heat exhaustion, muscle cramps, or even life‑threatening conditions like heat stroke. Below are practical tips, real‑world examples, and gear recommendations to keep both of you safely refreshed.
1. Understand the Hydration Needs
- Dogs: A general rule is that a healthy adult dog should drink about 50–60 ml (≈2 oz) of water per kilogram of body weight each day. For example, a 20‑kg dog needs roughly 1–1.2 L daily.
- You: Aim for at least 500 ml (17 oz) of water every hour during moderate activity and increase to 750–1000 ml (25–34 oz) per hour in hot conditions.
2. Timing Your Water Breaks
Plan hydration stops at least every 30 minutes for dogs and every 45 minutes for humans, especially on steep or hot trails.
Example: On a 10‑mile hike with a 15‑kg dog, schedule water breaks at mile markers 2, 5, 7, and 9. Use a portable water bowl to keep the dog comfortable during each stop.
3. Choosing the Right Water Containers
- Dog: A collapsible nylon or silicone bowl (e.g., KONG Collapsible Dog Bowl) is lightweight and easy to pack. Pair it with a water bottle with a built‑in filter for clean water from streams.
- You: A 750 ml insulated hydration pack (e.g., CamelBak Hydration Pack) keeps your water cool and within arm’s reach.
4. Water Quality Matters
Always treat natural water sources with a portable filter or purification tablets (e.g., Sawyer Mini Filter) before giving it to your dog. Dogs are more sensitive to contaminants, and untreated water can lead to gastrointestinal upset.
5. Signs Your Dog Needs More Water
- Dry or sticky gums
- Lethargy or weakness
- Rapid breathing or panting beyond the normal rate (≈35–45 breaths/min for most breeds)
- Red, swollen ears or an excessively warm body temperature (>102 °F)
6. Practical Hydration Hacks
- Freeze Water in Treats: Freeze small portions of water or broth into ice cube trays with a dog treat insert (e.g., Pupford Dog Treat Ice Cubes) to keep your dog cool and hydrated.
- Use a Water Bottle with a Built‑In Bowl: Devices like the Blue Lizard Dog Water Bottle combine a bowl and bottle in one unit, saving space.
- Carry Extra Bottles: Pack at least two spare bottles for yourself and an extra collapsible bowl to replace any that get lost or break.
7. Post‑Hike Hydration Routine
After the trek, refill your dog’s water bowl with fresh water and offer a small snack (e.g., a chilled carrot stick) to encourage drinking. For you, sip on electrolytes or coconut water to replenish lost minerals.
Quick Checklist:
- Check the weather forecast – higher temps = more hydration.
- Pack a collapsible dog bowl + filter bottle.
- Schedule breaks every 30–45 minutes.
- Observe your dog's drinking behavior and body temperature.
- Use insulated packs to keep water cool.
By following these hydration strategies, you’ll both stay safe, energized, and ready for the next adventure on the trail.
Essential First Aid Kit Items
A well‑equipped first aid kit is the safety net that keeps you and your canine companion out of trouble when an unexpected injury or illness occurs. Below are the core items every hiker should include, along with practical tips on how to use them and examples tailored for dogs.
1. Basic First Aid Supplies
- Bandages (non‑adhesive gauze pads, elastic bandage): Use gauze to cover cuts or abrasions and wrap with elastic bandage for joints or sprains. Example: a 4 × 6” gauze pad will fit most paw injuries.
- Adhesive tape (medical grade): Secure gauze in place; choose a skin‑friendly variety to avoid irritation.
- Antiseptic wipes or solution (povidone‑iodine, chlorhexidine): Clean wounds before dressing. For dogs, use a 1:10 dilution of povidone‑iodine and apply with a cotton ball.
- Hydrogen peroxide (3%): Flush out dirt from deeper wounds; do not overuse as it can damage tissue.
- Scissors & tweezers: Trim gauze or remove debris. Use blunt‑tipped scissors for dog’s sensitive skin.
2. Dog‑Specific First Aid Tools
- Paw protection pads: Foam or silicone pads that can be wrapped around a paw to shield a puncture wound from dirt.
- Dog‑sized splint kit (foldable splints, elastic wrap): For fractures of the leg or tail. Example: a pre‑cut 12” splint and a small elastic bandage can immobilize a broken front paw.
- Hydrogel wound dressing: Keeps the area moist for faster healing; ideal for deep cuts that might bleed.
- Heat pack (reusable or disposable): Apply to swollen joints. Warmth improves circulation but ensure it’s not too hot—test with your hand first.
- Dog‑safe pain relief medication: Never give human NSAIDs; instead, carry a veterinarian‑prescribed analgesic if you have one for emergencies.
3. Emergency and Miscellaneous Items
- Emergency blanket (thermal): Keeps both you and your dog warm in case of sudden weather changes.
- Water purification tablets or filter: Prevent dehydration from contaminated water sources.
- Portable phone charger & waterproof pouch: Maintain communication with rescue services.
- First aid manual (dog‑specific guide): Quick reference for treating common hiking injuries. The American Veterinary Medical Association publishes concise guides suitable for outdoor use.
- Emergency contact sheet: Include local wildlife authorities, nearest vet clinic, and your own emergency contacts.
4. How to Use Your Kit on the Trail
- Assess the situation: Quickly determine if the injury is life‑threatening or can be managed with basic care.
- Clean first: Use antiseptic wipes; rinse with clean water if possible. For dogs, avoid scrubbing too hard—use gentle strokes.
- Dress the wound: Apply gauze and secure with elastic bandage or adhesive tape. Keep pressure light to allow circulation.
- Monitor for complications: Watch for signs of infection (redness, swelling, discharge) or worsening pain.
- Seek professional help if needed: If the injury is severe, consider calling local wildlife services or heading back to a vet clinic. Dogs with broken bones or internal bleeding often require immediate veterinary attention.
5. Quick Packing Checklist
- 4 × 6” gauze pads – 10 packs
- Elastic bandage (8” wide) – 2 rolls
- Medical tape – 1 roll
- Antiseptic wipes – 1 pack
- Hydrogen peroxide – 1 bottle (3%)
- Scissors & tweezers – 1 set
- Paw protection pads – 4 pieces
- Dog splint kit – 1 set
- Hydrogel dressing – 2 sheets
- Heat pack – 1 (reusable)
- Emergency blanket – 1
- Water filter or tablets – 5 tablets
- Portable charger & pouch – 1 each
- First aid manual – 1 copy
- Emergency contact sheet – printed and laminated
By tailoring your first aid kit to the unique needs of both you and your canine companion, you’ll be better prepared for any mishap that might occur on the trail. Remember: prevention is always preferable—keep your dog’s vaccinations up‑to‑date, check for ticks before and after hikes, and keep an eye out for signs of heat exhaustion or dehydration.
Dog‑Friendly Gear: Leashes, Harnesses & ID Tags
When you’re planning a hike with your canine companion, the right gear can make all the difference between a safe adventure and an uncomfortable situation. Below is a practical guide to choosing leashes, harnesses, and ID tags that keep your dog secure, comfortable, and easily identifiable on any trail.
1. Leashes
- Standard 4‑ft leash: Ideal for short walks around the campsite or when you need quick control in crowded sections of a trail. Look for braided nylon or polyester with a sturdy metal clip.
- Long‑line (10–15 ft): Gives your dog more freedom while still maintaining safety. Great for open meadows or when you want to let them sniff without losing control. Use a swivel connector on the end to prevent tangling.
- Retractable leashes: Convenient for urban hikes but can be risky on uneven terrain. Only use them if you’re comfortable re‑tensioning frequently and if the dog is well trained to stay within range.
2. Harnesses
A harness distributes pressure evenly across your dog’s chest, reducing strain on the neck—especially important for breeds prone to respiratory issues or those with short snouts.
- Back‑clip harness: The most common type; attach the leash to the back. Works well for dogs that pull less and for familiar trails.
- Front‑clip harness (e.g., Thundershirt, Martingale): Adds a gentle corrective force when the dog pulls, making it easier to keep them close on steep or narrow paths.
- Step‑in harness: Quick and comfortable for dogs that like to jump in and out of gear. Ensure it has a secure locking mechanism to prevent accidental release.
3. ID Tags
Your dog’s identification tag is the first line of defense if they wander off the trail. Follow these best practices:
- Include full contact details: Owner name, phone number, and a secondary email address.
- Use a durable material: Stainless steel or titanium tags resist corrosion from sweat, rain, and trail mud.
- Add a microchip: Complement the tag with a microchip that contains your contact info. Most shelters can scan it even if the dog is far away.
- Consider a reflective or glow‑in‑the‑dark tag: Enhances visibility during dawn, dusk, or low‑light conditions.
Practical Tips for Gear Selection
- Test fit before the hike: Let your dog wear the harness and leash in a controlled environment to check for chafing or discomfort.
- Check weight limits: Leashes and harnesses often have maximum weight ratings. Exceeding these can lead to breakage.
- Pack extras: Bring at least one spare leash, a quick‑release clip, and an extra ID tag in case of loss or damage.
- Clean after each use: Wash nylon leashes with mild soap and let them dry completely to prevent mildew.
By investing in quality leashes, harnesses, and reliable ID tags—and by following these practical guidelines—you’ll ensure a safe, enjoyable hike for both you and your furry friend.
Choosing the Right Footwear and Clothing for Dogs
While many dogs can traverse most terrains on their own, a well‑designed pair of dog boots or specialized clothing can dramatically improve comfort, safety, and performance. This section breaks down the key factors to consider, offers real‑world examples, and gives practical advice on selecting gear that fits both your dog's needs and the hiking environment.
1. Assess Your Dog’s Physical Characteristics
- Size & Weight: Small dogs (under 20 lb) often benefit from lightweight boots with minimal ankle support, whereas larger breeds may need reinforced soles and more robust lacing systems.
- Paw Anatomy: Dogs with webbed feet or flat pads can struggle on rocky surfaces; look for boots that offer extra traction and cushioning in these areas.
- Health Conditions: If your dog has joint issues, arthritis, or a history of paw injuries, choose boots with anti‑slip soles and padded interiors to reduce impact forces.
2. Match the Gear to Terrain & Climate
| Terrain / Climate | Recommended Boot Type | Key Features |
|---|---|---|
| Rocky, uneven trails (dry) | Sturdy rubber‑sole boots with reinforced toe caps | Deep tread pattern, anti‑slip grip, breathable mesh lining |
| Sandy or gravel beaches | Lightweight foam boots | Quick‑dry material, wide toe box for sand intrusion protection |
| Wet, muddy paths | Waterproof boots with drainage holes | Neoprene or PVC outer shell, vented lining to prevent overheating |
| Cold, snowy conditions | Insulated hiking boot | Flannel or fleece lining, rubber outsole with high traction, optional ankle support |
3. Understand the Build Materials
Different materials serve distinct purposes:
- Neoprene: Offers flexibility and warmth but may not be ideal for hot, dry trails.
- PVC & Rubber: Durable and waterproof; best for rugged terrains.
- Foam (EVA or polyurethane): Lightweight and cushioned, suitable for short hikes or warm weather.
- Cork or natural fibers: Eco‑friendly options that adapt to paw shape but may need more frequent cleaning.
4. Proper Fit & Adjustment Techniques
- Measure the Paw: Use a tape measure to find the length (heel to tip of longest toe) and width (across the widest part).
- Try on Shoes: Have your dog walk around in the boots while you observe for signs of slipping or rubbing.
- Lacing & Fastening: For lace‑up boots, ensure the loops are snug but not tight; Velcro models should hold without leaving deep indentations.
- Check for Heat Build‑Up: On hot days, remove boots after a short test walk and feel the inside lining. If it’s too warm, consider a lighter model or a break‑in period with gradual exposure.
5. Practical Examples & Product Highlights
- Ruffwear Dog Boots: Known for their ruggedness and variety of sizes; the “Hiker” model includes a silicone outsole for excellent traction on rocky trails.
- Blue-9 Dog Shoes: Their “Keen” line offers breathable mesh construction, ideal for hot climates or beach hikes.
- Outward Hound Paws & Claws Waterproof Boots: A budget option with a simple Velcro strap and a removable lining that can be washed separately.
6. When to Use Clothing Instead of Boots
If your dog’s paws are naturally well‑protected, or if you’re tackling mild trails, lightweight clothing may suffice:
- Dog T-Shirts & Vests: Protects from sunburn and insects; choose moisture‑wicking fabrics like polyester blends.
- Insulated Jackets: For cold weather or high altitudes; look for adjustable waist ties to keep the garment snug without restricting movement.
7. Maintenance & Longevity Tips
- After each hike, rinse boots with lukewarm water and a mild soap to remove dirt and debris.
- Let them air‑dry away from direct sunlight; excessive heat can warp rubber soles.
- Inspect laces or Velcro regularly for wear and replace as needed to maintain secure fit.
8. Final Checklist Before Your Next Hike
- [ ] Measure paws accurately.
- [ ] Select gear matching terrain/climate.
- [ ] Ensure a snug but comfortable fit.
- [ ] Test on a short trail before the full excursion.
- [ ] Pack spare socks or boot liners for cleaning.
By thoughtfully selecting footwear and clothing that align with your dog's unique characteristics and the hiking conditions, you’ll give them the best chance of enjoying every step safely and comfortably.
Managing Dog’s Temperature on Hot Days
When the mercury climbs, your dog’s body temperature can rise quickly—especially if they’re a short‑haired breed or have a thick coat. The key is to keep them hydrated, cool, and out of direct heat for as long as possible.
1. Know Your Dog’s Heat Tolerance
- Breed factors: Flat‑nose breeds (e.g., Bulldogs, Boxers) are more prone to overheating because they breathe through their mouths.
- Age & health: Puppies and senior dogs have less efficient thermoregulation. Dogs with heart or lung disease should avoid high temperatures altogether.
2. Hydration Strategies
- Carry enough water: Use a collapsible bowl and at least 1 liter per dog per hour of activity.
- Add electrolytes: A pinch of salt or commercial electrolyte tablets can replace sodium lost through panting.
- Frequent breaks: Stop every 15–20 minutes to let your dog drink and cool down.
3. Cooling Gear
- Cooling vests & bandanas: Made from moisture‑wicking fabrics or phase‑change materials that absorb heat.
- Ice packs: Wrap a reusable pack in a towel and place it on the dog’s neck or belly. Replace every 20–30 minutes.
- Wet towels: Drape over the body during breaks; replace when dry.
4. Trail Selection & Timing
Choose trails with ample shade and avoid midday heat (10 am–2 pm). Early morning or late afternoon hikes keep temperatures lower and reduce UV exposure.
5. Monitor for Signs of Heat Stress
| Symptom | Description |
|---|---|
| Excessive panting or rapid breathing | Immediate cooling needed. |
| Drooling, vomiting, or diarrhea | Seek veterinary care. |
| Lethargy or collapse | Stop activity and cool immediately. |
6. Post‑Hike Recovery
- Give a light snack of bland food (boiled chicken & rice) to replenish energy without overloading the digestive system.
- Offer fresh water and let them rest in shaded areas for at least an hour.
- Check for signs of dehydration—dry gums, sunken eyes—and contact a vet if concerned.
Practical Gear Checklist
- Collapsible water bowl + extra water bottles
- Cooling vest or bandana
- Reusable ice packs & towel wraps
- First‑aid kit with heat‑stroke supplies (e.g., saline, electrolyte solution)
- Reflective collar and leash for visibility during low light conditions
By preparing properly and staying vigilant, you can keep your canine companion safe and comfortable even on the hottest hiking days.
Avoiding Dangerous Plants and Wildlife
Even the most well‑planned dog hike can turn into a health scare if you or your pup encounter toxic plants or aggressive wildlife. Below are concrete steps to keep both of you safe, plus gear suggestions that make spotting hazards easier.
1. Know the Common Toxic Plants in Your Region
- Poison Ivy (Toxicodendron radicans): Look for the classic “Leaves of three, let it be” sign. It thrives in shaded woods and along stream banks.
- Poison Oak & Poison Sumac: These have similar bark and leaf patterns but grow at different elevations—oak in lowlands, sumac higher up.
- Dandelion (Taraxacum officinale): While often harmless to humans, some dogs may develop stomach upset if they chew large amounts.
**Practical Tip:** Carry a pocket guide or a mobile app that identifies plants by photo. Apps like iNaturalist or PlantSnap allow you to quickly verify whether a plant is safe for your dog.
2. Watch Out for Aggressive Wildlife
- Bears (Black & Grizzly): Keep a safe distance, especially in berry‑bearing areas. Use bear spray and learn how to deploy it correctly.
- Coyote & Mountain Lion: These predators are more likely to be active at dawn or dusk. Maintain eye contact with your dog; avoid sudden movements.
- **Insects**: Mosquitoes, ticks, and black flies can carry Lyme disease, Rocky Mountain spotted fever, and other illnesses.
Practical Tip:** Keep your dog leashed in high‑traffic or known predator zones. For long hikes, use a sturdy retractable leash (at least 30 ft) to allow freedom while keeping control.
3. Equip Yourself with Protective Gear
- Dog Boots & Footwear: Prevent paw burns from hot rocks and protect against sharp plant stems or snake bites. Look for waterproof, breathable materials with a good grip.
- Leash Guard / Bite Deterrent: Attach a bite guard to the leash; it’s a simple rubber sleeve that reduces the force of an unexpected snap.
- Tailored First‑Aid Kit: Include plant sting pads, antihistamine spray (for dogs), tick removal tweezers, and a small bottle of hydrogen peroxide for minor wound cleaning.
4. Pre‑Trip Preparation: Scouting & Research
- Map the Trail: Identify water sources (streams, ponds) where poisonous plants often grow.
- Check Wildlife Reports: Many state park websites list recent bear or cougar sightings. Adjust your route if necessary.
- **Training Session**: Teach your dog to stay on the left side of the trail and to avoid approaching any vegetation that appears out of place.
5. During the Hike: Stay Alert & Keep Calm
- Use a headlamp or flashlight if you’re hiking near dusk; this helps you spot insects and see any plant dangers before your dog does.
- If you encounter a bear, remain calm, make yourself appear larger, and slowly back away. Never run—this triggers chase instincts.
- When your dog shows signs of irritation (scratching, licking paws, swelling), stop immediately, clean the area with cool water, and apply a pet‑safe anti‑itch cream.
6. Post‑Hike Care
- Inspect Your Dog’s Paws & Skin: Look for stuck debris or plant matter. Use tweezers to remove any foreign objects carefully.
- Check for Tick Bites: Ticks can hide in fur; use a tick remover tool and check under the collar, around ears, and inside the legs.
- **Report Any Incidents**: If you suspect your dog has ingested something toxic or was bitten by wildlife, contact your veterinarian immediately. Provide details of the location and any visible symptoms.
By combining knowledge, proper gear, and mindful hiking habits, you’ll reduce the risk of plant and wildlife encounters—making every trail adventure a safe, enjoyable experience for both you and your four‑legged companion.
Leave No Trace: Proper Waste Disposal
When hiking with your dog, waste management is not just a matter of cleanliness—it's a core principle of the Leave No Trace (LNT) ethic. Improper disposal can harm wildlife, pollute water sources, and degrade the trail experience for others.
Why It Matters
- Water Quality: Dog feces contain pathogens that can contaminate streams, lakes, and groundwater. Even a single excrement left on a trail can introduce bacteria such as E. coli into the water system.
- Ecosystem Health: Nutrient loading from pet waste can alter soil chemistry, favoring invasive plant species over native flora.
- Human Safety: Accumulated dog waste attracts pests and can spread zoonotic diseases to hikers and campers.
Practical Steps for Responsible Disposal
- Carry a Waste Bag or Biodegradable Pouch:
Most pet stores sell sturdy, resealable waste bags. For eco‑friendly options, look for biodegradable pouches that break down in 60–90 days.
- Use the “Pack It In, Pack It Out” Rule:
Never leave dog waste on the trail or in a natural water source. Even if you’re short on time, find a nearby restroom or designated pet‑waste station.
- Follow the 3–4 ft Rule (or 5 ft in some areas):
Leave at least 3 feet between your dog’s waste and any water source. In high‑traffic or sensitive zones, increase that distance to 5 feet.
- Use the “Scoop & Seal” Method:
- Scoop the waste into a bag with a sharp plastic knife.
- Seal the bag tightly and tie it securely.
- If you’re in an area where bags are not permitted, place the sealed bag in a waterproof container or a dedicated dog waste bin.
- Dispose at Designated Pet Waste Stations:
Many parks and campgrounds have bins labeled “Dog Waste.” These are often lined with absorbent material to prevent leakage. If none exist, bring a small, sealable container for later disposal.
- Consider a Dog‑Friendly Portable Toilet:
For longer trips or remote locations, devices like the Doggie Doo Doo or TinyTote allow you to deposit waste in a sealed container that can be buried (if permitted) or disposed of later.
- Leave No Trace on Trail Etiquette:
- Inform fellow hikers if you’re using a portable toilet—some camps prefer no dog waste near their cabins.
- Never leave the bag or container open; always seal it immediately after use.
- If you notice an unattended pet waste on the trail, take responsibility and clean it up yourself.
- Educate Your Dog:
Train your dog to respond to a “go potty” cue before you leave. Consistent training reduces the chances of accidental waste during hikes.
Gear Checklist for Waste Disposal
| Item | Why It Matters |
|---|---|
| Biodegradable waste bags (2–3 lbs each) | Reduces plastic pollution; quick to use. |
| Sharp plastic knife or multi‑tool with a cutting edge | Scoops efficiently without tearing the bag. |
| Sealable plastic container (15–20 oz) | For areas where bags are not allowed; can be buried or carried to disposal point. |
| Dog‑friendly portable toilet or waste station kit | Convenient for long trips or remote locations. |
| Waterproof bag or dry sack | Protects waste from rain and keeps the trail clean. |
Case Study: The Blue Ridge Trail
During a recent 10‑day backpacking trip on the Blue Ridge, we encountered an area with no pet waste stations. We used our portable toilet kit to deposit waste in a sealable container, then buried it at least 6 ft from any water source and more than 30 ft away from trailheads. This practice complied with the park’s LNT guidelines and ensured that future hikers would not encounter unsanitary conditions.
Final Thoughts
Proper waste disposal is a simple yet powerful way to respect nature, protect wildlife, and keep trails enjoyable for everyone. By planning ahead, carrying the right gear, and following LNT principles, you can confidently enjoy safe hiking adventures with your canine companion while leaving no trace behind.
Emergency Situations: What to Do When Something Happens
Even with the best preparation, accidents can happen on the trail. Knowing how to react quickly and calmly can turn a potentially dangerous situation into a manageable one. Below are common emergencies you might encounter while hiking with your dog, along with step‑by‑step guidance and gear recommendations.
1. Dog Pulls Off Trail or Gets Lost
- Stop and Stay Calm: Dogs often panic when they’re off‑path. Avoid running, which can trigger a chase response.
- Use Your Voice & Treats: Call your dog’s name in a calm tone, then offer a treat or favorite toy to lure them back.
- Mark the Spot: Drop a piece of your trail mix or a scented item (e.g., a small bottle of water with a citrus scent) to help you locate the spot later.
- Check for Injuries: Once found, inspect paws, ears, and any visible wounds. If you suspect an injury, keep the dog still and move to a safe area before applying first aid.
Gear Tip: Carry a portable GPS tracker that can be attached to your dog’s collar. Many models sync with a smartphone app so you can trace their last known location even if they wander off the trail.
2. Dog Suffers from Heat Stroke
- Move to Shade: Immediately find a shaded area or bring your dog under a tree.
- Cool the Body: Gently apply lukewarm water (not cold) to the paws, ears, and belly. Use a wet towel if you have one; avoid using ice as it can shock the system.
- Hydration: Offer small sips of cool water. Do not force-feed large amounts; this could induce vomiting.
- Seek Veterinary Help: If your dog shows signs of collapse, seizures, or unresponsiveness, call for emergency veterinary services immediately.
Gear Tip: Pack a small cooling vest designed for dogs. These vests contain gel packs that keep the dog’s core temperature down during hot weather hikes.
3. Dog Gets Injured
- Assess the Injury: Check for bleeding, swelling, or obvious deformities.
- Apply a Bandage: Use a clean gauze pad and a flexible bandage (like a roll‑up elastic) to immobilize the limb. If you’re unsure how to wrap it, use your first aid guide as a reference.
- Keep Calm & Quiet: Dogs can feel more pain when stressed; speak softly and keep movements minimal.
- Transport Safely: Place the dog in a dog stretcher or a padded bag if you have to move them. Keep the injured limb supported.
- Seek Veterinary Care: Even minor injuries should be checked by a professional, especially if the dog shows signs of limping or pain after rest.
Gear Tip: A compact first aid kit for dogs should include gauze, non‑adherent bandages, tweezers, and antiseptic wipes. Some kits also come with a small splint or a “dog rescue strap” that helps stabilize limbs during transport.
4. Dog Ingests Poisonous Plant or Substance
- Identify the Source: If you know what was ingested, keep a note of it (e.g., “dandelion leaves” or “unknown plant”).
- Check for Symptoms: Vomiting, diarrhea, excessive drooling, lethargy, or seizures are red flags.
- Do Not Induce Vomiting Without Guidance: Some substances can cause more damage if vomited. Call your vet or the local poison control hotline first.
- Bring a Sample: If possible, bring a small sample of the plant or substance for identification.
- Seek Immediate Veterinary Care: Even mild symptoms can worsen quickly.
Gear Tip: Keep a poison guidebook or download an app that identifies local poisonous plants. A small notebook for jotting down observations can also be helpful in emergencies.
5. Dog Faces Weather‑Related Emergencies
- Cold Exposure: If your dog shows shivering or lethargy in cold weather, move to a sheltered spot and wrap them in a warm blanket.
- Wind & Storms: Seek natural shelter (e.g., a hollow log or thick shrub) and keep the dog close to you. Avoid standing on wet rocks which can cause slips.
- Flash Flood: If water starts rising quickly, move uphill or onto higher ground immediately. Even shallow water can be dangerous for dogs with weak swimming ability.
Gear Tip: A lightweight dog rain jacket and a wind‑proof collar will keep your dog protected during sudden weather changes. Also, carry a small, portable first aid kit for cold injuries, including a heat pack and a warm towel.
Training Tips for Calm Trail Behavior
Even the most well‑bred dog can become anxious or overstimulated when exposed to the sights, sounds, and smells of a trail. By building confidence in a controlled setting before you hit the wilderness, you’ll help your companion stay relaxed and focused during hikes.
1. Establish Basic Obedience First
- Recall (Come When Called): Practice short‑distance recalls in a quiet yard or park. Use high‑value treats or a favorite toy as the reward. Gradually increase distance and add distractions.
- Loose‑Leash Walking: Teach your dog to walk beside you without pulling. Start in a low‑traffic area, rewarding with treats every 5–10 steps. Consistency is key—every time you go for a walk, reinforce the behavior.
- Leave It / Stay: These commands help you control impulsive reactions to food or interesting objects on the trail.
2. Use Positive Reinforcement
Dogs are motivated by rewards, not punishment. Whenever your dog displays calm behavior—such as keeping a steady pace, staying in your sight line, or ignoring distractions—reward immediately with a treat, praise, or a quick play session.
Example Routine:
- Walk to a quiet spot on the trail.
- Ask for “Sit” and reward if they comply.
- Let them sniff around briefly, then ask for “Stay.”
- If they remain still, give a treat and verbal praise.
3. Gradual Exposure to Trail Stimuli
Build tolerance by exposing your dog to the sights, sounds, and smells of trails in short bursts:
- Sight: Show them images or videos of hiking scenes while rewarding calmness.
- Sound: Play recordings of running water, bird calls, or distant traffic at low volume.
- Smell: Introduce scents like pine or wet soil using scented wipes or essential oil diffusers (ensure they’re safe for dogs).
4. Practice “Set” and “Back” Commands
On uneven terrain, you’ll want your dog to stay in a set position while you navigate obstacles.
- Command “Set” (or “Down”) at the base of a rock or fallen log.
- Reward for staying put.
- After a few seconds, give the “Back” command to move away safely.
5. Keep Training Sessions Short and Fun
A dog’s attention span is limited—especially when excited by new environments. Aim for 10–15 minute sessions with plenty of breaks. End on a positive note so your dog looks forward to the next training session.
- Retractable Leash (e.g., Flexi): Allows freedom while maintaining control—ideal for exploring open fields without risking a runaway dog.
- Head Halter or Harness: Gives you gentle guidance on the leash and reduces pulling.
- Portable Water Bowl & Hydration Pack: Keeping your dog hydrated prevents fatigue and agitation.
- Toy/Distraction Items: A chew toy or puzzle treat can keep a curious dog occupied during long stretches.
Practical Checklist Before Your Next Hike
- Verify that your dog’s basic commands work in a low‑stimulus environment.
- Pack a small training kit: treats, a favorite toy, and a clicker if you use clicker training.
- Bring a portable water source for both you and your dog.
- Check the weather forecast—avoid extreme heat or cold that could overstimulate your dog.
By combining structured training with thoughtful gear selection, you’ll create an environment where both you and your canine companion can enjoy the trail safely and calmly.
Planning Your Route and Checking Weather Conditions
A well‑planned hike is the foundation of a safe, enjoyable adventure for both you and your dog. Before setting out, take time to map out every detail: trail length, elevation gain, water sources, and potential hazards. Pair this with real‑time weather monitoring so you can adapt on the fly.
1. Selecting the Right Trail
- Assess Difficulty: Use guidebooks or apps (AllTrails, Gaia GPS) to gauge trail difficulty ratings. A “moderate” trail may still be too steep for a large breed.
- Check Dog‑Friendly Signage: Look for trails that explicitly allow dogs or have designated off‑trail areas where you can give your pet some wiggle room.
- Distance & Time: Plan a loop or out‑and‑back that fits within the dog’s stamina. For example, a 4‑mile loop with a 1,000‑foot elevation gain might take an average adult 2 hrs; add 15–20% extra time for your dog.
- Water & Food Sources: Map out natural water bodies and plan where you’ll refill or carry enough water for both of you. Remember the “Rule of Three”: bring at least three gallons per person, plus one gallon per dog.
2. Preparing a Detailed Route Plan
- Create a Turn‑by‑Turn Map: Print or save a GPS track that includes waypoints such as water sources, scenic overlooks, and potential rest spots.
- Leave a Trail Log: Write down the expected start time, trailhead coordinates, estimated finish time, and any points of interest. Share this with a friend or family member.
- Plan for Emergencies: Identify the nearest ranger station, medical facility, or cell‑service drop‑off point along your route.
3. Checking Weather Conditions
Weather can change rapidly in mountainous or coastal areas. Use multiple sources to get a comprehensive forecast.
- National Weather Service (NWS) or Local Meteorological Services: Check for severe weather alerts, temperature ranges, and precipitation forecasts.
- Weather Apps with Real‑Time Radar: Apps like AccuWeather or Weather Underground allow you to view radar overlays directly on your trail map.
- Microclimate Considerations: Remember that valleys can be cooler and windier than ridges; plan gear accordingly.
Practical Example: A Day Trip in the Cascades
Suppose you’re planning a 6‑mile loop at Mount St. Helens with your Labrador mix. You check the NWS forecast and see a low probability of rain but a chance of afternoon thunderstorms. On your GPS app, you plot water sources every 1.5 miles and mark a shaded rest area near the summit. In case the weather turns bad, you have an alternate shorter loop (3 mi) that stays below the ridge line, reducing exposure to wind.
Gear Checklist for Weather Preparedness
- Dog‑Friendly Rain Jacket: Lightweight, breathable, and with a hood.
- Waterproof Boots for You: Prevent slipping on wet rocks.
- Thermal Layer: In case temperatures drop unexpectedly.
- Reflective Vest or Harness: For low‑light conditions, especially if you’re hiking near dusk.
4. Adapting On the Trail
Even with meticulous planning, situations can change. Keep these points in mind:
- Stop If Weather Deteriorates: If a storm rolls in, seek immediate shelter—under a sturdy tree or inside a natural alcove.
- Use the Buddy System: If you’re hiking with another person, keep track of each other’s dogs. If one dog gets lost, both can search together.
- Hydration Check: In hot weather, a dog may need twice the water of a human; monitor signs of overheating (panting, drooling).
By combining thoughtful route planning with vigilant weather monitoring, you’ll ensure that both you and your canine companion stay safe, comfortable, and ready to enjoy every moment on the trail.
Conclusion: Enjoying the Trail Safely Together
When you hit the trail with your canine companion, the experience can be incredibly rewarding—long walks, fresh air, and a bond that deepens with every step. Yet, safety should always remain at the top of your checklist. By combining thoughtful preparation, mindful hiking habits, and the right gear, you’ll ensure both you and your dog stay healthy, happy, and ready for many adventures ahead.
1. Pre‑Trip Planning
- Vet Check‑In: Before a long hike, have your dog’s vaccinations up to date and discuss any health concerns with your veterinarian. A quick wellness exam can catch issues that might flare up on the trail.
- Trail Research: Look for dog‑friendly routes that match your dog’s fitness level. Check for water sources, shade, and potential hazards (e.g., cliffs, loose rocks).
- Pack a Safety Kit: Include a first aid kit for both you and your dog, spare leashes, extra harnesses, a portable water bowl, and a few treats to keep morale high.
2. On the Trail: Practical Tips
- Leash Management: Keep your dog on a short leash (6–8 ft) near busy trail sections or wildlife. Use a harness instead of a collar to reduce neck strain.
- Hydration: Carry at least 1 L of water per person and an equivalent amount for your dog. Hydration packs with built‑in bowls are especially handy on steep climbs.
- Watch the Weather: Sudden storms can be dangerous—bring a rain jacket, extra layers, and avoid hiking during peak heat hours (10 a.m.–4 p.m.).
- Leave No Trace: Carry out everything you bring in. Dispose of waste properly and respect wildlife by keeping a safe distance.
3. Gear Essentials for Dogs
| Item | Why It Matters |
|---|---|
| Comfortable Harness | Distributes pressure evenly and prevents neck injury. |
| Dog‑Friendly Backpack | Allows your dog to carry a small water bottle or snack pack. |
| Cooling Vest/Bandana | Helps regulate body temperature on hot days. |
| Reflective Gear | Improves visibility during dawn, dusk, or low‑light conditions. |
| First Aid Supplies | Bandages, antiseptic wipes, and a quick reference guide for common injuries. |
4. Post‑Hike Care
- Check your dog’s paws for cuts or debris—trim nails if necessary.
- Rehydrate and offer a balanced meal within an hour of finishing.
- Review the day’s highlights: what went well, any challenges, and how you can improve next time.
By incorporating these strategies into your routine, you’ll not only protect your dog’s health but also create lasting memories on the trail. Happy hiking!
FAQ: Quick Answers for Common Questions
- What’s the best time of day to hike with my dog?
-
Early morning or late afternoon are ideal because temperatures are cooler and there is less wind. In summer, aim for before 9 am or after 4 pm. During winter, daylight hours are shorter; choose a route that allows you to finish before dusk.
- How do I prepare my dog’s gear for a long trail?
-
- Backpack: A 10‑15 lb pack is enough for most dogs. Pack water, treats, a first‑aid kit, and an extra pair of shoes.
- Hydration: Use a collapsible bowl or a dog‑specific hydration bladder (e.g., PetSafe Drinkwell) to keep fresh water on hand.
- Food & Treats: Bring high‑energy snacks like peanut‑butter treats, freeze‑dried meat, or commercial trail foods. Aim for 5–10% of the dog’s daily calories per hour of hiking.
- Protection: Consider a lightweight rain jacket if weather is unpredictable and a reflective vest for low‑light conditions.
- What should I do if my dog starts to overheat?
-
Look for signs: excessive panting, drooling, lethargy, or a warm nose. Immediately:
- Move your dog to shade.
- Offer small amounts of water (1–2 oz per 10 lb).
- Use cool (not cold) water on the paws and belly; avoid using ice‑cold water which can shock the system.
- If symptoms persist, seek veterinary help immediately—heat stroke is a medical emergency.
- Can I bring my dog to all state parks?
-
Most parks allow dogs on trails but have specific rules:
- Leash requirements: Usually a 6‑ft leash in developed areas; some backcountry routes permit off‑leash.
- Permits: Certain high‑traffic parks (e.g., Yosemite) require a dog permit for trails longer than 5 mi.
- Trail restrictions: Dogs may be banned on some water crossings or in wildlife protection zones. Always check the park’s official website before heading out.
- What kind of footwear should I wear with my dog?
-
A good pair of hiking boots offers ankle support, waterproofing, and traction on rocky or muddy terrain. Consider:
- Durable outsole: Vibram or similar rubber provides grip.
- Waterproof membrane: Gore‑Tex keeps feet dry in wet conditions.
- Weight: Lighter boots reduce fatigue; a 1–2 lb difference can matter on long hikes.
- How do I keep my dog’s paws safe?
-
Paw protection is essential, especially on hot or rocky trails:
- Dog booties: Use breathable booties for hard surfaces.
- Paw balm: Apply a pet‑safe wax (e.g., Petroleum jelly) before hiking to protect against hot stones and ice.
- Check after each break: Look for cuts, blisters, or foreign objects lodged between pads.
- Is it safe to hike with a senior dog?
-
Yes—just adjust the plan:
- Shorter distance: Limit to 2–3 mi or fewer.
- More frequent rests: Stop every 15–20 minutes.
- Avoid steep climbs: Choose flatter trails and use a harness for better weight distribution.
- What should I bring if we’re going on an overnight hike?
-
Beyond the usual gear, add:
- Dog tent or tarp: A lightweight dog‑specific shelter protects against wind and rain.
- Sleeping pad & blanket: Keep paws warm and insulated from cold ground.
- Water purification tablets: Treat river water before drinking.
- Can I train my dog to use a harness while hiking?
-
Yes—start with short indoor sessions. Use positive reinforcement and gradually increase distance. A 3‑point harness (shoulder, chest, belly) distributes pressure evenly and prevents strain on the neck.
- What should I do if my dog gets lost?
-
- Stop immediately: Turn around and retrace your steps.
- Call out their name: Use a calm, firm voice.
- Check for microchip or ID tags: Contact local shelters if needed.
- Use scent trails: Leave familiar items (e.g., a blanket) to help the dog find its way back.
Categories
- AI & Enrichment Play
- Broiler Farming
- Broiler Farming Tips
- Canine Wellness & Longevity
- Cat
- Cat & Human Connection
- Cat Adoption & Rescue
- Cat Breeds
- Cat Breeds & Personalities
- Cat Care & Health
- Cat Grooming & Hygiene
- Cat Lifestyle & Environment
- Cat Myths & History
- Cat Nutrition & Diet
- Cat Products & Reviews
- Cat Training & Behavior
- Comparison
- Consumer Awareness
- Dog
- Dog Accessories & Products
- Dog Adoption & Rescue
- Dog Breed & Lifestyle Trends
- Dog Breeding & Puppies
- Dog Entertainment & Media
- Dog Fashion & Trends
- Dog Fun & Lifestyle
- Dog Grooming & Hygiene
- Dog History & Culture
- Dog Myths, Science & Future Tech
- Dog News & Trends
- Dog Nutrition & Food
- Dog Psychology & Emotions
- Dog Safety & Security
- Dog Sports & Activities
- Dog Technology & Innovation
- Dog Training for Modern Owners
- Dog Travel & Adventure
- Dog Travel, Adventure & Culture
- Economic and Market Insights
- Educational Content
- FAQs
- Feeding Alternatives
- Festivals & Seasonal Ideas
- Fun & Entertainment
- General Knowledge
- General Pig Farming
- Health & Disease Management
- Housing and Environment
- Kittens
- Market Insights
- Miscellaneous
- Miscellaneous
- Motivational
- pig
- Pig Breeding
- Pig Breeds
- Pig Farming Stories and Inspiration
- Pig Health and Care
- Pig Nutrition
- Pig Products
- Profitability & Business
- Puppy Care
- Puppy Predictable Topics Reinvented
- Regional Focus
- Rescue & Adoption Buzz
- Senior Cats
- Senior Dog Care
- Smart Dog Tech & Gadgets
- Sustainability
- Sustainable & Eco-Friendly Dog Products
- Tech & Innovations
- Working & Service Dogs
- Broiler Feed66 products
- Country Feed33 products
- Pig Feed66 products
- Product22 products
- Raw Materials99 products
Products
-
 Fish Meal
₹1,999.00 – ₹2,999.00Price range: ₹1,999.00 through ₹2,999.00Rated 0 out of 5
Fish Meal
₹1,999.00 – ₹2,999.00Price range: ₹1,999.00 through ₹2,999.00Rated 0 out of 5 -
 FATTENING BROILER FEED
₹2,299.00 – ₹2,349.00Price range: ₹2,299.00 through ₹2,349.00Rated 0 out of 5
FATTENING BROILER FEED
₹2,299.00 – ₹2,349.00Price range: ₹2,299.00 through ₹2,349.00Rated 0 out of 5 -
 LAYER COUNTRY FEED
₹1,549.00 – ₹1,649.00Price range: ₹1,549.00 through ₹1,649.00Rated 0 out of 5
LAYER COUNTRY FEED
₹1,549.00 – ₹1,649.00Price range: ₹1,549.00 through ₹1,649.00Rated 0 out of 5 -
 COUNTER BROILER FEED
₹1,199.00 – ₹1,299.00Price range: ₹1,199.00 through ₹1,299.00Rated 0 out of 5
COUNTER BROILER FEED
₹1,199.00 – ₹1,299.00Price range: ₹1,199.00 through ₹1,299.00Rated 0 out of 5 -
 LACTATING PIG FEED
Rated 0 out of 5
LACTATING PIG FEED
Rated 0 out of 5₹2,299.00Original price was: ₹2,299.00.₹1,740.00Current price is: ₹1,740.00. -
 Maize
Rated 0 out of 5
Maize
Rated 0 out of 5₹1,650.00Original price was: ₹1,650.00.₹1,300.00Current price is: ₹1,300.00. -
 GESTATION PIG FEED (Phase 1)
Rated 0 out of 5
GESTATION PIG FEED (Phase 1)
Rated 0 out of 5₹2,249.00Original price was: ₹2,249.00.₹1,699.00Current price is: ₹1,699.00. -
 Pre Starter Broiler Feed
₹2,399.00 – ₹2,499.00Price range: ₹2,399.00 through ₹2,499.00Rated 0 out of 5
Pre Starter Broiler Feed
₹2,399.00 – ₹2,499.00Price range: ₹2,399.00 through ₹2,499.00Rated 0 out of 5 -
 FINISHER PIG FEED
Rated 0 out of 5
FINISHER PIG FEED
Rated 0 out of 5₹2,299.00Original price was: ₹2,299.00.₹1,749.00Current price is: ₹1,749.00. -
 Broiler Premix
Rated 0 out of 5
Broiler Premix
Rated 0 out of 5₹820.00Original price was: ₹820.00.₹699.00Current price is: ₹699.00.