
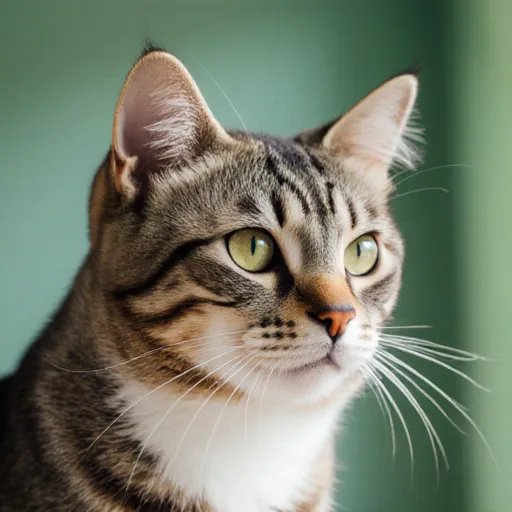
Mysteries of Feline Care Unveiled
Unlock the Secrets of Cat Care at Home
Table of Contents
- Introduction to DIY Cat Grooming
- Tools You Will Need for Grooming
- Brushing Your Cat's Coat Regularly
- Trimming Your Cat's Nails
- Cleaning Your Cat's Ears Properly
- Bathing Your Cat Safely at Home
- Identifying and Removing Tangles and Knots
- Handling Your Cat's Teeth and Gums
- Protecting Your Cat During Grooming
- Signs of a Healthy Coat and Skin
- When to Seek Professional Help for Grooming
- Creating a Positive Grooming Routine with Your Cat
- DIY Remedies for Common Skin Issues in Cats
- Conclusion: The Benefits of DIY Cat Grooming at Home
- FAQ: Frequently Asked Questions About DIY Cat Grooming
Introduction to DIY Cat Grooming
Introducing yourself into a world of DIY cat grooming can be an incredibly rewarding experience, not just for your feline friend but also for you. Grooming at home is more than just brushing; it's about taking care of your pet's well-being and enhancing their quality of life. By learning to groom your cat at home, you can save time and money typically spent on professional grooming services. This practice promotes a deeper bond between you and your kitty, as the routine becomes a time for both of you to relax.
Understanding the Basics
To start off with DIY grooming, it's essential to understand what tools are needed. A good quality brush or comb suited to your cat’s coat type is crucial. For short-haired cats, a rubber mitt or a pin brush can be effective, while long-haired breeds might benefit from a metal comb or rake. Additionally, you'll need scissors for trimming, nail clippers for trimming claws, and ear cleaning wipes.
Choosing the Right Timing
The best time to groom your cat is usually when they are calm and relaxed. This could be right after their meal or before bedtime. It's also a good idea to make grooming a regular part of your daily routine, perhaps following a specific schedule that works for both you and your pet.
Practical Steps for Successful Grooming
- Start with Brushing: Regular brushing helps remove loose fur, prevents matting, and keeps the coat clean. Use a circular motion to brush in the direction of your cat’s hair growth.
- Clean the Ears: Clean your cat's ears every few weeks or as needed using gentle ear cleaning wipes designed for cats.
- Trim the Nails: Nail clipping is an important part of grooming, especially if your cat doesn't wear them down naturally. Always be cautious and use a steady hand to avoid cutting too close to the quick (the pink part in the nail).
- Bath Time with Caution: Only give your cat a bath when absolutely necessary, as frequent bathing can strip their skin of natural oils. Use specially formulated cat shampoos and be gentle.
Motivating Your Cat
Cats can be wary of grooming sessions, but with patience and positive reinforcement, you can make it a more enjoyable experience for both of you. Start by making the environment comfortable, perhaps using soft music or playing your cat’s favorite toy during the session.
Professional Tips
While DIY grooming is perfectly doable, sometimes professional help might be necessary. If your cat has severe matting issues that you can't handle at home, consider consulting a professional groomer who specializes in pet care and can provide expert advice.
Conclusion
Grooming your cat at home is not only beneficial for their health but also enriches the bond between you and your feline companion. By following these steps, you'll be able to keep your cat looking and feeling their best, all while enjoying the process together.
Tools You Will Need for Grooming
Grooming your cat at home can be a rewarding experience, not only keeping them healthy and happy but also strengthening the bond between you and your pet. Proper tools are essential to ensure that grooming is comfortable and efficient. Here’s an in-depth look at what you’ll need:
1. Slicker Brush
The slicker brush, often referred to as a comb or a bristle brush, is one of the most important tools for cat grooming. It removes loose fur, dead skin cells (dander), and mats from your cat’s coat.
- When to use: Essential for long-haired cats but also helpful for short-haired cats during shedding seasons.
- Tips: Start grooming with a slicker brush to remove surface-level tangles. Use it in the direction of your cat’s hair growth.
2. Pin Brush
A pin brush is more delicate than a slicker brush and has finer, longer bristles. It helps to smooth out the coat after using a comb or brush and can be used on cats with short to medium-length fur.
- When to use: After you’ve already removed tangles with a slicker brush.
- Tips: Be gentle as the bristles are finer. Use it in the direction of your cat’s hair growth for a sleek finish.
3. Nail Clippers
Cat nails grow continuously, and regular trimming is necessary to prevent overgrowth. Long nails can be painful for both you and your pet during grooming sessions.
- When to use: Every 2-4 weeks or as needed based on nail growth.
- Tips: Keep the clippers sharp, trim only what is visible, and always check for pink areas (the quick) before cutting. If unsure, consult a professional groomer.
4. Ear Cleaner
Ear cleaning is crucial to prevent infections and maintain your cat’s overall health. Not all cats need frequent ear cleanings, but it’s good practice to check ears weekly for any signs of infection or wax buildup.
- When to use: Weekly checks with cleaning as needed based on your cat's behavior and appearance.
- Tips: Use a cotton ball and ear cleaner specifically formulated for cats. Avoid inserting anything deep into the ear canal, as this can cause discomfort or injury.
5. Dental Care Tools
Cats are prone to dental issues, which can affect their overall health if left unaddressed. Regular brushing and dental check-ups at home are essential for maintaining good oral hygiene.
- When to use: Brush your cat’s teeth weekly or as advised by a veterinarian.
- Tips: Introduce tooth brushing gradually. Use small, soft-bristled brushes designed specifically for cats and pet-safe toothpaste. Offer treats after brushing to reinforce positive behavior.
6. Clippers (Optional)
Brushing Your Cat's Coat Regularly
Regularly brushing your cat's coat is an essential part of DIY cat grooming at home. Not only does it help maintain a healthy and shiny fur, but it also strengthens the bond between you and your pet. By spending quality time with your cat during grooming sessions, you can identify any potential health issues early on, such as skin conditions or lumps.
Benefits of Regular Grooming
- Maintains Coat Health: Brushing removes dead hair, prevents matting, and encourages proper hair growth.
- Promotes Skin Health: While brushing your cat's coat, you can examine the skin for any unusual lumps or changes in color, which could indicate an underlying health issue.
- Prevents Shedding: Regular grooming helps reduce shedding by removing loose hairs and distributing natural oils evenly across the fur.
- Bonding Time: Grooming sessions are a great way to spend quality time with your cat, making it an enjoyable experience for both of you.
Choosing the Right Brush
Selecting the appropriate brush is crucial for effective grooming. Here are some common types:
Type
Purpose
Bristles/Teeth Density
Use Cases
Slicker Brush
Removes loose hair and mats.
Dense bristles or fine teeth.
Felines with short to medium coats.
Comb
Treats long fur, removes dead hairs, and distributes oils.
Moderate density.
Cats with long hair or double coats.
Finger Comb
Manual brushing tool; great for shorter-haired cats.
Varying densities.
Short-haired and semi-long-haired cats, especially during shedding seasons.
Step-by-Step Grooming Guide
- Choose the Right Time: Groom your cat in a calm and quiet environment. Cats tend to be more cooperative if they are relaxed.
- Start from the Neck Downward: Begin brushing at the neck, moving towards the tail. This helps prevent matting around the body.
- Brush Gently but Firmly: Use short, gentle strokes with your hand to guide the brush and maintain control over the brushing process.
- Spend Time on Problem Areas: Spend extra time grooming areas where your cat sheds the most or where hair tends to tangle easily. This typically includes behind ears, underbelly, and around paws.
- Clean Up Loose Hair: After brushing, use a cloth or towel to remove any loose fur from your cat's coat.
Tips for Cat Owners
Here are some practical tips to make grooming sessions more comfortable for both you and your cat:
- Cat Treats as Rewards: Use small treats as rewards during the grooming process. This can help keep your feline companion calm.
- Be Patient: Some cats may be less cooperative initially, so it's important to have patience and consistency in your approach.
- Celebrate Small Steps: If you're starting a new routine, acknowledge small achievements like completing a brushing session or getting the cat used to being brushed for longer periods of time.
- Stay Hydrated: Drink plenty of water yourself during grooming sessions to keep hydrated and remain energetic.
Trimming Your Cat's Nails
Giving your cat a manicure may seem like an intimidating task, but with the right tools and techniques, it can become a routine that is both beneficial for you and your pet. Trimming your cat’s nails is essential to maintaining their health and preventing potential issues such as overgrown nails or accidental scratches during playtime.
Why Trim Your Cat's Nails?
- Prevents Overgrowth: Cats naturally keep their nails short by scratching, but indoor cats may not get enough opportunities to do so. Regular trimming ensures that their nails don't grow too long.
- Avoids Scratches: Overgrown nails can cause painful scratches when your cat jumps or walks on you without realizing the discomfort they might be causing.
- Promotes Health: Long nails can lead to discomfort and potential injury, especially if they catch on clothing or carpet. Keeping them trimmed helps prevent this from happening.
The Necessary Tools
To trim your cat’s nails safely, you will need a few basic tools:
- Nail Clippers: There are special nail clippers designed specifically for cats. They have rounded tips that help avoid cutting the quick (the pink part in the center of the nail where nerves and blood vessels lie).
- File or Emery Board: If you prefer not to cut your cat’s nails, an emery board can be used instead.
How to Trim Your Cat's Nails
Here is a step-by-step guide on how to trim your cat’s nails:
- Familiarize Yourself with the Tools: Spend some time observing and playing with nail clippers or emery boards so that you feel comfortable using them.
- Select the Right Time: Choose a calm moment in your day when both you and your cat are relaxed. Cats may be more cooperative after playtime as they tend to be tired and less stressed.
- Capture Your Cat's Attention: Use treats or toys to get your cat’s attention before starting the grooming process. Positive reinforcement can make the experience enjoyable for both you and your pet.
- Hold Your Cat Comfortably: Depending on your cat's temperament, you may need assistance from another person who knows how to handle a cat gently yet securely during this time.
- Trim Gradually: Start by clipping just the tip of one nail at a time. If you have access to a camera or mirror, it can help you see exactly where the quick is located in relation to your cut. Cutting too close to the quick can cause pain and bleeding.
- Treat Your Cat: Reward your cat with treats and praise after each successful nail trim. This positive reinforcement will make future sessions easier and more pleasant for both of you.
Common Challenges and Solutions
Every cat is different, so what works for one may not work for another. Here are some common challenges you might face during nail trimming:
- Cat Anxiety: If your cat becomes anxious or stressed during the grooming process, try introducing them to tools and techniques gradually over time.
- Nail Breakage: Occasional accidents can happen when cutting too close. To minimize this risk, practice on a piece of paper before starting with your cat.
Conclusion
Trimming your cat's nails is an important part of their grooming routine and can be easily done at home with proper tools and techniques. By following these steps and providing positive reinforcement, you can make the experience as stress-free as possible for both you and your feline companion.
Cleaning Your Cat's Ears Properly
Cleaning Your Cat's Ears: A Guide for DIY Cat Grooming at Home
Ear cleaning is an essential part of grooming your cat, especially if they have long hair that can trap dirt and debris. Proper ear care helps prevent infections and keeps your pet healthy and comfortable. Here’s how to clean your cat's ears safely and effectively at home.
Tools You'll Need
- Cat-safe ear cleaner (available from veterinarians or pet stores)
- 棉球 or cotton pads (avoid using Q-tips as they can push debris deeper into the ear canal)
- Pet-friendly tweezers for removing excessive wax and hair
- A soft cloth
- Fresh water if you need to rinse out the ear canal after cleaning
Steps to Clean Your Cat's Ears Properly
- Warm Up the Cleaner: Before starting, warm up your ear cleaner slightly by holding the bottle in your hand. This makes it easier for your cat to accept the process.
- Inspect the Ear Canal: Gently lift your cat's ear flap and inspect the inside of their ear canal. Look for any signs of infection like redness, swelling, or unusual discharge.
- Apply Ear Cleaner: Using a cotton pad, gently apply the cleaner to the outer part of the ear flap. Avoid pushing it into the ear canal unless your vet has specifically advised you to do so.
- Rub Gently: Use your fingers or a soft cloth to rub the cleanser into the ear canal. Be gentle and avoid applying too much pressure, as this can cause discomfort for your cat.
- Clean the Outer Ear Canal: Once you've massaged in the cleaner, gently wipe the outer part of the ear canal with a clean cotton pad. Avoid inserting anything deeper into the ear canal to prevent injury or irritation.
- Rinse if Necessary: If there is excess wax or debris, rinse the ear canal very carefully. Use fresh water and ensure you don't flush it too hard, as this can cause discomfort for your cat.
- Dry Thoroughly: After cleaning, dry the outer part of the ear flap with a clean soft cloth. Ensure that no cleaner or moisture remains in the ear canal to prevent irritation or infection.
When to Seek Professional Help
- If your cat shows signs of discomfort during grooming (e.g., frequent head shaking, scratching at their ears).
- If you notice any abnormal discharge, redness, or foul smell coming from the ear canal.
- If there is excessive wax buildup that can't be easily removed with a gentle cleaning routine.
Preventing Ear Issues
To prevent ear problems in your cat, consider regular grooming and maintenance. Brushing your cat's fur regularly helps reduce the amount of debris that collects in their ears. Additionally, feeding them a balanced diet can support overall health, including proper ear function.
Conclusion: Regular ear cleaning is crucial for maintaining your cat’s health and comfort. By following these steps, you can perform this grooming task safely at home without the need for expensive vet visits. Remember to always use pet-safe products and be gentle with your cat during the process.
Bathing Your Cat Safely at Home
While it may seem daunting to bathe your cat, especially if they are not used to it, learning how to do so safely and effectively is a valuable skill. Bathing your cat can help keep them clean, maintain their coat health, and even assist in treating certain skin conditions. However, it's important to approach this task with care as cats can be easily stressed by water and loud noises.
Preparing for the Bathe
The first step in safely bathing your cat is preparation. Gather all necessary supplies beforehand so you don't have to rush or stress your cat further during the bath:
- A large container of lukewarm water (not too hot, not too cold).
- Cat-friendly shampoo.
- A soft-bristled brush.
- Towel for drying.
- Non-slip mat or rubber gloves to protect your hands from slippery fur.
Creating a Calm Environment
To minimize stress, choose a calm and quiet space away from loud noises. You might want to play some soft music or have another pet in the room for company. Familiar scents can also help soothe your cat.
The Bathe Process
- Brush Your Cat First: Before bathing, brush out any tangles to prevent them from becoming knots during the bath. This is especially important for long-haired cats.
- Create a Water Bath: Fill your container with lukewarm water and place it in a secure area where your cat can easily enter and exit without fear of falling.
- Gentle Rinse: Start by getting the fur wet, but avoid putting the head under water. Use your hands to gently apply the shampoo, working it into the coat from the back towards the front. Be careful not to get water or soap in their eyes, ears, and mouth.
- Rinse Thoroughly: Rinse all the shampoo out of your cat's fur until the water runs clear.
Drying Your Cat
After bathing, it’s crucial to dry your cat thoroughly. Excessive moisture can lead to skin issues or even hypothermia. Use a soft towel and start from the tail end of the body moving upwards. If necessary, you might use a hairdryer on a low heat setting, keeping a safe distance away to avoid burning the fur.
DIY Grooming Tips
Giving your cat regular grooming at home not only keeps them clean but also helps strengthen the bond between you and your pet. Here are some DIY grooming tips:
- Regular Brushing: Use a soft-bristled brush to remove dead hair, prevent matting, and distribute natural oils through the coat.
- Ears Checkup: Inspect your cat's ears regularly for any signs of infection or unusual odor. Clean them with a cotton ball dipped in ear cleaner if necessary.
- Nail Trimming: Trim nails every few weeks to prevent overgrowth and potential injury.
- Tooth Care: Introduce tooth brushing early on; use cat-safe toothpaste and brushes.
Grooming your cat at home is a rewarding activity that can greatly improve their overall health and well-being. By following these tips and steps, you can ensure the bathing process is both safe and stress-free for your feline companion.
Identifying and Removing Tangles and Knots
Proper grooming is crucial for maintaining your cat's coat and overall health. One of the most important aspects of cat grooming is identifying and removing tangles and knots. These can occur due to various reasons such as matting, shedding, or simply lack of regular brushing.
Identifying Tangles and Knots
Before you start combing your cat's fur, it's important to carefully examine the coat for tangles and knots. Start by running your fingers through the hair to locate any areas that feel tight or thick. Cats with long hair are more prone to matting, especially around the body and hindquarters.
- Long-haired cats: Regular brushing is essential for preventing tangles from forming. Use a wide-toothed comb or a slicker brush to gently separate any knots.
- Short-haired cats: While they are less likely to develop mats, it's still important to check the coat regularly. Look out for areas where the fur looks patchy or feels rough to the touch.
Tools You Will Need
To effectively remove tangles and knots at home, you'll need a few basic tools:
- Slicker brush: Great for removing surface-level knots and short hair.
- Comb: Use a wide-toothed comb to separate deeper tangles. Avoid using fine-tooth combs as they can cause more damage if used on matted fur.
- Dematting tools: For severe cases of matting, consider using dematting tools like a pair of scissors or a dematting comb. Be cautious and use these tools carefully to avoid causing pain or injury to your cat.
Step-by-Step Guide
- Start at the tip: Always begin by brushing the fur from the end of the hair towards the skin. This helps prevent pulling on the hair and reduces stress for your cat.
- Use a slicker brush: Apply gentle pressure to work through the tangles, moving in one direction only.
- Pet your cat: Cats are more likely to cooperate if they feel comfortable. Speak softly and pet them while grooming to keep them calm.
- Use a comb for deeper mats: If you encounter particularly stubborn knots, switch to the comb or dematting tool. Be patient and take your time to avoid causing discomfort.
Practical Tips
To make grooming less stressful and more enjoyable for both you and your cat:
- Catch tangles early: Regular brushing can prevent the formation of severe mats. Aim to groom your cat daily or every other day, depending on their coat type.
- Choose the right time: Grooming sessions should be scheduled when your cat is in a good mood. Avoid grooming during stressful times like mealtime or just before bedtime.
- Be consistent: Cats thrive on routine, so try to maintain a regular grooming schedule. Consistency will make the experience less daunting for both you and your pet.
Conclusion
Identifying and removing tangles and knots is an essential part of DIY cat grooming at home. With the right tools, patience, and a gentle touch, you can keep your furry friend's coat healthy and free from mats.
Handling Your Cat's Teeth and Gums
Caring for your cat’s teeth and gums is a crucial aspect of pet ownership. Just like humans, cats need regular dental care to prevent oral diseases such as gingivitis, periodontal disease, and tooth decay. By incorporating some simple steps into your daily routine, you can ensure that your feline companion maintains healthy teeth and gums.
Importance of Dental Hygiene
Dental health is closely linked to overall body health in cats. Ignoring oral hygiene can lead to severe health issues such as heart disease, kidney infections, and other systemic diseases. By addressing dental care early on, you can prevent these complications and extend your cat’s life expectancy.
DIY Grooming Routine
- Daily Inspections: Check for any signs of redness, swelling, or bad breath. This is a crucial step in catching issues early. Look out for plaque buildup and tartar which could indicate gum disease.
- Weekly Brushing Sessions: Use a cat-specific toothbrush and toothpaste to gently brush your cat’s teeth at least twice a week. Start by acclimating your cat to the brushing process gradually, as they may not be used to it initially.
- Cat Tooth Brushes and Gels: Invest in soft-bristled brushes or finger brushes designed for cats. These are more comfortable for them than human toothbrushes. Additionally, use a fluoride-free cat-specific toothpaste that comes in flavors your cat might enjoy.
- Chew Toys and Treats: Provide dental treats and toys that help reduce plaque buildup and massage the gums. Products like Greenies or Oravet Chews are popular choices among pet owners for promoting oral health.
Tips for Making Grooming Sessions Enjoyable
- Make it a positive experience by rewarding your cat with treats and praise during grooming sessions. This can help reduce any stress or anxiety they might feel.
- Be patient; some cats may take longer to get used to the routine. Consistency is key in making these sessions enjoyable for both you and your pet.
- If possible, involve others like family members or friends who can join in on the grooming process. The more people involved, the easier it becomes for your cat to adjust.
Seeking Professional Help
While DIY grooming is effective and necessary, there may come a time when professional dental care from a veterinarian is required. Signs that you should consult with a vet include persistent bad breath, bleeding gums, loose teeth, or your cat refusing to eat.
Incorporating regular at-home dental care into your daily routine can significantly improve your cat’s oral health and overall well-being. By following these steps and making grooming enjoyable for both you and your pet, you’re taking a proactive approach to maintaining their health and happiness.
Protecting Your Cat During Grooming
DIY cat grooming at home can be a rewarding experience for both you and your pet, but it's essential to ensure that your cat remains safe throughout the process. Proper care and preparation are key when handling your feline friend during grooming sessions. Here are some practical tips and advice to help protect your cat during DIY grooming:
1. Choose the Right Grooming Tools
Selecting appropriate tools is crucial for a safe and effective grooming session. Use humane brushes designed specifically for cats, such as pin brushes or combing combs, which are gentle on your cat's coat. Avoid using overly sharp tools that could cause discomfort or injury.
2. Prepare Your Workspace
Ensure you have a comfortable and safe area to groom your cat. Choose a quiet room with minimal distractions where your cat feels secure. Lay down a soft, non-slip mat on the floor to provide additional comfort for your cat during grooming.
3. Keep Your Cat Calm
Cats can become stressed if they feel overwhelmed or uncomfortable. To keep your cat calm, speak in soothing tones and move slowly and gently throughout the process. If possible, have a friend or family member assist you to create a relaxing environment.
4. Establish Positive Associations
To make grooming sessions enjoyable for both you and your cat, try to establish positive associations with the experience. Reward your cat with treats and praise after each successful step in the grooming process. This will help build trust between you and your pet.
5. Check for Health Concerns
During grooming sessions, pay attention to any signs of skin irritation or potential health issues. If you notice anything unusual, such as bald patches, redness, or lumps, consult a veterinarian promptly. Regular check-ups can help identify and address any problems early.
6. Set Clear Boundaries
To ensure your cat's safety during grooming, set clear boundaries about what you will do and where you will handle them. For instance, avoid pulling or tugging on your cat's skin or coat too aggressively. Instead, use gentle strokes and short bursts of handling.
7. Use Gentle Products
Select grooming products that are safe for cats. Avoid using human shampoos or conditioners, as they can be harsh on a cat's sensitive skin and coat. Opt for pet-safe shampoos formulated specifically for your cat's needs.
8. Monitor Your Cat’s Behavior
Throughout the grooming session, monitor your cat's behavior closely. If you notice any signs of discomfort or distress, stop immediately and try again later with more care and patience. Cats are unpredictable, so it's important to be attentive to their signals.
9. Seek Professional Help
If grooming becomes stressful for either you or your cat, consider seeking help from a professional groomer. They have the expertise and tools necessary to provide a safe and comfortable experience without causing stress to your pet.
By following these tips and taking the time to make grooming sessions enjoyable and stress-free, you can protect your cat during DIY grooming at home while fostering a positive relationship with your feline friend.
Signs of a Healthy Coat and Skin
When it comes to DIY cat grooming, observing signs of a healthy coat and skin is crucial for ensuring your feline friend's overall well-being. A healthy coat not only enhances your pet’s appearance but also indicates their internal health. Here are some key indicators that you should look out for when caring for your cat at home:
Shiny Coat
A glossy, lustrous coat is one of the most visible signs of a healthy skin and coat in cats. Cats with shiny coats typically have good nutrition and are generally well taken care of. You can enhance this by using natural oils like coconut oil or almond oil during your grooming sessions to add shine and prevent dryness.
Soft Texture
A healthy cat's coat should be soft to the touch. It shouldn’t feel rough, brittle, or flaky. If your cat's fur feels coarse or irregular, it might indicate underlying issues such as poor nutrition or skin conditions like flea infestations. Regular brushing can help remove dead hair and distribute natural oils more evenly across the skin.
No Dandruff
A healthy coat should not be flaky or covered in dandruff. Cats with dandruff often suffer from dry, irritated skin which could be a sign of allergies or other health issues. Using a gentle shampoo specifically formulated for cats can help maintain the pH balance of your cat's skin and reduce dandruff.
No Visible Skin Irritations
Healthy skin should have no visible signs of irritation, such as redness, swelling, or sores. If you notice any of these symptoms, it’s important to consult a veterinarian promptly as they could indicate an underlying health problem like allergies, infections, or parasites.
Lack of Odor
A cat's coat should not have a strong odor. Cats naturally have a light scent which is normal, but if their skin and fur start to smell, it can be indicative of poor grooming practices, an unhealthy diet, or other health issues like infection. Regular bathing and cleaning sessions can help keep your cat smelling fresh.
Uniform Hair Length
A healthy coat should have uniform hair length throughout the body. Uneven shedding areas could indicate underlying medical conditions or poor grooming practices. Regular brushing and combing are essential to maintain a uniform coat, which also helps in identifying any early signs of problems like matted fur.
By paying attention to these signs during your DIY cat grooming sessions at home, you can ensure that your pet maintains healthy skin and a beautiful coat. Remember, consistency is key when it comes to maintaining a healthy cat. With the right tools, care, and routine, you can keep your furry companion looking and feeling their best.
When to Seek Professional Help for Grooming
While DIY cat grooming can be a rewarding experience and is often sufficient for most cats, there are instances where seeking professional help becomes necessary. Professional groomers have the expertise, tools, and knowledge to handle complex grooming needs that may arise with certain feline conditions or behaviors.
Signs It's Time to Visit a Professional Groomer
- Hairballs and Shedding Issues: If your cat experiences excessive hairballing or shedding, it may indicate underlying health issues such as thyroid problems or digestive disorders. A professional groomer can help manage these issues by trimming long hairs more frequently.
- Tangles and Mats: Cats with long fur often develop tangles and mats that are difficult to manage at home. These areas can lead to skin irritation if not addressed promptly, so a professional grooming session is advisable.
- Skin Infections or Irritations: If you notice signs of skin infections such as redness, swelling, or scabs, it's essential to seek help from a professional groomer. They can identify the cause and provide appropriate care.
Behavioral Challenges
Cats with behavioral challenges may resist grooming attempts, making at-home sessions stressful for both you and your pet. In such cases, consulting a professional who specializes in behavior issues can help create a calming environment and establish trust between the cat and the groomer.
Specialized Grooming Needs
- Senior Cats: Older cats may experience mobility issues that make grooming difficult. A professional groomer can provide gentle, effective care tailored to their needs.
- Breed-Specific Issues: Certain breeds require specialized grooming techniques due to unique fur types or lengths. For instance, Sphinx cats have no hair and need regular skin inspections. Professionals are equipped to handle these specific requirements.
Conclusion
In summary, while DIY cat grooming is a valuable skill, it's important to know when professional assistance is needed. By recognizing the signs of health issues or behavioral challenges and understanding specialized needs, you can ensure your cat receives the best possible care.
Creating a Positive Grooming Routine with Your Cat
Creating a positive grooming routine with your cat is not just about maintaining their hygiene; it’s also an excellent opportunity to strengthen the bond between you and your feline companion. Grooming can help reduce stress, prevent health issues, and keep your cat comfortable and happy. DIY grooming at home can be both rewarding and effective if done correctly.
To establish a positive grooming routine, it's important to understand the specific needs of your cat. Cats vary in how much grooming they require, but most cats appreciate some form of brushing or handling. Long-haired breeds like Maine Coons and Persians may need more frequent grooming compared to short-haired breeds such as Siamese or Abyssinians.
DIY Grooming Tools
- Soft-bristle brush: Ideal for short-haired cats, this brush helps remove loose fur and distribute natural oils throughout the coat.
- Comb: Perfect for long-haired cats to remove tangles and mats.
- Rubber glove: Some cat owners find that a rubber glove can be surprisingly effective at removing dead hair, especially during shedding seasons.
- Nail clippers: Regular nail trimming is crucial for preventing overgrown nails which could lead to discomfort or injury.
The key to a successful DIY grooming session at home lies in making it enjoyable and stress-free for your cat. Here are some tips:
- Start early: Introduce grooming when your kitten is young, so they get used to the process from an early age.
- Positive reinforcement: Use treats or praise during grooming sessions to make it a positive experience. A small treat can be given after each session as a reward for good behavior.
- Short sessions: Keep each grooming session short, especially with kittens or cats who are not used to being handled this way. Gradually increase the duration over time.
- Pick the right time: Some cats prefer to be groomed when they are calm and relaxed, such as after a nap or mealtime. Identify your cat's best time and stick to it.
Cats can sometimes get nervous during grooming sessions, especially if certain areas of their body are particularly sensitive or difficult for them. Here’s how you can handle these situations:
- Patience: If your cat is uncomfortable with a particular brush or technique, try different tools and methods until you find what works best.
- Shorten the session: For particularly sensitive cats, consider breaking up grooming into shorter sessions spread throughout the day rather than one long session.
- Consult a professional: If your cat is extremely anxious or resistant to grooming, it might be helpful to consult with a veterinarian or a professional groomer who can provide advice and possibly desensitize your cat to the process.
Grooming at home is not just about brushing; it’s also an excellent opportunity to check for any signs of illness or injury. Regularly inspect your cat's coat, skin, and nails:
- Check the coat: Look for any unusual shedding patterns, bald patches, or visible parasites.
- Inspect the skin: Check for redness, irritation, or signs of infection such as lumps or bumps.
- Nail care: Trim nails regularly to avoid overgrowth and prevent your cat from injuring themselves. Use a pet-safe nail clipper and take small steps to familiarize your cat with the process.
Incorporating DIY grooming into your daily routine can greatly enhance both you and your cat’s quality of life. By creating positive associations, using appropriate tools, and being patient, you can ensure that grooming sessions are enjoyable for everyone involved.
DIY Remedies for Common Skin Issues in Cats
Cat grooming at home can help you identify and address common skin issues early. Regular brushing, checking for lumps or abnormalities, and observing your cat's behavior are key components of DIY cat care. Here are some effective DIY remedies that can assist with various skin problems your cat might encounter:
1. Flea Bites
Flea bites can cause intense itching and irritation in cats. To alleviate discomfort, you can create a soothing paste using oatmeal or colloidal oatmeal. Simply mix one cup of oatmeal with two cups of water until it forms a thick paste. Apply the mixture to your cat's affected areas after bathing them in lukewarm water. Allow the paste to dry on your cat’s skin for about 30 minutes before rinsing thoroughly.
2. Skin Allergies
If your cat suffers from allergies, you can use a mixture of apple cider vinegar and water as a natural antihistamine. Mix one part apple cider vinegar with three parts water in a spray bottle. Apply the solution sparingly to areas affected by allergies; avoid getting it into your cat's eyes or ears. This remedy helps balance the skin’s pH levels, providing relief from itchiness.
3. Hot Spots
Hot spots on a cat are painful and can progress quickly if not treated promptly. To treat hot spots, you need to clean the area thoroughly with an antiseptic solution made of mild hydrogen peroxide diluted one part peroxide to two parts water. Keep your cat from licking or biting at the spot by applying a cone collar to prevent further irritation.
4. Dry Skin
Dry skin can be addressed with a homemade moisturizer using coconut oil and raw honey. Apply a small amount of this mixture to your cat's dry patches, paying special attention to the areas behind their ears, around their tail, and under their legs. Coconut oil is not only hydrating but also rich in fatty acids that support overall skin health.
5. Bacterial Infections
Bacterial infections can be tricky to manage, especially if they are severe or recurring. In these cases, it's crucial to seek veterinary advice. However, for minor bacterial infections, you might try a solution of Betadine diluted in warm water as an antiseptic wash. Always ensure the concentration is appropriate and never leave your cat unsupervised while bathing.
DIY grooming and remedy-making at home can be highly beneficial but should not replace professional veterinary advice. Regular check-ups with your veterinarian are essential to monitor any ongoing skin issues effectively. By staying informed about these remedies, you can provide better care for your beloved pet.
Conclusion: The Benefits of DIY Cat Grooming at Home
DIY cat grooming at home offers a multitude of benefits for both pet owners and their feline companions. Regular grooming can significantly enhance the quality of life for your cat, ensuring they remain healthy, comfortable, and happy. Here are some key advantages:
1. Promotes Health and Hygiene
Grooming is crucial in maintaining your cat's skin and coat health. Regular brushing helps remove loose fur, dirt, and debris from their coat. This not only keeps them looking sleek but also prevents hairballs and reduces shedding around the house. For cats with long coats or those prone to matting, daily grooming can be a lifesaver.
2. Enhances Bonding
Grooming is an excellent opportunity for you and your cat to spend quality time together. It allows for gentle interaction that strengthens the bond between pet and owner. Cats often enjoy the attention they receive during grooming, making it a stress-free experience for both parties.
3. Early Detection of Health Issues
Daily grooming provides an opportunity to closely examine your cat's coat and skin, which can help identify any signs of potential health problems early on. Common issues that might be detected include flea infestations, skin irritations, or even lumps under the fur. Early intervention is crucial for addressing these concerns effectively.
4. Saves Money
While professional grooming services can be beneficial, especially if your cat has a particularly difficult coat type, DIY grooming offers significant cost savings over time. By purchasing necessary tools and supplies once, you avoid the recurring expenses associated with regular salon visits.
5. Customization to Your Cat's Needs
Cats are individuals with unique preferences and needs. DIY grooming allows you to tailor your approach based on your cat’s personality and preferences. For instance, some cats enjoy being brushed while others need gentle handling; DIY grooming gives you the flexibility to adapt.
Practical Tips for Effective Grooming
- Select the Right Tools: Invest in high-quality brushes and combs suitable for your cat’s coat type. For short-haired cats, a metal comb may suffice, whereas long-haired breeds benefit from a slicker brush or a deshedding tool.
- Dedicate Time: Set aside a specific time each week dedicated to grooming. Consistency is key in ensuring your cat looks and feels their best.
- Treat Your Cat: Offering treats during grooming can make the process more enjoyable for both you and your cat, especially if they have been resistant to it initially.
In conclusion, DIY cat grooming at home is a rewarding experience that brings numerous benefits. From health and hygiene to bonding and cost savings, the advantages are clear. By incorporating regular grooming into your routine, you can ensure your cat remains healthy, happy, and well-groomed.
FAQ: Frequently Asked Questions About DIY Cat Grooming
Q: Is it necessary to groom my cat regularly?
Regular grooming is essential for maintaining your cat's health and well-being. It helps prevent hairballs, reduces shedding, and keeps your cat's coat in top condition. If you have a long-haired breed like a Persian or Maine Coon, daily brushing might be necessary to manage tangles and mats.
Q: What tools do I need for DIY cat grooming?
For basic grooming, you'll need a good quality brush or comb appropriate for your cat's coat type. Slicker brushes are great for short-haired cats to remove loose fur and dirt, while a wide-toothed comb is better suited for long-haired breeds. Additionally, you may want to have scissors (cat-specific), nail clippers, and ear cleaner on hand.
Q: How often should I groom my cat?
The frequency of grooming depends on your cat's coat type and activity level. Generally, short-haired cats might need brushing once a week, while long-haired breeds may require daily or every other day sessions to prevent tangles from forming.
Q: Can I use human hair products on my cat?
No, you should never use human hair products like shampoos, conditioners, or styling sprays on your cat. These products can be harmful and irritating to a cat's skin and coat. Always use pet-specific grooming products designed for cats.
Q: How do I trim my cat's nails safely?
Trimming your cat's nails should be done carefully to avoid causing discomfort or injury. First, inspect the nail to find the "quick" – a pink area that contains blood vessels and nerves. It's crucial not to cut into this part as it can cause pain and bleeding. Start by gently holding your cat in a secure position. You can use treats to distract them during the grooming session. Trim only the tips of the nails, taking care to remove just enough to keep the nails at an appropriate length.
Q: What should I do if my cat is resistant to being groomed?
Many cats are not fond of grooming sessions and may need time and patience for you to build a routine that they can get used to. Start by spending short, positive reinforcement-filled sessions with your cat. Gradually increase the duration as they become more comfortable. Using treats and praise can help make grooming less stressful for both you and your cat.
Q: Should I clip my cat's fur?
In most cases, clipping a cat’s fur is not recommended unless it is absolutely necessary due to medical reasons or severe matting. Clipping can be stressful for the cat and should only be done by someone experienced with this procedure. Always consult with your veterinarian before considering fur clipping.
Brushing Your Cat's Coat Regularly
Regularly brushing your cat's coat is an essential part of DIY cat grooming at home. Not only does it help maintain a healthy and shiny fur, but it also strengthens the bond between you and your pet. By spending quality time with your cat during grooming sessions, you can identify any potential health issues early on, such as skin conditions or lumps.
Benefits of Regular Grooming
- Maintains Coat Health: Brushing removes dead hair, prevents matting, and encourages proper hair growth.
- Promotes Skin Health: While brushing your cat's coat, you can examine the skin for any unusual lumps or changes in color, which could indicate an underlying health issue.
- Prevents Shedding: Regular grooming helps reduce shedding by removing loose hairs and distributing natural oils evenly across the fur.
- Bonding Time: Grooming sessions are a great way to spend quality time with your cat, making it an enjoyable experience for both of you.
Choosing the Right Brush
Selecting the appropriate brush is crucial for effective grooming. Here are some common types:
| Type | Purpose | Bristles/Teeth Density | Use Cases |
|---|---|---|---|
| Slicker Brush | Removes loose hair and mats. | Dense bristles or fine teeth. | Felines with short to medium coats. |
| Comb | Treats long fur, removes dead hairs, and distributes oils. | Moderate density. | Cats with long hair or double coats. |
| Finger Comb | Manual brushing tool; great for shorter-haired cats. | Varying densities. | Short-haired and semi-long-haired cats, especially during shedding seasons. |
Step-by-Step Grooming Guide
- Choose the Right Time: Groom your cat in a calm and quiet environment. Cats tend to be more cooperative if they are relaxed.
- Start from the Neck Downward: Begin brushing at the neck, moving towards the tail. This helps prevent matting around the body.
- Brush Gently but Firmly: Use short, gentle strokes with your hand to guide the brush and maintain control over the brushing process.
- Spend Time on Problem Areas: Spend extra time grooming areas where your cat sheds the most or where hair tends to tangle easily. This typically includes behind ears, underbelly, and around paws.
- Clean Up Loose Hair: After brushing, use a cloth or towel to remove any loose fur from your cat's coat.
Tips for Cat Owners
Here are some practical tips to make grooming sessions more comfortable for both you and your cat:
- Cat Treats as Rewards: Use small treats as rewards during the grooming process. This can help keep your feline companion calm.
- Be Patient: Some cats may be less cooperative initially, so it's important to have patience and consistency in your approach.
- Celebrate Small Steps: If you're starting a new routine, acknowledge small achievements like completing a brushing session or getting the cat used to being brushed for longer periods of time.
- Stay Hydrated: Drink plenty of water yourself during grooming sessions to keep hydrated and remain energetic.
Trimming Your Cat's Nails
Giving your cat a manicure may seem like an intimidating task, but with the right tools and techniques, it can become a routine that is both beneficial for you and your pet. Trimming your cat’s nails is essential to maintaining their health and preventing potential issues such as overgrown nails or accidental scratches during playtime.
Why Trim Your Cat's Nails?
- Prevents Overgrowth: Cats naturally keep their nails short by scratching, but indoor cats may not get enough opportunities to do so. Regular trimming ensures that their nails don't grow too long.
- Avoids Scratches: Overgrown nails can cause painful scratches when your cat jumps or walks on you without realizing the discomfort they might be causing.
- Promotes Health: Long nails can lead to discomfort and potential injury, especially if they catch on clothing or carpet. Keeping them trimmed helps prevent this from happening.
The Necessary Tools
To trim your cat’s nails safely, you will need a few basic tools:
- Nail Clippers: There are special nail clippers designed specifically for cats. They have rounded tips that help avoid cutting the quick (the pink part in the center of the nail where nerves and blood vessels lie).
- File or Emery Board: If you prefer not to cut your cat’s nails, an emery board can be used instead.
How to Trim Your Cat's Nails
Here is a step-by-step guide on how to trim your cat’s nails:
- Familiarize Yourself with the Tools: Spend some time observing and playing with nail clippers or emery boards so that you feel comfortable using them.
- Select the Right Time: Choose a calm moment in your day when both you and your cat are relaxed. Cats may be more cooperative after playtime as they tend to be tired and less stressed.
- Capture Your Cat's Attention: Use treats or toys to get your cat’s attention before starting the grooming process. Positive reinforcement can make the experience enjoyable for both you and your pet.
- Hold Your Cat Comfortably: Depending on your cat's temperament, you may need assistance from another person who knows how to handle a cat gently yet securely during this time.
- Trim Gradually: Start by clipping just the tip of one nail at a time. If you have access to a camera or mirror, it can help you see exactly where the quick is located in relation to your cut. Cutting too close to the quick can cause pain and bleeding.
- Treat Your Cat: Reward your cat with treats and praise after each successful nail trim. This positive reinforcement will make future sessions easier and more pleasant for both of you.
Common Challenges and Solutions
Every cat is different, so what works for one may not work for another. Here are some common challenges you might face during nail trimming:
- Cat Anxiety: If your cat becomes anxious or stressed during the grooming process, try introducing them to tools and techniques gradually over time.
- Nail Breakage: Occasional accidents can happen when cutting too close. To minimize this risk, practice on a piece of paper before starting with your cat.
Conclusion
Trimming your cat's nails is an important part of their grooming routine and can be easily done at home with proper tools and techniques. By following these steps and providing positive reinforcement, you can make the experience as stress-free as possible for both you and your feline companion.
Cleaning Your Cat's Ears Properly
Cleaning Your Cat's Ears: A Guide for DIY Cat Grooming at Home
Ear cleaning is an essential part of grooming your cat, especially if they have long hair that can trap dirt and debris. Proper ear care helps prevent infections and keeps your pet healthy and comfortable. Here’s how to clean your cat's ears safely and effectively at home.
Tools You'll Need
- Cat-safe ear cleaner (available from veterinarians or pet stores)
- 棉球 or cotton pads (avoid using Q-tips as they can push debris deeper into the ear canal)
- Pet-friendly tweezers for removing excessive wax and hair
- A soft cloth
- Fresh water if you need to rinse out the ear canal after cleaning
Steps to Clean Your Cat's Ears Properly
- Warm Up the Cleaner: Before starting, warm up your ear cleaner slightly by holding the bottle in your hand. This makes it easier for your cat to accept the process.
- Inspect the Ear Canal: Gently lift your cat's ear flap and inspect the inside of their ear canal. Look for any signs of infection like redness, swelling, or unusual discharge.
- Apply Ear Cleaner: Using a cotton pad, gently apply the cleaner to the outer part of the ear flap. Avoid pushing it into the ear canal unless your vet has specifically advised you to do so.
- Rub Gently: Use your fingers or a soft cloth to rub the cleanser into the ear canal. Be gentle and avoid applying too much pressure, as this can cause discomfort for your cat.
- Clean the Outer Ear Canal: Once you've massaged in the cleaner, gently wipe the outer part of the ear canal with a clean cotton pad. Avoid inserting anything deeper into the ear canal to prevent injury or irritation.
- Rinse if Necessary: If there is excess wax or debris, rinse the ear canal very carefully. Use fresh water and ensure you don't flush it too hard, as this can cause discomfort for your cat.
- Dry Thoroughly: After cleaning, dry the outer part of the ear flap with a clean soft cloth. Ensure that no cleaner or moisture remains in the ear canal to prevent irritation or infection.
When to Seek Professional Help
- If your cat shows signs of discomfort during grooming (e.g., frequent head shaking, scratching at their ears).
- If you notice any abnormal discharge, redness, or foul smell coming from the ear canal.
- If there is excessive wax buildup that can't be easily removed with a gentle cleaning routine.
Preventing Ear Issues
To prevent ear problems in your cat, consider regular grooming and maintenance. Brushing your cat's fur regularly helps reduce the amount of debris that collects in their ears. Additionally, feeding them a balanced diet can support overall health, including proper ear function.
Conclusion: Regular ear cleaning is crucial for maintaining your cat’s health and comfort. By following these steps, you can perform this grooming task safely at home without the need for expensive vet visits. Remember to always use pet-safe products and be gentle with your cat during the process.
Bathing Your Cat Safely at Home
While it may seem daunting to bathe your cat, especially if they are not used to it, learning how to do so safely and effectively is a valuable skill. Bathing your cat can help keep them clean, maintain their coat health, and even assist in treating certain skin conditions. However, it's important to approach this task with care as cats can be easily stressed by water and loud noises.
Preparing for the Bathe
The first step in safely bathing your cat is preparation. Gather all necessary supplies beforehand so you don't have to rush or stress your cat further during the bath:
- A large container of lukewarm water (not too hot, not too cold).
- Cat-friendly shampoo.
- A soft-bristled brush.
- Towel for drying.
- Non-slip mat or rubber gloves to protect your hands from slippery fur.
Creating a Calm Environment
To minimize stress, choose a calm and quiet space away from loud noises. You might want to play some soft music or have another pet in the room for company. Familiar scents can also help soothe your cat.
The Bathe Process
- Brush Your Cat First: Before bathing, brush out any tangles to prevent them from becoming knots during the bath. This is especially important for long-haired cats.
- Create a Water Bath: Fill your container with lukewarm water and place it in a secure area where your cat can easily enter and exit without fear of falling.
- Gentle Rinse: Start by getting the fur wet, but avoid putting the head under water. Use your hands to gently apply the shampoo, working it into the coat from the back towards the front. Be careful not to get water or soap in their eyes, ears, and mouth.
- Rinse Thoroughly: Rinse all the shampoo out of your cat's fur until the water runs clear.
Drying Your Cat
After bathing, it’s crucial to dry your cat thoroughly. Excessive moisture can lead to skin issues or even hypothermia. Use a soft towel and start from the tail end of the body moving upwards. If necessary, you might use a hairdryer on a low heat setting, keeping a safe distance away to avoid burning the fur.
DIY Grooming Tips
Giving your cat regular grooming at home not only keeps them clean but also helps strengthen the bond between you and your pet. Here are some DIY grooming tips:
- Regular Brushing: Use a soft-bristled brush to remove dead hair, prevent matting, and distribute natural oils through the coat.
- Ears Checkup: Inspect your cat's ears regularly for any signs of infection or unusual odor. Clean them with a cotton ball dipped in ear cleaner if necessary.
- Nail Trimming: Trim nails every few weeks to prevent overgrowth and potential injury.
- Tooth Care: Introduce tooth brushing early on; use cat-safe toothpaste and brushes.
Grooming your cat at home is a rewarding activity that can greatly improve their overall health and well-being. By following these tips and steps, you can ensure the bathing process is both safe and stress-free for your feline companion.
Identifying and Removing Tangles and Knots
Proper grooming is crucial for maintaining your cat's coat and overall health. One of the most important aspects of cat grooming is identifying and removing tangles and knots. These can occur due to various reasons such as matting, shedding, or simply lack of regular brushing.
Identifying Tangles and Knots
Before you start combing your cat's fur, it's important to carefully examine the coat for tangles and knots. Start by running your fingers through the hair to locate any areas that feel tight or thick. Cats with long hair are more prone to matting, especially around the body and hindquarters.
- Long-haired cats: Regular brushing is essential for preventing tangles from forming. Use a wide-toothed comb or a slicker brush to gently separate any knots.
- Short-haired cats: While they are less likely to develop mats, it's still important to check the coat regularly. Look out for areas where the fur looks patchy or feels rough to the touch.
Tools You Will Need
To effectively remove tangles and knots at home, you'll need a few basic tools:
- Slicker brush: Great for removing surface-level knots and short hair.
- Comb: Use a wide-toothed comb to separate deeper tangles. Avoid using fine-tooth combs as they can cause more damage if used on matted fur.
- Dematting tools: For severe cases of matting, consider using dematting tools like a pair of scissors or a dematting comb. Be cautious and use these tools carefully to avoid causing pain or injury to your cat.
Step-by-Step Guide
- Start at the tip: Always begin by brushing the fur from the end of the hair towards the skin. This helps prevent pulling on the hair and reduces stress for your cat.
- Use a slicker brush: Apply gentle pressure to work through the tangles, moving in one direction only.
- Pet your cat: Cats are more likely to cooperate if they feel comfortable. Speak softly and pet them while grooming to keep them calm.
- Use a comb for deeper mats: If you encounter particularly stubborn knots, switch to the comb or dematting tool. Be patient and take your time to avoid causing discomfort.
Practical Tips
To make grooming less stressful and more enjoyable for both you and your cat:
- Catch tangles early: Regular brushing can prevent the formation of severe mats. Aim to groom your cat daily or every other day, depending on their coat type.
- Choose the right time: Grooming sessions should be scheduled when your cat is in a good mood. Avoid grooming during stressful times like mealtime or just before bedtime.
- Be consistent: Cats thrive on routine, so try to maintain a regular grooming schedule. Consistency will make the experience less daunting for both you and your pet.
Conclusion
Identifying and removing tangles and knots is an essential part of DIY cat grooming at home. With the right tools, patience, and a gentle touch, you can keep your furry friend's coat healthy and free from mats.
Handling Your Cat's Teeth and Gums
Caring for your cat’s teeth and gums is a crucial aspect of pet ownership. Just like humans, cats need regular dental care to prevent oral diseases such as gingivitis, periodontal disease, and tooth decay. By incorporating some simple steps into your daily routine, you can ensure that your feline companion maintains healthy teeth and gums.
Importance of Dental Hygiene
Dental health is closely linked to overall body health in cats. Ignoring oral hygiene can lead to severe health issues such as heart disease, kidney infections, and other systemic diseases. By addressing dental care early on, you can prevent these complications and extend your cat’s life expectancy.
DIY Grooming Routine
- Daily Inspections: Check for any signs of redness, swelling, or bad breath. This is a crucial step in catching issues early. Look out for plaque buildup and tartar which could indicate gum disease.
- Weekly Brushing Sessions: Use a cat-specific toothbrush and toothpaste to gently brush your cat’s teeth at least twice a week. Start by acclimating your cat to the brushing process gradually, as they may not be used to it initially.
- Cat Tooth Brushes and Gels: Invest in soft-bristled brushes or finger brushes designed for cats. These are more comfortable for them than human toothbrushes. Additionally, use a fluoride-free cat-specific toothpaste that comes in flavors your cat might enjoy.
- Chew Toys and Treats: Provide dental treats and toys that help reduce plaque buildup and massage the gums. Products like Greenies or Oravet Chews are popular choices among pet owners for promoting oral health.
Tips for Making Grooming Sessions Enjoyable
- Make it a positive experience by rewarding your cat with treats and praise during grooming sessions. This can help reduce any stress or anxiety they might feel.
- Be patient; some cats may take longer to get used to the routine. Consistency is key in making these sessions enjoyable for both you and your pet.
- If possible, involve others like family members or friends who can join in on the grooming process. The more people involved, the easier it becomes for your cat to adjust.
Seeking Professional Help
While DIY grooming is effective and necessary, there may come a time when professional dental care from a veterinarian is required. Signs that you should consult with a vet include persistent bad breath, bleeding gums, loose teeth, or your cat refusing to eat.
Incorporating regular at-home dental care into your daily routine can significantly improve your cat’s oral health and overall well-being. By following these steps and making grooming enjoyable for both you and your pet, you’re taking a proactive approach to maintaining their health and happiness.
Protecting Your Cat During Grooming
DIY cat grooming at home can be a rewarding experience for both you and your pet, but it's essential to ensure that your cat remains safe throughout the process. Proper care and preparation are key when handling your feline friend during grooming sessions. Here are some practical tips and advice to help protect your cat during DIY grooming:
1. Choose the Right Grooming Tools
Selecting appropriate tools is crucial for a safe and effective grooming session. Use humane brushes designed specifically for cats, such as pin brushes or combing combs, which are gentle on your cat's coat. Avoid using overly sharp tools that could cause discomfort or injury.
2. Prepare Your Workspace
Ensure you have a comfortable and safe area to groom your cat. Choose a quiet room with minimal distractions where your cat feels secure. Lay down a soft, non-slip mat on the floor to provide additional comfort for your cat during grooming.
3. Keep Your Cat Calm
Cats can become stressed if they feel overwhelmed or uncomfortable. To keep your cat calm, speak in soothing tones and move slowly and gently throughout the process. If possible, have a friend or family member assist you to create a relaxing environment.
4. Establish Positive Associations
To make grooming sessions enjoyable for both you and your cat, try to establish positive associations with the experience. Reward your cat with treats and praise after each successful step in the grooming process. This will help build trust between you and your pet.
5. Check for Health Concerns
During grooming sessions, pay attention to any signs of skin irritation or potential health issues. If you notice anything unusual, such as bald patches, redness, or lumps, consult a veterinarian promptly. Regular check-ups can help identify and address any problems early.
6. Set Clear Boundaries
To ensure your cat's safety during grooming, set clear boundaries about what you will do and where you will handle them. For instance, avoid pulling or tugging on your cat's skin or coat too aggressively. Instead, use gentle strokes and short bursts of handling.
7. Use Gentle Products
Select grooming products that are safe for cats. Avoid using human shampoos or conditioners, as they can be harsh on a cat's sensitive skin and coat. Opt for pet-safe shampoos formulated specifically for your cat's needs.
8. Monitor Your Cat’s Behavior
Throughout the grooming session, monitor your cat's behavior closely. If you notice any signs of discomfort or distress, stop immediately and try again later with more care and patience. Cats are unpredictable, so it's important to be attentive to their signals.
9. Seek Professional Help
If grooming becomes stressful for either you or your cat, consider seeking help from a professional groomer. They have the expertise and tools necessary to provide a safe and comfortable experience without causing stress to your pet.
By following these tips and taking the time to make grooming sessions enjoyable and stress-free, you can protect your cat during DIY grooming at home while fostering a positive relationship with your feline friend.
Signs of a Healthy Coat and Skin
When it comes to DIY cat grooming, observing signs of a healthy coat and skin is crucial for ensuring your feline friend's overall well-being. A healthy coat not only enhances your pet’s appearance but also indicates their internal health. Here are some key indicators that you should look out for when caring for your cat at home:
Shiny Coat
A glossy, lustrous coat is one of the most visible signs of a healthy skin and coat in cats. Cats with shiny coats typically have good nutrition and are generally well taken care of. You can enhance this by using natural oils like coconut oil or almond oil during your grooming sessions to add shine and prevent dryness.
Soft Texture
A healthy cat's coat should be soft to the touch. It shouldn’t feel rough, brittle, or flaky. If your cat's fur feels coarse or irregular, it might indicate underlying issues such as poor nutrition or skin conditions like flea infestations. Regular brushing can help remove dead hair and distribute natural oils more evenly across the skin.
No Dandruff
A healthy coat should not be flaky or covered in dandruff. Cats with dandruff often suffer from dry, irritated skin which could be a sign of allergies or other health issues. Using a gentle shampoo specifically formulated for cats can help maintain the pH balance of your cat's skin and reduce dandruff.
No Visible Skin Irritations
Healthy skin should have no visible signs of irritation, such as redness, swelling, or sores. If you notice any of these symptoms, it’s important to consult a veterinarian promptly as they could indicate an underlying health problem like allergies, infections, or parasites.
Lack of Odor
A cat's coat should not have a strong odor. Cats naturally have a light scent which is normal, but if their skin and fur start to smell, it can be indicative of poor grooming practices, an unhealthy diet, or other health issues like infection. Regular bathing and cleaning sessions can help keep your cat smelling fresh.
Uniform Hair Length
A healthy coat should have uniform hair length throughout the body. Uneven shedding areas could indicate underlying medical conditions or poor grooming practices. Regular brushing and combing are essential to maintain a uniform coat, which also helps in identifying any early signs of problems like matted fur.
By paying attention to these signs during your DIY cat grooming sessions at home, you can ensure that your pet maintains healthy skin and a beautiful coat. Remember, consistency is key when it comes to maintaining a healthy cat. With the right tools, care, and routine, you can keep your furry companion looking and feeling their best.
When to Seek Professional Help for Grooming
While DIY cat grooming can be a rewarding experience and is often sufficient for most cats, there are instances where seeking professional help becomes necessary. Professional groomers have the expertise, tools, and knowledge to handle complex grooming needs that may arise with certain feline conditions or behaviors.
Signs It's Time to Visit a Professional Groomer
- Hairballs and Shedding Issues: If your cat experiences excessive hairballing or shedding, it may indicate underlying health issues such as thyroid problems or digestive disorders. A professional groomer can help manage these issues by trimming long hairs more frequently.
- Tangles and Mats: Cats with long fur often develop tangles and mats that are difficult to manage at home. These areas can lead to skin irritation if not addressed promptly, so a professional grooming session is advisable.
- Skin Infections or Irritations: If you notice signs of skin infections such as redness, swelling, or scabs, it's essential to seek help from a professional groomer. They can identify the cause and provide appropriate care.
Behavioral Challenges
Cats with behavioral challenges may resist grooming attempts, making at-home sessions stressful for both you and your pet. In such cases, consulting a professional who specializes in behavior issues can help create a calming environment and establish trust between the cat and the groomer.
Specialized Grooming Needs
- Senior Cats: Older cats may experience mobility issues that make grooming difficult. A professional groomer can provide gentle, effective care tailored to their needs.
- Breed-Specific Issues: Certain breeds require specialized grooming techniques due to unique fur types or lengths. For instance, Sphinx cats have no hair and need regular skin inspections. Professionals are equipped to handle these specific requirements.
Conclusion
In summary, while DIY cat grooming is a valuable skill, it's important to know when professional assistance is needed. By recognizing the signs of health issues or behavioral challenges and understanding specialized needs, you can ensure your cat receives the best possible care.
Creating a Positive Grooming Routine with Your Cat
Creating a positive grooming routine with your cat is not just about maintaining their hygiene; it’s also an excellent opportunity to strengthen the bond between you and your feline companion. Grooming can help reduce stress, prevent health issues, and keep your cat comfortable and happy. DIY grooming at home can be both rewarding and effective if done correctly.
To establish a positive grooming routine, it's important to understand the specific needs of your cat. Cats vary in how much grooming they require, but most cats appreciate some form of brushing or handling. Long-haired breeds like Maine Coons and Persians may need more frequent grooming compared to short-haired breeds such as Siamese or Abyssinians.
DIY Grooming Tools
- Soft-bristle brush: Ideal for short-haired cats, this brush helps remove loose fur and distribute natural oils throughout the coat.
- Comb: Perfect for long-haired cats to remove tangles and mats.
- Rubber glove: Some cat owners find that a rubber glove can be surprisingly effective at removing dead hair, especially during shedding seasons.
- Nail clippers: Regular nail trimming is crucial for preventing overgrown nails which could lead to discomfort or injury.
The key to a successful DIY grooming session at home lies in making it enjoyable and stress-free for your cat. Here are some tips:
- Start early: Introduce grooming when your kitten is young, so they get used to the process from an early age.
- Positive reinforcement: Use treats or praise during grooming sessions to make it a positive experience. A small treat can be given after each session as a reward for good behavior.
- Short sessions: Keep each grooming session short, especially with kittens or cats who are not used to being handled this way. Gradually increase the duration over time.
- Pick the right time: Some cats prefer to be groomed when they are calm and relaxed, such as after a nap or mealtime. Identify your cat's best time and stick to it.
Cats can sometimes get nervous during grooming sessions, especially if certain areas of their body are particularly sensitive or difficult for them. Here’s how you can handle these situations:
- Patience: If your cat is uncomfortable with a particular brush or technique, try different tools and methods until you find what works best.
- Shorten the session: For particularly sensitive cats, consider breaking up grooming into shorter sessions spread throughout the day rather than one long session.
- Consult a professional: If your cat is extremely anxious or resistant to grooming, it might be helpful to consult with a veterinarian or a professional groomer who can provide advice and possibly desensitize your cat to the process.
Grooming at home is not just about brushing; it’s also an excellent opportunity to check for any signs of illness or injury. Regularly inspect your cat's coat, skin, and nails:
- Check the coat: Look for any unusual shedding patterns, bald patches, or visible parasites.
- Inspect the skin: Check for redness, irritation, or signs of infection such as lumps or bumps.
- Nail care: Trim nails regularly to avoid overgrowth and prevent your cat from injuring themselves. Use a pet-safe nail clipper and take small steps to familiarize your cat with the process.
Incorporating DIY grooming into your daily routine can greatly enhance both you and your cat’s quality of life. By creating positive associations, using appropriate tools, and being patient, you can ensure that grooming sessions are enjoyable for everyone involved.
DIY Remedies for Common Skin Issues in Cats
Cat grooming at home can help you identify and address common skin issues early. Regular brushing, checking for lumps or abnormalities, and observing your cat's behavior are key components of DIY cat care. Here are some effective DIY remedies that can assist with various skin problems your cat might encounter:
1. Flea Bites
Flea bites can cause intense itching and irritation in cats. To alleviate discomfort, you can create a soothing paste using oatmeal or colloidal oatmeal. Simply mix one cup of oatmeal with two cups of water until it forms a thick paste. Apply the mixture to your cat's affected areas after bathing them in lukewarm water. Allow the paste to dry on your cat’s skin for about 30 minutes before rinsing thoroughly.
2. Skin Allergies
If your cat suffers from allergies, you can use a mixture of apple cider vinegar and water as a natural antihistamine. Mix one part apple cider vinegar with three parts water in a spray bottle. Apply the solution sparingly to areas affected by allergies; avoid getting it into your cat's eyes or ears. This remedy helps balance the skin’s pH levels, providing relief from itchiness.
3. Hot Spots
Hot spots on a cat are painful and can progress quickly if not treated promptly. To treat hot spots, you need to clean the area thoroughly with an antiseptic solution made of mild hydrogen peroxide diluted one part peroxide to two parts water. Keep your cat from licking or biting at the spot by applying a cone collar to prevent further irritation.
4. Dry Skin
Dry skin can be addressed with a homemade moisturizer using coconut oil and raw honey. Apply a small amount of this mixture to your cat's dry patches, paying special attention to the areas behind their ears, around their tail, and under their legs. Coconut oil is not only hydrating but also rich in fatty acids that support overall skin health.
5. Bacterial Infections
Bacterial infections can be tricky to manage, especially if they are severe or recurring. In these cases, it's crucial to seek veterinary advice. However, for minor bacterial infections, you might try a solution of Betadine diluted in warm water as an antiseptic wash. Always ensure the concentration is appropriate and never leave your cat unsupervised while bathing.
DIY grooming and remedy-making at home can be highly beneficial but should not replace professional veterinary advice. Regular check-ups with your veterinarian are essential to monitor any ongoing skin issues effectively. By staying informed about these remedies, you can provide better care for your beloved pet.
Conclusion: The Benefits of DIY Cat Grooming at Home
DIY cat grooming at home offers a multitude of benefits for both pet owners and their feline companions. Regular grooming can significantly enhance the quality of life for your cat, ensuring they remain healthy, comfortable, and happy. Here are some key advantages:
1. Promotes Health and Hygiene
Grooming is crucial in maintaining your cat's skin and coat health. Regular brushing helps remove loose fur, dirt, and debris from their coat. This not only keeps them looking sleek but also prevents hairballs and reduces shedding around the house. For cats with long coats or those prone to matting, daily grooming can be a lifesaver.
2. Enhances Bonding
Grooming is an excellent opportunity for you and your cat to spend quality time together. It allows for gentle interaction that strengthens the bond between pet and owner. Cats often enjoy the attention they receive during grooming, making it a stress-free experience for both parties.
3. Early Detection of Health Issues
Daily grooming provides an opportunity to closely examine your cat's coat and skin, which can help identify any signs of potential health problems early on. Common issues that might be detected include flea infestations, skin irritations, or even lumps under the fur. Early intervention is crucial for addressing these concerns effectively.
4. Saves Money
While professional grooming services can be beneficial, especially if your cat has a particularly difficult coat type, DIY grooming offers significant cost savings over time. By purchasing necessary tools and supplies once, you avoid the recurring expenses associated with regular salon visits.
5. Customization to Your Cat's Needs
Cats are individuals with unique preferences and needs. DIY grooming allows you to tailor your approach based on your cat’s personality and preferences. For instance, some cats enjoy being brushed while others need gentle handling; DIY grooming gives you the flexibility to adapt.
Practical Tips for Effective Grooming
- Select the Right Tools: Invest in high-quality brushes and combs suitable for your cat’s coat type. For short-haired cats, a metal comb may suffice, whereas long-haired breeds benefit from a slicker brush or a deshedding tool.
- Dedicate Time: Set aside a specific time each week dedicated to grooming. Consistency is key in ensuring your cat looks and feels their best.
- Treat Your Cat: Offering treats during grooming can make the process more enjoyable for both you and your cat, especially if they have been resistant to it initially.
In conclusion, DIY cat grooming at home is a rewarding experience that brings numerous benefits. From health and hygiene to bonding and cost savings, the advantages are clear. By incorporating regular grooming into your routine, you can ensure your cat remains healthy, happy, and well-groomed.
FAQ: Frequently Asked Questions About DIY Cat Grooming
Regular grooming is essential for maintaining your cat's health and well-being. It helps prevent hairballs, reduces shedding, and keeps your cat's coat in top condition. If you have a long-haired breed like a Persian or Maine Coon, daily brushing might be necessary to manage tangles and mats.
For basic grooming, you'll need a good quality brush or comb appropriate for your cat's coat type. Slicker brushes are great for short-haired cats to remove loose fur and dirt, while a wide-toothed comb is better suited for long-haired breeds. Additionally, you may want to have scissors (cat-specific), nail clippers, and ear cleaner on hand.
The frequency of grooming depends on your cat's coat type and activity level. Generally, short-haired cats might need brushing once a week, while long-haired breeds may require daily or every other day sessions to prevent tangles from forming.
No, you should never use human hair products like shampoos, conditioners, or styling sprays on your cat. These products can be harmful and irritating to a cat's skin and coat. Always use pet-specific grooming products designed for cats.
Trimming your cat's nails should be done carefully to avoid causing discomfort or injury. First, inspect the nail to find the "quick" – a pink area that contains blood vessels and nerves. It's crucial not to cut into this part as it can cause pain and bleeding. Start by gently holding your cat in a secure position. You can use treats to distract them during the grooming session. Trim only the tips of the nails, taking care to remove just enough to keep the nails at an appropriate length.
Many cats are not fond of grooming sessions and may need time and patience for you to build a routine that they can get used to. Start by spending short, positive reinforcement-filled sessions with your cat. Gradually increase the duration as they become more comfortable. Using treats and praise can help make grooming less stressful for both you and your cat.
In most cases, clipping a cat’s fur is not recommended unless it is absolutely necessary due to medical reasons or severe matting. Clipping can be stressful for the cat and should only be done by someone experienced with this procedure. Always consult with your veterinarian before considering fur clipping.
Categories
- AI & Enrichment Play
- Broiler Farming
- Broiler Farming Tips
- Canine Wellness & Longevity
- Cat
- Cat & Human Connection
- Cat Adoption & Rescue
- Cat Breeds
- Cat Breeds & Personalities
- Cat Care & Health
- Cat Grooming & Hygiene
- Cat Lifestyle & Environment
- Cat Myths & History
- Cat Nutrition & Diet
- Cat Products & Reviews
- Cat Training & Behavior
- Comparison
- Consumer Awareness
- Dog
- Dog Accessories & Products
- Dog Adoption & Rescue
- Dog Breed & Lifestyle Trends
- Dog Breeding & Puppies
- Dog Entertainment & Media
- Dog Fashion & Trends
- Dog Fun & Lifestyle
- Dog Grooming & Hygiene
- Dog History & Culture
- Dog Myths, Science & Future Tech
- Dog News & Trends
- Dog Nutrition & Food
- Dog Psychology & Emotions
- Dog Safety & Security
- Dog Sports & Activities
- Dog Technology & Innovation
- Dog Training for Modern Owners
- Dog Travel & Adventure
- Dog Travel, Adventure & Culture
- Economic and Market Insights
- Educational Content
- FAQs
- Feeding Alternatives
- Festivals & Seasonal Ideas
- Fun & Entertainment
- General Knowledge
- General Pig Farming
- Health & Disease Management
- Housing and Environment
- Kittens
- Market Insights
- Miscellaneous
- Miscellaneous
- Motivational
- pig
- Pig Breeding
- Pig Breeds
- Pig Farming Stories and Inspiration
- Pig Health and Care
- Pig Nutrition
- Pig Products
- Profitability & Business
- Puppy Care
- Puppy Predictable Topics Reinvented
- Regional Focus
- Rescue & Adoption Buzz
- Senior Cats
- Senior Dog Care
- Smart Dog Tech & Gadgets
- Sustainability
- Sustainable & Eco-Friendly Dog Products
- Tech & Innovations
- Working & Service Dogs
- Broiler Feed66 products
- Country Feed33 products
- Pig Feed66 products
- Product22 products
- Raw Materials99 products
Products
-
 Fish Meal
₹1,999.00 – ₹2,999.00Price range: ₹1,999.00 through ₹2,999.00Rated 0 out of 5
Fish Meal
₹1,999.00 – ₹2,999.00Price range: ₹1,999.00 through ₹2,999.00Rated 0 out of 5 -
 FATTENING BROILER FEED
₹2,299.00 – ₹2,349.00Price range: ₹2,299.00 through ₹2,349.00Rated 0 out of 5
FATTENING BROILER FEED
₹2,299.00 – ₹2,349.00Price range: ₹2,299.00 through ₹2,349.00Rated 0 out of 5 -
 LAYER COUNTRY FEED
₹1,549.00 – ₹1,649.00Price range: ₹1,549.00 through ₹1,649.00Rated 0 out of 5
LAYER COUNTRY FEED
₹1,549.00 – ₹1,649.00Price range: ₹1,549.00 through ₹1,649.00Rated 0 out of 5 -
 COUNTER BROILER FEED
₹1,199.00 – ₹1,299.00Price range: ₹1,199.00 through ₹1,299.00Rated 0 out of 5
COUNTER BROILER FEED
₹1,199.00 – ₹1,299.00Price range: ₹1,199.00 through ₹1,299.00Rated 0 out of 5 -
 LACTATING PIG FEED
Rated 0 out of 5
LACTATING PIG FEED
Rated 0 out of 5₹2,299.00Original price was: ₹2,299.00.₹1,740.00Current price is: ₹1,740.00. -
 Maize
Rated 0 out of 5
Maize
Rated 0 out of 5₹1,650.00Original price was: ₹1,650.00.₹1,300.00Current price is: ₹1,300.00. -
 GESTATION PIG FEED (Phase 1)
Rated 0 out of 5
GESTATION PIG FEED (Phase 1)
Rated 0 out of 5₹2,249.00Original price was: ₹2,249.00.₹1,699.00Current price is: ₹1,699.00. -
 Pre Starter Broiler Feed
₹2,399.00 – ₹2,499.00Price range: ₹2,399.00 through ₹2,499.00Rated 0 out of 5
Pre Starter Broiler Feed
₹2,399.00 – ₹2,499.00Price range: ₹2,399.00 through ₹2,499.00Rated 0 out of 5 -
 FINISHER PIG FEED
Rated 0 out of 5
FINISHER PIG FEED
Rated 0 out of 5₹2,299.00Original price was: ₹2,299.00.₹1,749.00Current price is: ₹1,749.00. -
 Broiler Premix
Rated 0 out of 5
Broiler Premix
Rated 0 out of 5₹820.00Original price was: ₹820.00.₹699.00Current price is: ₹699.00.